Unleash Your Patronus Part 1
Introduction
Hello everyone, welcome to Part 1 of our Walkthrough for Unleash Your Patronus Adventure of Harry Potter Hogwarts Mystery. This adventure is available for students of Year 4 and above. Similar to many others, it consists of four parts, and once you start it, you have 3 days and 19 hours to complete it. During it, you’ll be able to learn one of the most powerful Defense Charms, which will undoubtedly come in handy during your curse-breaking adventures.
Summary
Part 1 Summary:
- Task 1: Meet Ben
- Location: Artifact Room
- Requirements: 1 hour – 1/5 stars
- Choice: Tell Ben if you believe him
- I believe you (18 Empathy): +10 Empathy
- I have my doubts: +5 Knowledge
- Task 2: Warn Dumbledore
- Location: Dumbledore’s Office
- Requirements: 3 hours – 5/5 stars
- Choice: Decide if you want to make a promise to Dumbledore
- I promise (17 Courage): +10 Courage
- I can’t make any promises: +5 Empathy
- Task 3: Check on Penny
- Location: Hospital Wing
- Requirements: 3 hours – 5/5 stars
- Choice: Decide on what to ask Penny
- What was the last thing you saw?: +5 Knowledge
- What was the last thing you heard?: +5 Knowledge
- What was the last thing you felt?: +5 Knowledge
- Task 4: Inspect the Scene
- Location: Training Grounds
- Requirements: 3 hours – 5/5 stars
- Part 1 Rewards: 250 Coins
Walkthrough
Video guides are available at our YouTube channel. Use the button below.
When you begin, head to the Artefact Room to meet Ben.
[Disclaimer: This walkthrough will feature the gameplay from the perspective of a Year 4 student. Since the adventure is available for students of Year 4 and above, the star and attribute requirements for certain tasks might be different for you, depending on your current progress of the main story.]
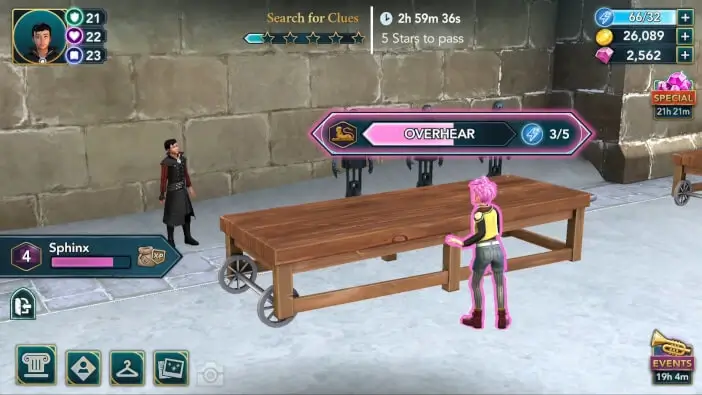
Once you arrive, Ben will tell you that someone was searching for something in the Artefact Room.
He’ll ask if you believe him. If you care about Ben, tell him you do. Otherwise, you can pick either option. Other than a few minor dialogue differences, this choice won’t have any significant impact on the story.

You’ll then get to search the room and see if you can find any clues. To do that, you need to earn at least one out of five stars within an hour to pass.

If you are looking to save some energy, you should only earn one star and then wait for the time to run out. This can save you some energy, which is always nice during Time-Limited Side Quests.
However, if you want to earn some extra rewards and a chance for a Chocolate Frog Card, it is recommended to fully complete this task. It’s also worth mentioning there are bonus progress actions tied to your character and some of the nearby books.

As it turns out, Ben was correct. Once you’re done searching the room, you’ll find another Black Quill.
There is only one way to find out if this is another one of ‘R”s messages. Trace the wand movement on the screen to cast Reparifarge.

The spell will work and the Quill will transform into a piece of paper. And the message was indeed sent by ‘R’.

If what’s written on that piece of paper is true, Hogwarts may be in grave danger, and the best course of action would be to inform Professor Dumbledore immediately.
Proceed to the Headmaster’s office as soon as possible. Once you get there, you’ll notice that all four Heads of the Houses are talking to Professor Dumbledore about something important.

As soon as they notice you, they’ll end their discussion. After telling them that Hogwarts may be in danger, the Headmaster will ask you to explain everything in detail.
Discussing the threat requires obtaining five stars within three hours. All of the stars are needed to pass, so avoid starting this task with an empty energy bar.

There are bonus progress actions linked to Professor McGonagall and Professor Snape. Prioritize them if you want to save some energy.

Once you are done, the Headmaster will tell you that the professors are going to handle this situation. In fact, he’ll even ask you to promise not to get involved.
You have two response options. This choice won’t have any significant effect on the outcome of the story, but since you’ll get involved either way, it might be better not to make any promises, so it is recommended to go with the second option.

Shortly after that, Tonks will inform you that Penny is in the Hospital Wing. Proceed there to meet her. Upon arriving, you can interact with some of the students before continuing.
As it turns out, Madam Pomfrey didn’t allow Tonks to visit Penny. Perhaps you can talk her into it? Thankfully, Professor McGonagall will support you.

In the end, Madam Pomfrey will allow you to see Penny once she wakes up. In the meantime, you’ll have to help other patients until your Hufflepuff friend awakes.
Helping other patients is a three-hour task with a passing requirement of five stars. Since all five stars are needed to pass, avoid starting the task if your energy bar is empty.

There are actions with bonus progress tied to Penny, your character, and the cabinet. Focus on those actions to save energy.

Once Penny is awake, she’ll be surprised to see you and Tonks. Unfortunately, she won’t remember exactly what happened, and her memory will be blurry.
You’ll then get to ask her a question. While none of the options will impact the story in any significant way, they will provide you with some hints and additional information, so feel free to choose the question you want to ask her.

You will tell Tonks about the note Ben and you found in the Artifact Room and say there is a possibility that ‘R’ might be responsible for what happened.

Penny will also tell you that she was attacked on the Training Grounds, so go there when you are ready to continue.
Once you arrive, you’ll suggest searching the area for any clues about Penny’s attacker.

Looking for clues requires earning five stars within three hours. Since all five stars are needed to pass, avoid starting this task if your energy is low.

The only bonus progress action here is tied to Tonks, so prioritize doing her actions if you want to save some energy.
Sadly, you won’t be able to find anything, so you’ll decide to split up to cover more ground.
Not long after that, you’ll be approached by a floating figure. A Dementor! So that’s the one that attacked Penny.

You’ll quickly grab your wand to defend yourself. Trace the wand movement on the screen to cast the Knockback Jinx.

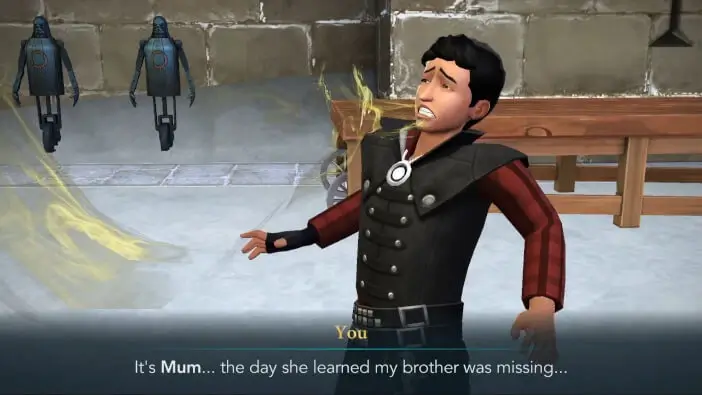
Sadly, that spell will turn out to be completely ineffective against Dementor, who will quickly approach and start draining all the positive emotions out of you.
It will make you experience some of the saddest moments of your life all over again.
Luckily for you, Tonks will arrive just in time to save you from this awful creature.


Her Patronus will drive the Dementor away, and you’ll be free from its grasp. However, it will take you a while to recover from that unpleasant experience.

Tonks will explain that the only spell effective against Dementors is the Patronus Charm.
This will come out as a huge surprise to you since not that many witches or wizards can conjure a Patronus.

She’ll promise to give you all the answers you need, but first, you’ll have to recover from the attack.
This will end Part 1 of Unleash Your Patronus Adventure. Hit the Collect button to claim your reward. You will receive 250 Coins.
This is an interesting turn of events. A Dementor at Hogwarts! Could ‘R’ really be responsible for it? And how did Tonks manage to learn the Patronus Charm at a such young age? Find out the answers in the continuation of Unleash Your Patronus Adventure of Harry Potter Hogwarts Mystery!
Thank you for reading.