Unleash Your Patronus Part 2
Introduction
Hello everyone, welcome to Part 2 of our Walkthrough for Unleash Your Patronus Adventure of Harry Potter Hogwarts Mystery. In the previous part, you found out that ‘R’ is planning to unleash something horrible on Hogwarts.
You warned the Headmaster and the professors, but later on, you learned that Penny has already been attacked. You visited her in the Hospital Wing, and she told you that she was attacked on the Training Grounds.
You went there with Tonks to see if you can find out any clues about her attacker… and eventually, you did. Upon searching the location, you were attacked by a Dementor, and thanks to Tonks’ timely intervention, you were able to survive the encounter unscathed.
And that’s not all, you found out that Tonks is able to conjure a Patronus – an extremely powerful defensive charm that is very difficult to perform. She promised to provide you with answers to everything, so proceed to the Great Hall to meet her when you’re ready.
Summary
Part 2 Summary:
- Task 1: Make a Plan
- Location: The Great Hall
- Requirements: 16 Courage, 16 Empathy, 17 Knowledge; 700 Coins
- Questions and Answers:
- Isn’t doing this by myself easier – We’re stronger together (Courage)
- Why have me teach you? – You’re a Patronus prodigy (Knowledge)
- What if I’m rotten teacher? – You won’t be (Empathy)
- It’s very difficult spell… – I’m capable of it. (Courage)
- I’m afraid you’ll get hurt… – You’ll be there to protect me. (Empathy)
- Choice: Tell Tonks why ‘R’ would bring Dementor to Hogwarts
- To create a distraction: +5 Knowledge
- To test Hogwarts’ defences: +5 Knowledge
- To get rid of someone: +5 Knowledge
- Task 2: Meet Tonks
- Location: Zonko’s Joke Shop
- Requirements: 1 hour, 5/5 stars
- Choice: Tell Tonks what sort of trick you would most enjoy
- Something discrete: +5 Knowledge
- Something harmless: +5 Empathy
- Something big: +5 Courage
- Task 3: Pull Trick
- Waiting Time: 4 hours
- Location: Three Broomsticks
- Requirements: 3 hours – 5/5 stars
- Choice (IMPORTANT): Tell Tonks why you really want to learn the Patronus Charm
- I want to prove I’m strong enough: +5 Courage, your Patronus will be White Stallion, Leopard, or Mountain Hare
- I want to uncover the truth: +5 Knowledge, your Patronus will be Abraxan, Tiger, or Lop-eared Rabbit
- I want to protect my friends: +5 Empathy, your Patronus will be Unicorn, Cheetah, or Spotted Hare
- Task 4: Start Learning the Patronus Charm
- Location: Training Grounds
- Requirements: 3 hours – 5/5 stars
- Choice: Convince Tonks to teach Merula the Patronus Charm
- To prove Merula’s not a threat: +5 Knowledge
- She’ll blackmail us to get her way: +5 Courage
- It’s clearly important to her (17 Empathy): +10 Empathy
- Part 2 Rewards: 5 Gems, 1 Chocolate Frog
Walkthrough
Video guides are available at our YouTube channel. Use the button below.
[Disclaimer: This walkthrough will feature the gameplay from the perspective of a Year 4 student. Since the adventure is available for students of Year 4 and above, the star and attribute requirements for certain tasks might be different for you, depending on your current progress of the main story.]
Once you get there, you will be able to interact with some of the characters by tapping on the speech bubbles above them.
After thanking Tonks for helping you, she’ll explain some things about Dementors.

You’ll then share your theory with her. All the clues point out that ‘R’ is responsible for the Dementor’s attacks.
Tonks will be curious to know why ‘R’ would do such a thing. You have three options to respond with. None of these will have any significant impact on the story, so feel free to pick the answer you want.

Not long after that, you’ll ask Tonks to teach you the Patronus Charm. At first, she’ll be very hesitant to do that, so you’ll have to convince her to teach you.
The task window will display the recommended attribute levels and the cost of each attempt.

This is fairly similar to Meal With a Friend. Simply pick the most convincing/selfless answers and you’ll be done in no time. The attribute requirements are fairly low, even if you are in Year 4, which will make it easier to complete this task. Below are some of the questions and the answers to them.
- Isn’t doing this by myself easier – We’re stronger together (Courage)
- Why have me teach you? – You’re a Patronus prodigy (Knowledge)
- What if I’m rotten teacher? – You won’t be (Empathy)
- It’s very difficult spell… – I’m capable of it. (Courage)
- I’m afraid you’ll get hurt… – You’ll be there to protect me. (Empathy)
Once you are done, Tonks will agree to teach you. She will, however, tell you that learning Patronus Charm is not an easy task. She’ll say that she was only able to learn that spell through a lot of willpower and training.
And so, your training will begin. The first part of it includes visiting Zonko’s Joke Shop, so head there when you’re ready. Upon arriving, you’ll notice the speech bubbles above some of the characters. Tap on those if you are curious to see what they have to say.
You’ll find it quite odd that Tonks wants to spend time at Zonko’s shop, especially with Hogwarts in danger. She’ll explain her reasoning to you, and everything will start making sense.

Apparently, she’s planning to play a trick in order to get you in the right mindset for learning the Patronus Charm.
She’ll ask what kind of trick you would prefer. There are three options to reply with. Each of these will lead to the same outcome, so pick whichever one you want.

You’ll then get to shop for prank items. Doing so requires earning five stars within an hour. Since all five stars are needed to pass, it is highly recommended to have full energy prior to starting the task.

There are bonus progress actions linked to your character, Fanged Frisbee, and the jar.

Once you’re done, Tonks will tell you that she’s planning to use some Belch Powder to get you in the right mindset.
And by the looks of it, she wants to use it in the Three Broomsticks.

However, there is a waiting period of four hours before you’re able to proceed with the plan. Since you will likely be low on energy at this point, it is recommended to wait and let your energy recharge in the meantime.
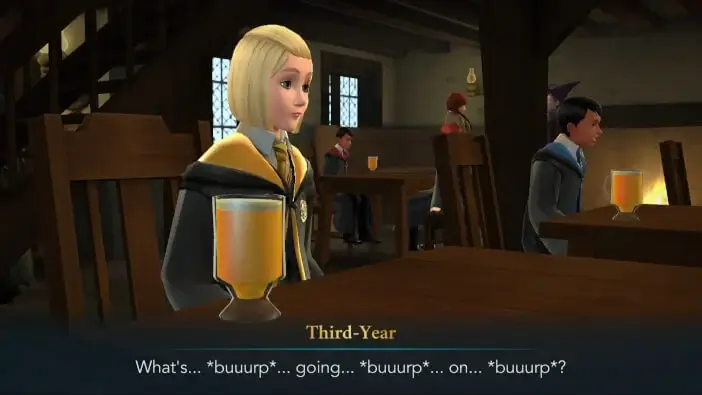
Head to the Three Broomsticks once the waiting time is over. Upon arriving, you will be able to check out what some of the characters have to say by tapping on the speech bubbles above them.
The plan is pretty simple, you’ll distract Madam Rosmerta while Tonks puts the Belch Powder into the Butterbeer barrel.

To distract Madam Rosmerta, you need to obtain five stars within three hours. Since all of the stars are required to pass, it’s best to avoid starting this task if you’re low on energy.

There are bonus progress actions tied to your character and one of the customers. Prioritize those actions if you are looking to save some energy.

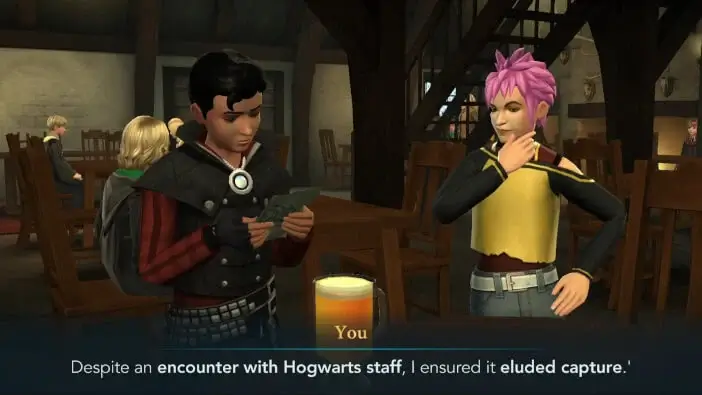
Once you finish the task, both you and Tonks will sit down and she’ll thank you for distracting Madam Rosmerta.
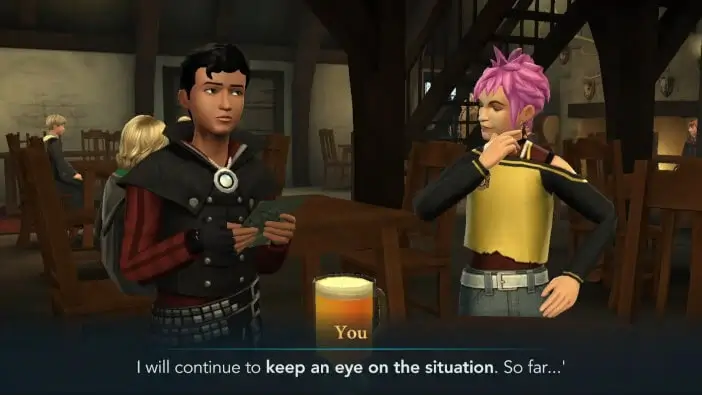
Shortly after that, she’ll ask why you are so determined to learn the Patronus Charm. You have three options to respond with. THESE ANSWERS WILL DETERMINE THE CORPOREAL SHAPE OF YOUR PATRONUS LATER ON!
- If you say you want to prove you’re strong enough, you will later get to choose between White Stallion, Leopard, or Mountain Hare.
- If you tell her you want to uncover the truth, you’ll get the choice of Abraxan, Tiger, or Lop-Eared Rabbit.
- If you say you want to protect your friends, you’ll get to choose from Unicorn, Cheetah, or Spotted Hare.
Take your time to think about the corporeal form you’d like your Patronus to have and once you make up your mind, go for the option you want.

Not long after that, you’ll get to witness a belching spectacle.

Once all the belching quiets down, you’ll find another strange note that looks like the ones ‘R’ wrote.
It looks like whoever wrote this message is definitely working with ‘R’.

Shortly after, you’ll get to start learning the Patronus Charm. Head to the Training Grounds to begin your training.
Both Tonks and you will agree that you need to learn the Patronus Charm as soon as possible.
However, it won’t be easy, so you’ll need to try your hardest to learn such a complex spell. Tonks will suggest starting with some simple stuff.
Going through the basics requires earning five stars within three hours. Similar to most of the previous tasks, all of the stars are needed to pass, so avoid starting this with an empty energy bar.

There are only two highlighted objects with actions tied to them – Tonks and your character. Most of the bonus progress actions are tied to Tonks, which is why you should focus on her if you are looking to save some energy.

When you are done, Tonks will demonstrate her Patronus once again.

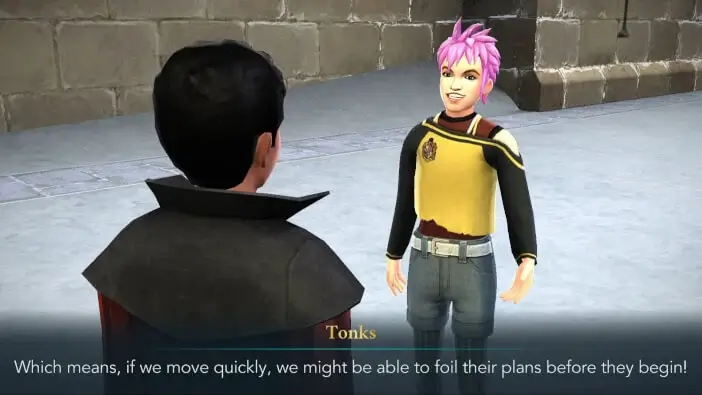
Not long after that, Merula will surprise you with her appearance. It looks like she’s been following you for quite a while.

And she is well aware that Tonks is trying to teach you the Patronus Charm. It seems that all she wants is to learn the Patronus Charm too.
While Tonks will be strongly against it, you’ll suggest that perhaps she should teach Merula too. You have three options to justify your decision. Each of these will lead to the same outcome, but if you like Merula, it is recommended to go with the third option.

Eventually, Tonks will agree to teach the Most Powerful Witch at Hogwarts, and the three of you will head to the Library.
This will mark the end of Part 2 of Unleash Your Patronus Adventure. Hit the Collect button to claim your rewards. You will receive 5 Gems and 1 Chocolate Frog.
Things are getting more and more interesting. Will you manage to learn the Patronus Charm before the Dementor strikes again? And which happy memory will you use for conjuring your Patronus? Find out in the next part of Unleash Your Patronus Adventure Walkthrough for Harry Potter: Hogwarts Mystery!
Thank you for reading.