Chapter 15 – Secrets and lies
Introduction
Hello everyone, welcome to our Walkthrough for Chapter Fifteen of Year Five of Harry Potter Hogwarts Mystery. In the previous chapter, you returned Fang to Hagrid after taking him on an adventure to retrieve Scabbers, whom you also returned to his owner, Percy.
Later on, you met with Ben and discussed another one of his fears. This time, he told you he suspects Scabbers being the one responsible for his memory loss.
Afterward, you went to meet Madam Rakepick. You told her about your search and showed her the old parchment you found in the Cursed Corridor. As it turned out, it was the very item you were after the entire time – the Marauder’s Map.
Summary
Chapter Summary:
- Lesson 1: Deprimo
- Location: Defence Against the Dark Arts Classroom
- Unlock: 9 Defence Against the Dark Arts Stars
- Requirements: 3 hours – 5/5 stars
- Lesson 2: International Statute Of Secrecy
- Location: History of Magic Classroom
- Unlock: 9 History of Magic Stars
- Requirements: 8 hours – 5/5 stars
- Task 1: Meet Rakepick
- Location: Training Grounds
- Requirements: 3 hours – 1/5 stars
- Choice: Tell Rakepick what you will do if someone tries to take the Marauder’s Map
- I’ll run away: +5 Empathy
- I’ll use my magic (26 Courage): +10 Courage
- I’ll use my cunning (Slytherin only): +10 Knowledge
- Task 2: Meet Barnaby
- Location: Defence Against the Dark Arts Classroom
- Requirements: 3 hours – 1/5 stars
- Choice: Guess why Rakepick has a Black Quill in her desk
- Rakepick is R: +5 Knowledge
- Someone is framing Rakepick: +5 Courage
- Rakepick is searching for R (26 Empathy): +10 Empathy
- Task 3: Meet Tonks
- Location: Filch’s Office
- Requirements: 3 hours – 1/5 stars
- Choice: Guess why Filch is keeping records on Rakepick
- Filch hates Rakepick: +5 Knowledge
- The teachers don’t trust her: +5 Courage
- Someone is framing Rakepick: +5 Empathy
- Task 4: Meet Tulip and Merula
- Waiting Time: 3 hours
- Location: Jacob’s Room
- Requirements: 8 hours – 1/5 stars
- Choice: Decide what to do next
- Confront Rakepick (26 Courage): +10 Courage
- Consult Bill (Bill level 10): +10 Empathy
- Tell my Head of House: +5 Knowledge
- Chapter Rewards: 250 Coins and 2000 Experience Points
Walkthrough
As usual, you can do the lessons part of the chapter before advancing the story. Proceed to the Defence Against the Dark Arts classroom when you are ready.
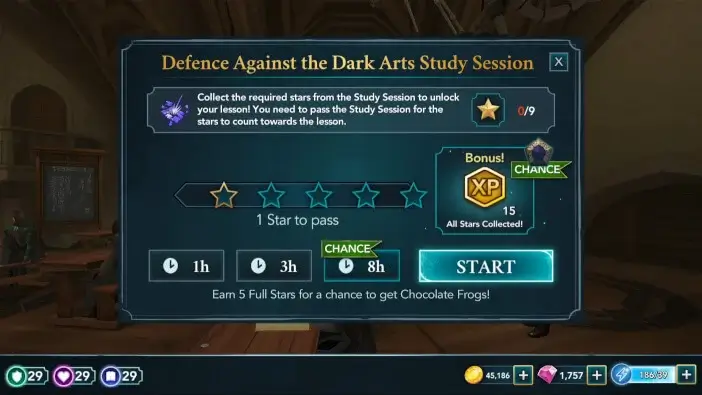
To unlock the Deprimo lesson, you need to obtain nine stars from the Defence Against the Dark Arts classes. Pick whichever class duration you prefer and hit Start to begin.
During these classes, focus primarily on actions with bonus progress to make things easier. Thankfully, they are in abundance, so you shouldn’t have too much trouble.
And pay special attention to the mini-tasks to gain some additional Courage points.

Once you have enough stars, head back to the classroom to attend the lesson.
Learning to cast the Deprimo Charm is a three-hour task with a passing requirement of five stars. Because of this, you should avoid starting it with an empty energy bar.

The lesson is fairly similar to the classes, so you can treat it as such.
When you earn the fifth star, you will be tasked with casting the spell. Trace the wand movement on the screen to do so.

This will result in your character blasting the floor and the werewolf toy will fall right through it.

Hit the Collect button to claim your rewards. You’ll receive an additional reward for completing the lesson. You can claim it in the Defence Against the Dark Arts section of your Hogwarts Record.

Proceed to the History of Magic classroom for the second lesson of the chapter.
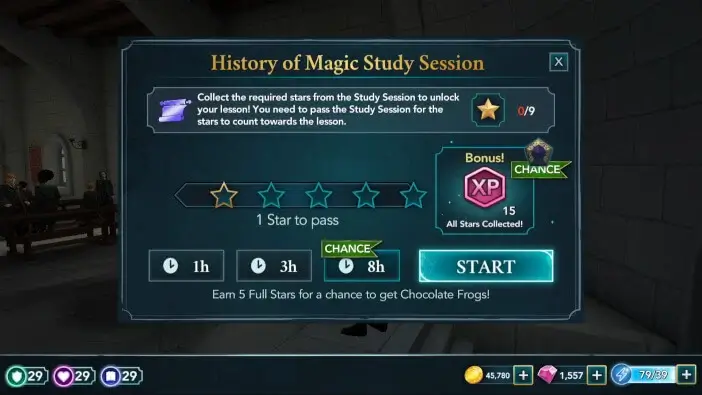
To unlock the International Statute of Secrecy lesson, you need to earn a total of nine stars from the History of Magic classes. Select the class duration that suits you and hit Start to begin.
While doing these classes, try your best to optimize energy usage by doing as many bonus progress actions as possible.
Also, focus on successfully completing all of the mini-tasks to earn some extra Knowledge points.

Head back to the classroom when you acquire all the necessary stars.
Professor Binns will hold a short introductory speech before the lesson begins.

Completing this one requires you to earn five stars within eight hours. All five stars are needed to pass, so be prepared for a long and “exciting” History of Magic lesson.

Other than the star requirements and some of the mini-tasks, there isn’t much of a difference between this lesson and the classes you took previously.
Once you obtain the fifth star, you’ll quickly need to finish your essay.

Hit the Collect button to claim your rewards. You’ll receive an additional reward for completing the lesson. You can collect it in the History of Magic section of your Hogwarts Record.

Now that you’ve completed the lessons, you can continue the story. Proceed to the Training Grounds when you are ready to meet Madam Rakepick.
Once you get there, she will explain to you some things about the Marauder’s Map and its creators.


According to her, the map contains all of Hogwarts, including the secret passages and castle grounds. It also tracks every person in Hogwarts, identified by name.
This will seem unimaginable, to say the least. The possibilities one could do with the map are endless.
Madam Rakepick will decide to tell you more about it. This is your next task. To complete it, you need to earn five stars within three hours. Passing, on the other hand, only requires one star.

There are actions with bonus progress tied to your character and the map. Focus on those to save energy.

When you are done, Madam Rakepick will explain what she intends to do with the map.

She will tell you that it would be devastating if the map falls into the wrong hands. She’ll then ask what you would do if someone tries to take it from you.
There are three options to respond with (the third option is only available to Slytherin students). Each of those will lead to the same outcome, with some minor dialogue differences, so pick the one you prefer.

Madam Rakepick will tell you the magic words that are used to reveal and hide the contents of the map.


What follows is a scene in which you recite the words and take a glimpse of the map.

However, before you get to take a good look at it, Rakepick will take it from you.
She’ll explain that it’s for your own good since the person who attacked Mundungus Fletcher will likely kill you to keep his secret.

Luckily, you managed to see some of the rooms that the person visited. The first one to check is the Defence Against the Dark Arts classroom. Proceed there when you are ready.
Thankfully, Barnaby agreed to help you with the search. With his help, you might be able to find out what Fletcher’s attacker was doing in the classroom.

Searching for clues is a three-hour task with a passing requirement of one out of five stars.

There are bonus progress actions tied to Barnaby and one of the dark artifacts. Prioritize those actions to save energy.

When you finish the task, you’ll find a black quill inside Madam Rakepick’s desk.

Barnaby will ask if you can think of a reason why she would have it in her desk. There are three options to respond with.
While this choice has no immediate consequences, it might be a good thing to decide whether you trust Madam Rakepick or not. In case you do, you should select the second or the third option. Otherwise, pick the first one.

Next, you should use Reparifarge on the black quill to see if it’s actually a secret message.

After casting the spell, you’ll notice that it had no effect on the quill. By the looks of it, it’s just an ordinary feather.

In any case, you should proceed to the caretaker’s office to look for further clues. Sadly, Barnaby will be too tired to accompany you, but luckily, Tonks will offer to help you with this one.
After explaining the situation to her, she’ll be more than happy to help you rummage through Filch’s stuff.

To complete this task, you need to earn five stars within three hours. Only one star is required to pass.

There are actions with bonus progress tied to the desk and the cabinet. Focus on those to save some energy.

Once you are done, you’ll stumble upon a stack of reports on Rakepick, dating all the way back to her student days.
Tonks will ask you why the caretaker would keep those in his office. You can respond in three different ways. This choice won’t significantly impact the story, so feel free to go with the option you prefer.

Judging by the reports, Rakepick was quite mischievous in her student days. This is probably the reason why Tonks likes her so much.

The next place to check is Jacob’s room. However, there is a waiting period of three hours before you can proceed.

Once the waiting time is over, head to your brother’s room to meet Tulip and Merula.
After explaining the situation to them in a rather comical way, you will decide to search the room.

But first, you need to illuminate your surroundings, and Lumos is the perfect spell for that.

You have eight hours to search the room and earn at least one out of five stars.

There is a bonus progress action tied to Merula. Prioritize it whenever it is available to save a bit of energy.

When you are done with the search, you’ll find another black quill.
Could this one be fake as well? There is only one way to find out. Trace the wand movement on the screen to cast Reparigarge.

The spell will work and the quill will transform into a notebook.

Upon reading its contents, you’ll find some shocking information, revealing that Rakepick was working with Jacob all along.
After talking for a bit, Tulip will ask what you are planning to do. You have three possible options. This choice will heavily influence the story of the next chapter, so bear that in mind when deciding what to do.

Shortly after, Chapter 15 of Year 5 will be over. Hit the Collect button to claim your rewards. You will receive 250 Coins and 2000 Experience points.
That was quite a shocking turn of events. Could it be that Rakepick was protecting you and your brother all along without you knowing? And who is this mysterious Cabal that Jacob mentioned in the notebook? What will happen when you finally confront Rakepick and ask her about it? Find out in the next chapter of Harry Potter Hogwarts Mystery!
Thank you for reading. Until next time.