Chapter 16 – The Wizard In White
Introduction
Hello everyone, welcome to our Walkthrough for Chapter Sixteen of Year Six of Harry Potter Hogwarts Mystery. In the previous chapter, Professor Dumbledore made an announcement and told everyone about what happened to Madam Pomfrey. He also forbade any student from leaving the castle since an assassin was on the loose.
Still, despite all this, you and Beatrice snuck out to search the lakeshore for the final vault. Sadly, instead of it, you found the missing Azkaban escapee, but luckily, you got away with just minor injuries.
Summary
Chapter Summary:
- Lesson 1: Cough Potion
- Location: Potions Classroom
- Unlock: 9 Potions Stars
- Requirements: 3 hours – 5/5 stars
- Lesson 2: Sneezewort
- Location: Herbology Classroom
- Unlock: 9 Herbology Stars
- Requirements: 3 hours – 5/5 stars
- Task 1: Seek Chiara’s Help
- Location: Artefact Room
- Requirements: 3 hours – 1/5 stars
- Task 2: Meet with Dumbledore
- Location: Dumbledore’s Office
- Requirements: 3 hours – 1/5 stars
- Choice: Choose whether to agree with Beatrice or side with the Headmaster
- The faculty are doing their best: +5 Knowledge
- I’m frustrated too: +5 Empathy
- Task 3: Serve Detention
- Waiting Time: 2 hours
- Location: Kitchens
- Requirements: 8 hours – 3/5 stars
- Task 4: Meet with Talbott
- Waiting Time: 1 hour
- Location: Owlery
- Requirements: 1 hours – 1/5 stars
- Choice: Choose to tease him or thank him
- Tease Talbott (level 4): +10 Empathy
- Thank Talbott: +5 Knowledge
- Task 5: Translate the Letter
- Waiting Time: 2 hours
- Location: Library
- Requirements: 3 hours – 3/5 stars
- Choice: Tell Talbot if you are afraid to go to the place where you were attacked
- I am afraid: +5 Empathy
- Why would I be? (35 Courage): +10 Courage
- Are YOU afraid? (26 Knowledge) : +10 Knowledge
- Chapter Rewards: 250 Coins and 2000 Experience Points
Walkthrough
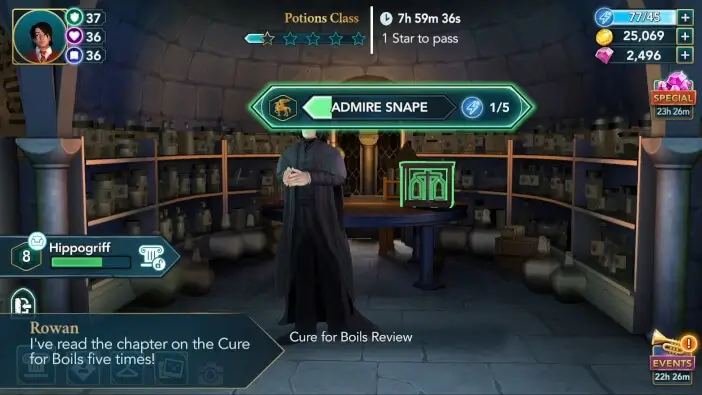
Now, you can start things off by getting the lessons out of the way, as usual. Proceed to the Potions classroom when you’re ready. Unlocking the Cough Potion lesson requires earning a total of nine stars from Potions classes. Select the class duration you prefer and hit Start to begin.

As always, prioritize the reward actions if you’re looking to save some energy.
Also, try your best to complete most of the mini-tasks to earn some additional Knowledge points.

Return to the classroom once you’ve unlocked the lesson. Learning to brew the Cough Potion requires earning five stars within three hours. Since all of the stars are needed to pass, it is not recommended to start this lesson if your energy bar is empty.

For the most part, this is fairly similar to regular classes.

The major difference is in some of the mini-tasks.

Upon earning the fifth star, you’ll be tasked with waving your wand over the cauldron.

Hit the Collect button to claim your rewards. You can claim an additional reward in the Potions section of your Hogwarts Record.

When you’re ready, head to the Herbology classroom for the second lesson of the chapter. To unlock the Sneezewort lesson, you need to obtain nine stars from Herbology classes.

Like before, prioritize the bonus actions to save energy.

As for the mini-tasks, completing them will grant you some extra Empathy points.

Head back to the classroom once you earn nine stars. To complete the Sneezewort lesson, you need to earn five stars within three hours. All five stars are needed to pass, which is why it’s not recommended to start the lesson if your energy bar is empty.

Other than the star requirement, the major difference between this lesson and regular classes is the mini-tasks.


Upon earning the fifth star, you’ll be tasked with fertilizing your plant.

When you are done, hit the Collect button to claim your rewards. You’ll earn an additional reward for completing the lesson. You can collect it in the Herbology section of your Hogwarts Record.

When you are ready, proceed to the Artefact Room to meet Chiara. You’ll thank her for being kind enough to help you.

If you befriended Chiara, she’ll be sure to mention it here.

She’ll be shocked when you tell her about the attack.

You’ll explain that you didn’t inform anyone because you and Beatrice secretly left the castle to check out the Lakeshore, and that’s when a wizard in white robes suddenly attacked you. She’ll then decide to treat your injuries while you explain everything in detail. This requires earning five stars within three hours. Only one star is needed to pass.

There are reward actions tied to Chiara and your character, which should make things a bit easier.

After finishing the task, Chiara will cast one final healing spell on you.

Her spell will work, and you’ll feel as good as new.

You’ll notice she’s really worried about your health and wonder why the wizard didn’t hurt you when you were down. In any case, Chiara will agree to help you. For now, you’ll just ask her not to tell anyone about your trip to the lakeshore.

You’ll notice Beatrice entering the Artefact Room.

As it seems, the Headmaster wants to have a word with the two of you.

Proceed to his office when you are ready. Apparently, Professor Dumbledore is fully aware of your encounter with the Dark Wizard.


You’ll tell him that Chiara has already taken care of your injuries, and then you’ll proceed to discuss the attack with him. This requires earning five stars within three hours. Only one star is needed to pass.

Both Dumbledore and Beatrice have bonus actions tied to them. Prioritize these in order to save some energy.

According to the Headmaster, the wizard who attacked you is a former student of Mahoutokoro School of Magic.


Once again, Dumbledore will ask you to stay out of anything related to the cursed vaults. Beatrice will definitely not be happy with this. You have two options to respond with. You can either side with her or the Headmaster. This choice won’t have any major effect on the story, so feel free to take your pick.

Regardless of your choice, both you and Beatrice will be getting detention.

You have around two hours before your detention begins. Simply use this time to regenerate some energy.

Head to the Kitchens once the waiting time is over. Upon arriving, you will be able to interact with some of the house elves. Jae will be happy to see you again.

Beatrice will seem excited about detention, and you’ll introduce her to Jae.


Soon enough, Pitts will arrive, and he’ll be very displeased to see you standing there talking instead of working. Serving detention requires earning five stars within eight hours. Three stars are needed to pass.

There are reward actions linked to your character and a stack of knives on the shelf. Focus on these if you are looking to save some energy.

Not long after you’re done, Penny will arrive, and she’ll be shocked to see her sister in detention. If you decided to tell Penny about your trip to the Black Lake in the previous chapter, you will explain what happened. Otherwise, it will be Jae who tells her. Either way, she will find out the truth.


Needless to say, Penny will not be happy to hear that.


In any case, Pitts will be annoyed by your arguing, and he’ll quickly dismiss everyone. Before you leave, Penny will tell you that Talbott wants to have a word with you. There is one hour of waiting time before you can proceed. Like before, simply wait until this timer runs out.

Once you’re able to continue, head to the Owlery to meet Talbott. As it turns out, he might have something that could help you with your investigation.

Sadly, the owl got spooked when he arrived, and it dropped the letters.

You’ll then get to look for the letter the white owl was carrying. This requires earning five stars within an hour. One star is needed to pass.

There is a bonus action tied to one of the letters.

Sadly, even after looking around, you won’t be able to find anything. Thankfully, Talbott had more luck while searching.


You’ll tell him about the attack.

However, in order to find out more, you’ll have to translate the letter. Talbott will be quick to offer his help. You can either choose to tease him or thank him. This choice won’t affect the story much, so feel free to pick either option.

If you befriended Talbott, you will get some additional lines of dialogue here. Also, if he was your first date, he’ll be sure to mention it.

You’ll accept his help, and suggest going to the Library to translate the letter. Once again, there’s a waiting period of two hours before you can continue. Simply wait and let your energy replenish in the meantime.

Proceed to the Library once the waiting time is over. When you arrive, you’ll be able to check out what some of the characters have to say by tapping on the speech bubbles above them. Thankfully, Talbott gathered every book on Japanese he could find.

Translating the letter requires earning five stars within three hours. Three stars are needed to pass.

There are reward actions linked to Talbott and your character. Focus on these if you want to save a bit of energy.

You’ll sum things up once you’re done translating.


Talbott will ask if you’re afraid to go there again. There are three options to respond with, but none of these will influence the story much, so feel free to pick whichever one you prefer.

In any case, both of you will decide to go to the Lakeshore and look for the White Quills. Still, you have to find a way to sneak out of the castle undetected. If you completed Become an Animagus adventure, you’ll suggest using your Animagus forms to sneak out. Otherwise, you’ll just decide to use the Invisibility Cloak.

Either way, you’ll be determined to search the lakeshore.


This will mark the end of Year 6 Chapter 16. Hit the Collect button to claim your rewards. You will receive 250 Coins and 2000 Experience Points.
So it’s decided. Talbott and you will go back to the Lakeshore to look for the White Quills. But will you manage to sneak out of the castle undetected? And if you do, will your search end up successful? Find out in the next chapter of Harry Potter Hogwarts Mystery!
Thank you for reading.