samsara room walkthrough
Including secret level
[Secret level included]
Website | Facebook | Reddit | Android | iOS
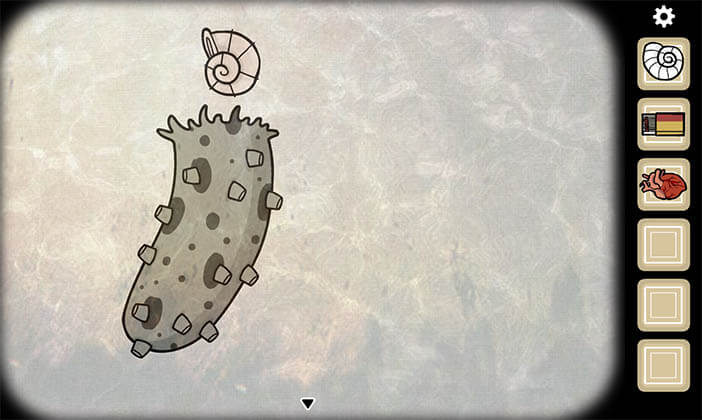
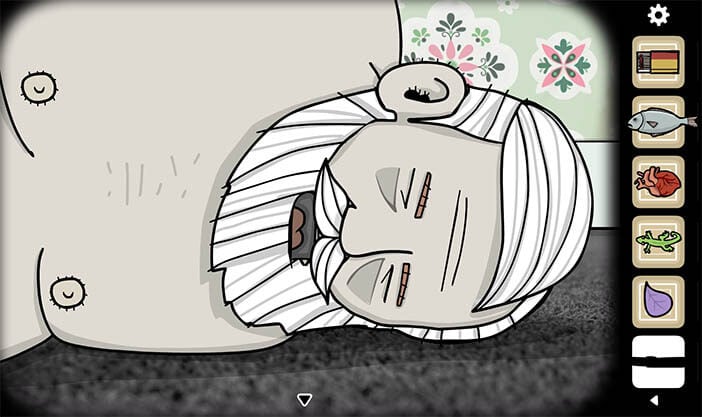
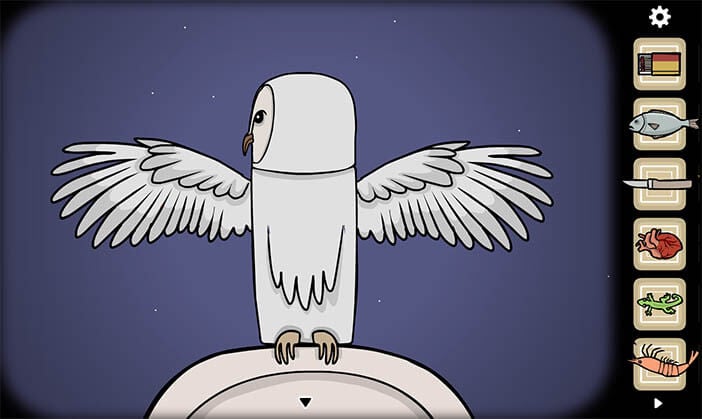
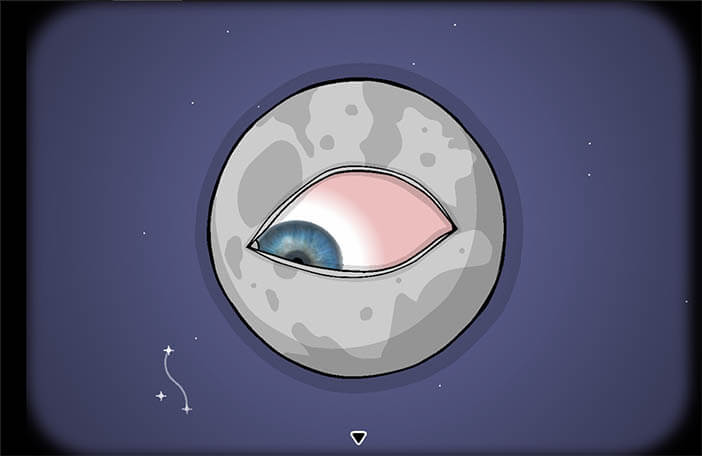
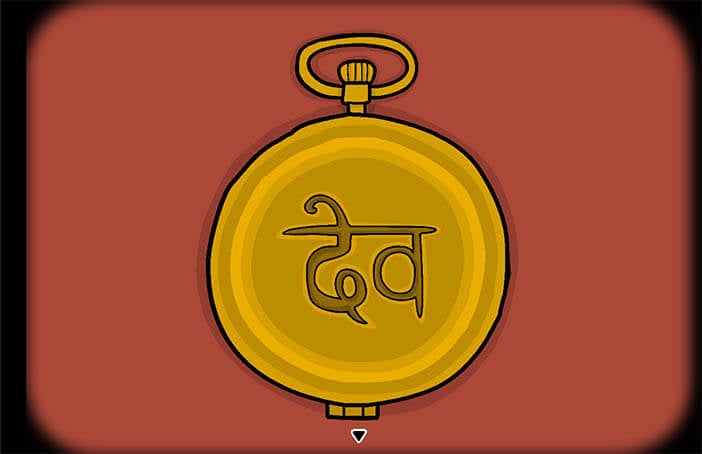
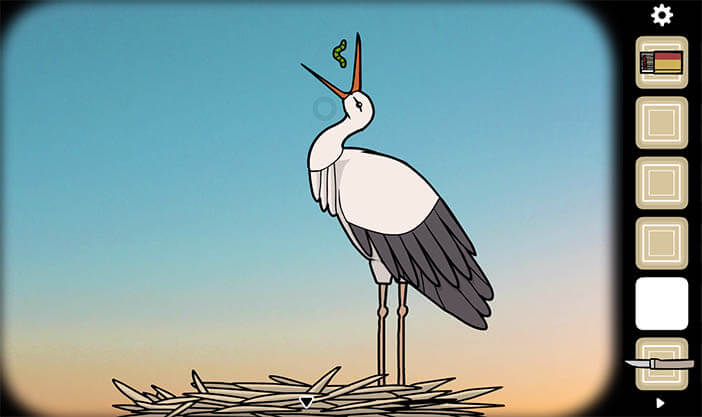
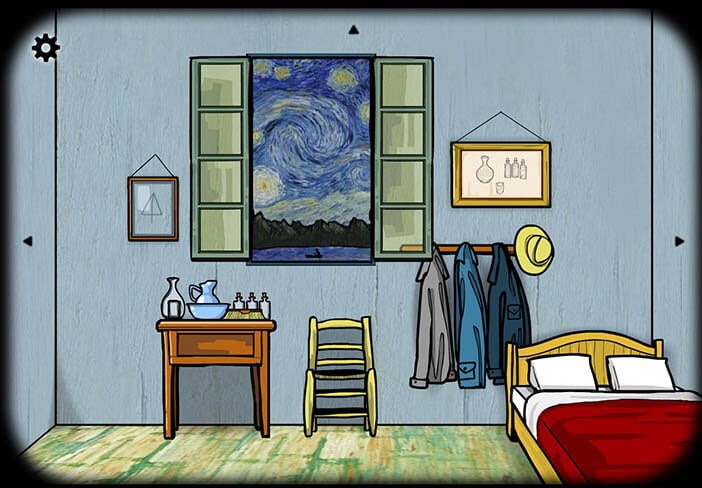
The best description of this game is in its name “Samsara Room”. The word “Samsara” comes from Sanskrit and it means “the cycle of death and rebirth to which life in the material world is bound.” The protagonist is placed inside a room of judgment in which it’s determined where his soul is going to end up next. In the room, his soul is transformed into several forms until he finally returns to the real world as a newborn.
The story of this game is tied to the overall lore of Rusty Lake so if you want to have a more complete experience of the whole story we recommend that you play other games made by the studio Rusty Lake. In this walkthrough, we will show you how to solve all the puzzles and finish the game.
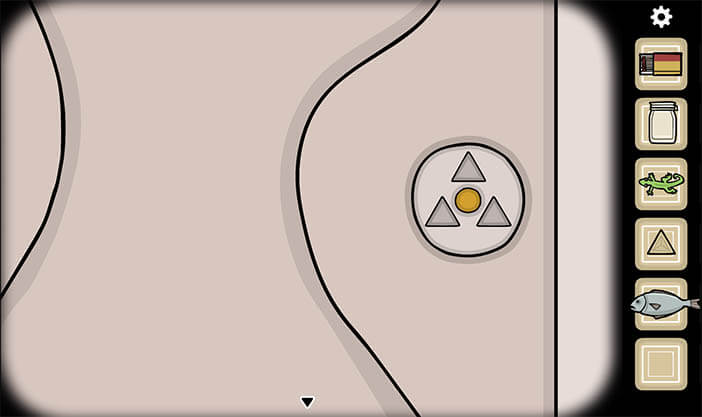
To go straight to the secret level you can use the jump button in the lower right corner.
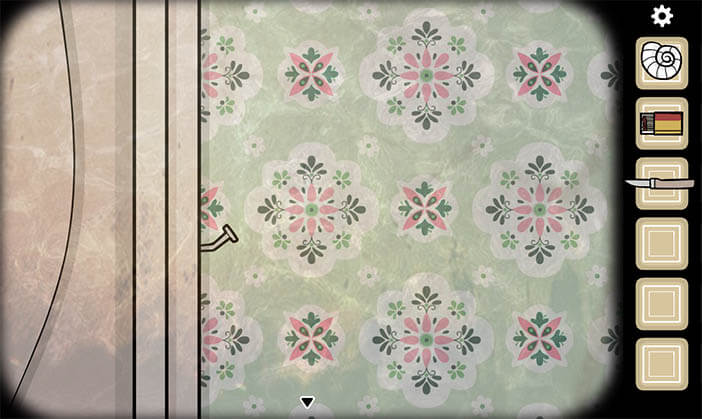
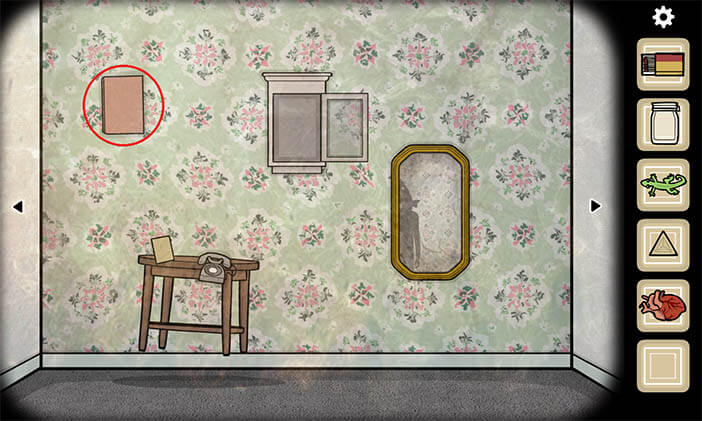
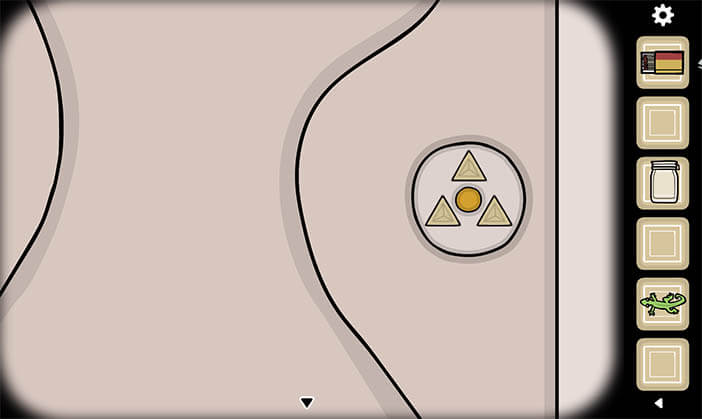
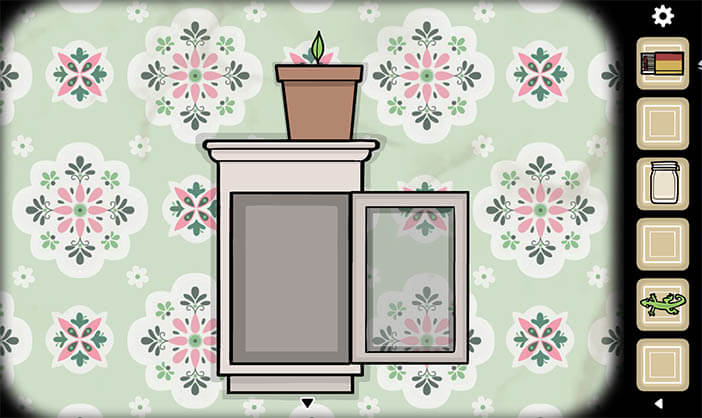
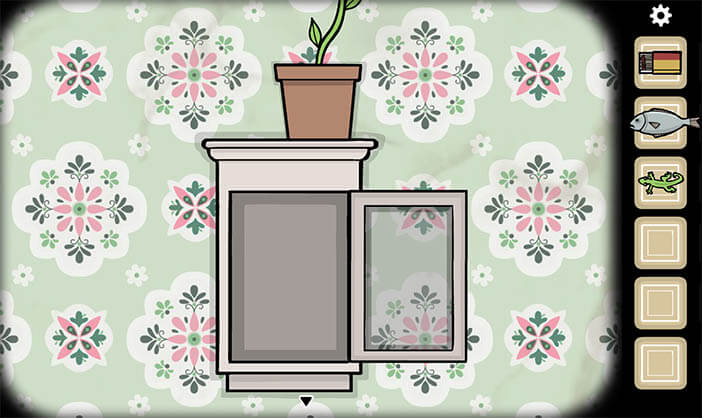
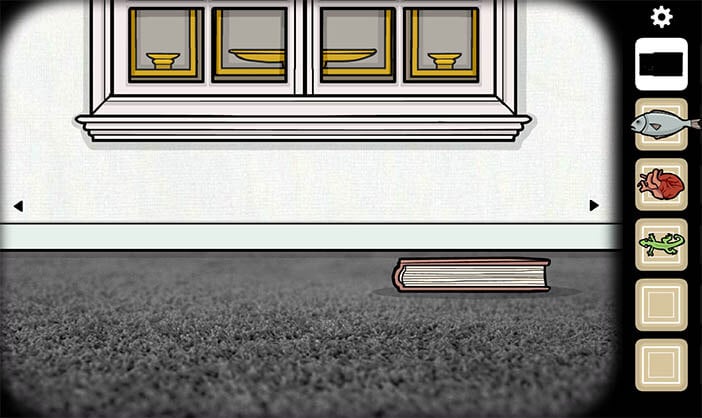
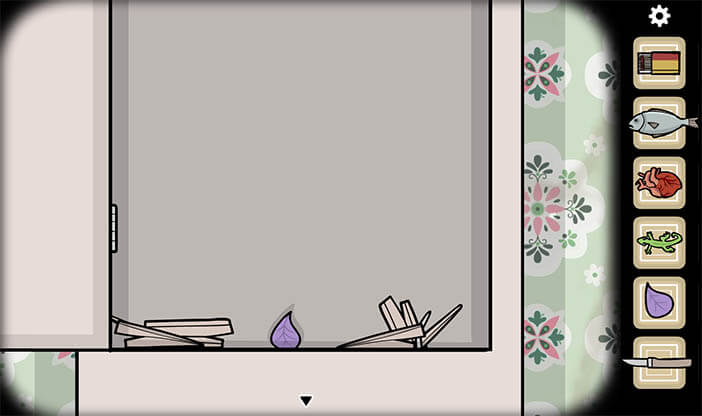
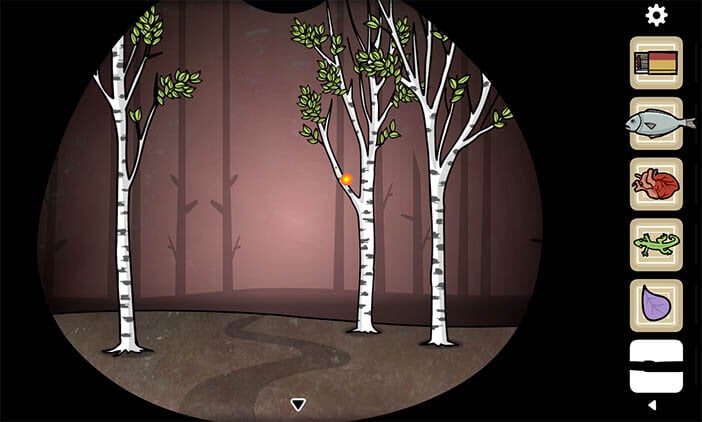
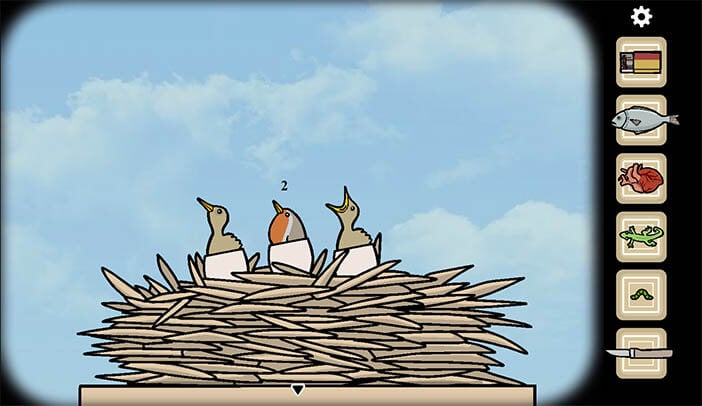
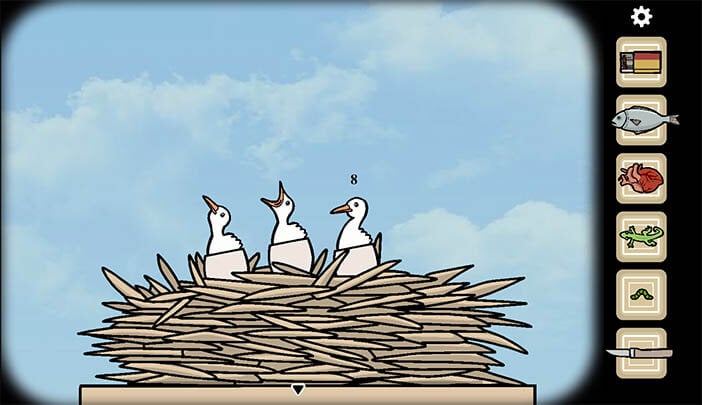
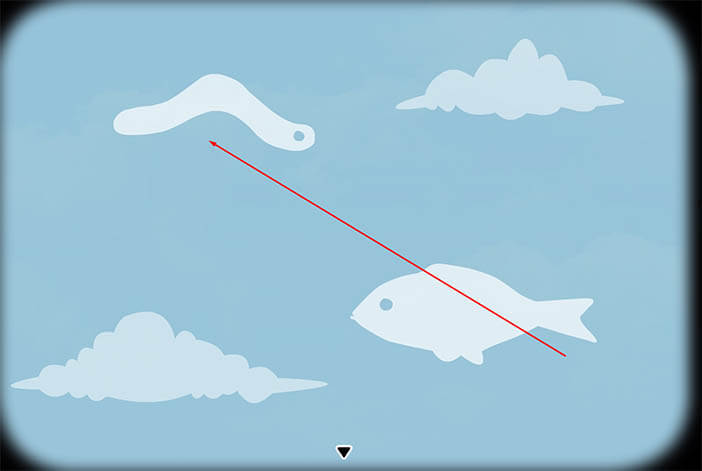
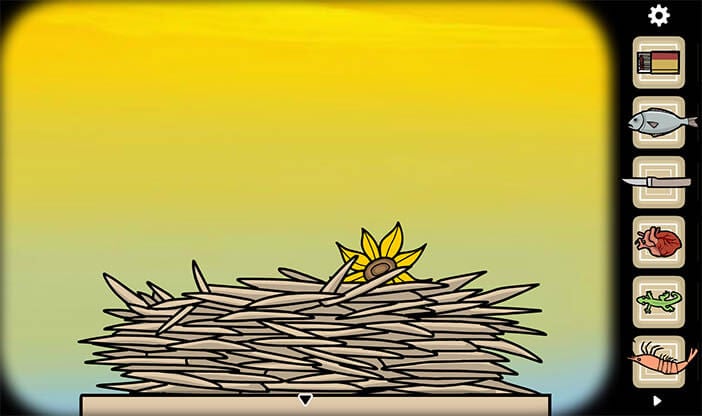
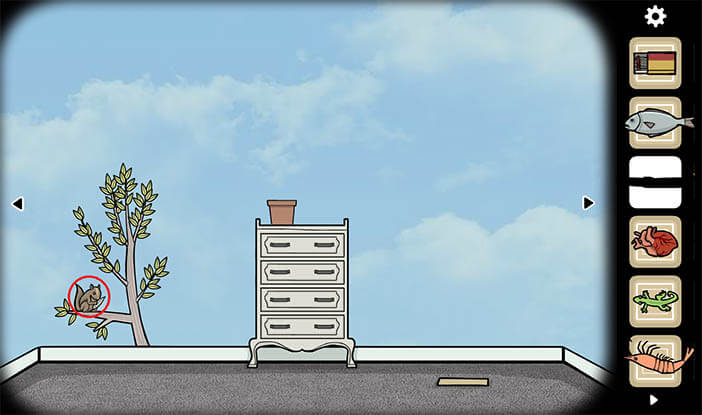
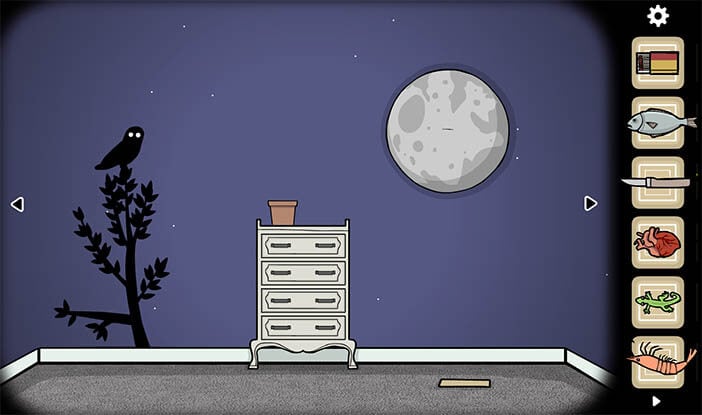
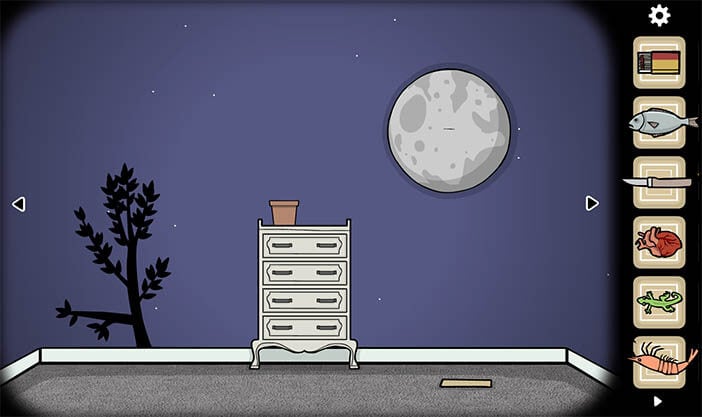
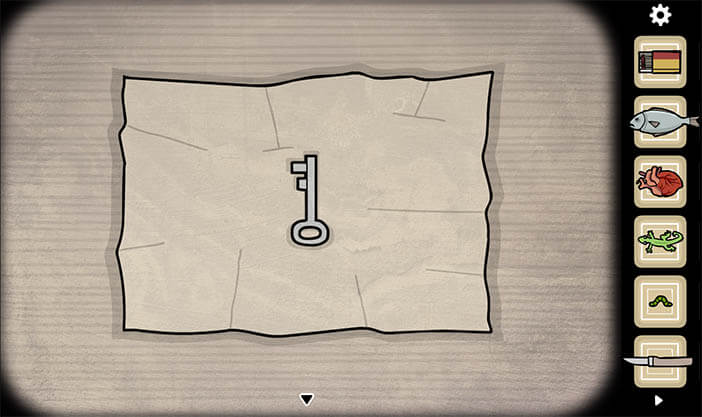
In the first/human dimension of the room, you will need to find 4 candles and a fish. You can find the first candle on the cupboard inside the plant pot in the first room.
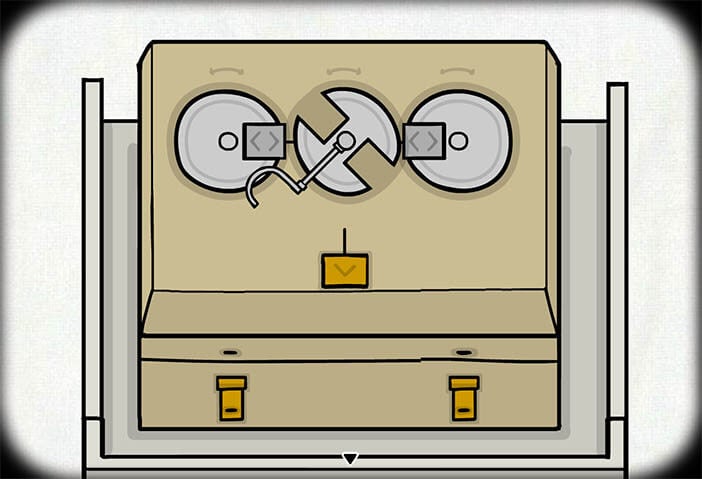
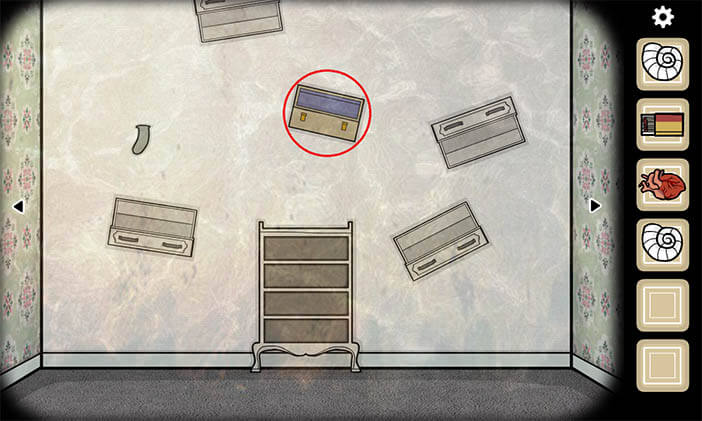
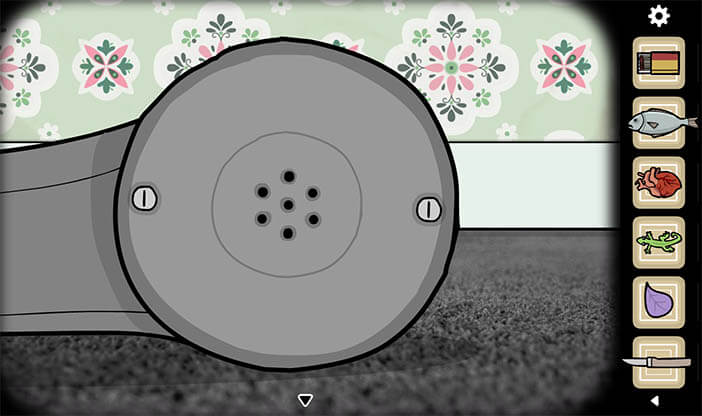
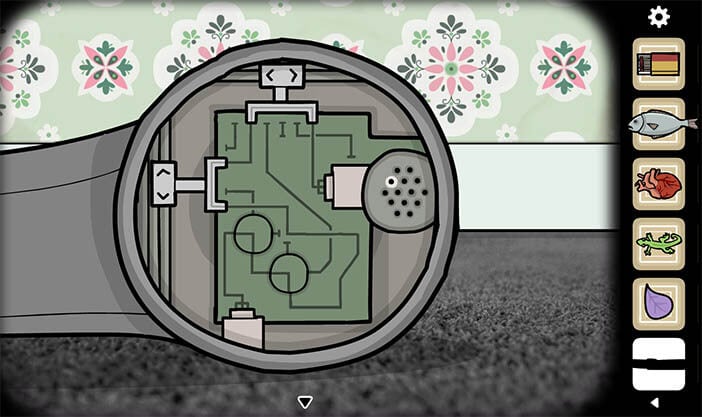
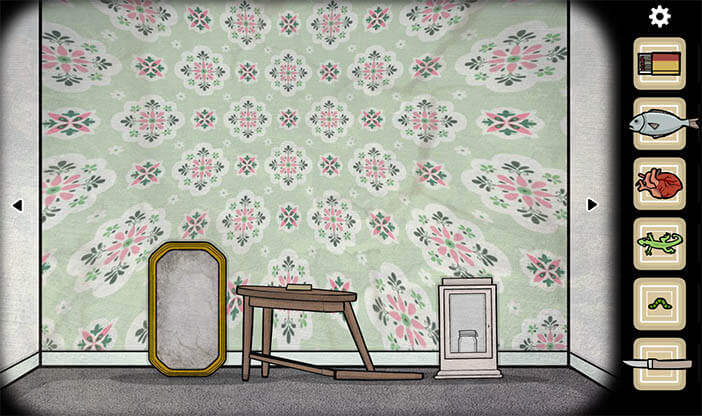
After grabbing the first candle go into the next room to the left. On top of the drawer, there is a box with a turning puzzle within it.
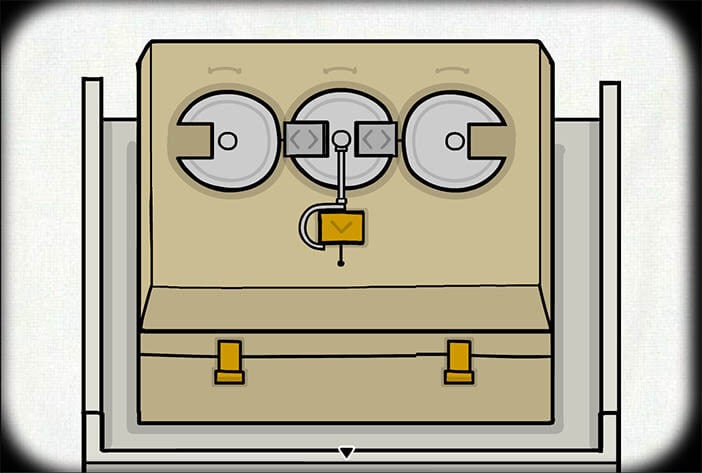
The holes on the circles on the left and right should be turned to the middle circle and two squares that block the third circle can be moved left and right releasing the middle wheel. When moved the mid-wheel releases a golden square and that square is dragged lower and unlocks the box. Inside the box, there is the second candle.
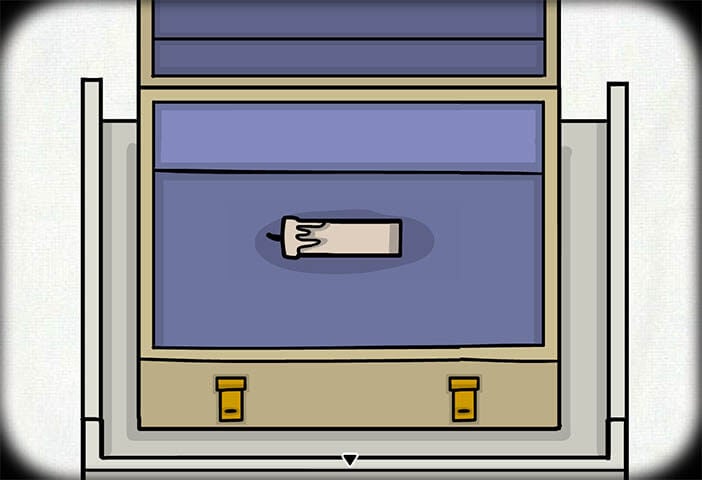
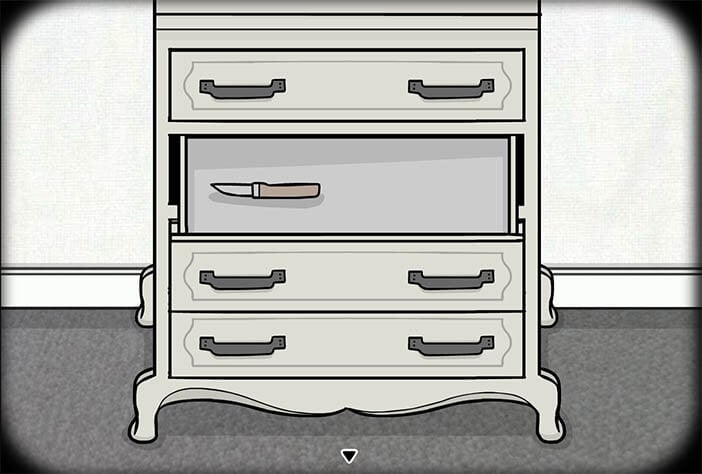
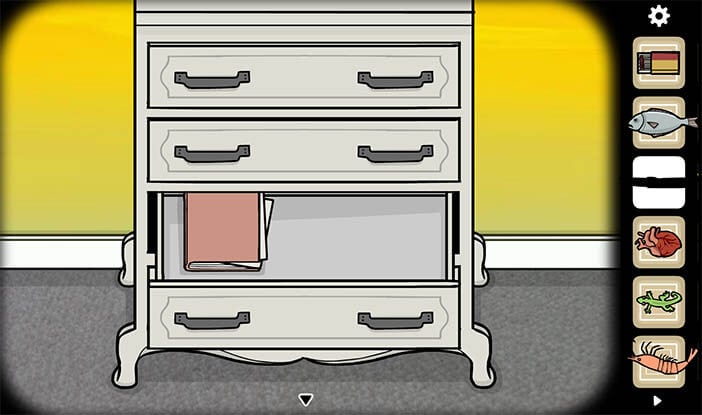
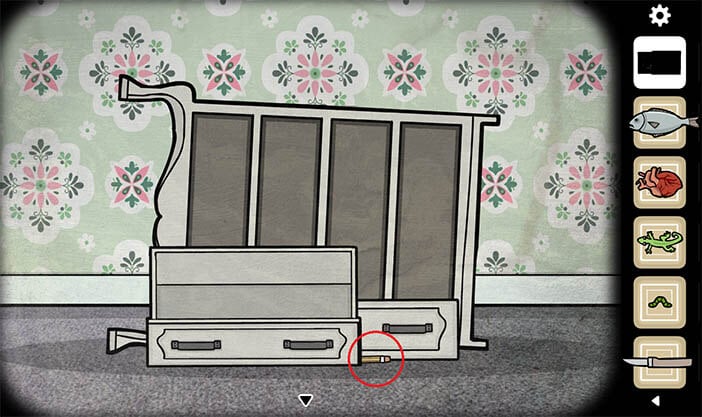
The third candle can be found in the first drawer from the floor.
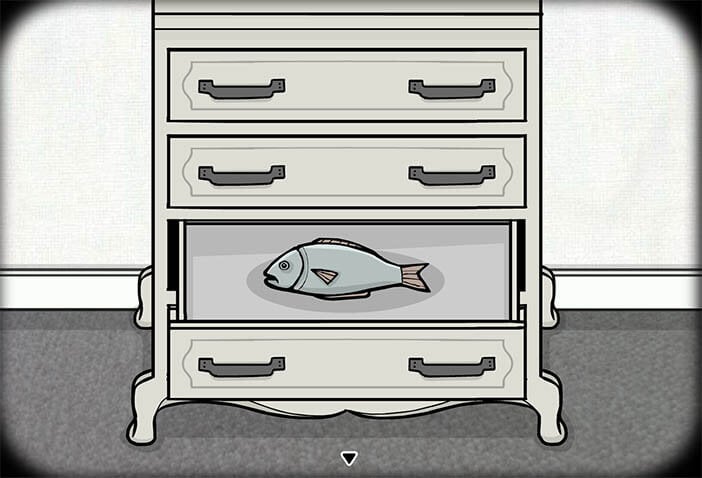
In the second drawer, you will find the fish, in the third from the bottom, you will find a knife.
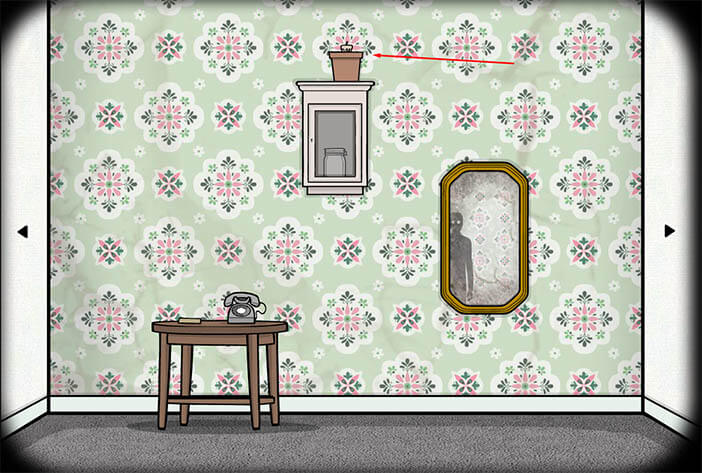
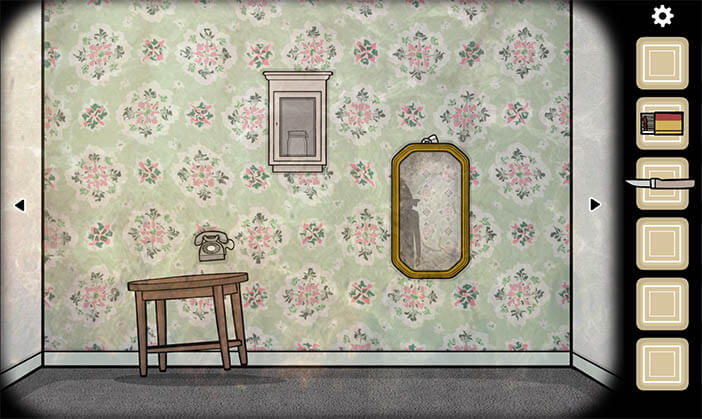
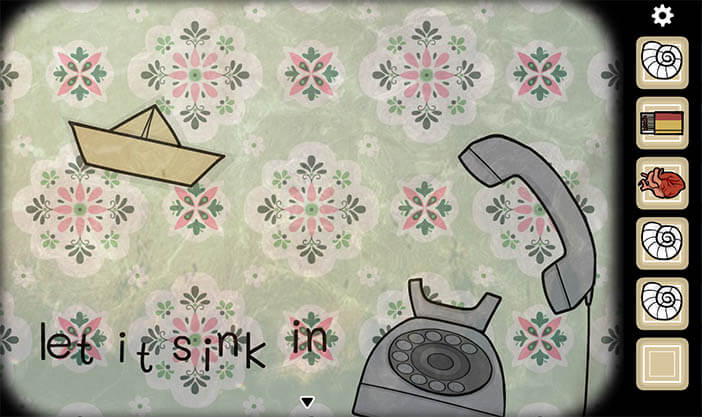
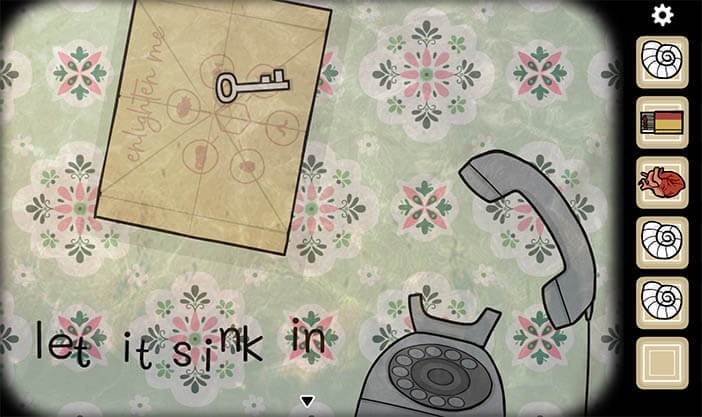
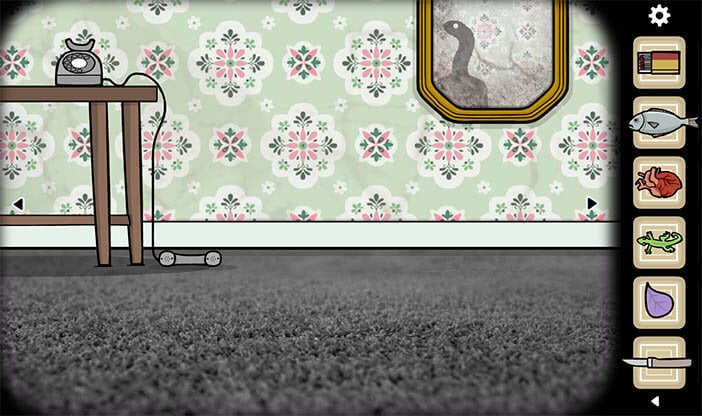
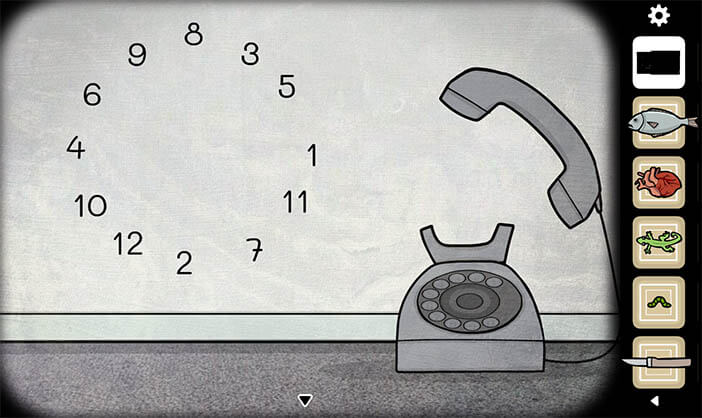
Back in the first room, where you started, go to the table with a telephone and a letter. Use the knife to open the letter, in the letter you will find a paper with all the symbols that will help you move between room dimensions. At the top of the letter, it is written: “enlighten me” which is a solution to the next piece of the puzzle.
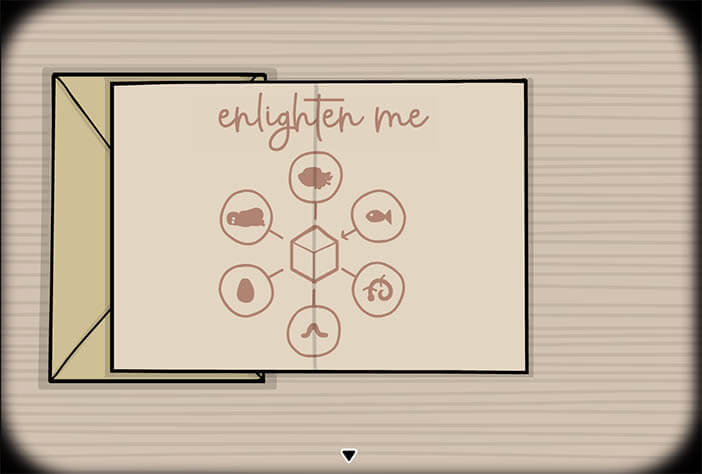
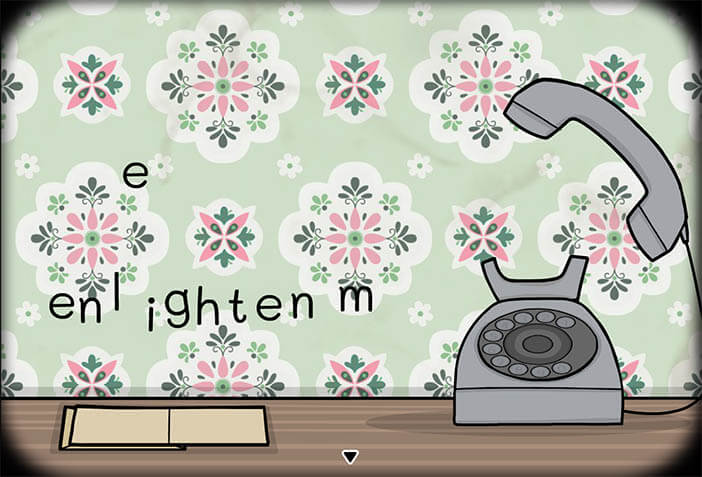
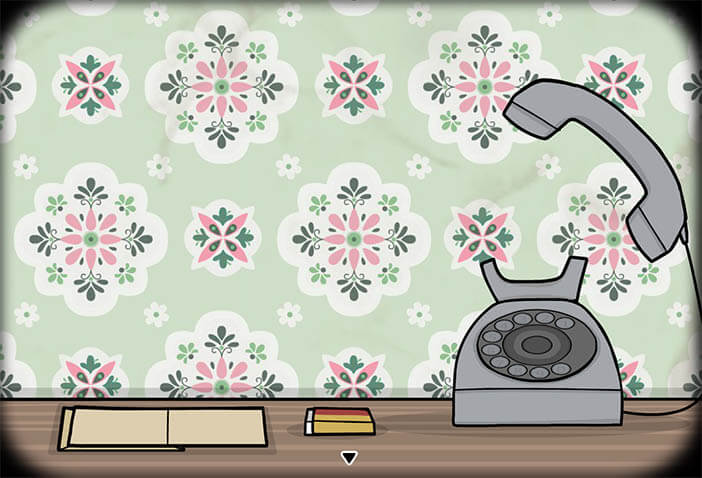
When putting down the letter, pick up the phone, out of the receiver letters would scatter around and out of you will need to arrange the last clue sentence: “enlighten me”. When you solve it a matchbox will drop from the ceiling. When you solve it a matchbox will drop from the ceiling.

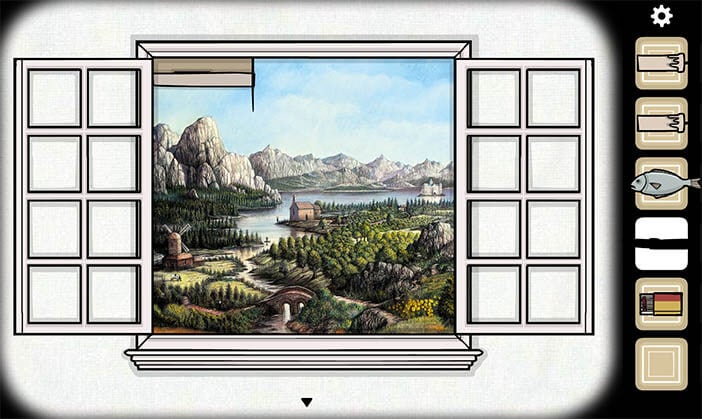
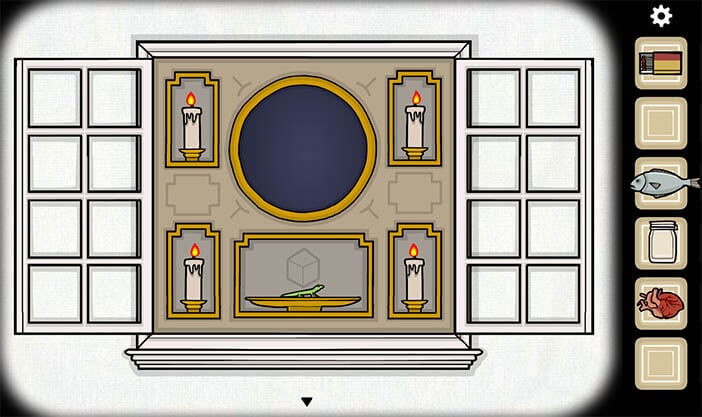
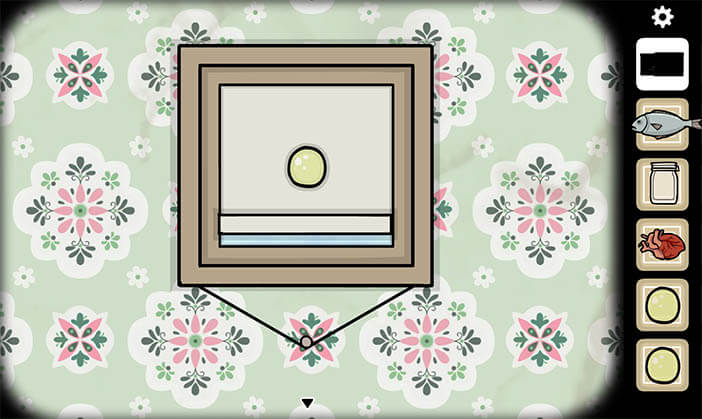
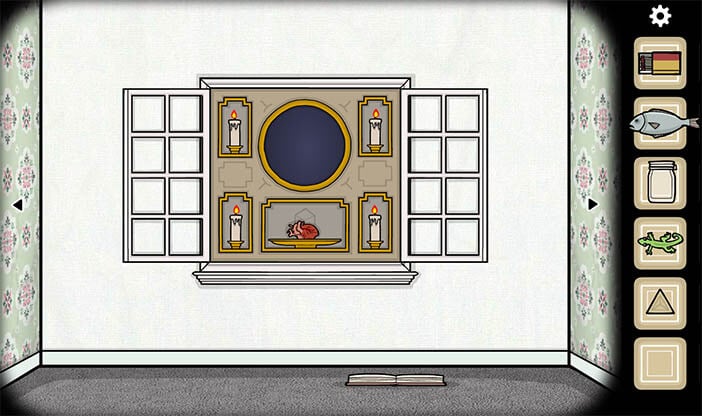
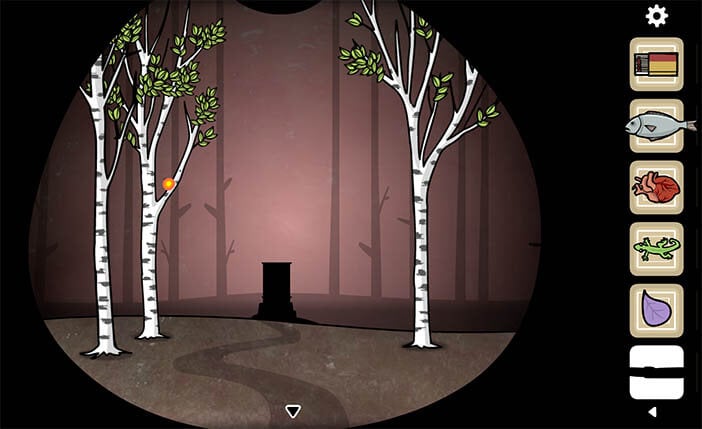
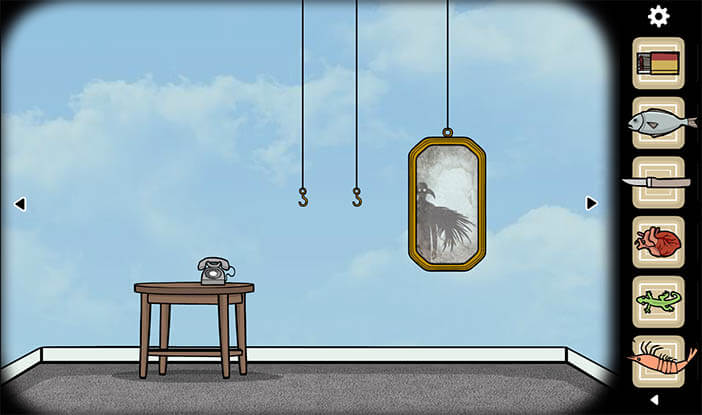
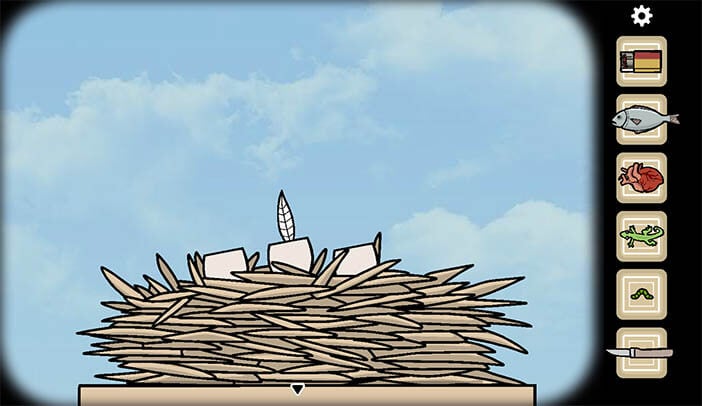
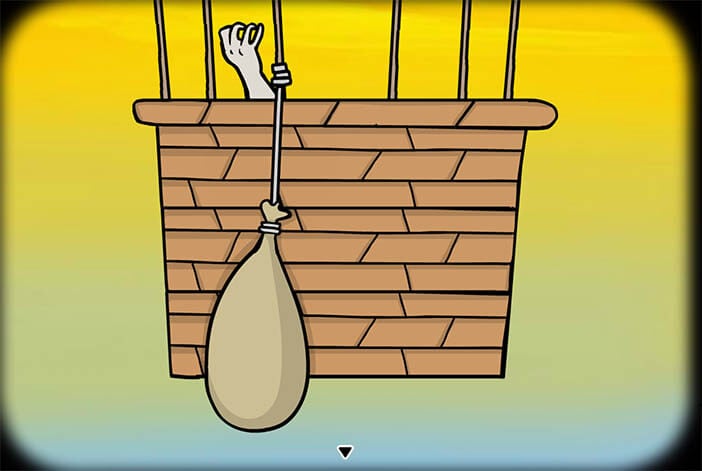
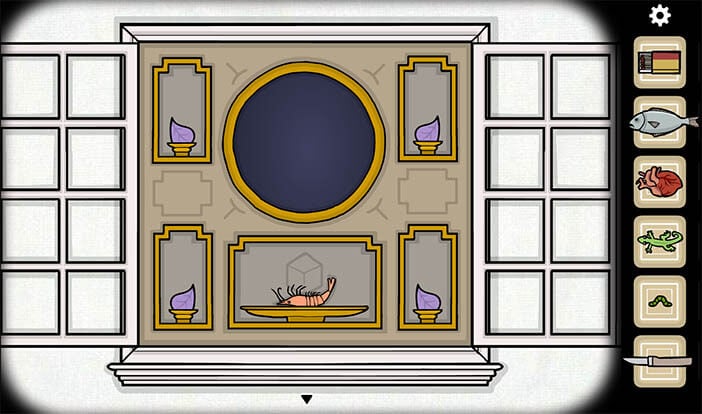
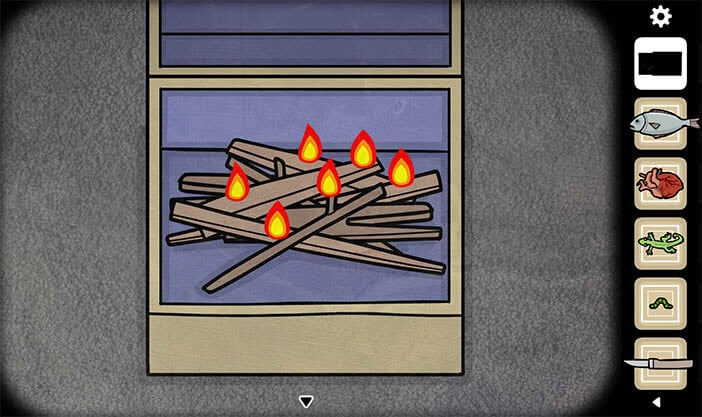
From the first room go right into the next room, within it there is a window and behind the window, there is a painting of a landscape. Take the knife from your inventory and cut up the painting, underneath it, there is something like a sacrificial altar with four candle holders, a plate, and a circle with an aperture.
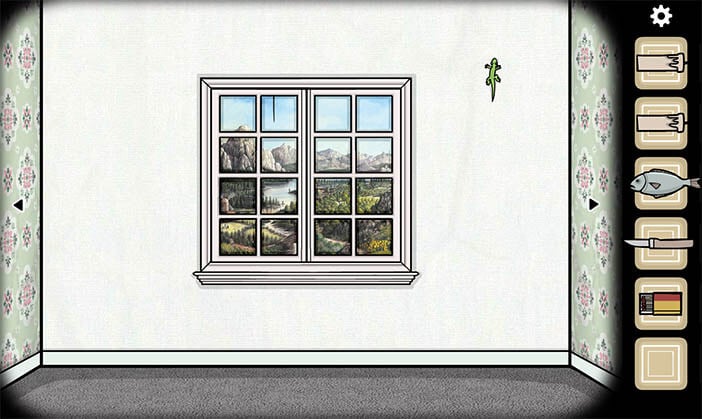
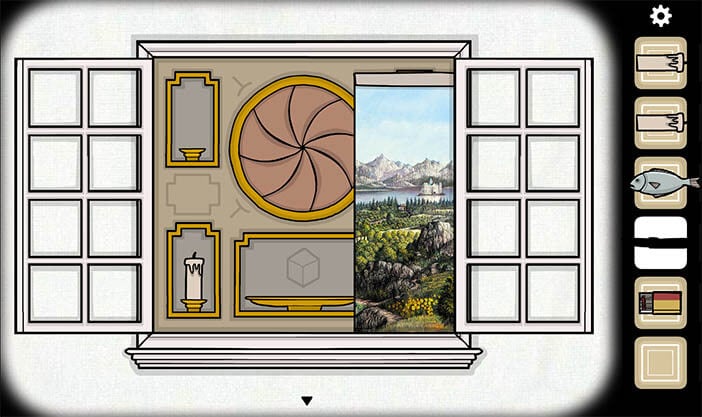
Place the other three candles in their places and place the fish on the plate.

Lighting the candles will open the aperture.
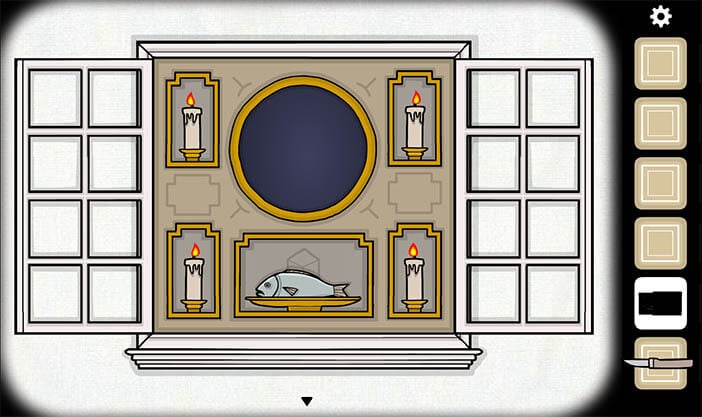
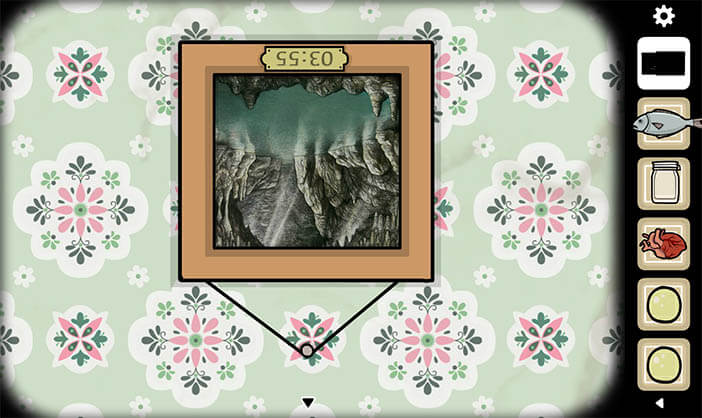
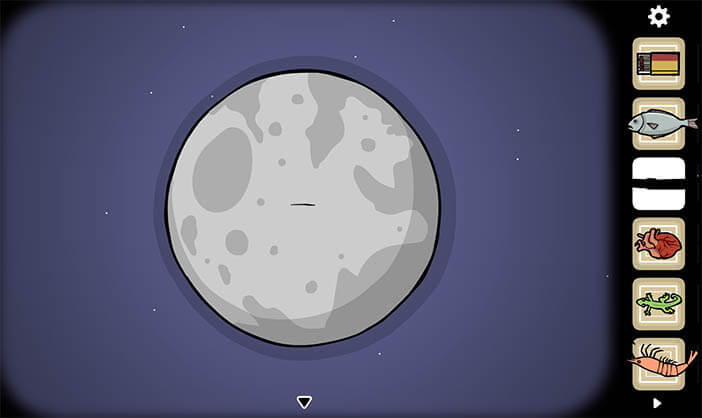
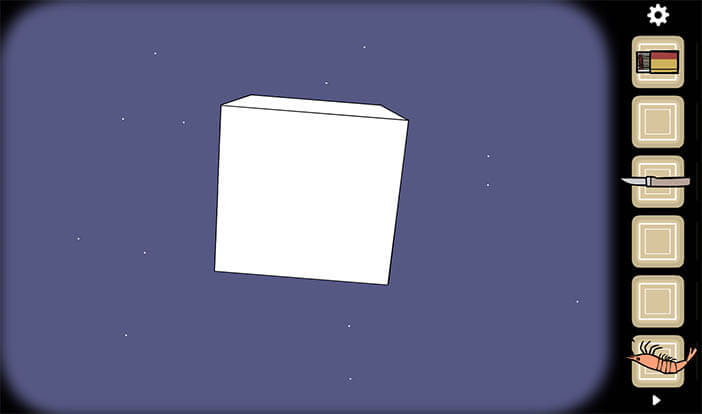
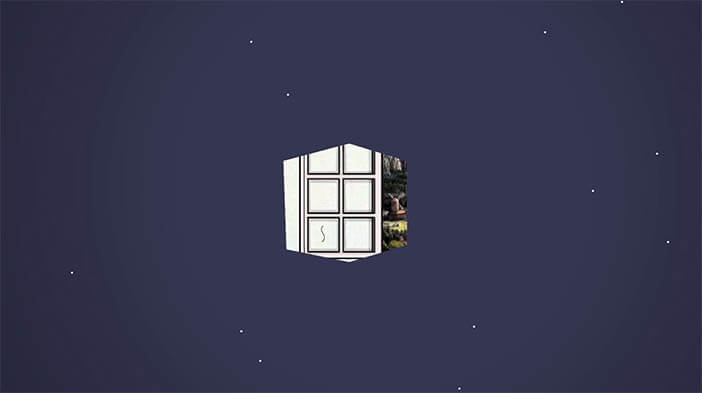
Going inside the opening you will float inside space towards a spinning white cube.
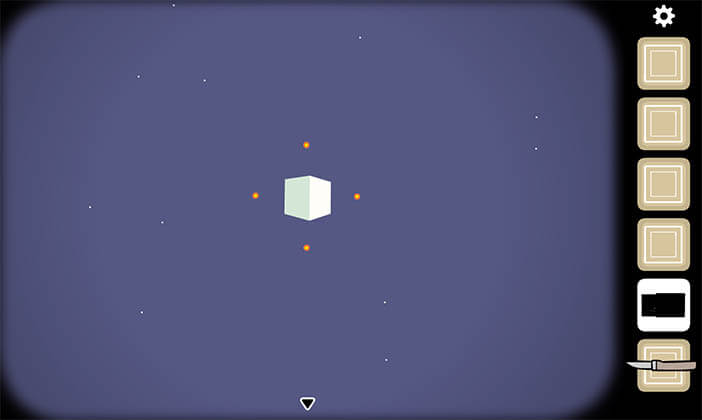
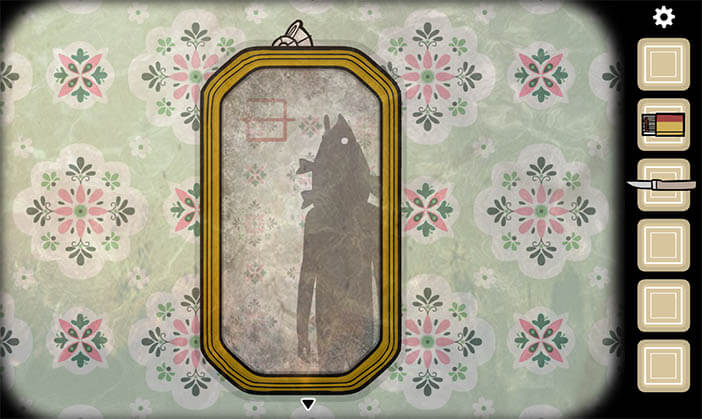
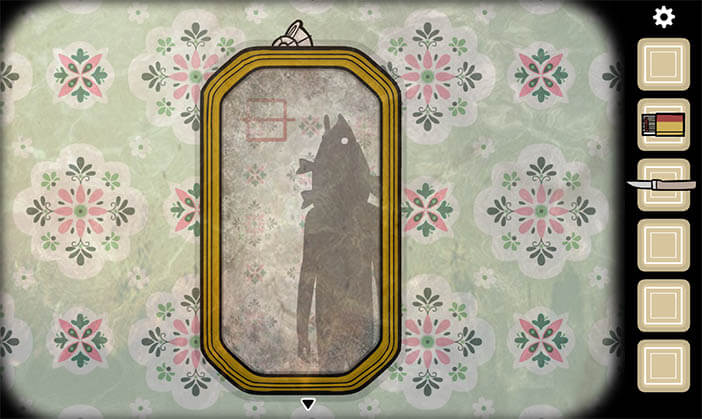
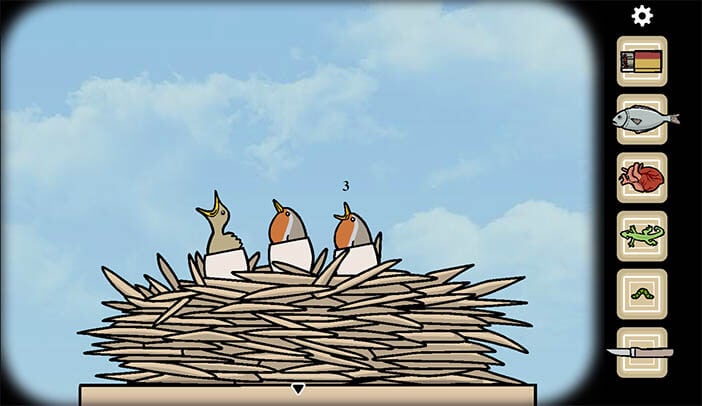
The cube will lead you to the second dimension. In this fish dimension, your reflection in the mirror will change and instead of having a human silhouette your head will have a silhouette of a fish and everything appears to float as if it’s underwater.
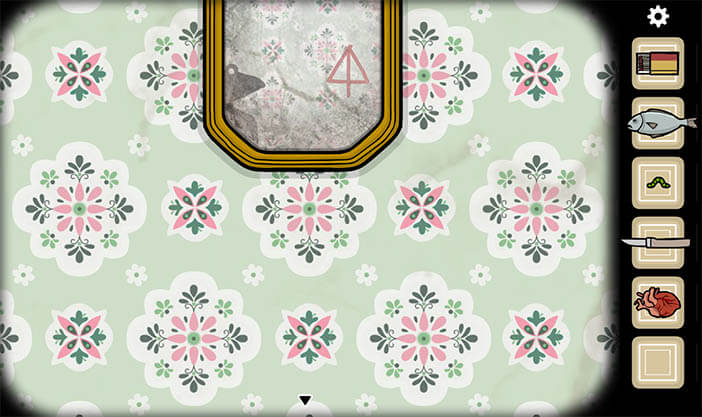
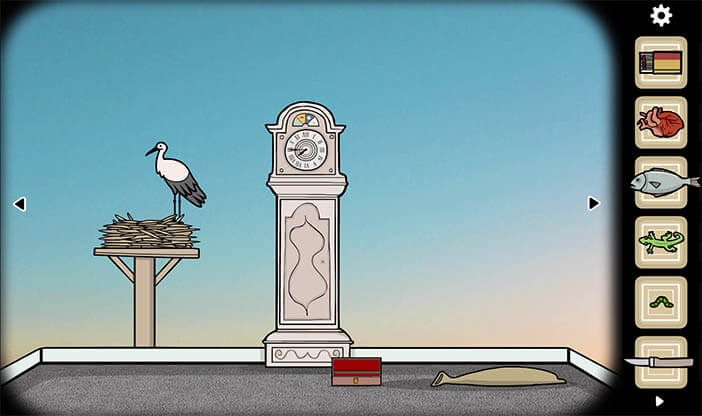
In the fish dimension, you will need to find 4 seashells and a heart. You will find the first shell on top of a mirror in the first room.
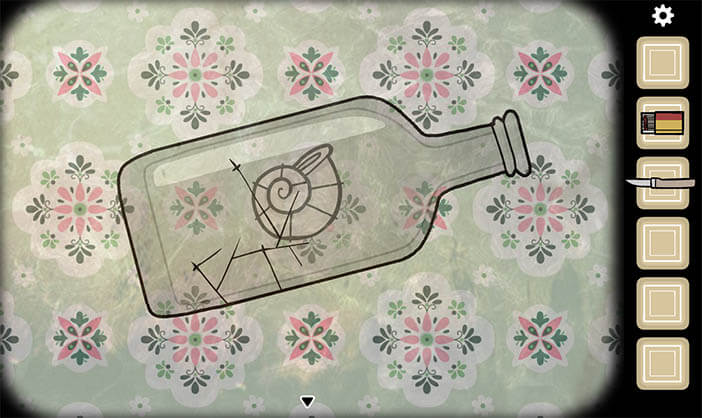
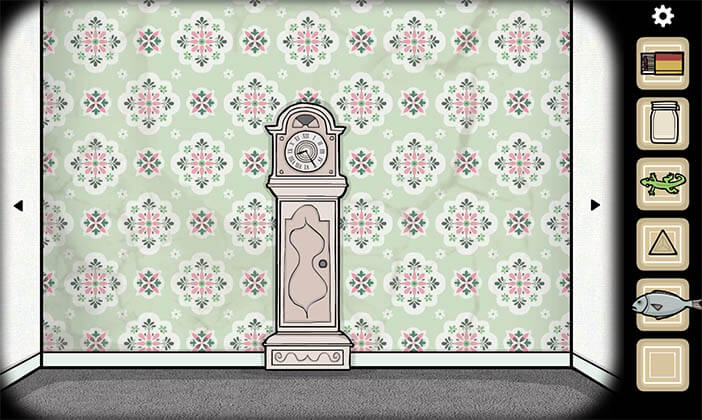
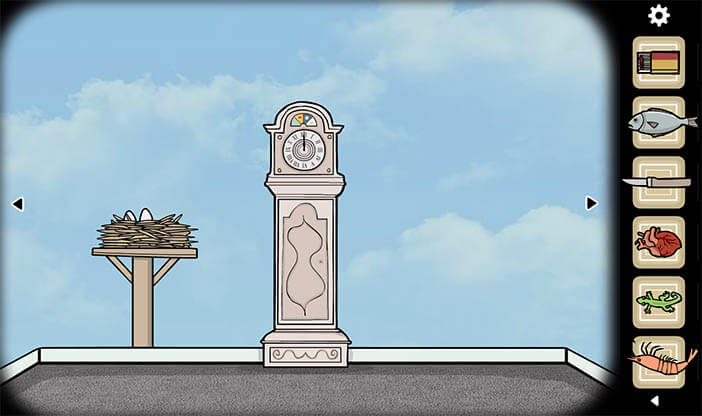
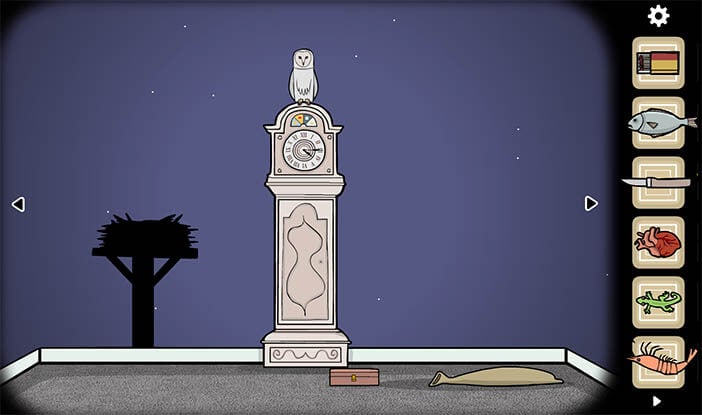
The second seashell can be found in the room with the big grandfathers’ clock, next to it a bottle is floating in the room, inside the bottle is the second shell, to get to it you will need to gradually crack the bottle until it breaks so you can take out the contents.

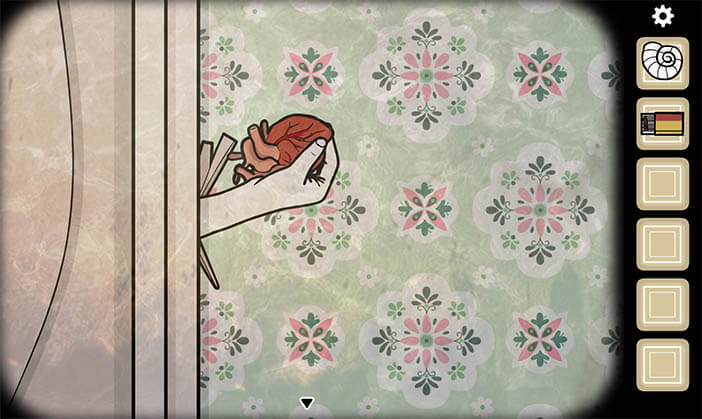
You will notice a small black protrusion on the right side of the clock if you zoom in you will notice that it is a crooked nail.
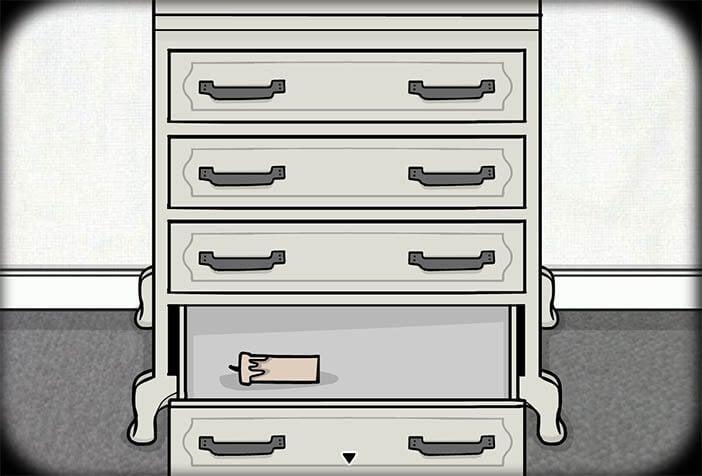
Tap on the nail and splinters and nails will start floating out, tap on them until a human hand pokes out.

Place a knife in the hand and return with a heart.

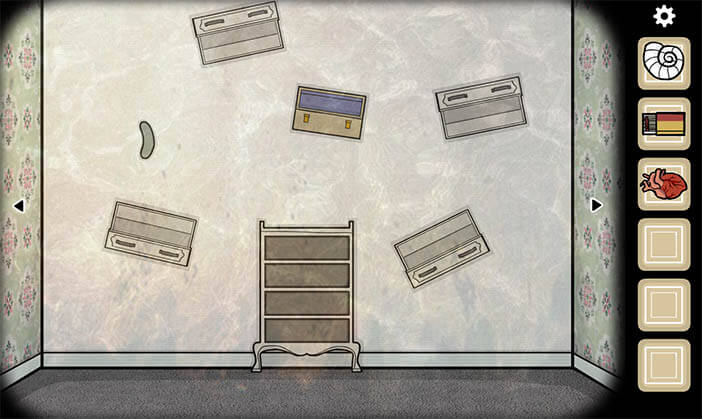
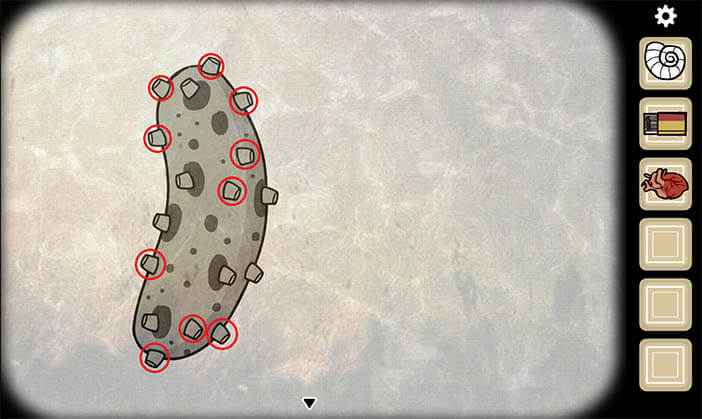
In the room with the drawer, there is a floating pickle.
After you zoom in, press all bumps that are not surrounded by darker spots (we marked them with red circles) until the pickle breaks and shows a shell.
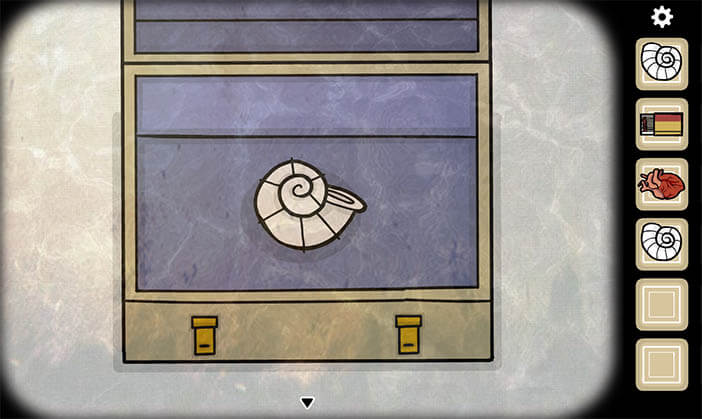
The fourth shell is placed inside the box that floats above the drawer,
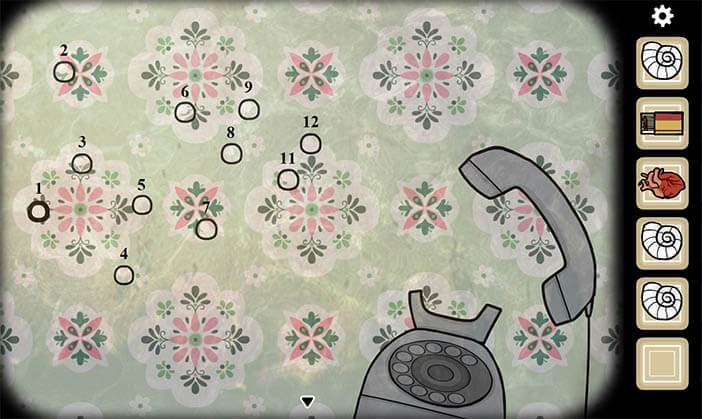
now go back to the first room and pick up the phone. When the bubbles show up, pop them gradually from left to right spelling: “let that sink in”, a letter will drop with a key.
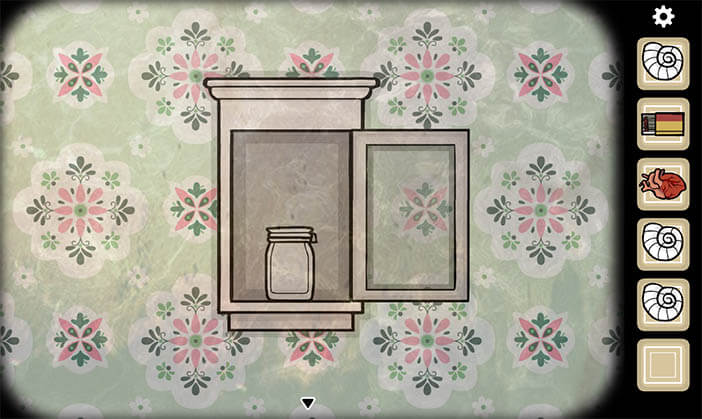
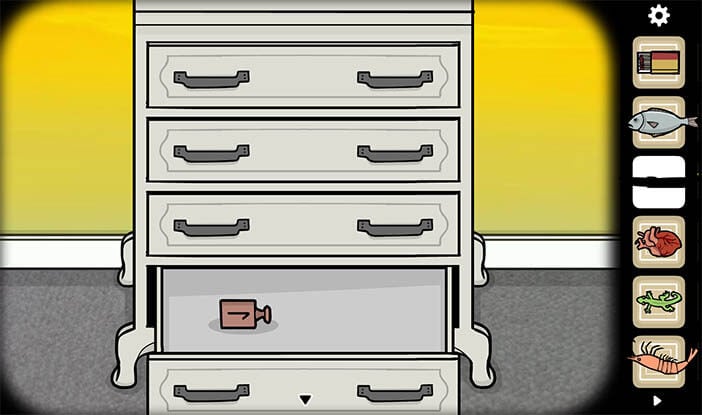
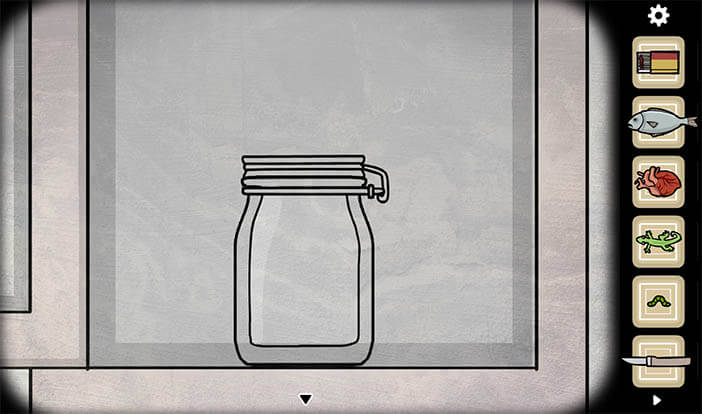
The key can be used in the same room to open a cabinet with a jar, take the jar.
Go back to the wall altar and place the four seashells where you last placed candles and replace the fish with the heart, the aperture will open again, once you enter it you will return to the human dimension.

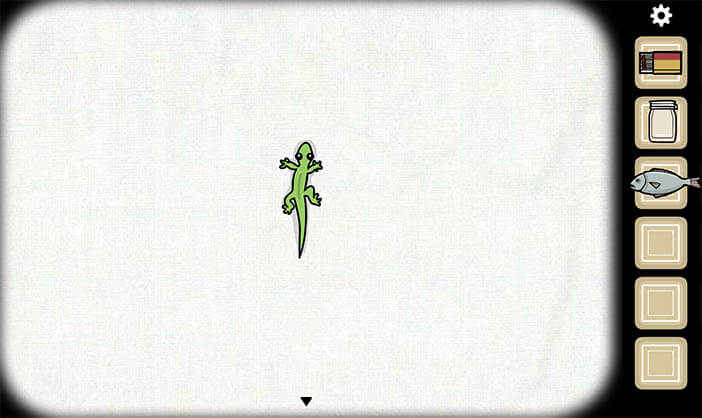
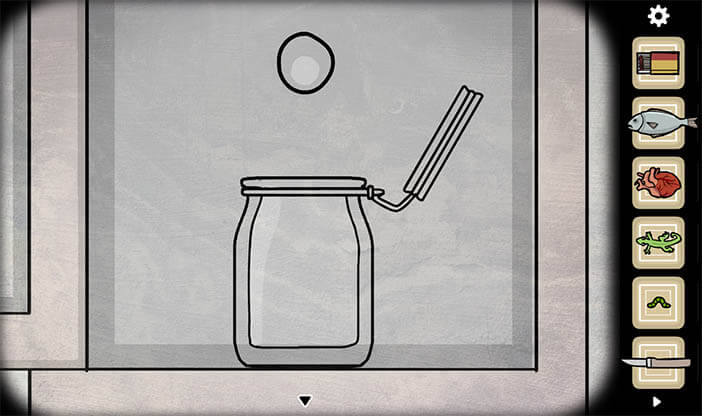
In the human dimension look for a gecko, upon tapping it, it will run away and reappear in another room, so instead tap on the jar in your inventory and capture the gecko with it.
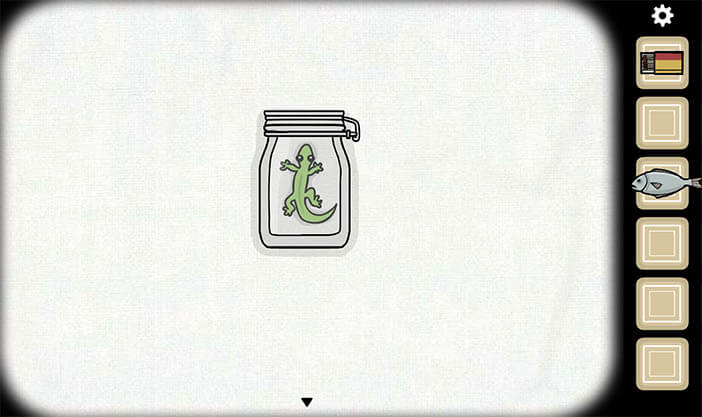
Go back to the altar room again and replace the heart with a gecko.
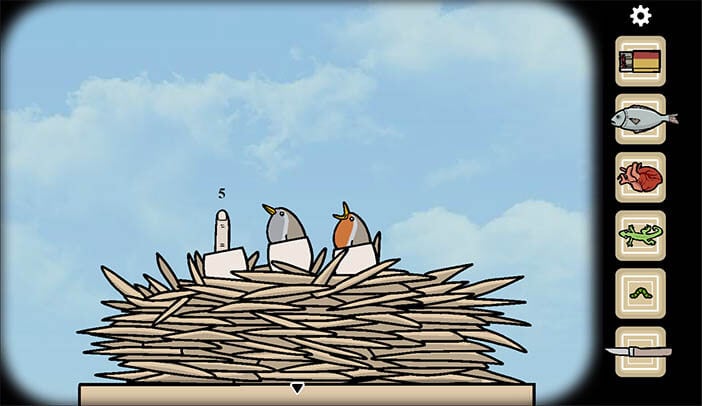
Enter the hole and you will go into the Gecko dimension where everything is upside down and your head is that of a gecko.
In the Gecko dimension, you will need to find four marbles and a worm key. The first marble is in the pot in the first room.

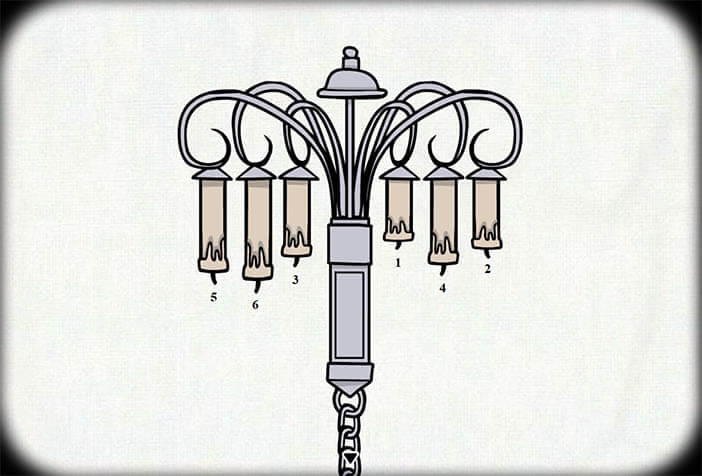
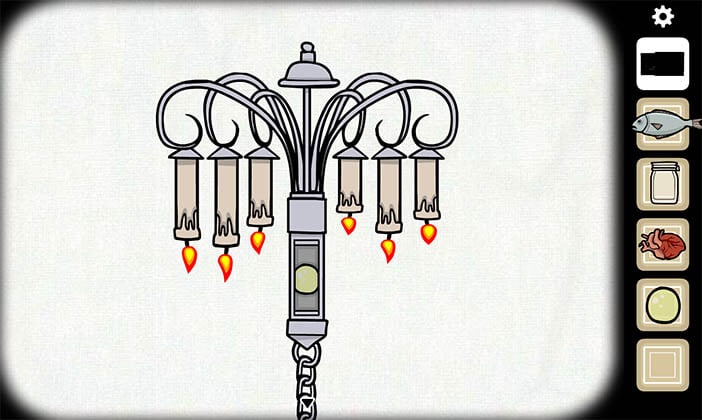
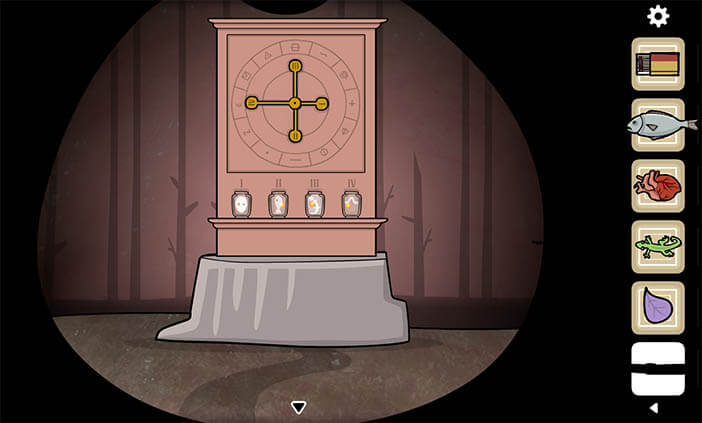
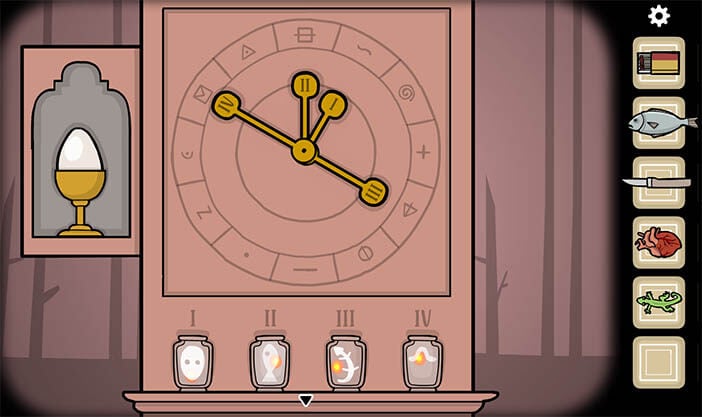
Go to the room with the altar in it and you will see an upside-down chandelier. This chandelier is a puzzle that requires you to light the candles in a sequence. Start lighting them from the right the small candles closest to the chain of the chandelier, then go to the small candle on the far right on the right side, next one should be the one on the right of the left side right next to the chain, light the big candle on the right side in between two small candles, then light the one on the far left side and finally the middle one on the left side of the chain.
After the solution of the puzzle, a small compartment opens in the middle of the chandelier revealing the second marble.
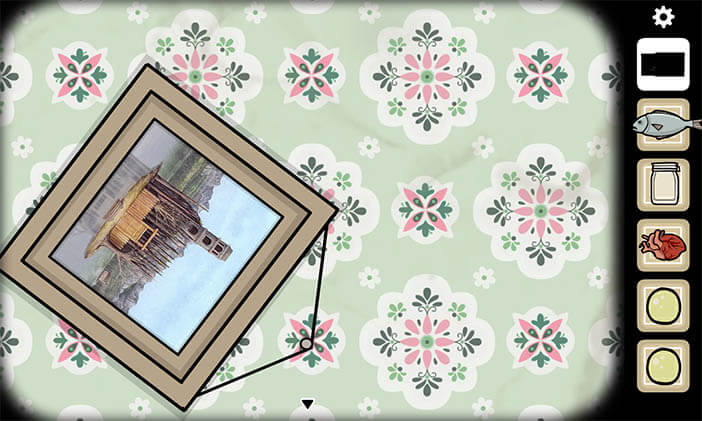
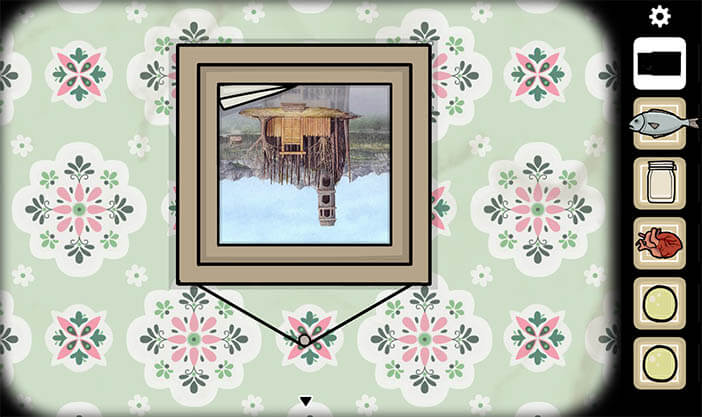
In the room with the clock, there are three pictures on the wall.
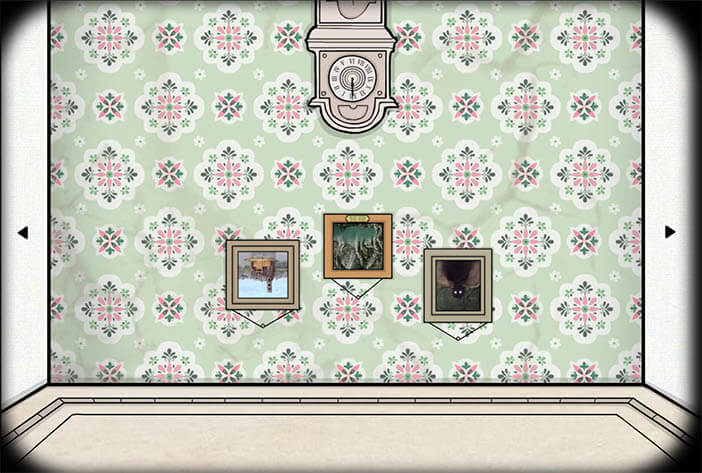
Zoom in on the left one and move it, by moving it the edge of the small painting will fold, tap on it and drag until the whole picture folds and reveals a marble.
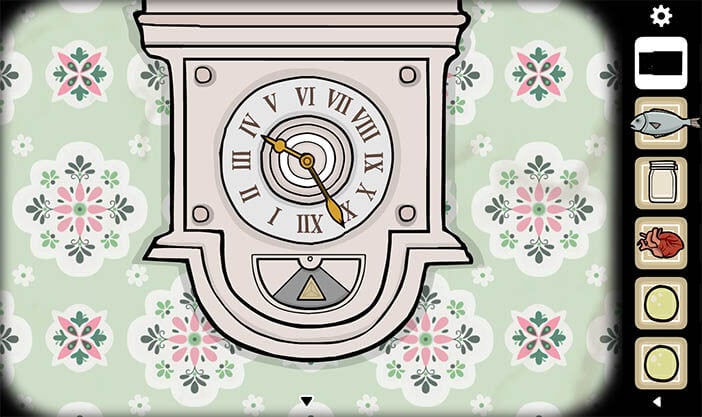
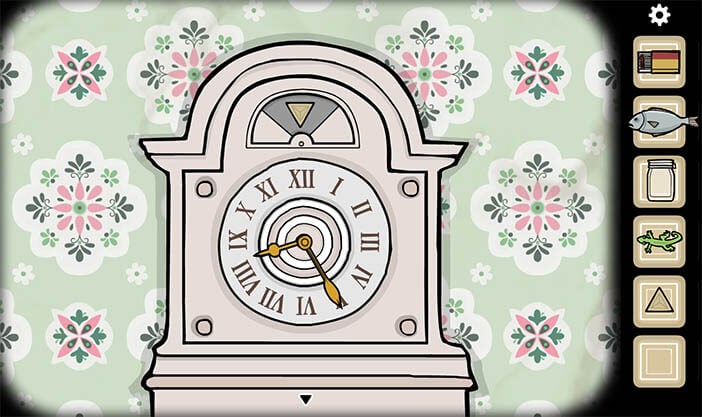
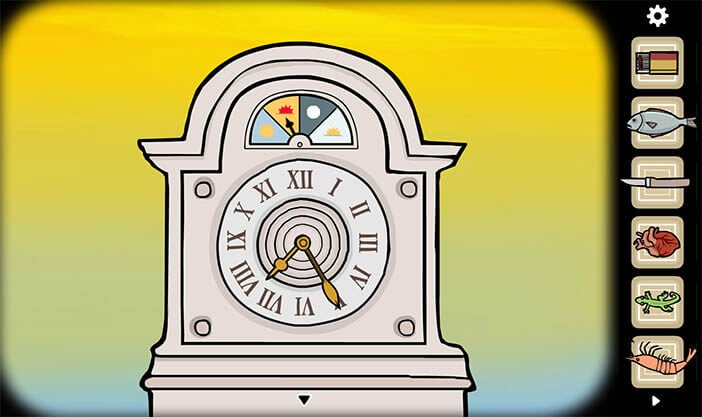
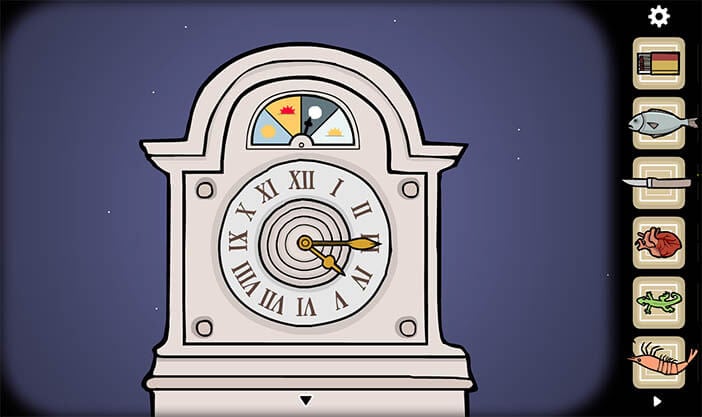
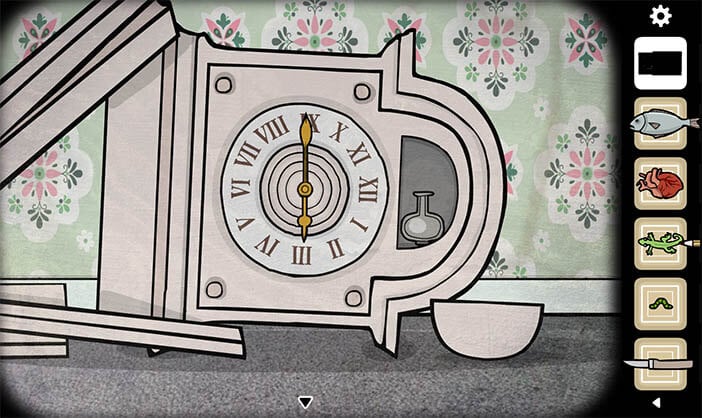
In the mid picture, you will see the numbers 03:55 written upside down.
Move the clock arms to show 3:55, this is going to open a small door on the top of the clock with the triangle key.
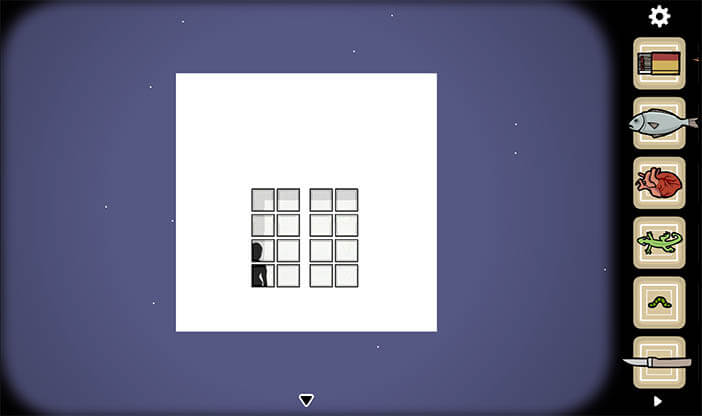
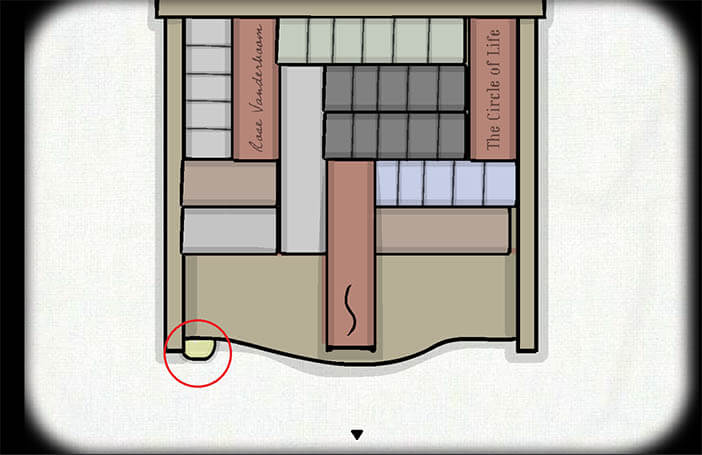
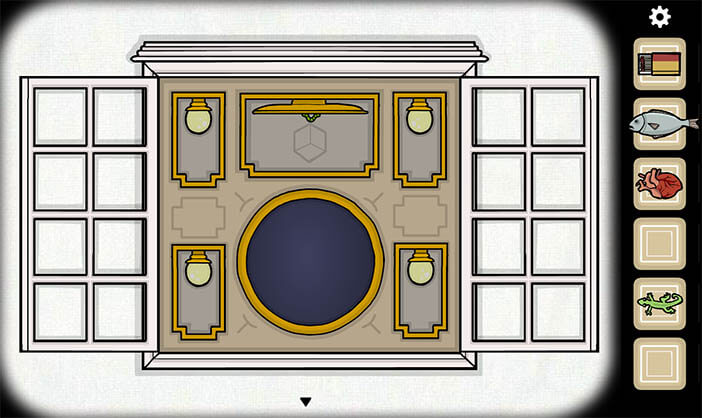
In the next room, you will find a marble on top of a bookshelf. On the bookshelf, there is a puzzle that when solved will reveal the result in the next room. Solve the puzzle by using this picture as a reference on how it should be solved:
When you solve it a book will become shaky upon tapping on it it will fall on the floor and you won’t be able to see it in the Gecko dimension. To get to the book you will need to go back to the human dimension. Place the marbles in their designated places and place the heart on the sacrificial plater.

Enter the first dimension and find the book on the floor.
In the book, you will find information on the coming events of the game, and solving of oncoming puzzles but for now, the second page shows where all the triangle keys are, on the third page you’ll see a clock drawing showing the time of 8:25.
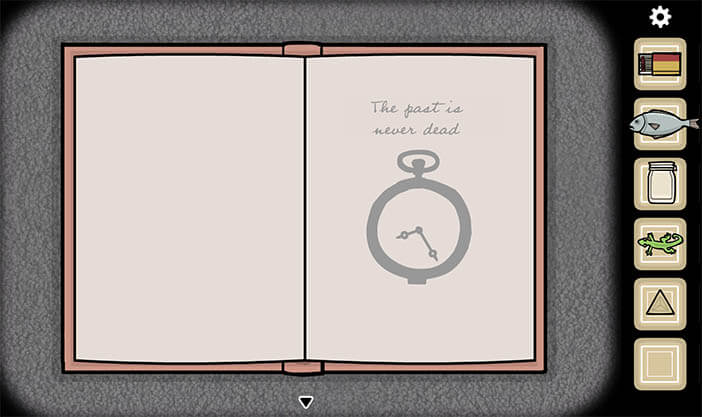
Go to the clock and place the clock hands to 8:25 and you will gain another triangle key.
Go to the Fish dimension next. In the first room, there will be a red book named “Samsara” with a drawing of a clock showing 2:15.

Go to the clock room again and move the clock hands to 2:15, this will reveal the third triangle key.
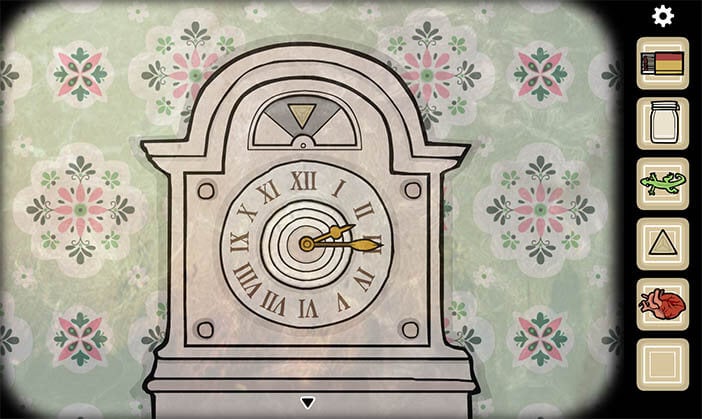
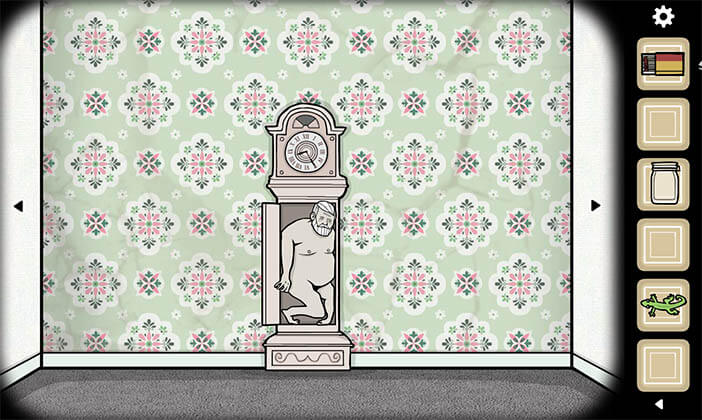
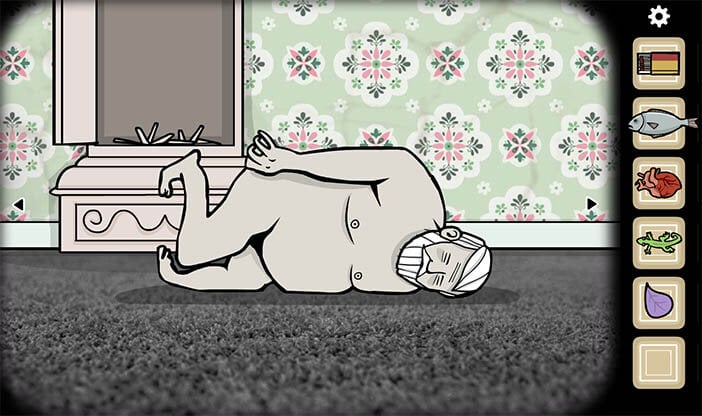
Go back to the human dimension. In the human dimension find the clock zoom in and place the three triangle keys in the lock.
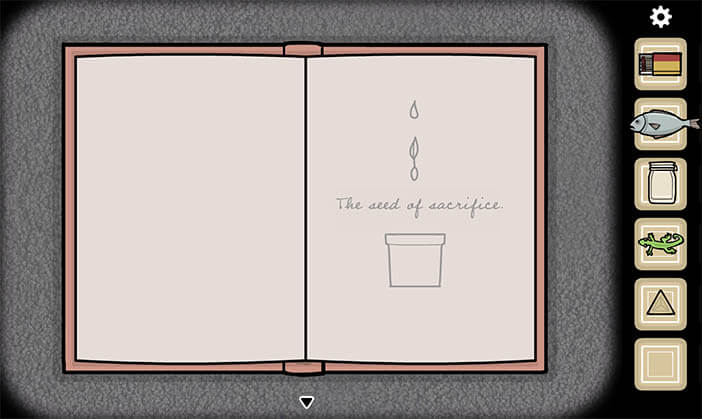
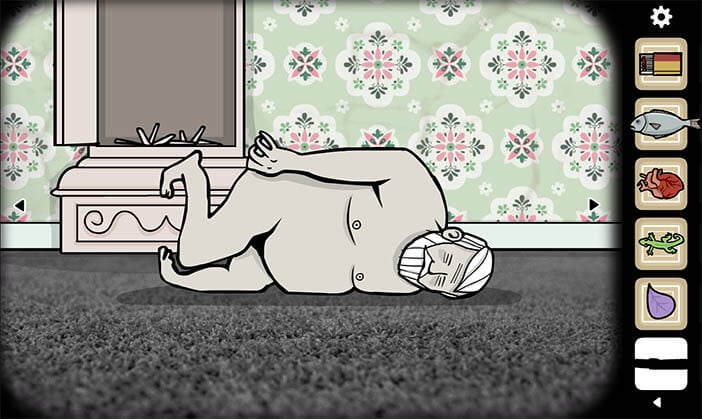
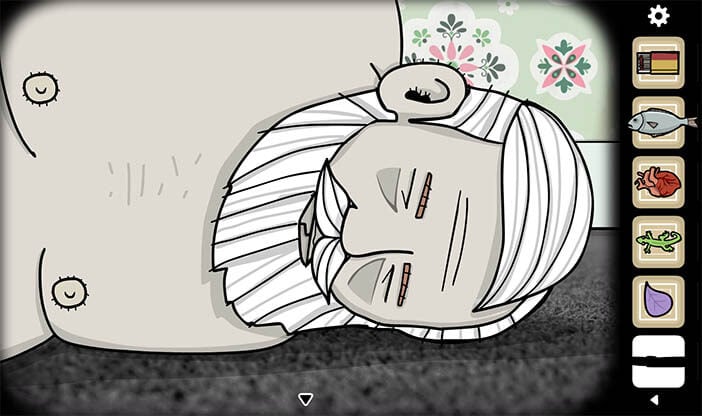
The door on the clock will be unlocked and reveal a body of a dead old man tap on him until he falls to the ground, zoom in and tap on his hand, it will drop a seed with a little sprout.


Plant it in the pot of the first room of the first dimension.
Now return to the fish dimension, tap on your jar, and then tap anywhere so you fill it with water. Return to the First dimension and water the small sprout, once it grows go to the gecko dimension.
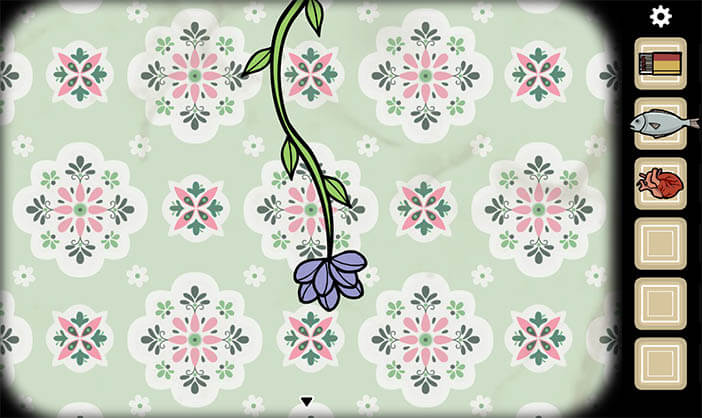
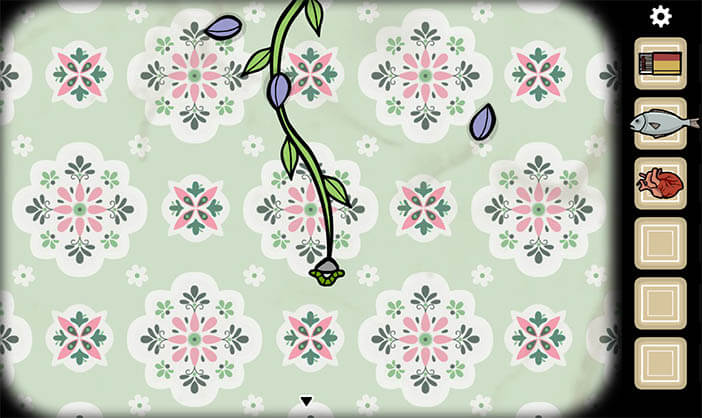
In the Gecko dimension, you will see that the sprout has grown into a flower, pick off all the petals to reveal a worm, pick up the worm and go to the altar, place the worm on the plate and enter the worm dimension.

In this dimension your perspective will be from that of a worm close to the ground and your head will be that of a worm in the mirror.

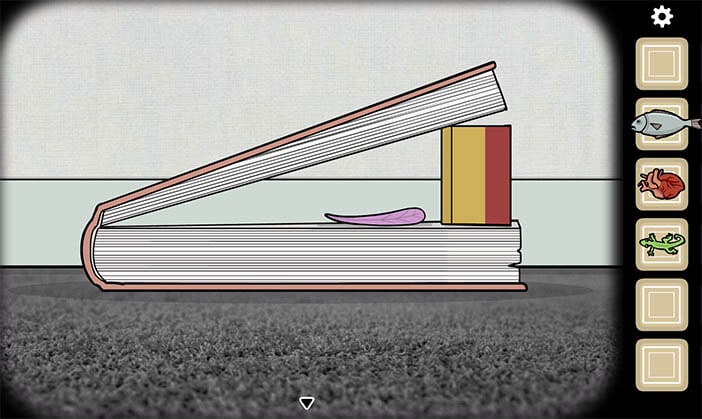
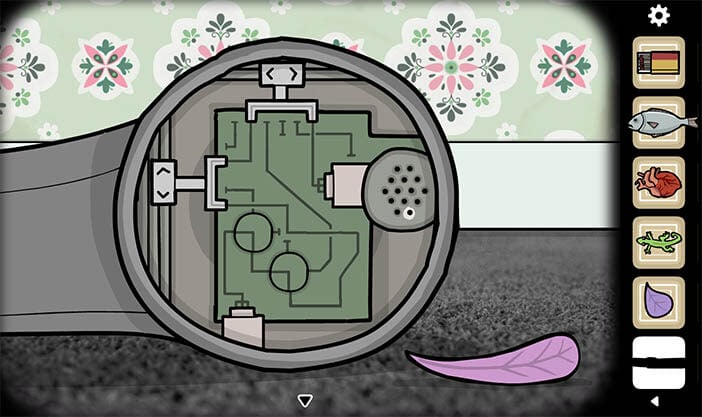
In this dimension, you will need to find 4 flower petals, a knife, and an egg. You will find the first petal in the room with a book, lift the pages of the book with the matchbox and pick up your first flower petal.
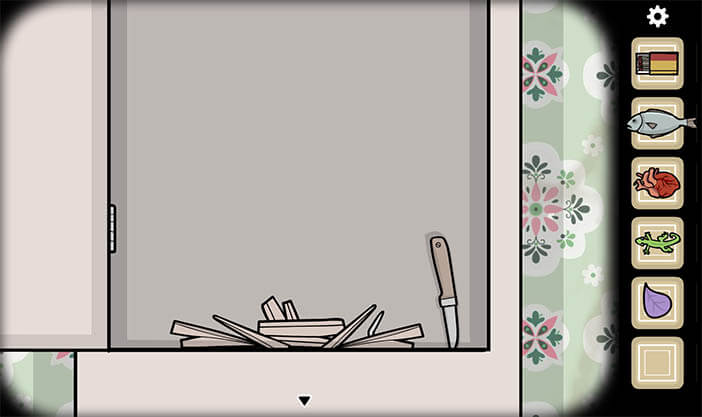
In the room with the clock and the dead body clear away the wood chips from the clock and nails and pick up the second flower petal along with the knife which is placed in the clock.
In the first room tap on the phone two times until the phone receiver falls to the ground. Unscrew the headphone and solve the simple puzzle so that the earphone magnet is connected to the source of power.
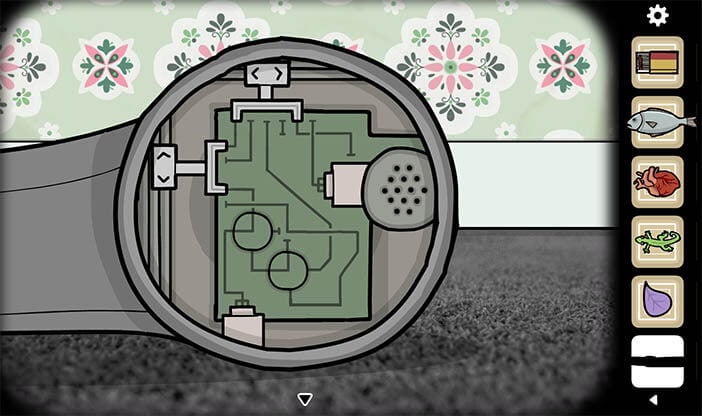
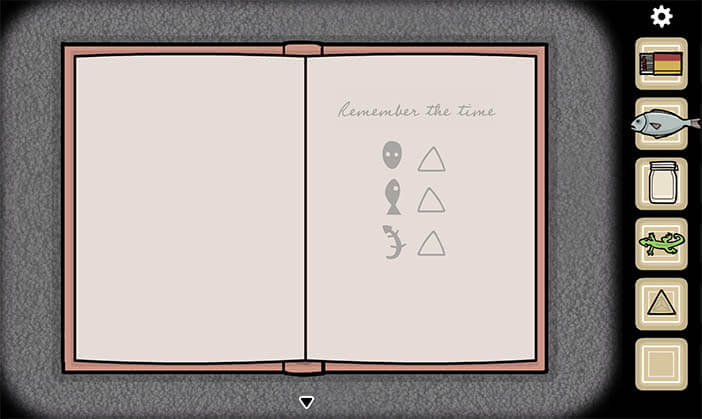
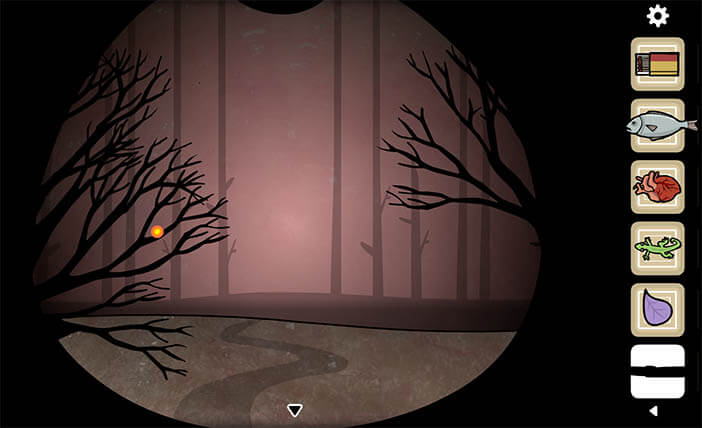
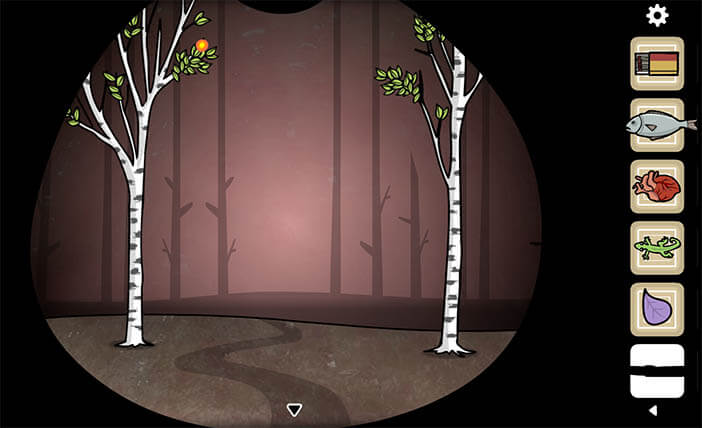
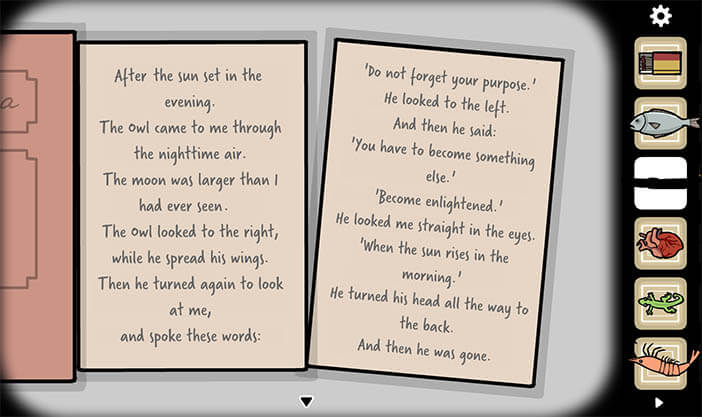
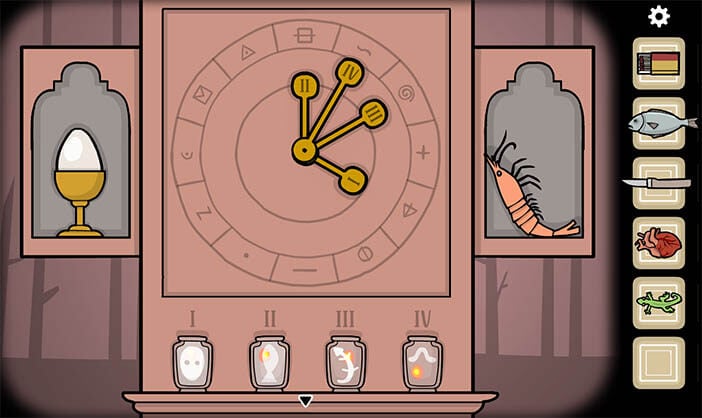
Tap on it several times and it will send sparks to the ceiling attracting the third flower petal. The fourth flower petal is located inside the mouth of the dead old man that is located in the clock room. When you enter his mouth you will enter a forest in each part of the forest you will need to press on any part of the screen for the moment you are holding a firefly will appear on that part of the forest press the firefly whenever you see it, if you go through all of them you will solve the final puzzle of the dead man dimension that will show you the symbols of all dimensions numbered underneath something resembling a clock.
Each handle has a roman numeral corresponding to the symbol of the dimension underneath. You will find in each of the dimension symbols corresponding to the ones on the clock in the mirrors of those dimensions, if you are feeling lazy looking for them you can see the solution of the puzzle in the picture underneath.
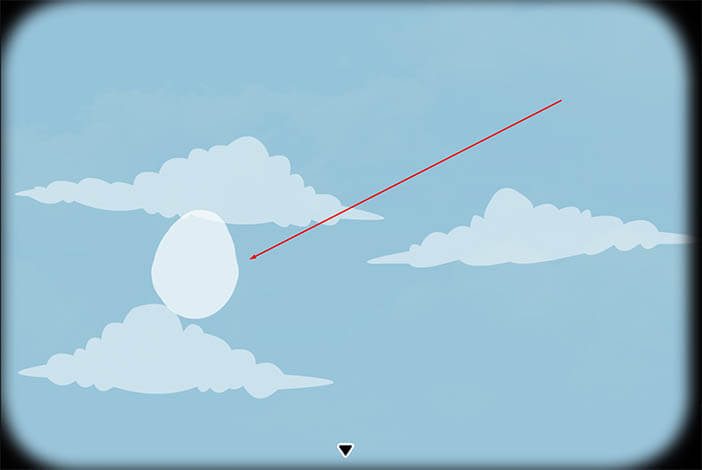
After solving this puzzle, the clock will give you an egg.
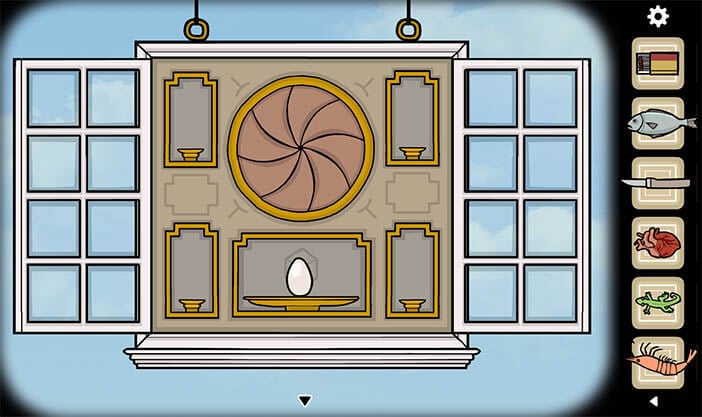
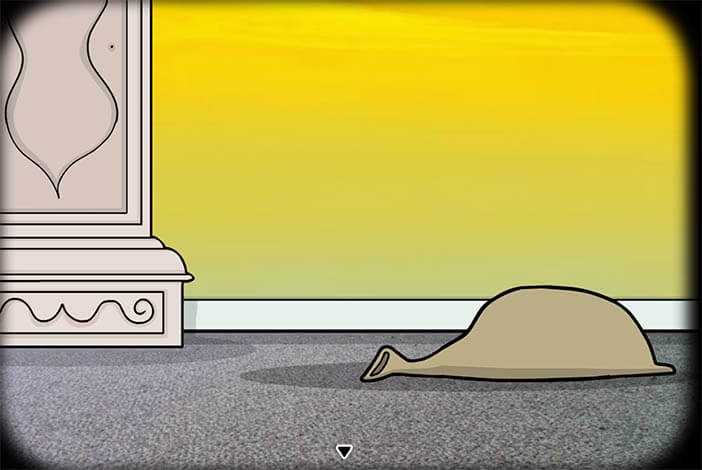
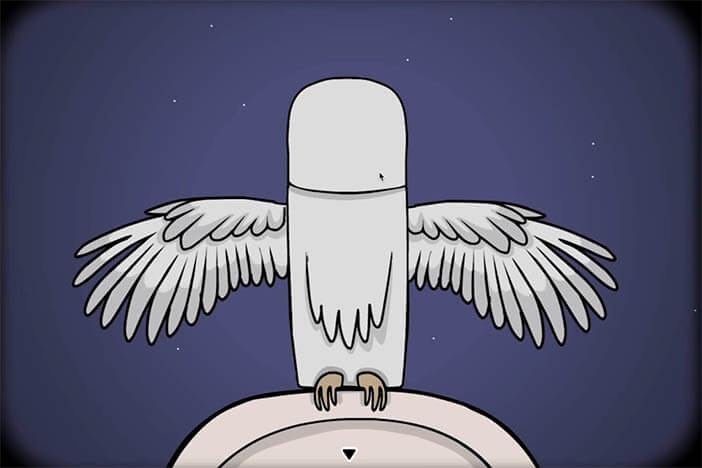
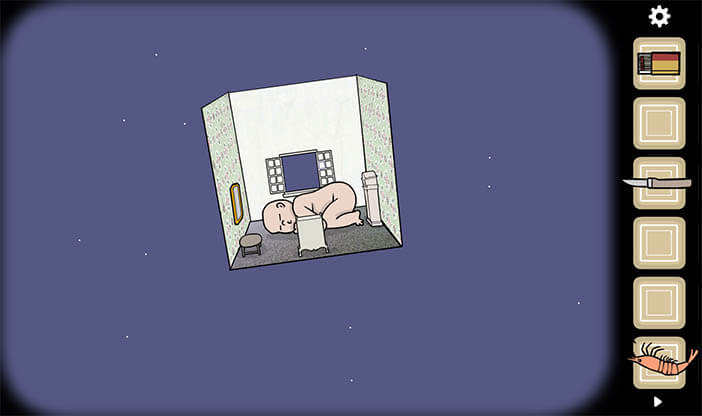
You will find the fourth flower petal in the drawer room just fall down on the floor. Go to the altar and place the Egg on the plater, with it you will enter the Egg or Bird dimension in it you will be at the top of a building and you will have wings and a beak at the side of your head.
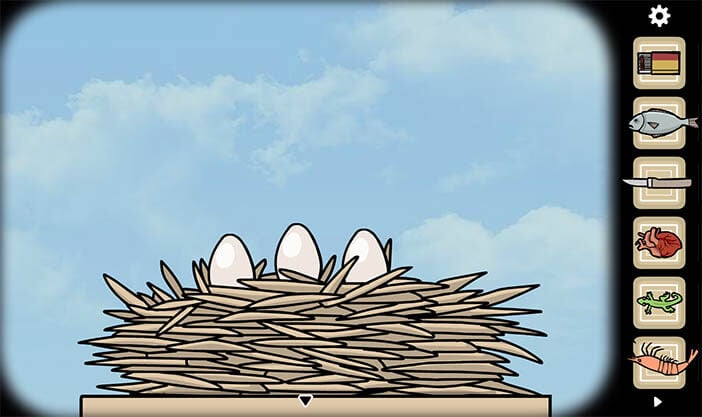
In this dimension, you will need to find four feathers and a baby. Go to the altar room and take the Egg with you and place it in the nest with other eggs.
It takes three taps on each egg revealing a new puzzle, the order can be mixed up for different people but the object is always the same and this is the way that you should solve it:


On the next puzzle, you have the cloud puzzle where you should move clouds until they morph into recognizable objects, an egg, a gecko, a fish, and a worm. The upper right cloud will morph into an egg when moved down and left.
Cloud on the upper left will turn into a fish on the down right side of the frame, keep in mind when you want to solve the fish, worm and gecko shapes try to find a position where their eyes start to form.
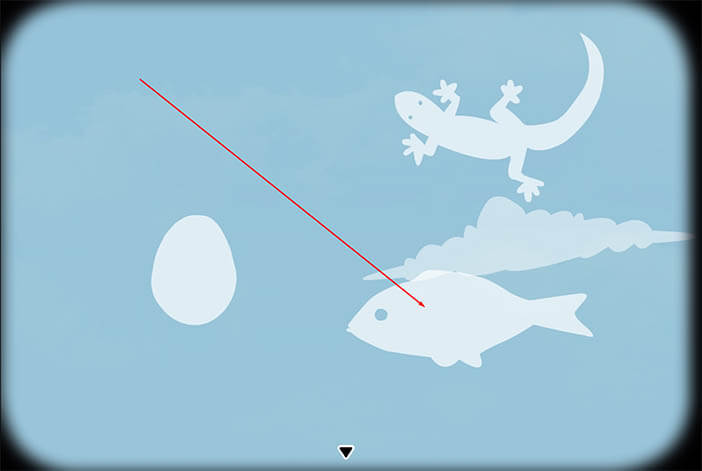
The lower right cloud will morph into a worm on the upper left
and the lower-left cloud will morph into a gecko on the upper right corner.

When the puzzle is solved it will give you the last cloud that when placed approximately in the center of the screen will show you a clock with clock arms showing 7:25.
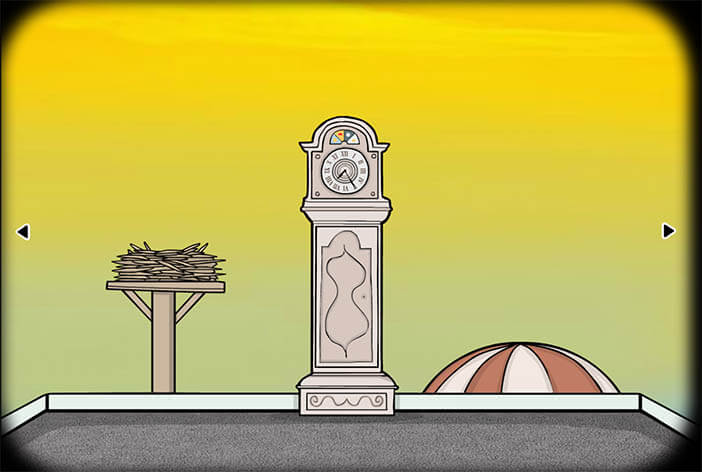
Go to the clock room and move the clock arms to 7:25, this will change the time in the background to dusk.
You will notice next to the clock a jagged shadow in the nest, when zoomed in you will see a sunflower, pick it up.
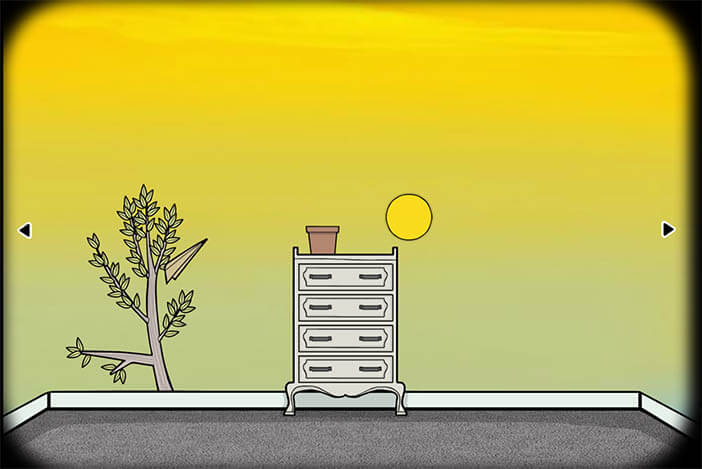
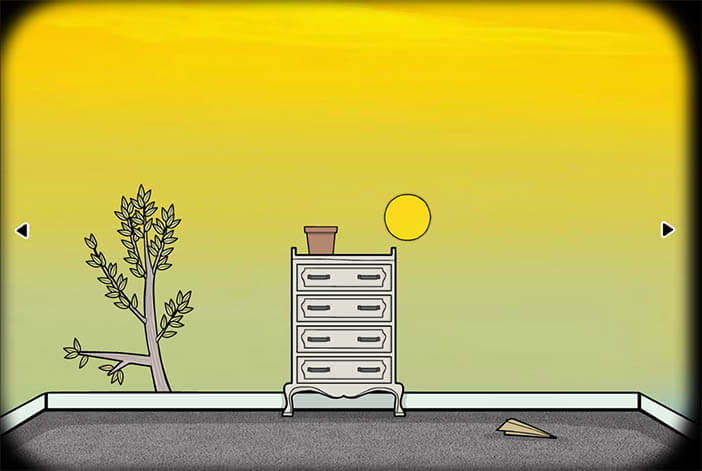
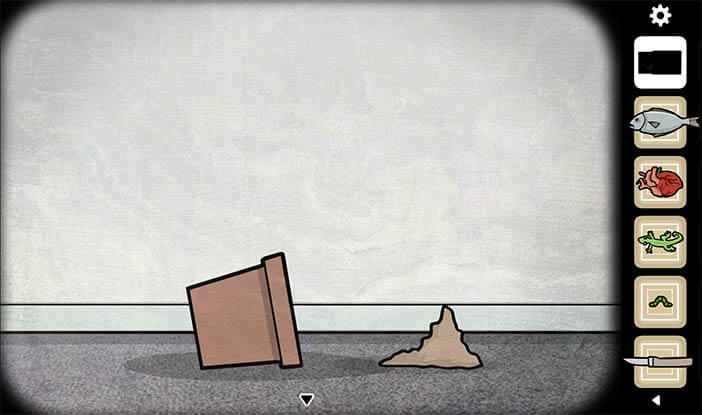
Now go to the room with the drawer and a tree branch, next to the tree branch a paper airplane will float around, tap on it once and it will float to the floor.
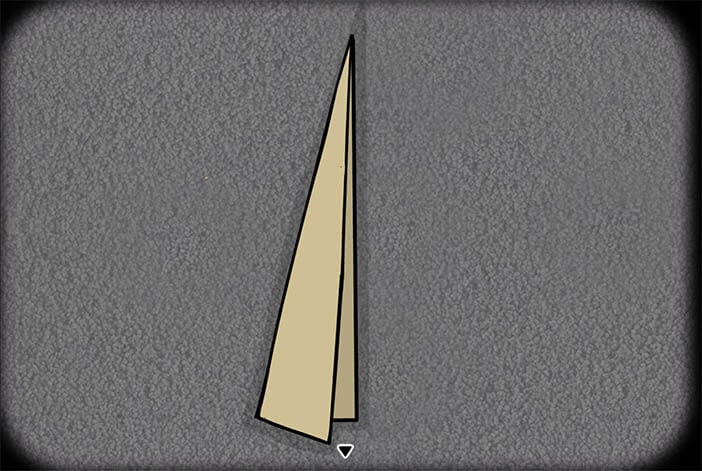
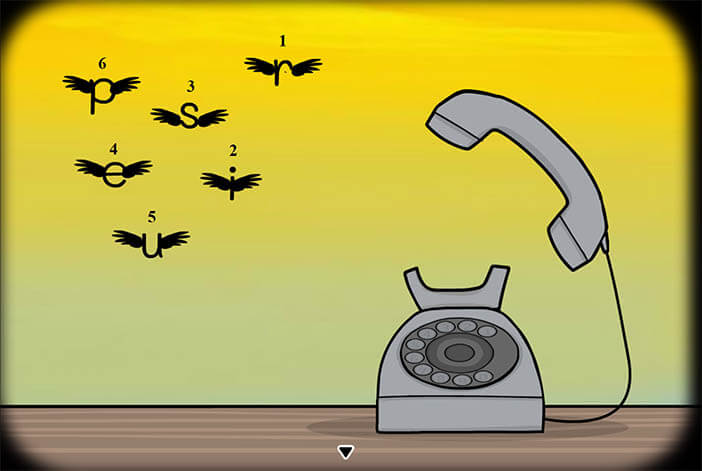
Once you open the plane it will show a symbol of a phone handle with writing: “rise up”. In it there is the second feather, pick it up.
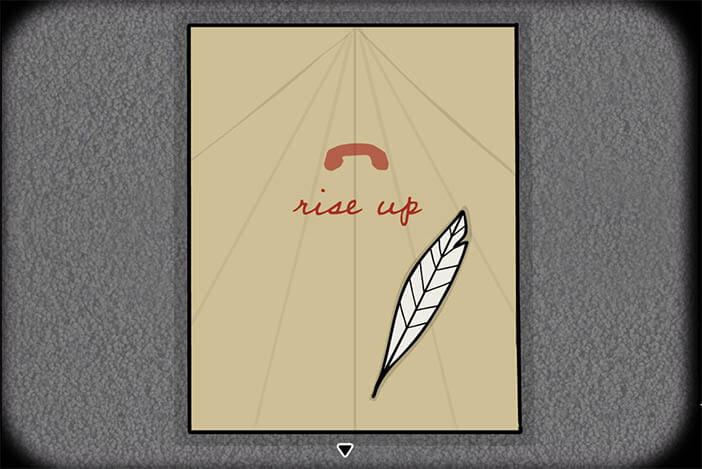
Go to the phone and pick up the dial until letters fly out, write: rise up, with those letters.
A hot balloon will appear in the foreground and tap it several times until it goes left.

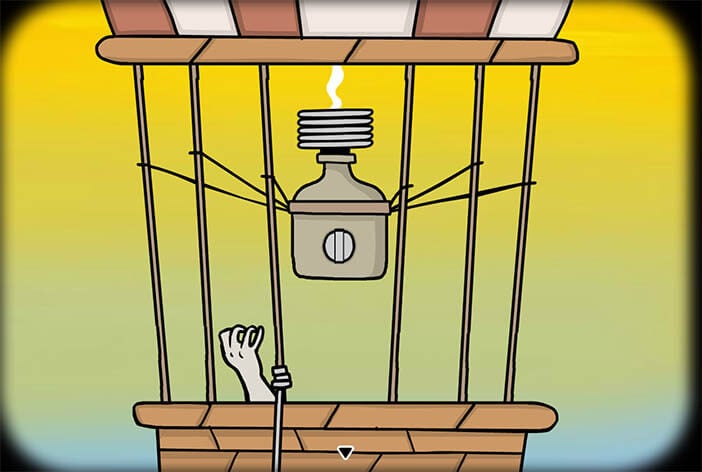
Go to the clock room and tap on the top of the hot balloon next to the clock until it floats up, zoom in.
Release the gas and light it with matches, when it rises a little more cut the rope that holds the sack with a knife.
You will see the sack next to the clock tap on it four times, first time to untie the sack, the second time it will release sand, third a box and fourth two scale plates.

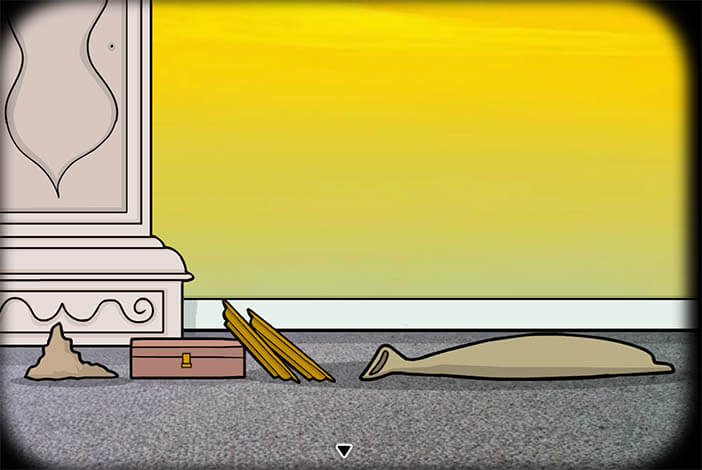
Go to the drawer room and zoom in on the pot that is on top of the drawer. Put sand inside the pot and plant the sunflower, move and place the Sun above the sunflower in the edge of the screen until it falls along with the pot, it will release a sunflower seed, pick up the seed.


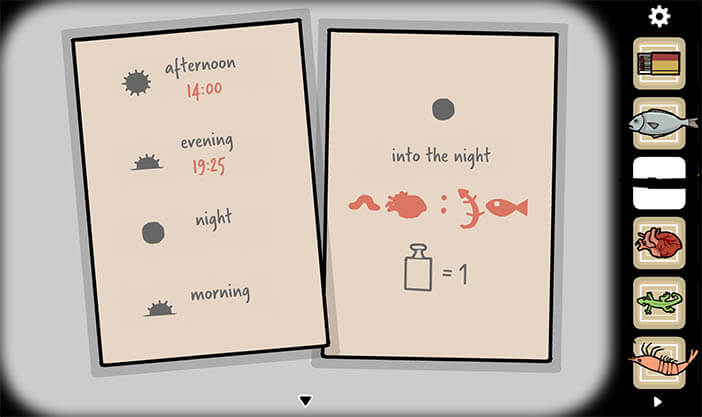
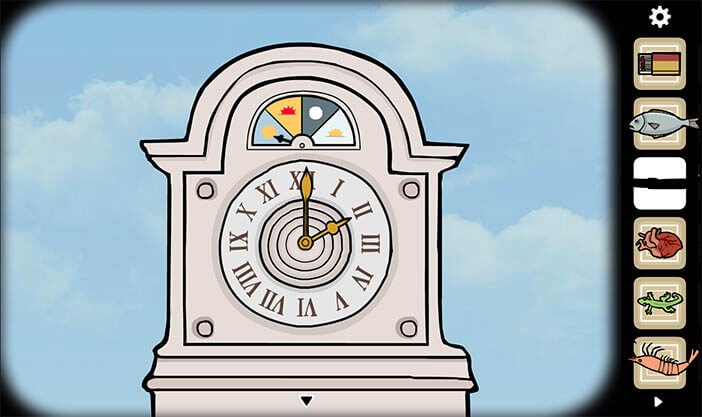
In the first drawer from the top, it will give you instructions on how to use the clock and where to move clock hands to shift between afternoon and evening and the evening is at 19:25 while the afternoon is at 14:00.

In the second drawer, there is a solution to the forthcoming Owl puzzle and in the bottom drawer, there is a scale weight which you should pick up.
Go to the clock and go back to the afternoon moving the clock arms to 14:00.
In the afternoon go to the drawer room again and give the sunflower seed to the squirrel in return it will drop the feather that it’s holding in its tiny little paws.
Now return to the first room, the one with the mirror, and place the scale plates on hooks that are next to the mirror.

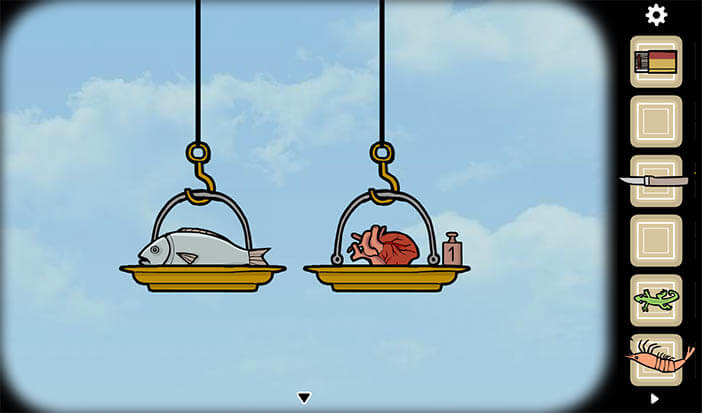
With the scales and the weight you can determine at what hour starts the night, the solution to this puzzle is shown on the paper in the first drawer of the drawer:
The solution to this puzzle is that the worm is equal to 0, the heart is equal to 4, the gecko is a one and the fish is 5, meaning that you will enter the evening through the clock if you place the clock arms at 4:15 on the clock, this dimension will turn into the night this is when the owl puzzle ought to be solved.

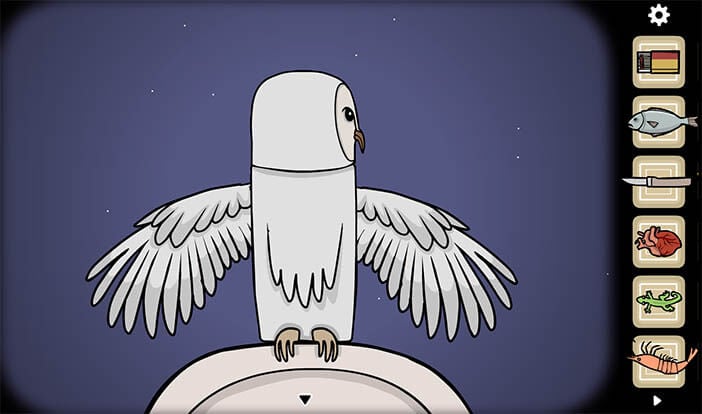
Go to the drawer room, tap on the owl at the top of the tree so it leaves and remind yourself as to the solution to the puzzle by looking at the papers in the second drawer from the top.
In the book, it says that you should move the owls head to the right then straight back to you with dropped wings then move it’s head to the left and again straight back to you with the wings dropped and then make it look to its back.

You will find the owl at the top of the clock. Once you make it do this series of movements it will drop a feather, pick up the feather.


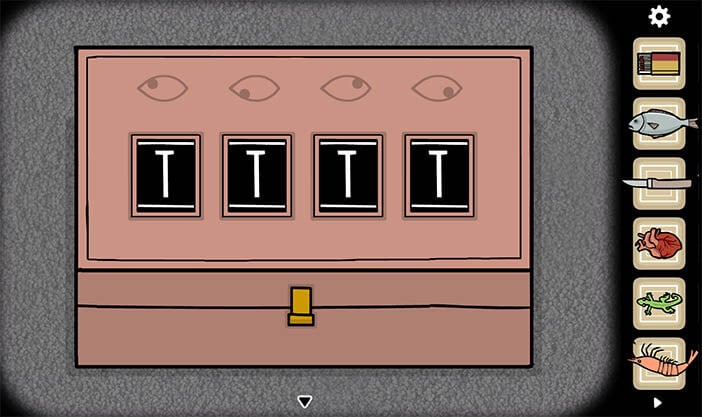
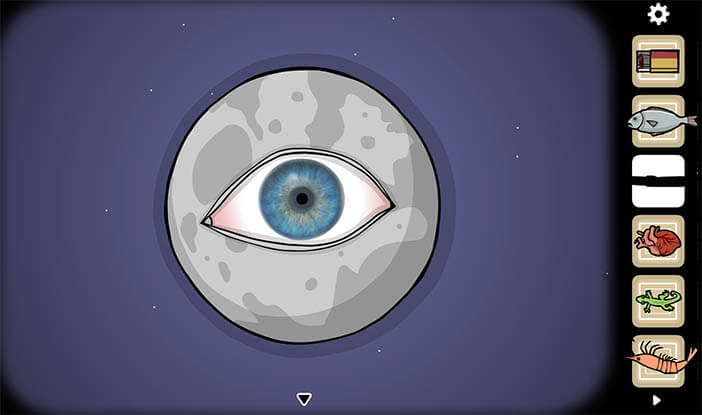
There is still the box that wasn’t opened until now and it has a puzzle with four dials that move vertically revealing a series of symbols each of the four dials is tied to an eye movement and you will find this eye inside the Moon next to the drawer. To access the eye you will need to cut the slit further on the moon, tap several times until it opens its eye. The solution to the box puzzle is as follows:

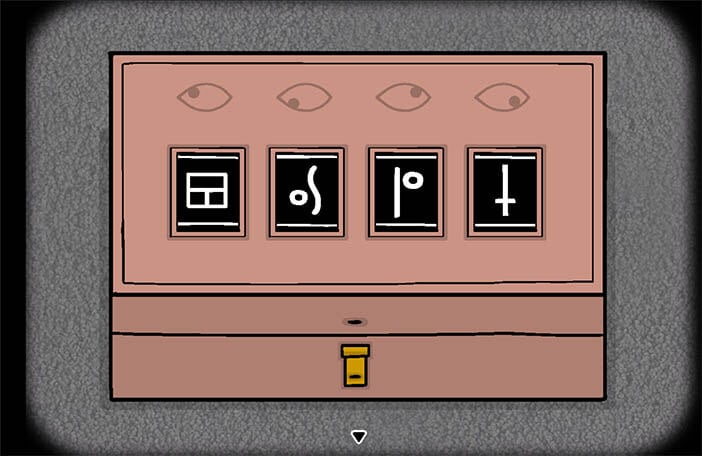
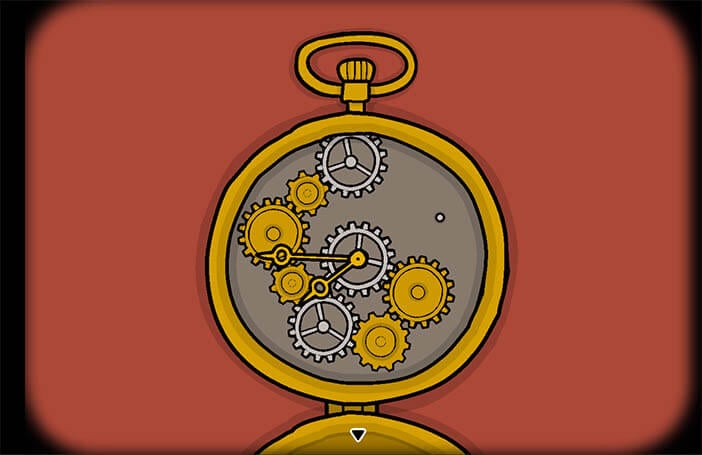
Inside the box, there is a pocket watch, open it, inside there is a mechanism which you should move to make all the gear wheels move, once that is solved the watch arms will move until they show 8:45.
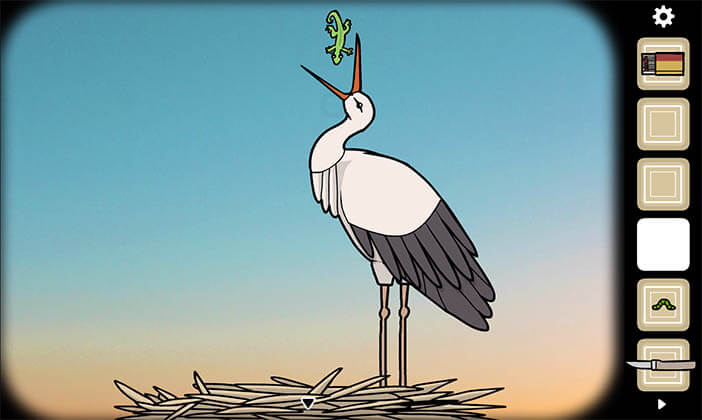
On the grandfather’s clock move the clock arms to 7:45 to get to the morning phase of this dimension. Once you go there, there will be a stork in the nest next to the big clock. Feed the stork with the gecko, the worm, the heart, and the fish, or in whatever order you prefer, then tap on it several times until it vomits out a baby, pick up the baby.


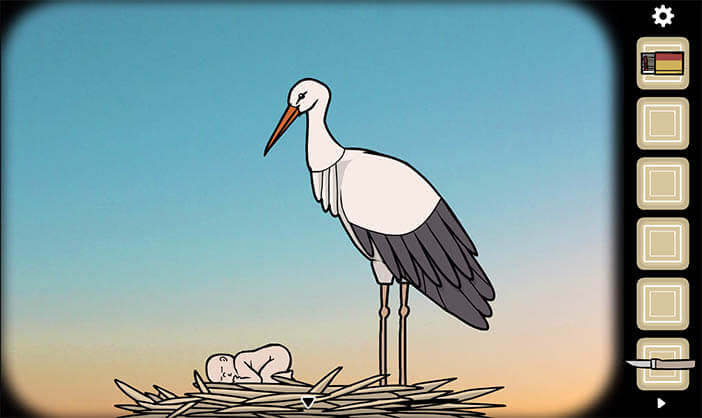
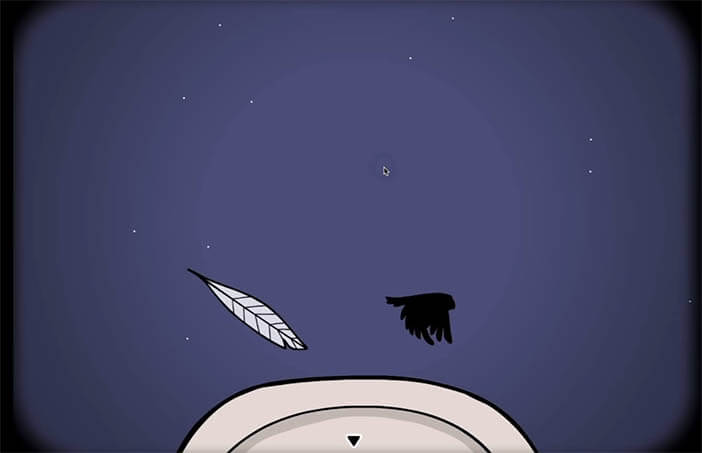
Go to the altar and place the four feathers on the candle stands and place the baby on the plate.
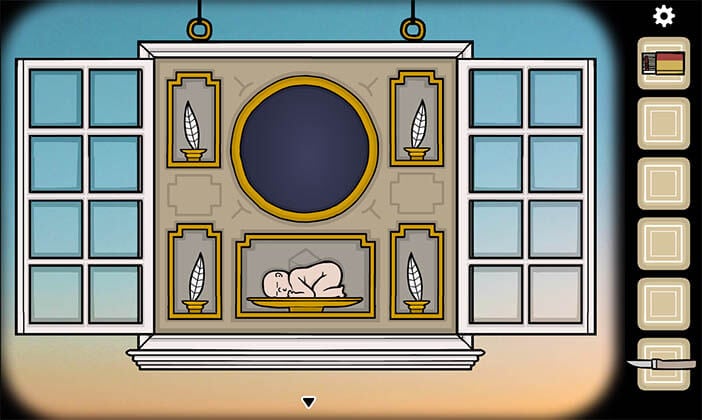
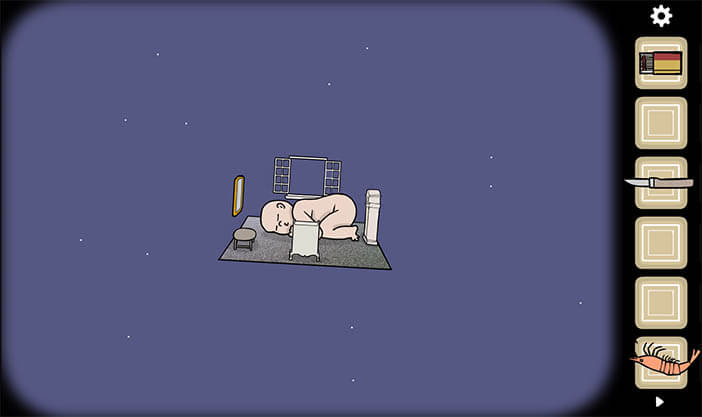
Enter the hole and you will see the familiar white box turning in space but instead of going into the room the white box will be floating in front of you tapping it, it will reveal that dimensions were just a one room that was this box and rooms were the walls of this white box.
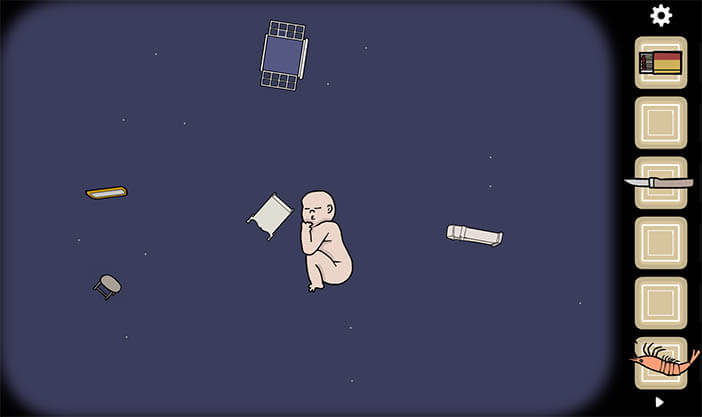
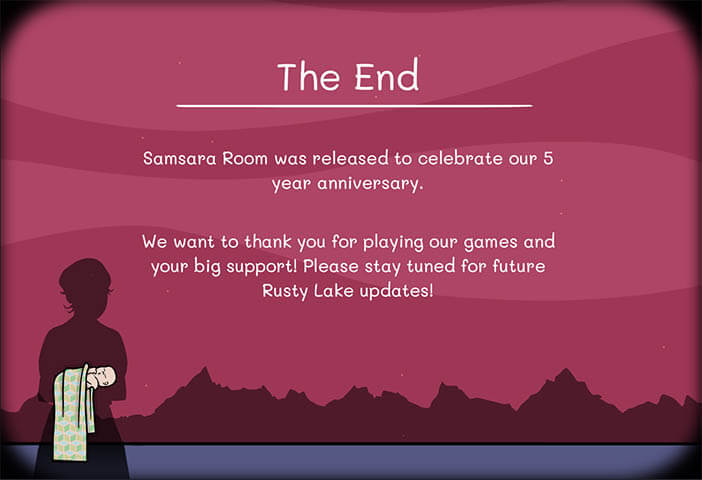
The baby is lying there at the center of the room and by tapping on the individual floating objects and the baby they will all fall. The camera pans up going further than the trees in the blue background up to the red background against which is a silhouette of a woman holding the baby in her arms. The end.
The Secret level
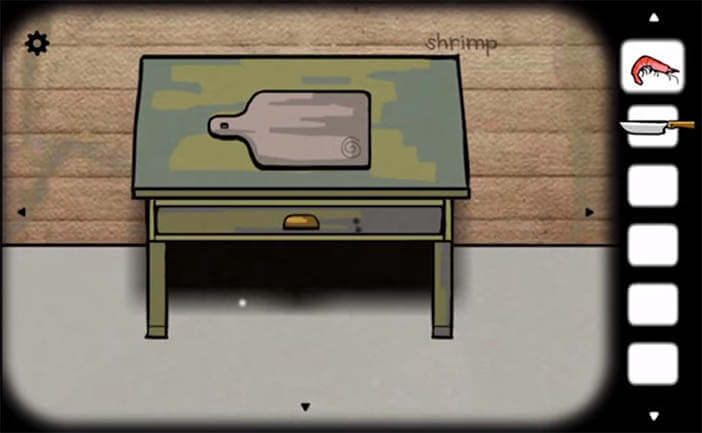
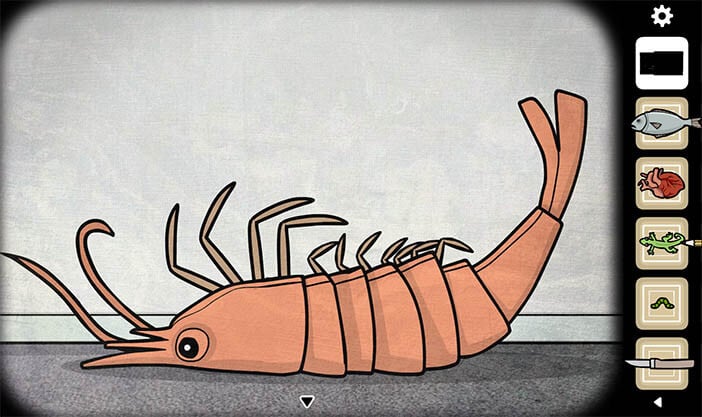
To get to the secret level you will need to go to the worm dimension and find four flower petals and a lobster. Inside the corpse of the old man go to the strange clock where the Egg can be found and put the symbols for the shrimp in the clock. All of the symbols are found outside of Samsara Room and they have been shown in other games and videos made by the studio Rusty Lake.
But the interesting thing is that Rusty Lake is not too secretive about their games so all the clues for this “secret” level were revealed on their official Twitter account.
The first clue can be found in Cube Escape: Arles; https://twitter.com/rustylakecom/status/1244690191052353542
The second symbol is said by Mr Owl in the “A Hypnosis Recording from The White Door” a video made by Rusty Lake. The description of the clue can be heard from 16:39 to 16:52 :
“I want you to imagine a square. In the middle, there is a line, running from left to right, right through that square. Imagine that now.”
https://youtu.be/_9ALPSYluW4?t=999
The third symbol can be found in Cube Escape: The Lake;
https://twitter.com/rustylakecom/status/1254146470187499521
The fourth and last symbol that you need to find can be found in the trailer for Samsara Room:
https://twitter.com/rustylakecom/status/1255496211320180738
When you find all of the symbols go to the clock and input them to get the Shrimp.
Go to the altar and place the shrimp with flower petals.
In the Shrimp dimension, you see every room as if through a fisheye lens and every piece of furniture is broken.
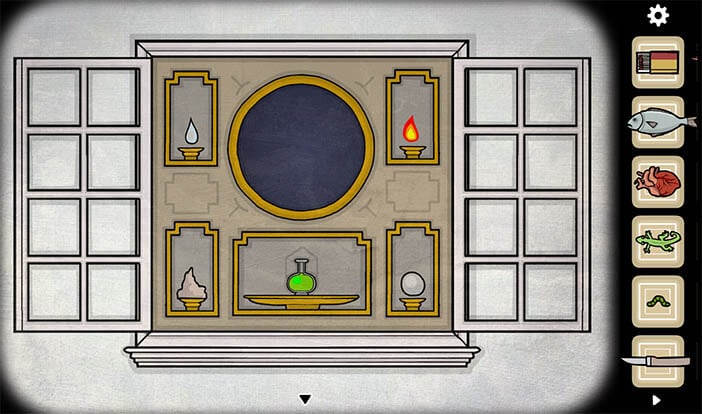
In this room, you are looking for Sand, Water, Fire, Air, and a vial of Elixir. You can find water on the mirror in the first room. When you zoom in on the mirror left to your shrimp-like appearance there is a droplet of water, pick it up. In the Altar room zoom in on the box to the left of the Altar and light the twigs on fire, pick up the fire.
To the right of the Altar there is a turned over pot, tap on it and it will expel sand from it, take the sand.
Right underneath the Altar there is a phone zoom in on it and pick up the headphone, random numbers will appear, move them so they look like a clock dial when you succeed in moving the numbers clock arms will show up as well placed at 2:45.

In the drawer room, you will find the smashed up drawer and smashed up grandfather’s clock.
Zoom in on the drawer and take the pencil.
Go up to the clock and move the clock arms to 2:45, this will open the top department of the clock and reveal a vial.
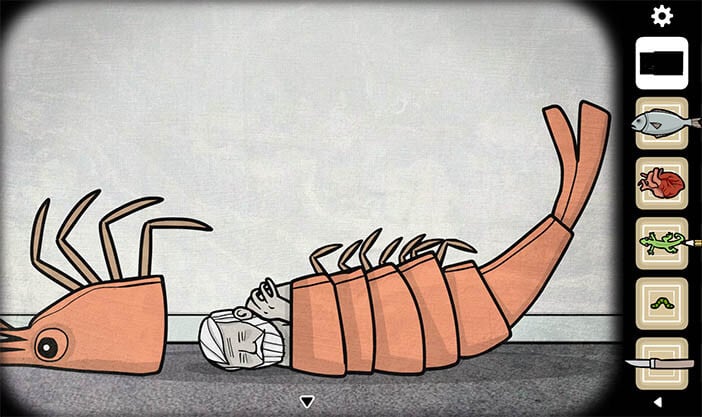
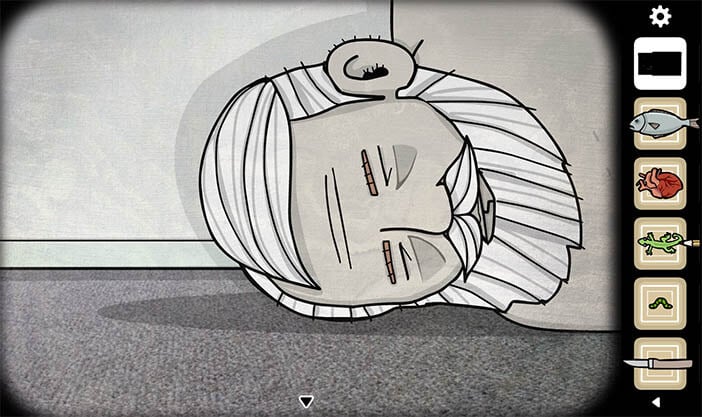
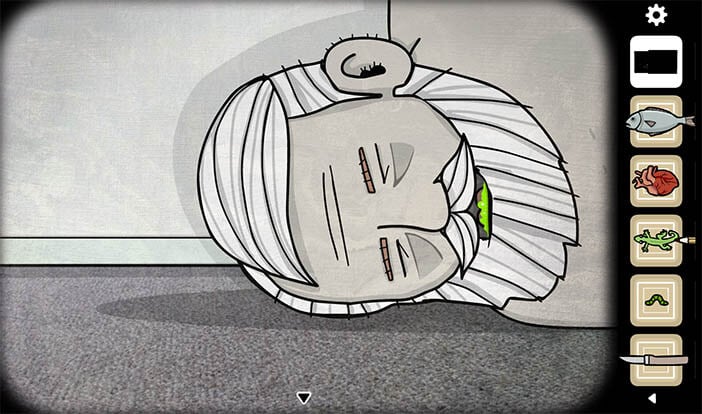
Now in the clock room, there is a Giant Shrimp, there is Samsara written in Sanskrit above the Shrimp. Pull apart the Shrimp until it reveals the body of the dead man. Zoom in on his head and open his mouth. His mouth will be full of green fluid, pick the green elixir with the vial that you have gotten out of the clock.

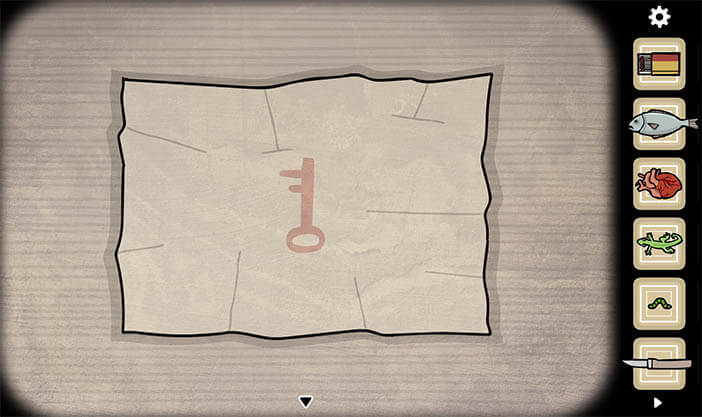
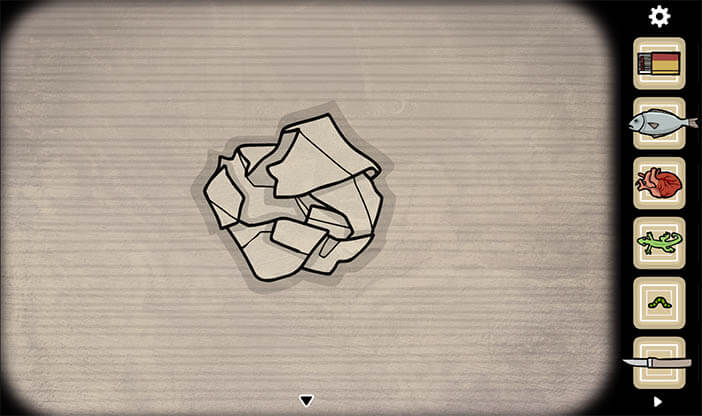
Go back to the first room where the mirror is placed, on the table, there is a paper tap on it while you have the pencil equipped, a key will be drawn, tap on the paper and it will crumple into a ball, uncrumple the drawing to reveal a key, pick up the key.

Now with the key opens up the showcase next to the table in it there is a jar, tap on the jar and an air bubble will float above it. Pick up the air bubble. Now you have all the elements that you need to open a portal at the altar.

Now place all the elements in candle holders and the green elixir on the sacrificial player.
Now inside the space, you will see a white square with window holes in it. Inside the window there is a grown woman with a girl next to her, it seems that the girl is you. The end of the secret level.