Chapter 6-1 Crossings of the Border
Complete Walkthrough
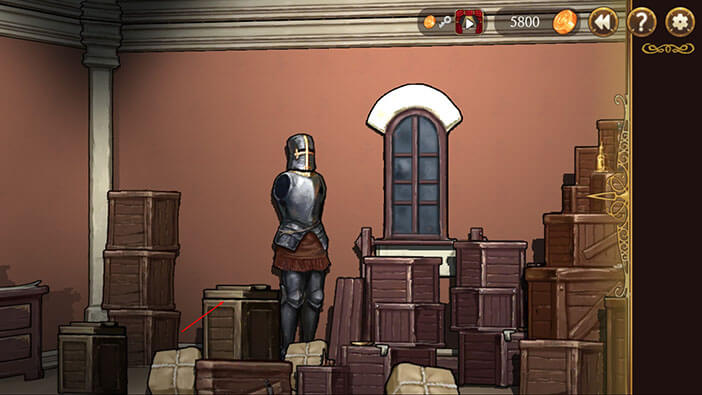
Hello everyone, and welcome to our Walkthrough for the First Stage of Chapter 6 for the Frankenstein Room ESC adventure game. In this stage, we will be playing as Elizabeth, she and Huxley go on a long journey in search for the mysterious place called “Babel”. It turns out it’s not close to the Sachsen, after all…
Interestingly, this chapter starts with the conversation between Henry and Erich. Erich wants to know who murdered Neumann, but Henry is dismissive, saying that he doesn’t have to know that information. Erich warns him that Schmitz is investigating the case and that she probably has some lead. Because of that, the young detective suggests that leaving town and laying low for a while might be the best course of action for Henry.
Ok, so these two obviously knew each other, and it looks like Erich was Henry’s informant. I didn’t see this one coming.

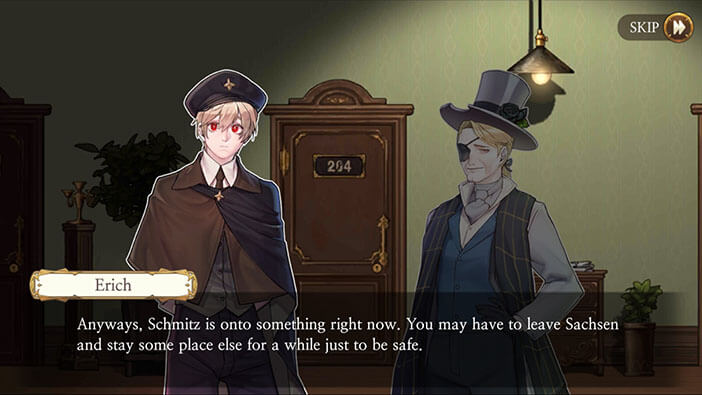
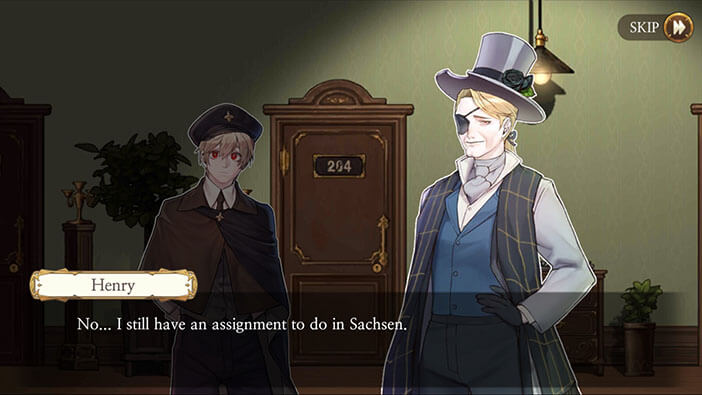
Henry refuses to leave town, saying that he still has some unfinished business in Sachsen. Erich is confused, but Henry’s decision is firm. He will stay in Sachsen as long as it takes, and see his plans through, regardless of risk for his own well being.
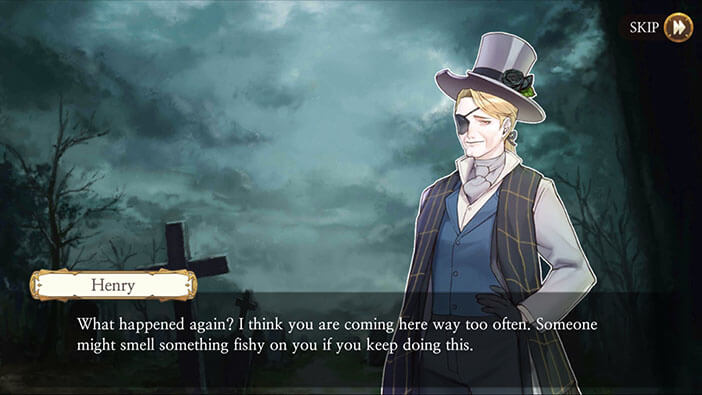
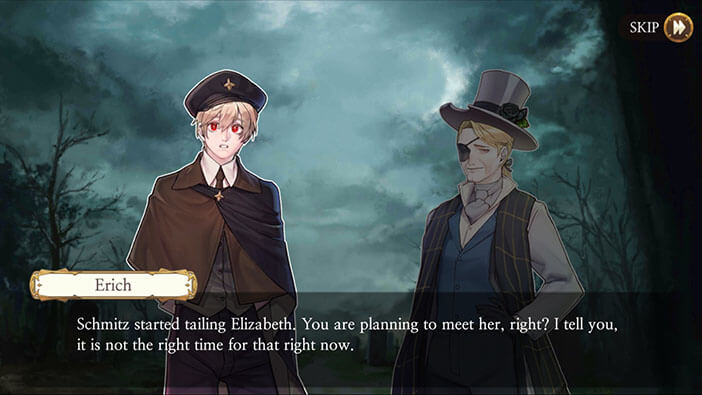
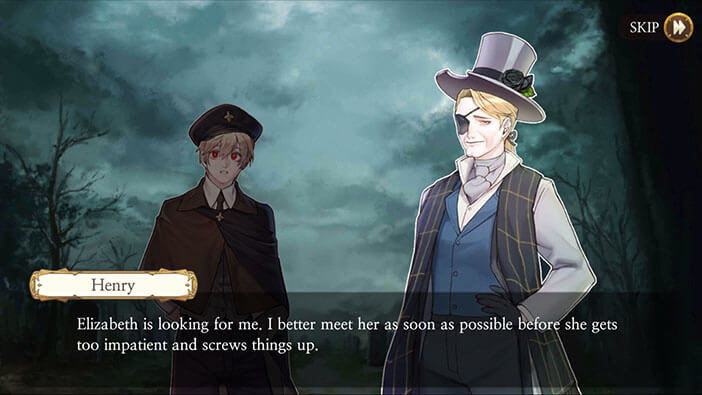
The story continues a few days later at Sachsen cemetery. Henry seems concerned for Erich’s safety since the young detective is taking a huge risk every time the two of them meet. Erich answers that he had to come because Schmitz has started tailing Elizabeth. The young detective had to warn Henry because he knows that Henry planned to meet with Elizabeth. Erich advises him to postpone this meeting until the coast is clear. However, Henry refuses, saying that Elizabeth is already looking for him, and the young girl might lose her patience and do something irrational, thus spoiling his plan.
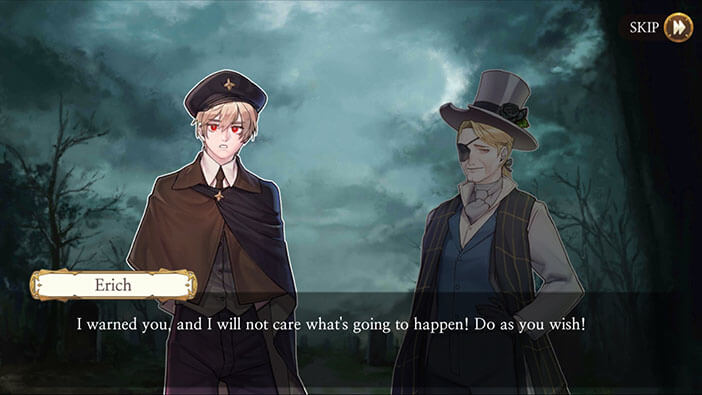
That’s why he decides to meet with her before it’s too late. Henry is willing to risk exposing himself to Schmitz who almost certainly couldn’t find him otherwise. Erich warns him that he will be in grave danger if Schmitz sees him. But, Henry has already made his decision.
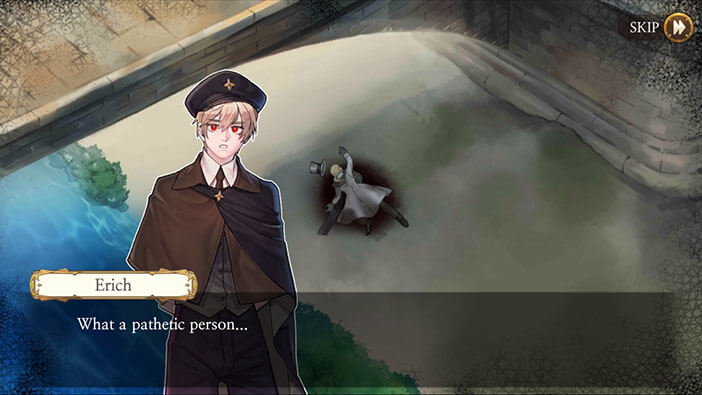
In retrospect, this was a bad call, and Henry paid for it with his life. As a side note, he was pretty calm when Schmitz approached him after he met with Elizabeth. I guess he was expecting Schmitz to go after him, but he didn’t expect to get stabbed by the detective. As the military saying goes “no plan survives the first contact with the enemy”.

Later, Henry states that he has to take Elizabeth and Huxley to Babel, even if it costs him his life. Erich is very confused since Huxley was executed, but then he starts to catch on…
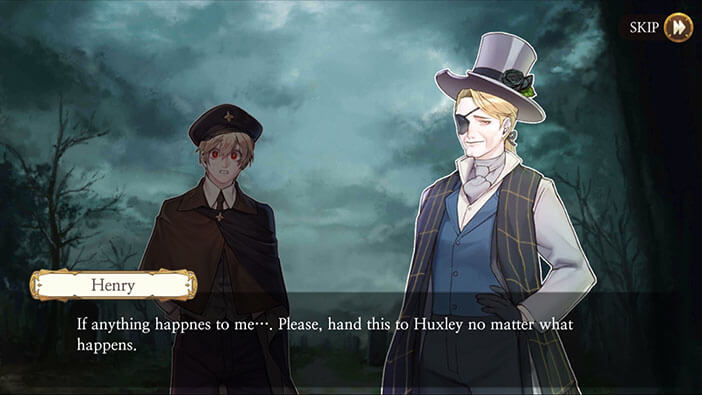
Henry didn’t answer the question. Instead, he hands him over the ticket to Babel, instructing Erich to find Huxley and give him the ticket, if anything happens to Henry.


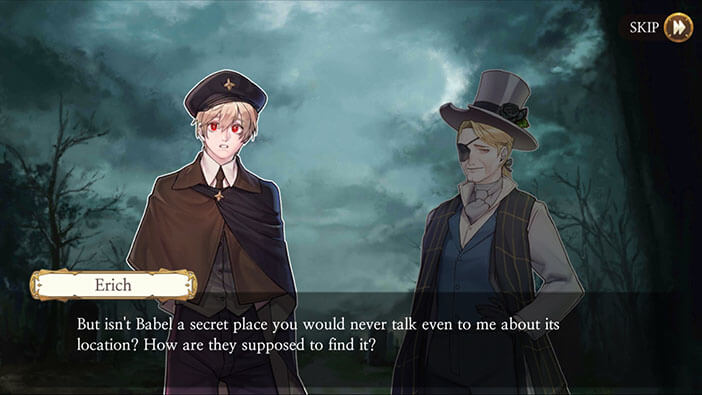
Erich is wondering will Elizabeth and Huxley be able to find this place without assistance, since Babel is surrounded by a shroud of mystery, and even Erich himself doesn’t know anything about it.
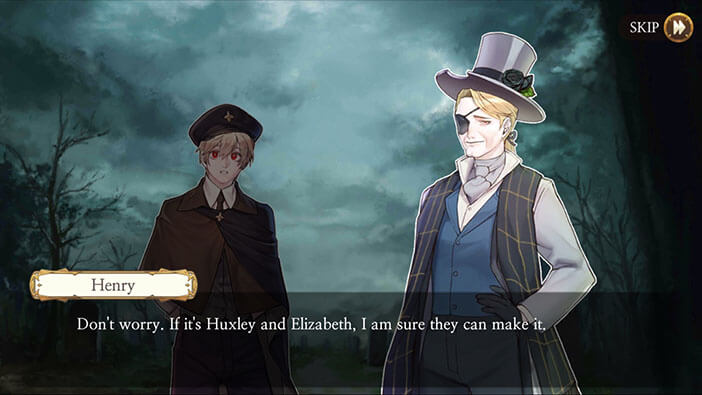
Henry reassures him, saying that, together, Elizabeth and Huxley will certainly succeed and get to Babel. Finally, he leaves Erich with one final instruction. The “couple” has to reach the Babel “by the day the crows fly to the sun”.
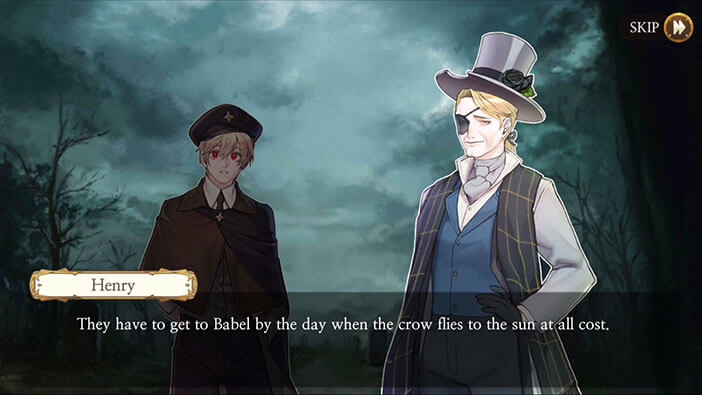
With this final instruction, Henry says that Erich should go if he understood everything. Erich agrees but warns Henry that this is a very dangerous course of action, before the two part ways.

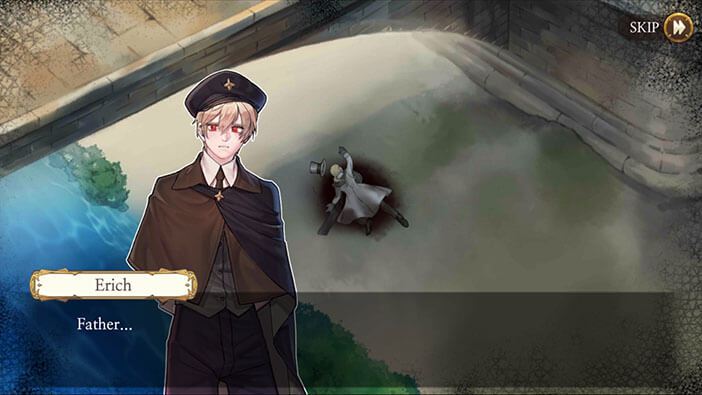
Our story continues a few days later, with Erich arriving at the scene of Henry’s death. The young detective comments how Henry abandoned his family, and did whatever he wanted, without paying attention to anyone else. Erich finally reveals that Henry was his father.
Wow, another unexpected twist! Well, that explains why Erich was so eager to gun down Schmitz. It wasn’t only to protect Elizabeth and Huxley, he also wanted to avenge his father’s death.

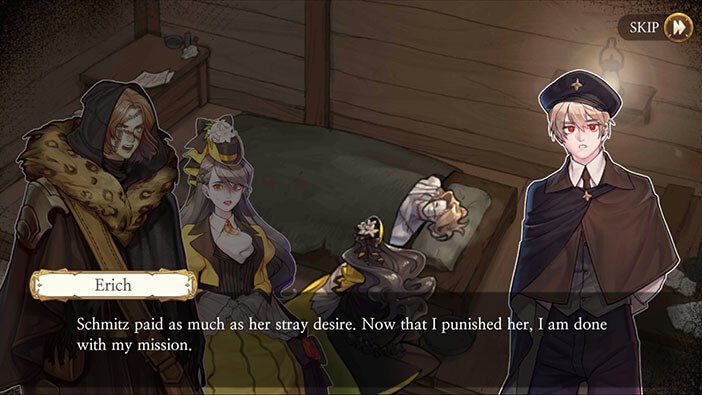
The story continues at the cabin, and we finally return to the present time. Erich explains that he was working for Henry, informing him about Schmitz’s plans. But, Schmitz murdered Henry because he knew her secret, and could easily prevent her promotion, or even put her into jail, if he decided to reveal it. Erich goes on to explain that Schmitz also wanted to get rid of Elizabeth and Huxley by framing them for Henry’s murder. For all of this, Schmitz paid with her life, and with Schmitz dead, Erich has fulfilled his task.
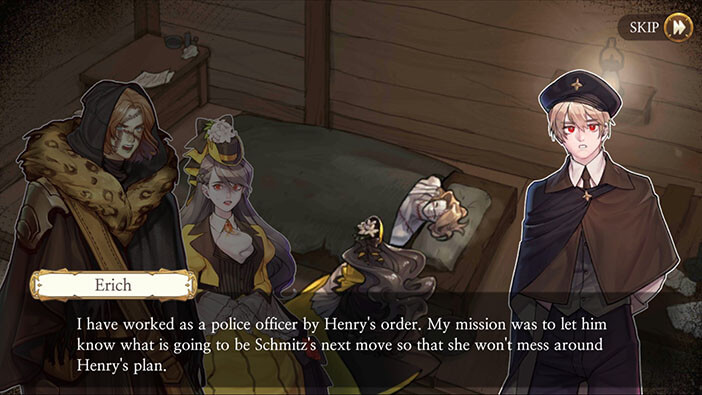

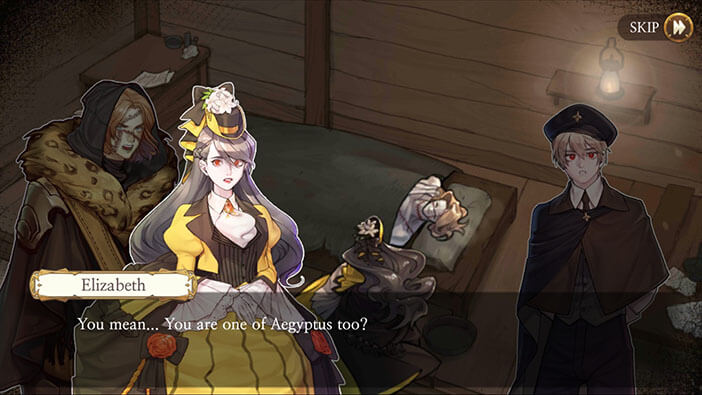
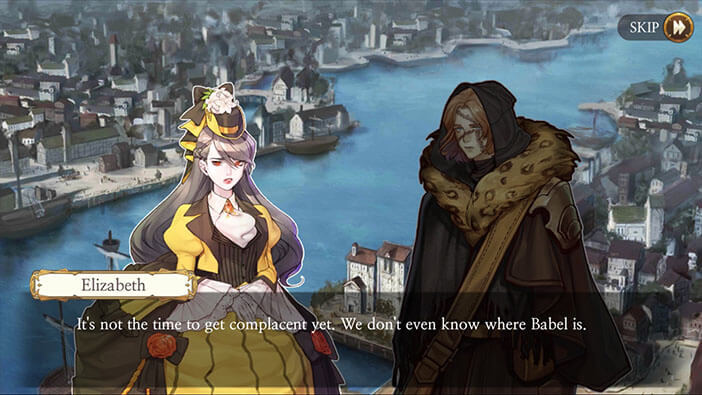
Logically, Elizabeth presumes that Erich is one of the members of the Aegyptus, but the young detective quickly denies any association with them and explains that he was only helping out Henry.

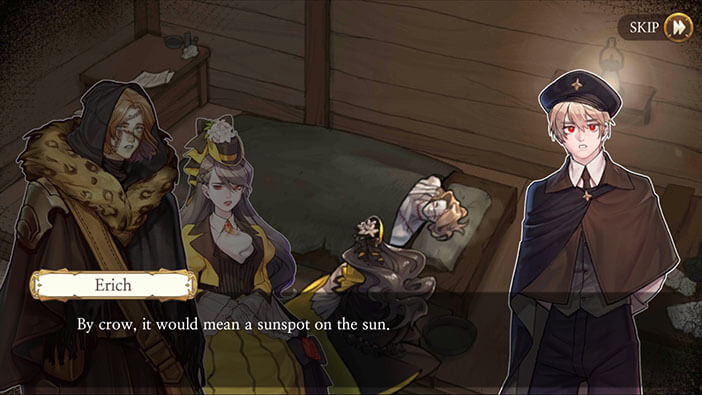
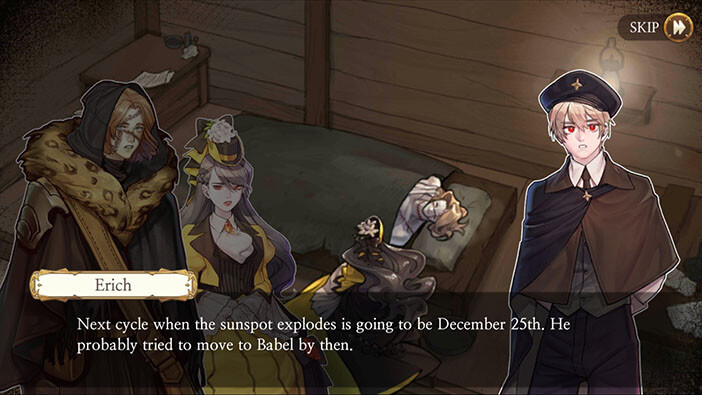
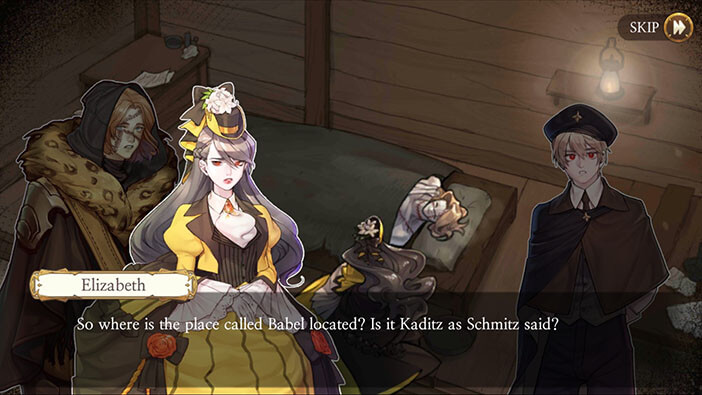
With that said, Erich hands over the letter to Huxley. The letter states that Samuel is at Babel, and the couple should go there on the day “when a crow flies to the sun”. Erich explains that the crow is probably a sunspot on the sun, the phenomenon during which dark spots appear on the sun’s surface. Erich goes on to explain that the next sunspot should appear on the 25th of December so the couple should reach the Babel before that. Elizabeth asks if the Babel is actually Kaditz street, but Erich explains that Schmitz probably said that only to taunt Elizabeth. He honestly says that he has no idea where Babel might be.


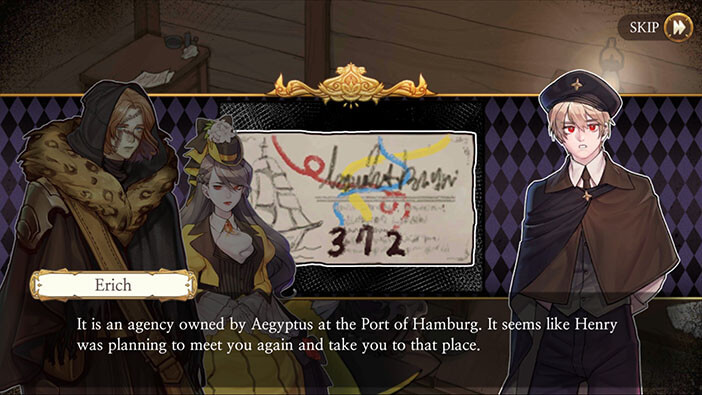
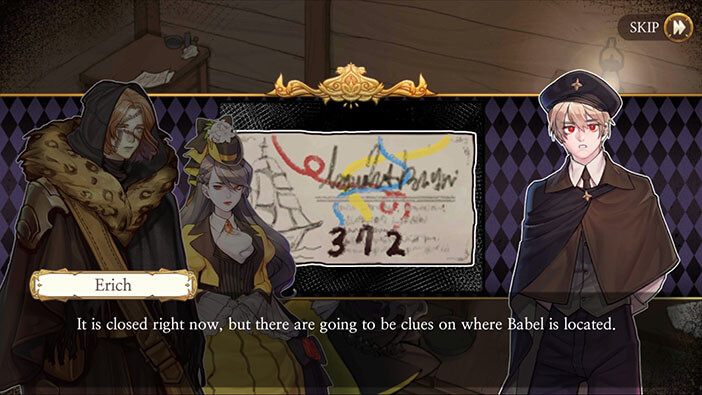
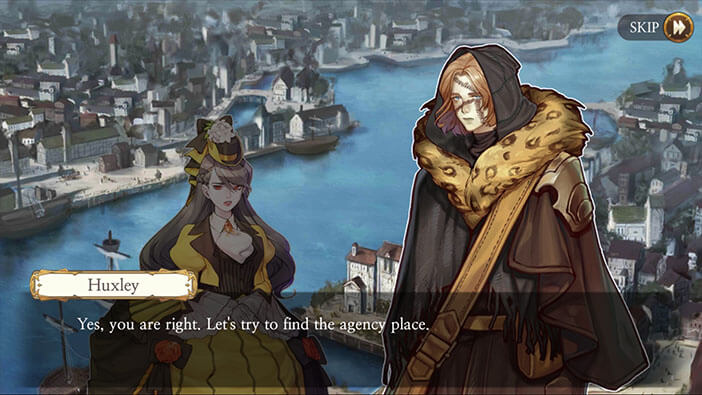
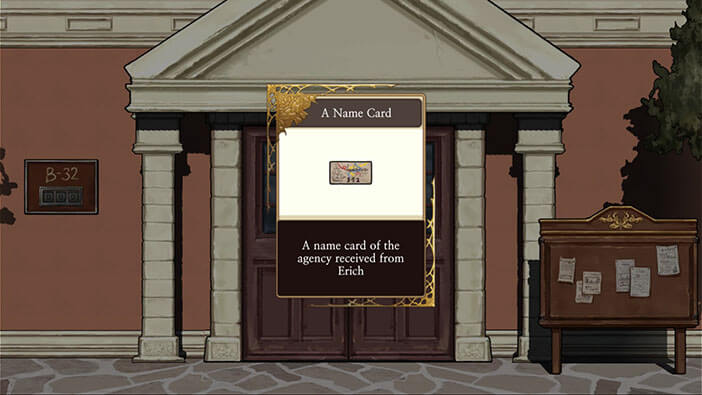
With that said, he hands them over a note written on the visit card of the “Hamburg Baum” agency. Erich explains that the agency is owned by Aegyptus, and that’s where Henry planned to travel with Elizabeth and Huxley. He also says that the agency isn’t operational at the moment, but Henry probably hid some clues there, that could reveal Babel’s location.
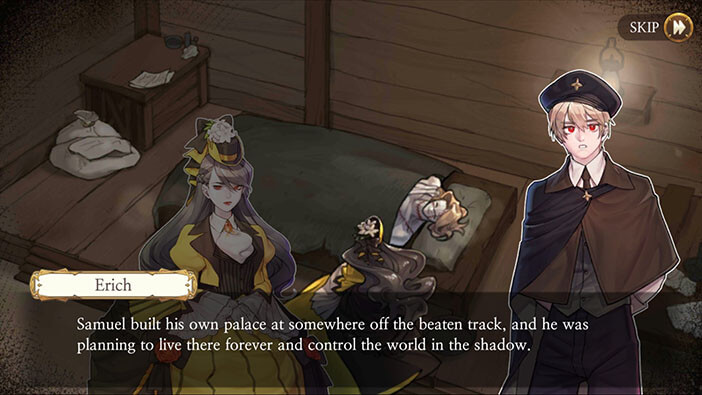
Elizabeth wants to know what Babel is, actually. Henry explains that Babel is Samuel’s palace that was built in some secluded location. Samuel intends to rule the world from there, once his plan for world domination comes to fruition, and after he achieves immortality with Victor’s help.
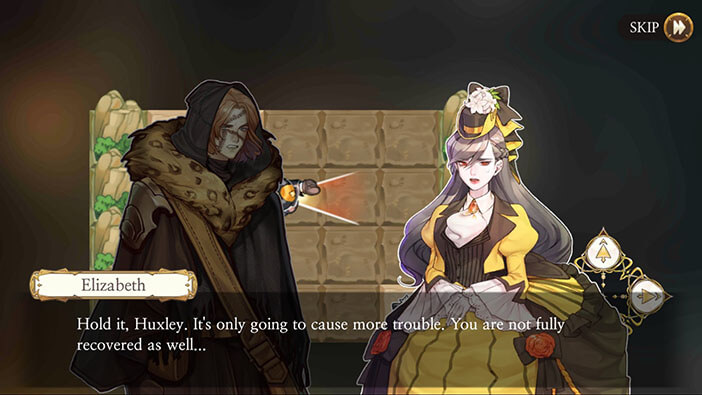
At this point, Erich’s mission is actually completed. He says that he will try to cover up the crime scene, but advises the couple to immediately leave Sachsen since Schmitz’s death won’t stop the police from searching for them. Fortunately, Huxley has recovered enough to travel. However, the two of them will have to cross the borders of several countries in order to reach Hamburg, and that isn’t going to be simple. Besides that, they also have to move quickly, because they must reach Hamburg as soon as possible in order to find information on Babel’s location, and get there before the 25th of December. Oh, I just realized that they will have to travel a very long distance on foot during winter, which can’t be a pleasant experience…

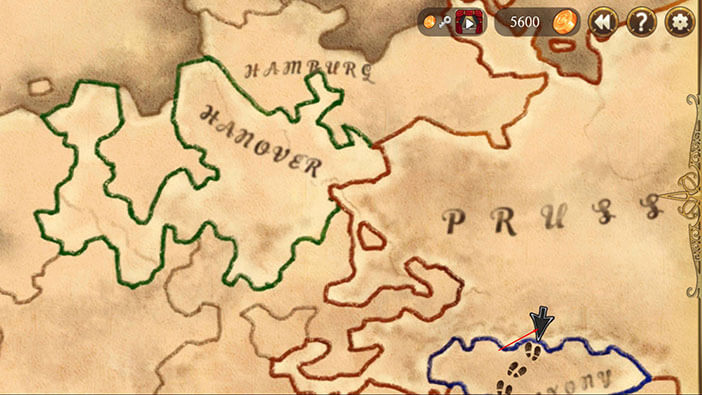
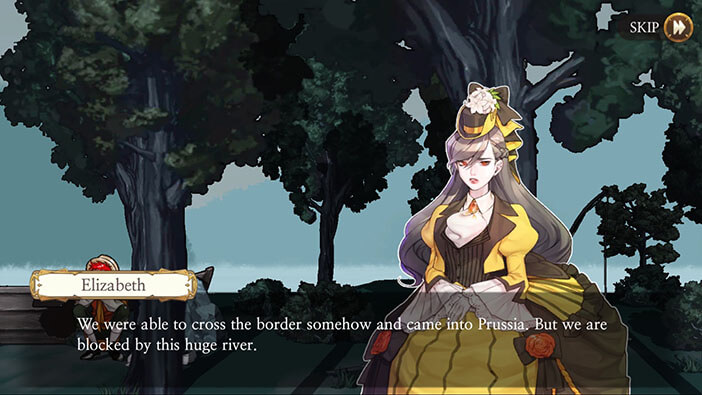
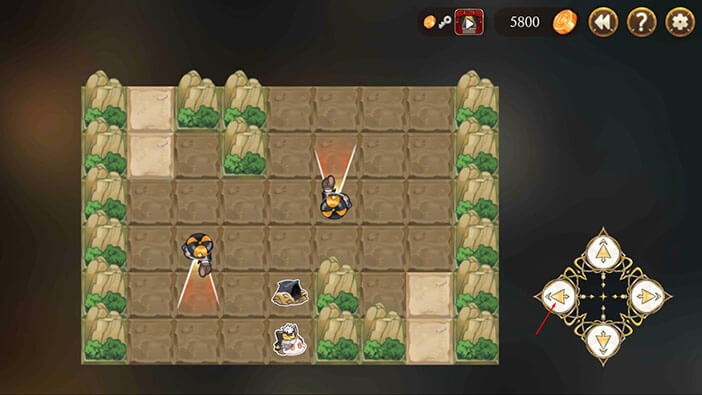
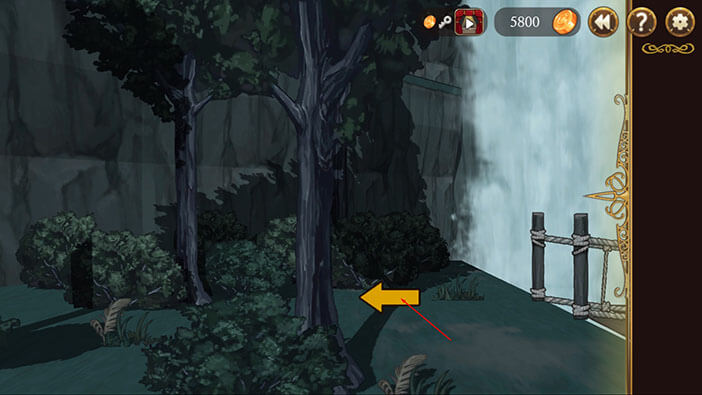
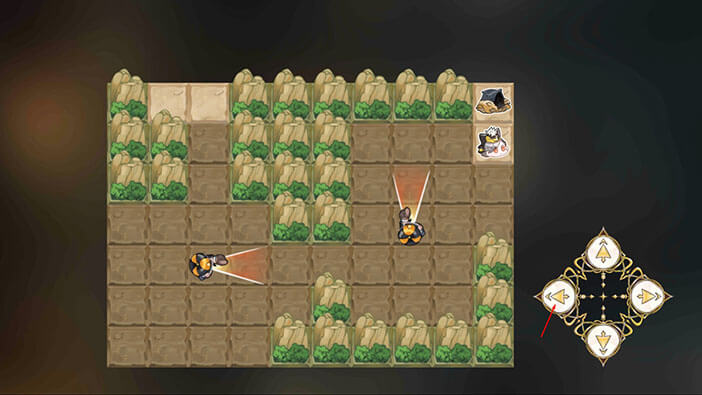
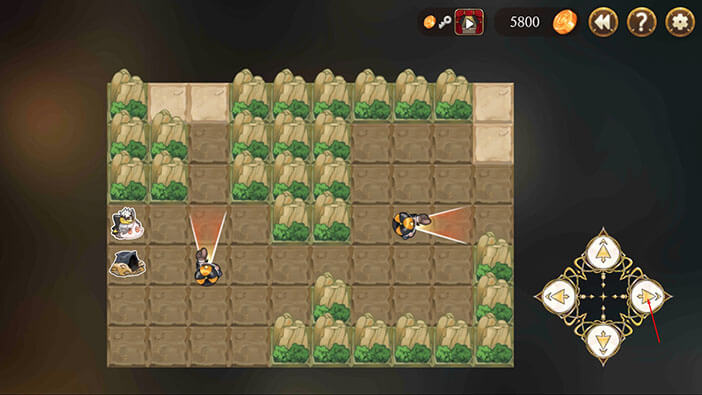
With that said, Elizabeth and Huxley immediately set off on their journey, and after some time, reach the border of Prussia. Tap on the arrow pointing at the border.
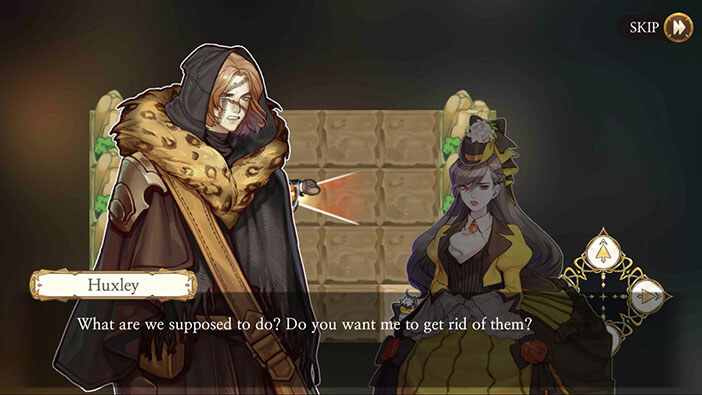
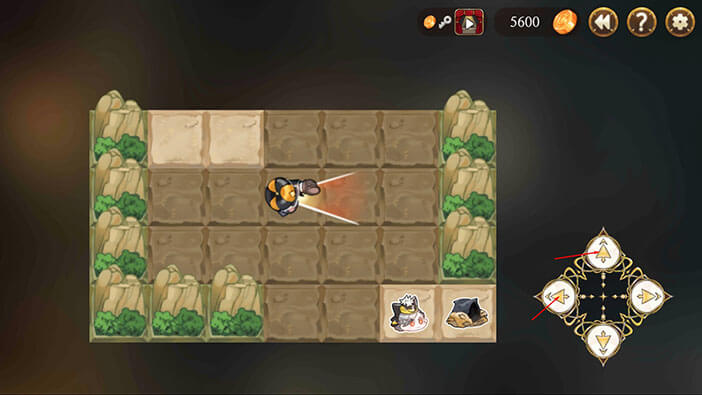
Elizabeth and Huxley run into the border guard. Huxley suggests charging in and eliminating the guards, but Elizabeth refuses this idea. She thinks that Huxley still hasn’t completely recovered from his wounds so taking on the guards is very risky. Besides, even if he eliminates the guards, they will just end up in even bigger trouble.
With that in mind, the couple decides to try to sneak by the guards, and that is our next task. There are three icons on the minimap, the border guard, Elizabeth, and Huxley. You can move our two characters by using arrows in the lower right corner.
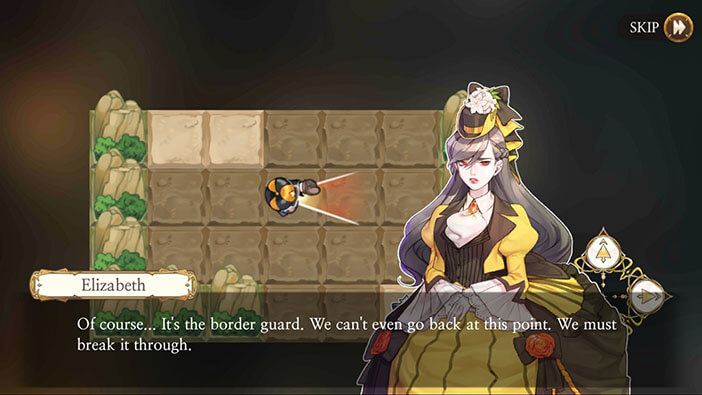

This is a turn-based task, not a real-time one. So, every time Elizabeth and Huxley move by one field, the border guard will also change its facing, turning counter-clockwise (from right to left).
Let’s begin. Tap on the “UP” arrow three times, followed by one tap on the “Left” arrow.
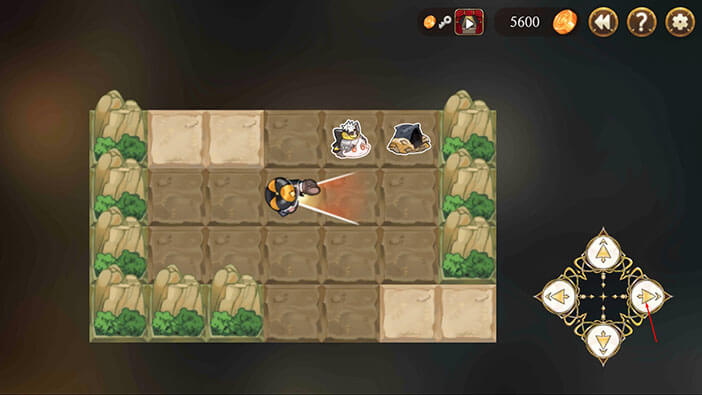
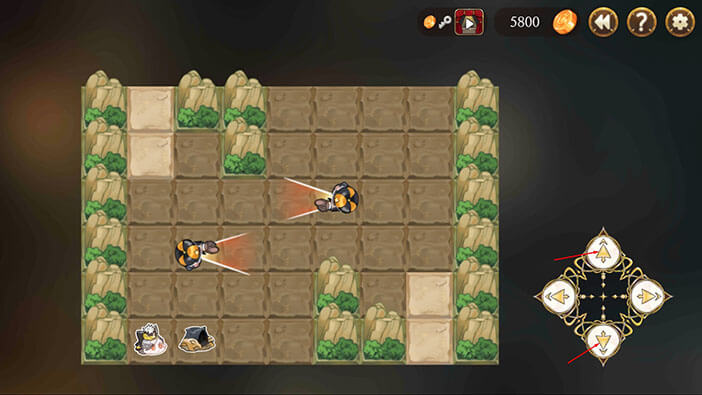
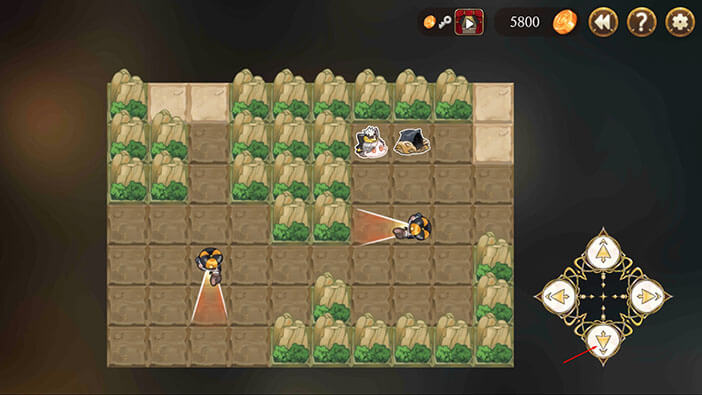
If we continue moving to the left, the border guard will look at the top of the map on the next turn and he will surely spot our characters. To avoid that, tap on the “Right” arrow once – our characters won’t move they will just change their positions – Huxley on the left and Elizabeth on the right.
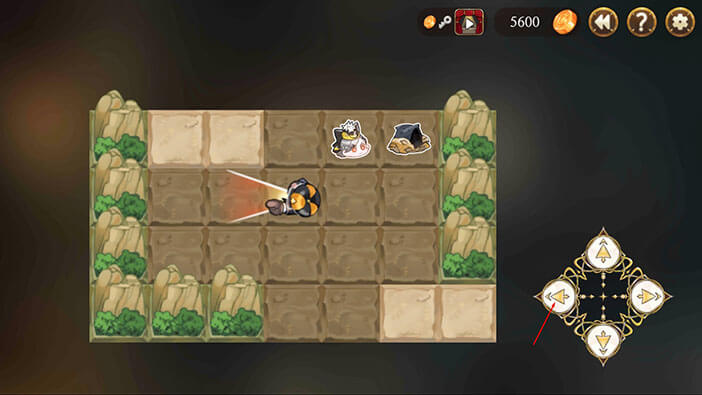
Tap on the “Left” arrow. Don’t be afraid, our characters won’t walk into the line of sight of the guard, they will just change their positions, again.

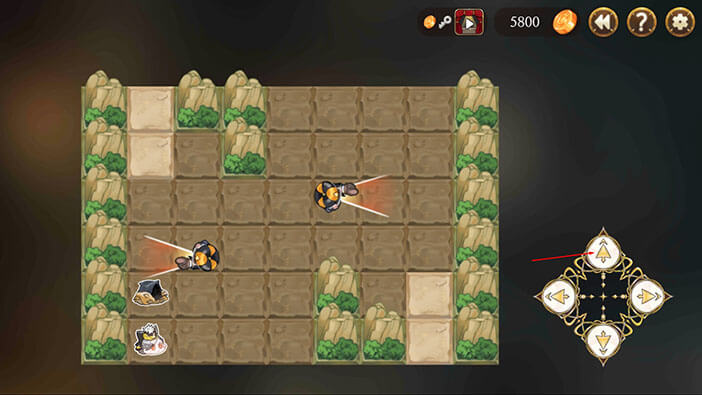
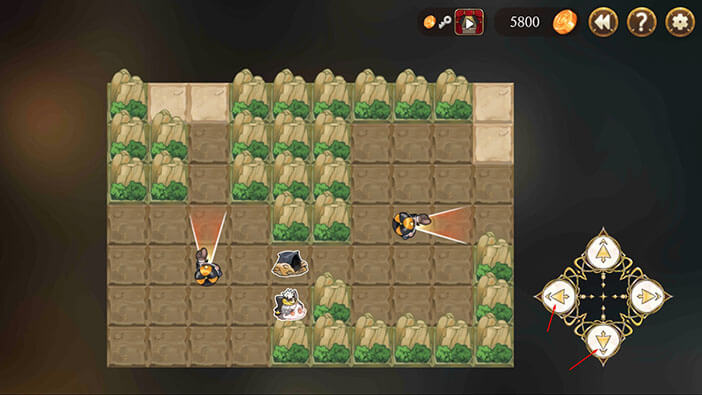
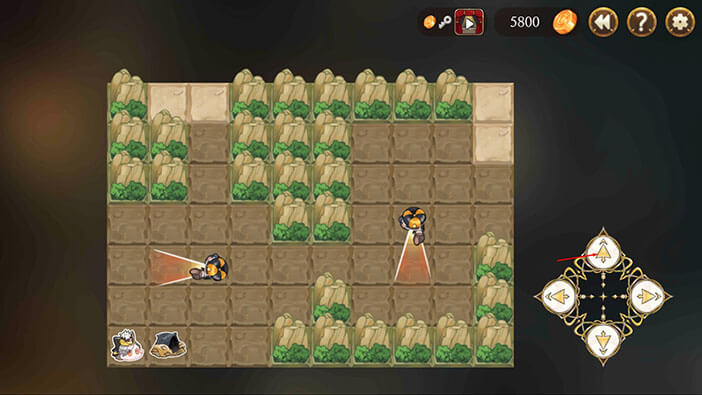
Ok, we are now clear. Tap on the “Left” arrow three times to evade the border guard and successfully complete the mission.
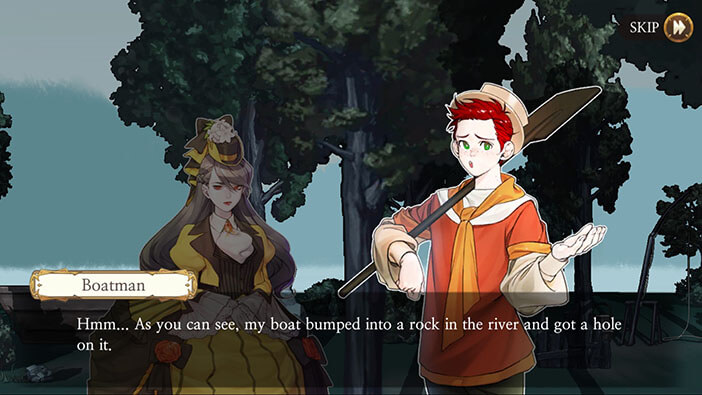
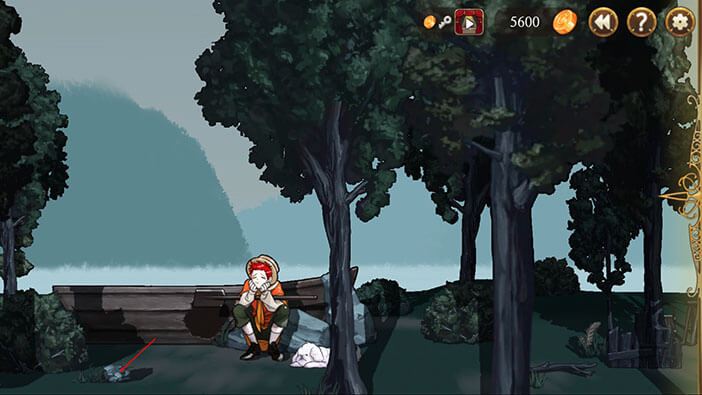
Our characters managed to cross the border undetected and reach Prussia. Their next task is to find a way to cross the river. Logically, they decide to ask a boatman for a ride.
Tap on the boatman.
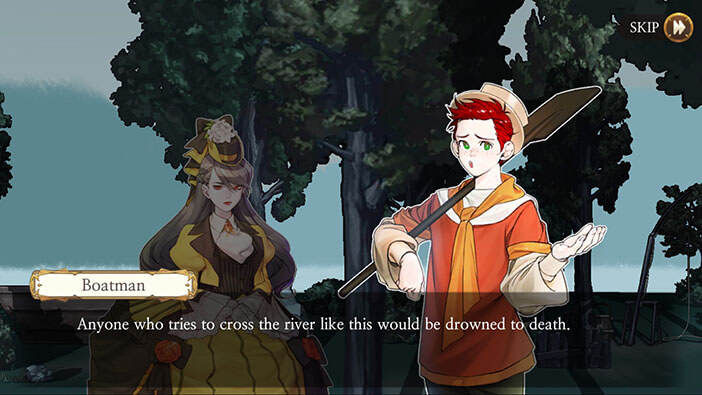
The boatman would gladly sail our characters across the river, however, his boat was damaged during the previous voyage. He explains that there’s no other way to cross the river. With that in mind, our characters decided to try to fix the boat.
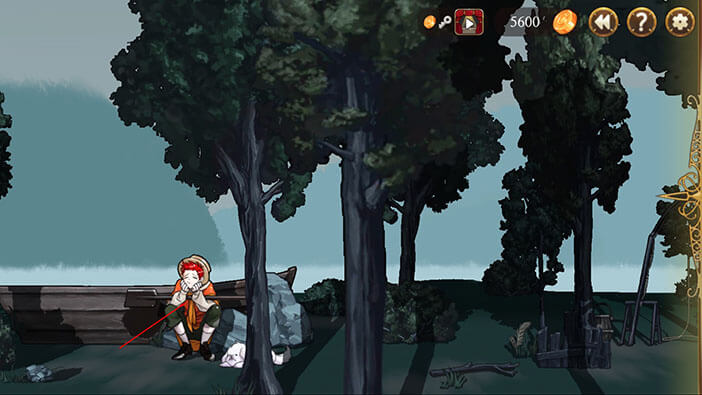
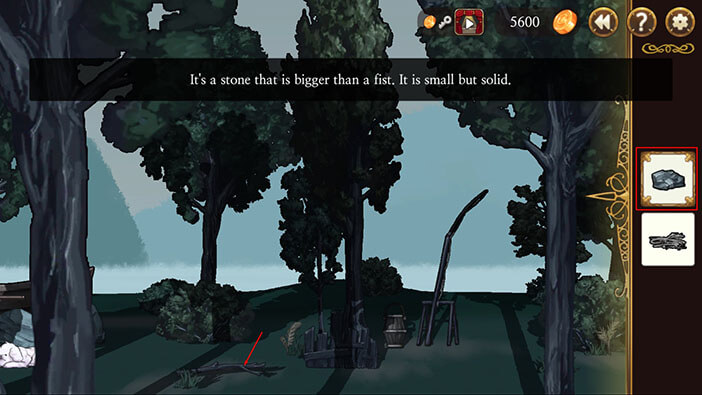
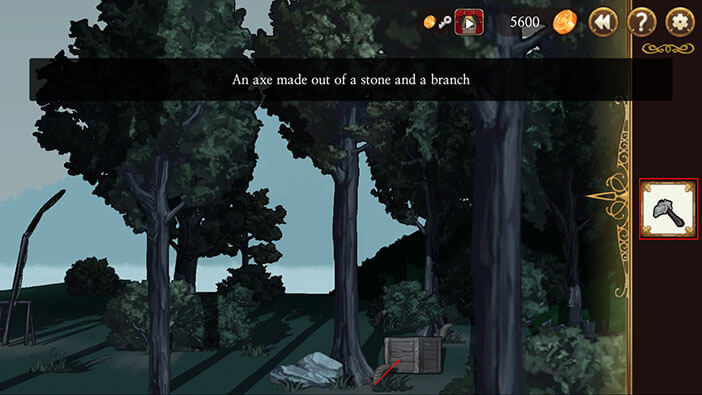
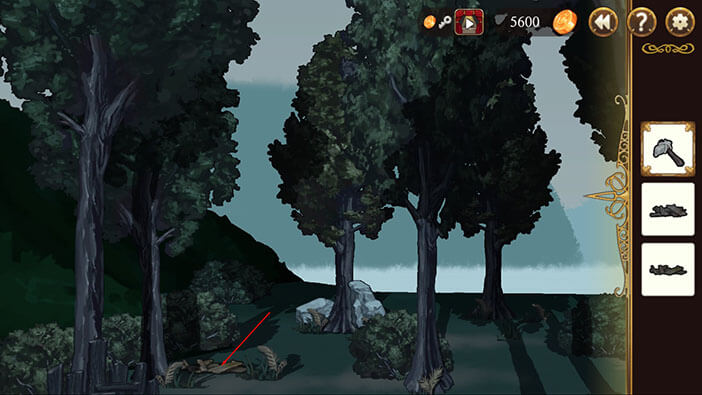
To the left of the boatman, you’ll notice a stone. Tap on the stone to pick it up.
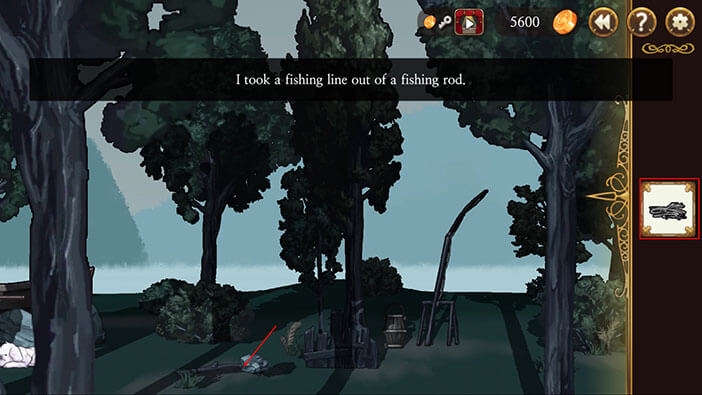
Turn to the right until you see a fishing pole. Tap on the fishing line to detach it from the fishing pole and pick it up.
Now, select the “Stone” from the inventory and tap on the wooden branch on the ground in front of you.
Ok, select the “Fishing line” from the inventory and tap on the branch. Our character will use the fishing line to tie the stone to the branch, and craft the “Stone Axe”.
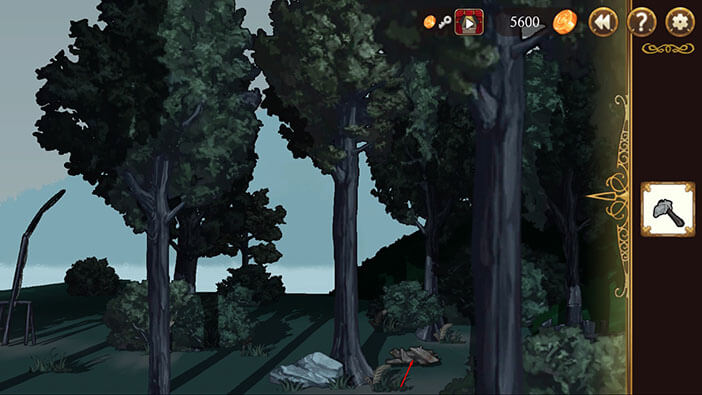
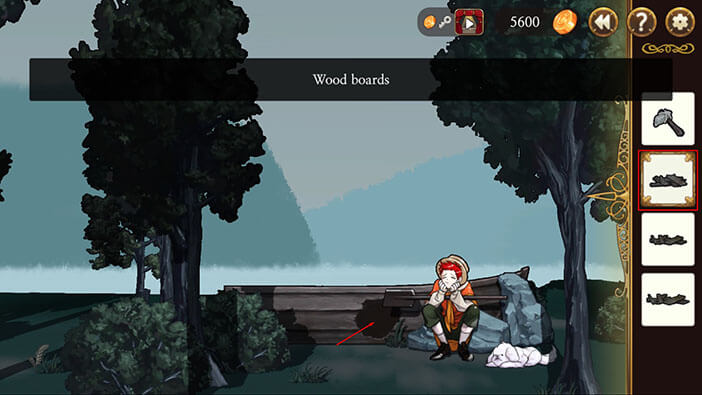
Turn all the way to the right and you will see a wooden box. We now have a stone axe, and we can use it to break the box and collect the wood boards that we will later use to fix the boat. So, select the “Stone Axe” from the inventory and tap on the wooden box.
After breaking the box, tap on it, and the “Wood Boards” will be added to your inventory.
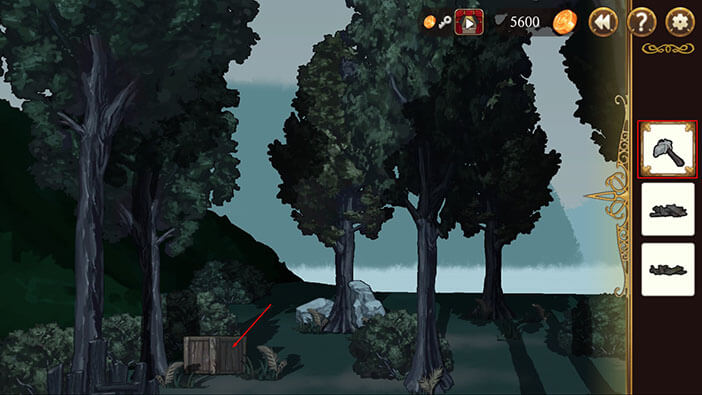
Turn to the left until you see another wooden box. Select the “Stone Axe” from the inventory and tap on the box to break it.
Tap on the broken wooden box to pick up the boards.

We need to break down one more wooden box to gather enough materials. Turn all the way to the left, select the “Stone Axe” from the inventory, and tap on the wooden box.
Tap on the broken wooden box to pick up the boards.
Go back to the boatman, select the “Wood Boards” from the inventory and tap on the hole in the boat.
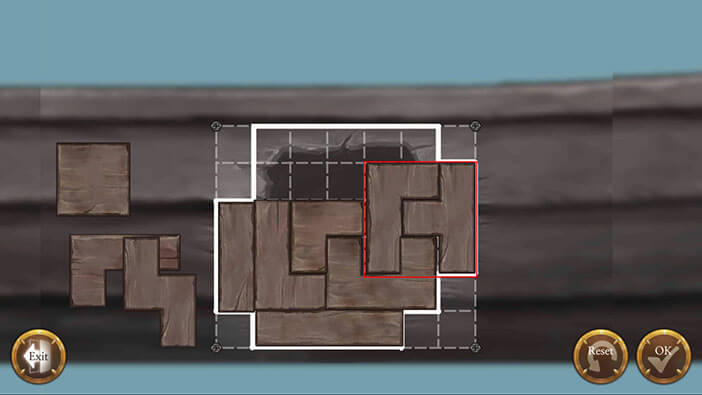
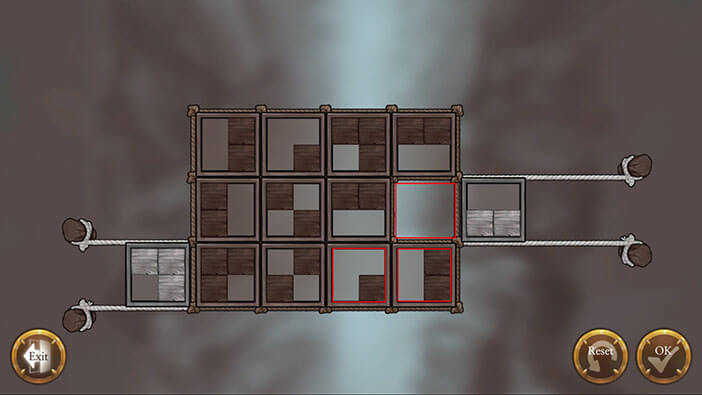
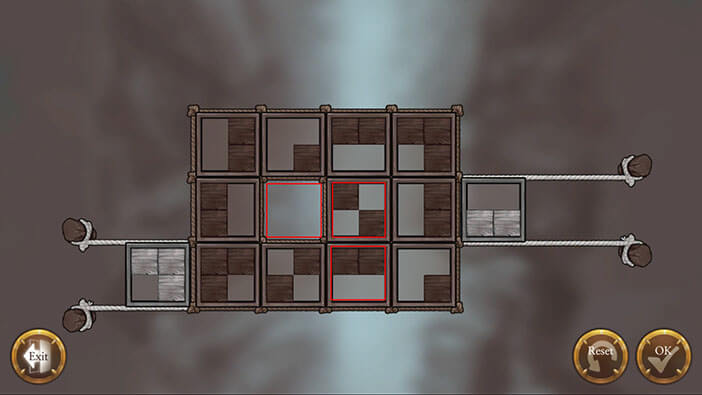
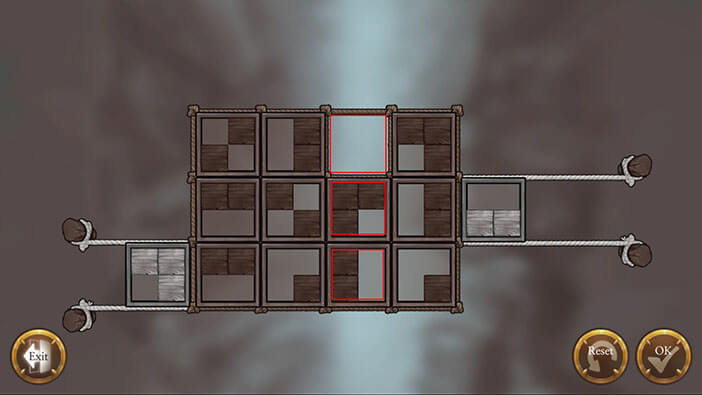
Ok, we have a small puzzle ahead of us. Our task is to fill up all fields on the grid by using boards of different shapes and repair the boat.
Step 1
Let’s start by moving aside the wooden piece that’s already on the grid.
Take the “straight horizontal” wooden piece, on the top right side, and place it at the bottom of the grid.
Take the “straight vertical” wooden piece on the right, and place it on the left side of the grid.
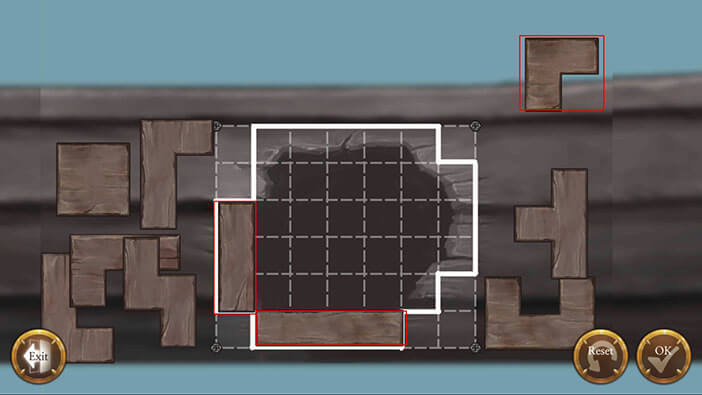
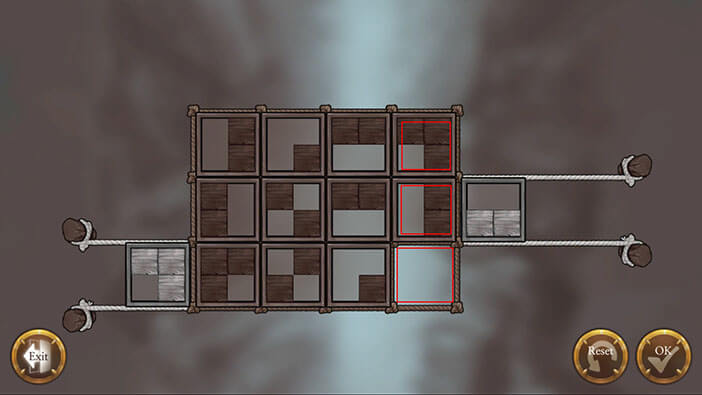
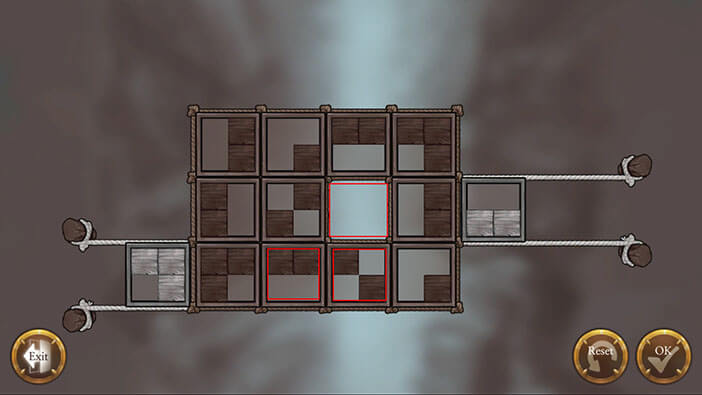
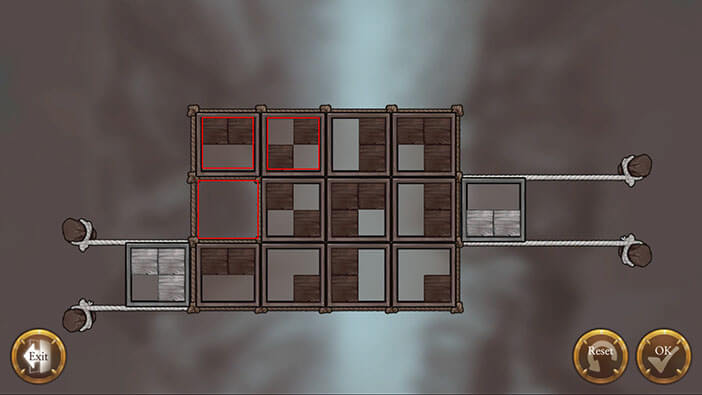
Step 2
Take the bottom piece on the right side, and place it in the lower right corner of the grid (on top of the horizontal piece)
Take the “L” shaped piece on the left side, and place it just to the left of the previous piece (in other words, between the previous piece and the vertical piece)
Take the piece that resembles the letter “r” on the right side, and place it between the two pieces that we moved in Step 2 (this step).
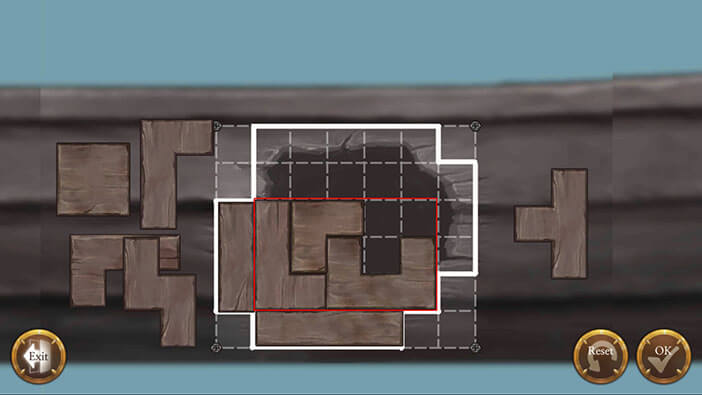
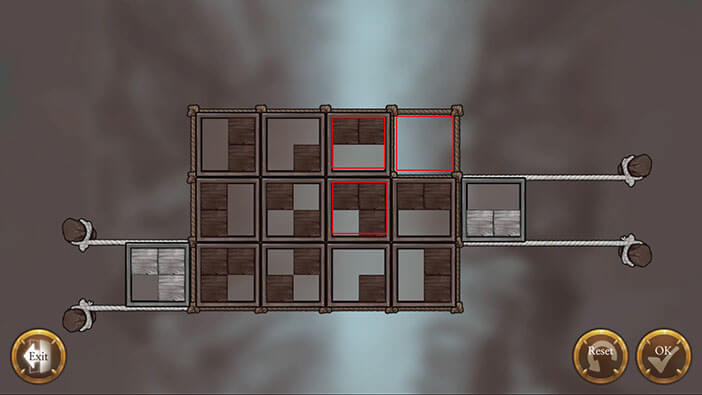
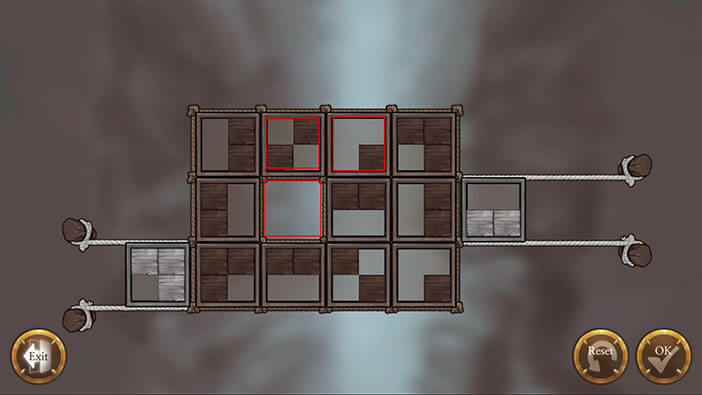
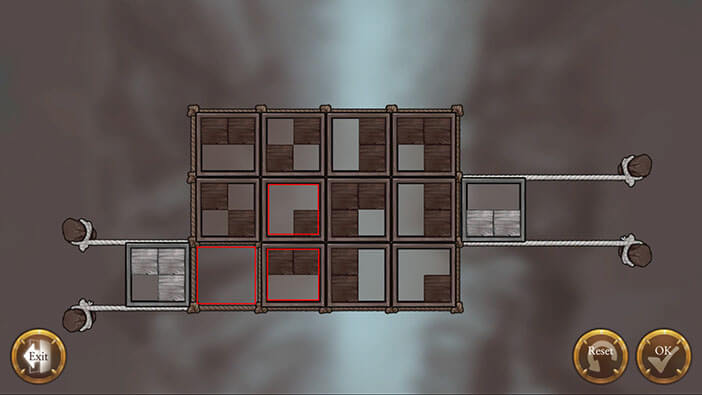
Step 3
Take the last piece on the right side, and place it on the right side of the grid.
Take the inverted “L” piece on the left side, and place it next to the piece that we just placed.
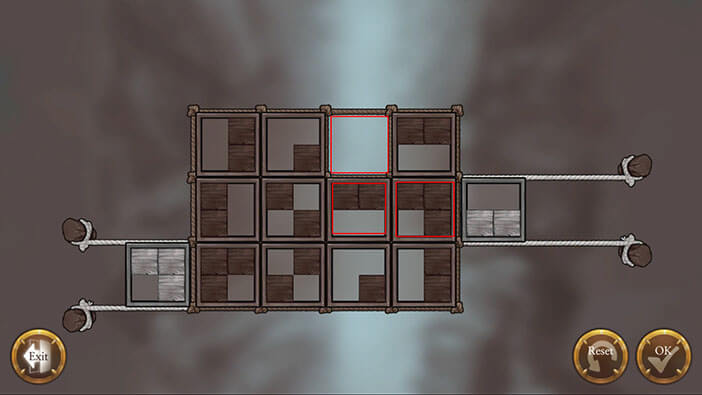
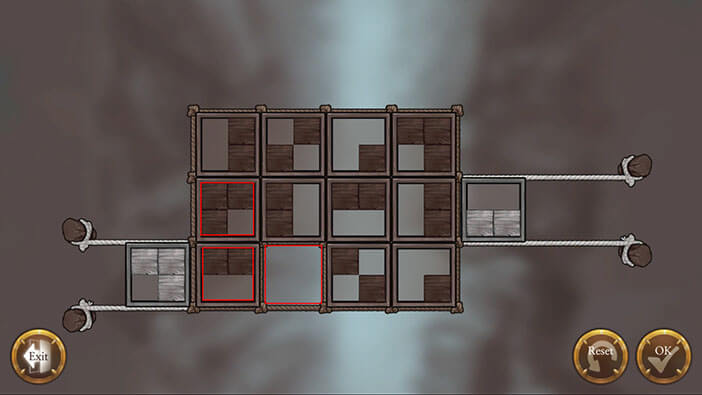
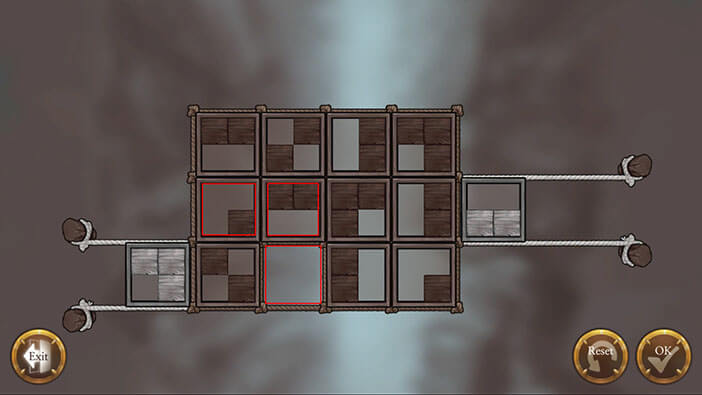
Step 4
The final step should be obvious by now. Take the “Square” piece from the left side and place it in the upper left corner of the grid.
Take the “horizontal L” piece on the left side, and use it to fill up the last hole.
Note: we don’t need the last piece to complete this puzzle.
Tap on the “OK” button to confirm. 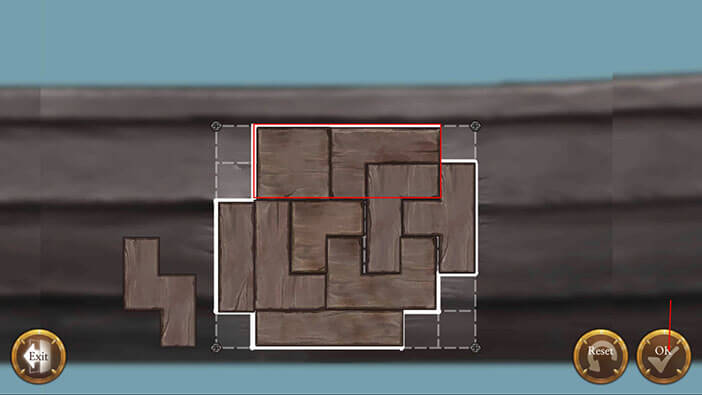
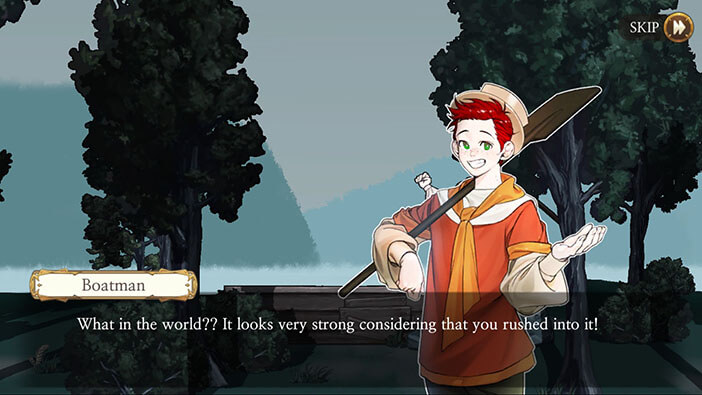
The boatman is overjoyed after seeing how well we managed to fix his boat, in such a short period of time. He says that he will take us over to the other side and immediately starts preparing for the voyage.
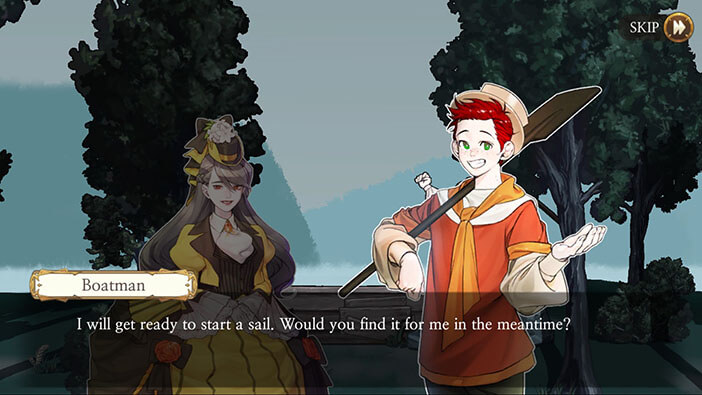
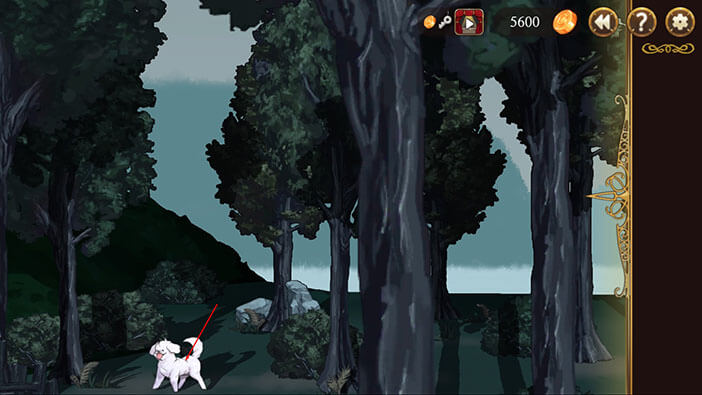
However, before we leave, he will ask us to look for his puppy.
Turn all the way to the left and tap on the “Puppy” to pick it up.
Go back to the boatman, select the “Puppy” from the inventory, and tap on the boatman to hand it over.
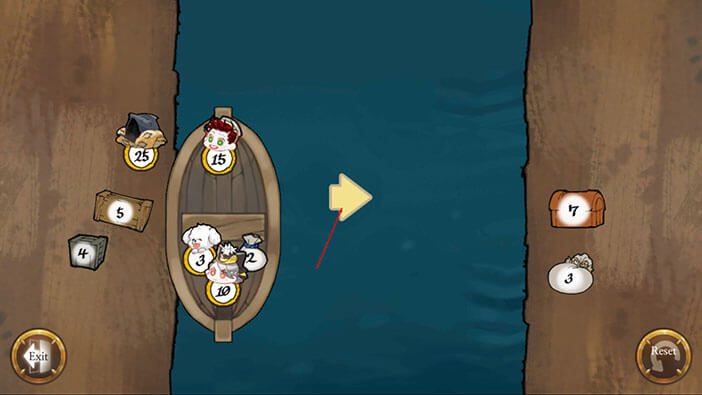
Boatman says that his boat has only been patched up, so it can’t be overburdened with cargo, or else it will sink. So, to safely cross the river we will have to stick to some rules concerning the cargo capacity.
Rule Number 1
The boatman always has to be on the boat, in order to row and steer it.
Rule Number 2
The weight distribution has to be the same on both sides of the boat, otherwise, it won’t be able to sail.
Rule Number 3
If all three of them get on the boat, they can’t load any additional cargo, because there won’t be any room left.
Rule Number 4
Lastly, since Huxley is huge he will take an entire side of the boat – nothing else can be loaded on that side. 


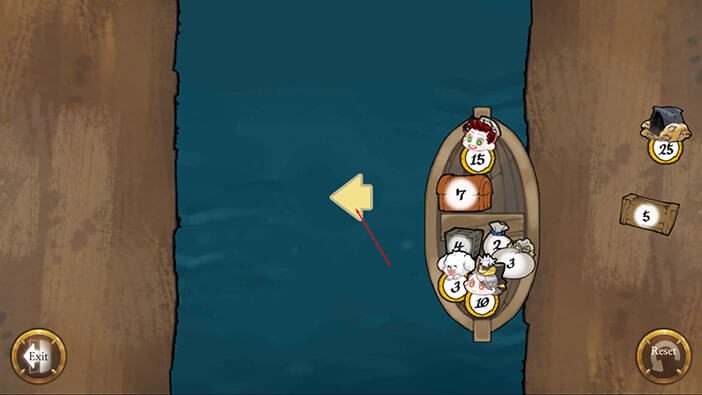
Now, we have to find a way to cross the river, without leaving anything behind. Ok, the most important rule here is that the two sides of the boat (upper and lower) must have the same weight.
The number inside the circle below the three character portraits (plus a puppy) represents their weight.
The number on the objects represents their weight.
Step 1
Load the chest (weight 7) on the boatman’s side. Total Weight: 15+7= 22
Load Elizabeth (10), puppy (3), the bag (3), the small bag (2), and the small wooden box (4) on the other side of the boat. 10+3+3+2+4= 22
With both sides of the boat equal in weight, the arrow pointing to the other side will become brighter. Tap on the arrow to get to the other side.
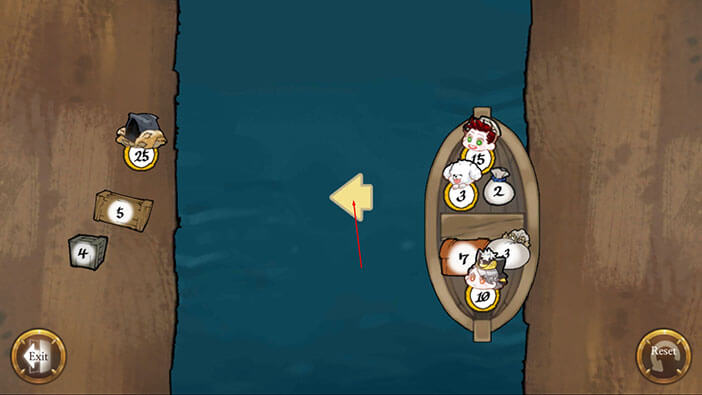
Step 2
After reaching the other side all cargo and passengers will be automatically unloaded from the boat, leaving the only boatman.
However, in order for the boatman to return to the other side and pick up more stuff, there must be a total weight of 15 on the other side of the boat.
So, load the chest (7), puppy (3), the bag (3), and the small bag (2) on the other side of the boat, and tap on the yellow arrow to go back to the other side of the river. 7+3+3+2 = 15

Step 3
It’s clear that we will have to go several times, back and forth, in order to transport all the people and cargo. Let’s transport Huxley this time.
Load the wooden box (5), puppy (3), and the small bag (2) on the boatman’s side. Total Weight: 15+5+3+2= 25
Load Huxley (25) on the other side of the boat, and tap on the yellow arrow.

Step 4
Load Elizabeth (10), puppy (3), and the small bag (2), on the other side of the boat, and tap on the yellow arrow. 10+3+2= 15
Step 5
Load the puppy (3) and the small bag (2) on the boatman’s side. Total Weight: 15+3+2= 20
Load Elizabeth (10), the chest (7), and the bag (3) on the other side of the boat. 10+7+3=20
Tap on the yellow arrow to complete this task.
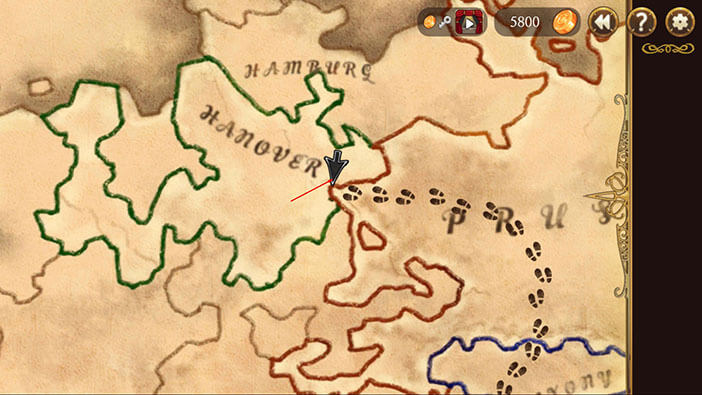
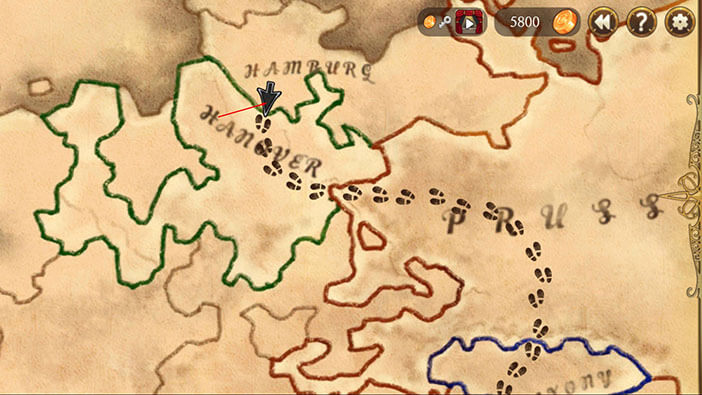
After crossing the river, our characters traveled through Prussia without an incident, and after some time reached the Hanover border.
Tap on the arrow on the map.
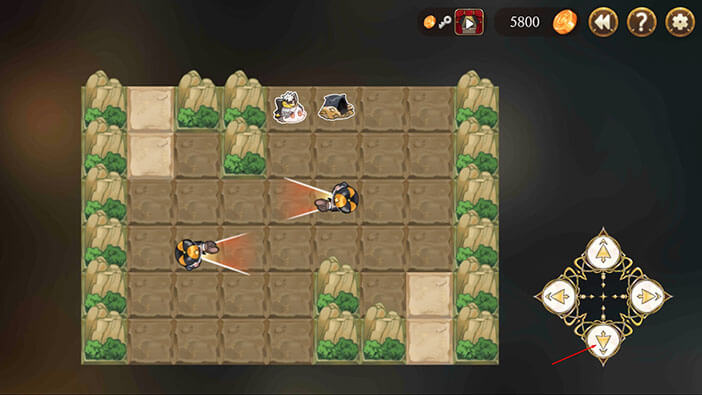
Here, we will have to evade the border guard, once more.
Step 1
Tap on the “UP” arrow four times.

Step 2
Tap on the “Left” arrow three times.

Step 3
Tap on the “Down” arrow five times. Don’t worry, border guards won’t be able to see you, see their line of sight is just one tile.
Step 4
Tap on the “Left” arrow three times.
Step 5
Tap on the “Up” arrow once. If we continue moving forward, the guard will see us. So, tap on the “bottom” arrow once. Elizabeth and Huxley will switch positions.
Step 6
Tap on the “Up” arrow five times to complete the mission. The first time you tap on the “Up” arrow, Elizabeth and Huxley will change positions once more, and won’t move forward into the guard’s line of sight.
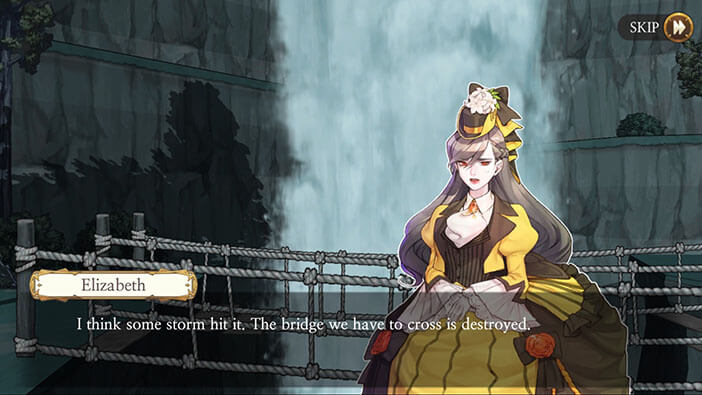
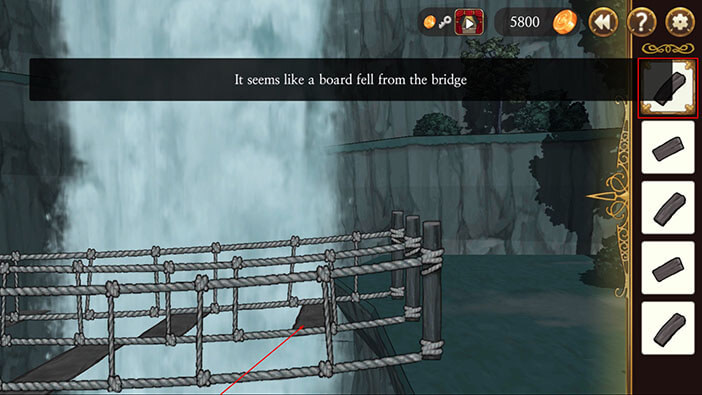
After successfully evading the border guard our characters reach the improvised bridge. Tap on the bridge.
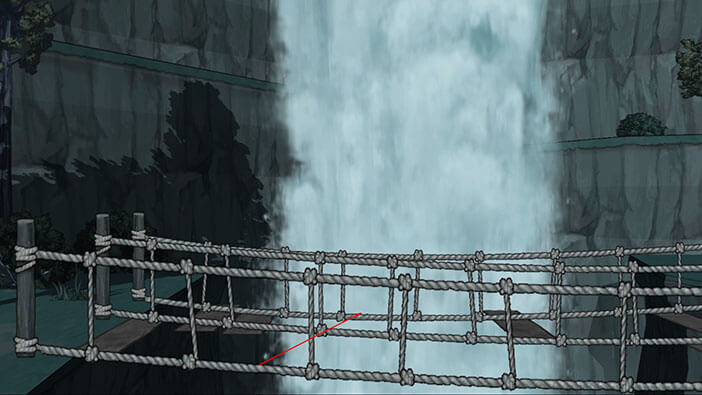
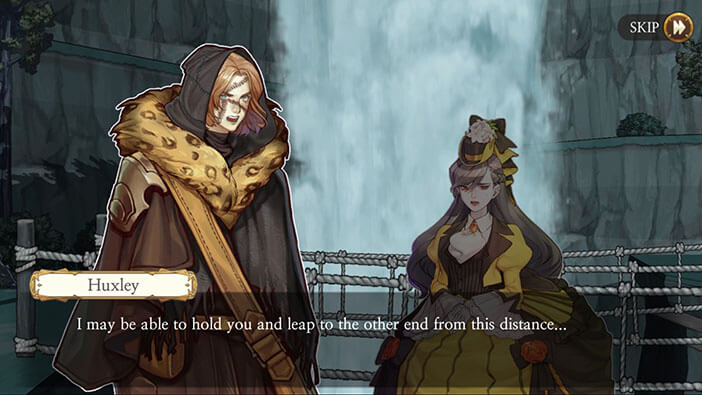
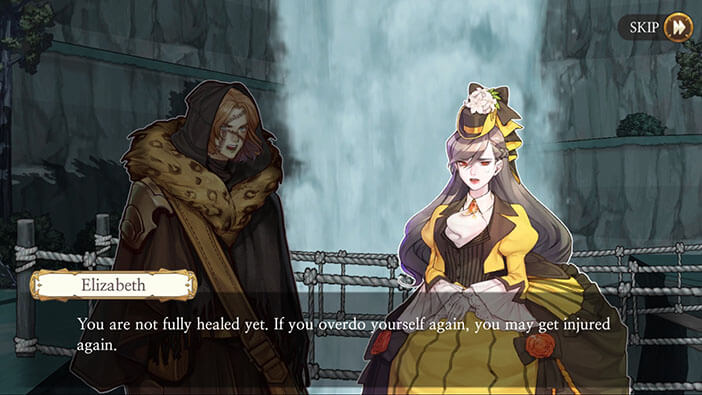
The bridge has been badly damaged by the storm, and Huxley thinks that he might be able to jump to the other side with Elizabeth in his arms. However, she refuses this suggestion, saying that Huxley’s wound might reopen if he did this. Instead, she decides to collect the wood boards that the storm blew off, and try to fix the bridge. Huxley grudgingly agrees…
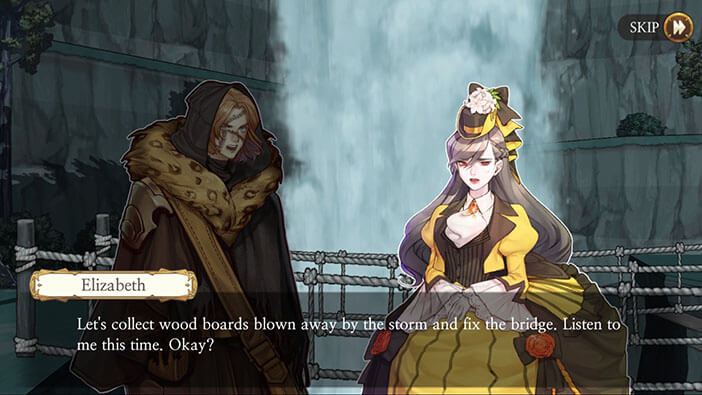
Move to the right and you’ll notice three wooden boards. Tap on them to pick them up.
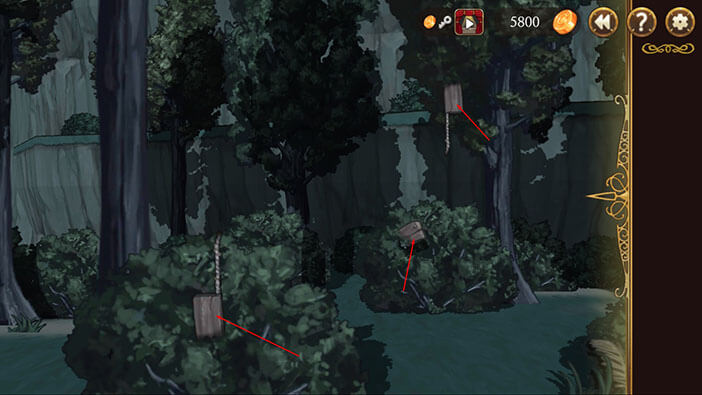
Move a bit more to the right and you’ll notice another three boards. Pick them up.
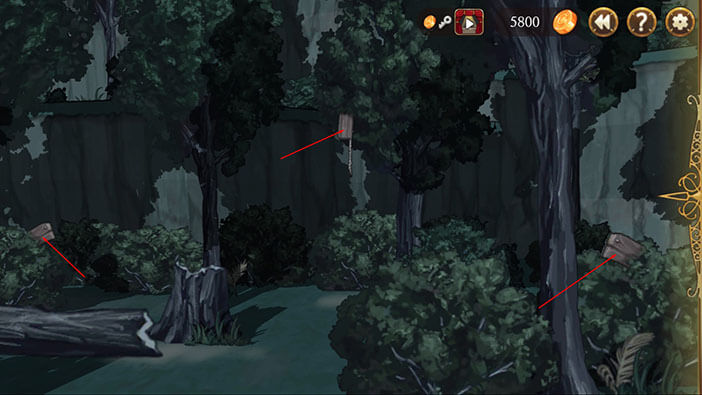
After collecting six boards in total, go back to the bridge, select the first board from the inventory, and tap on the bridge to fix it.
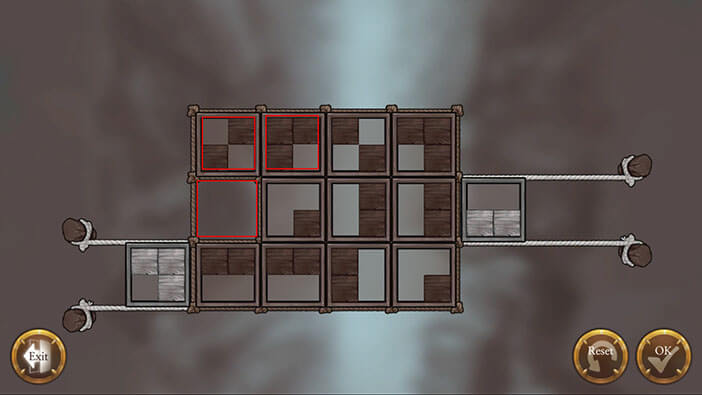
Explaining the following puzzle step by step is going to be very difficult, but I am going to try. First of all, we will have to mark the fields of the grid with numbers from one through twelve, as you can see in the image below.
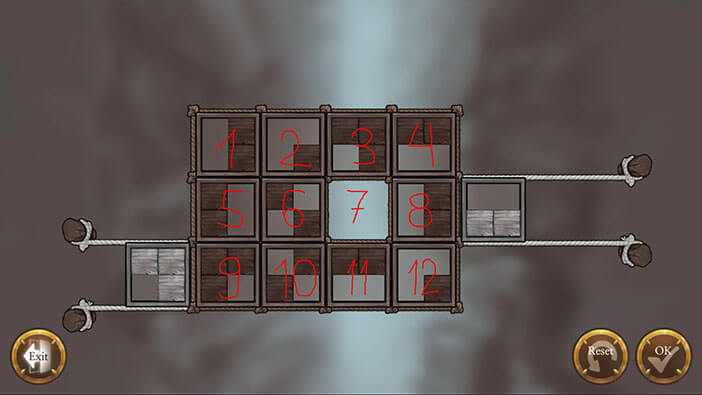
Let’s start.
Step 1
Tap on field No. 11 to move the board up.
Tap on field No. 12 to move the board left.
Tap on field No. 8 to move the board down.
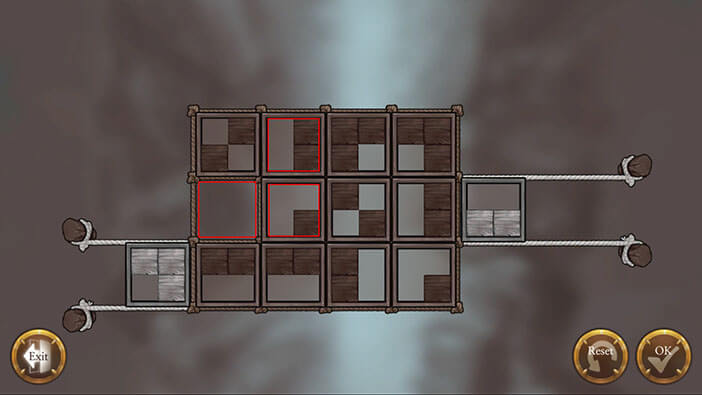
Step 2
Tap on field No. 7 to move the board right.
Tap on field No. 3 to move the board down.
Tap on field No. 4 to move the board left.
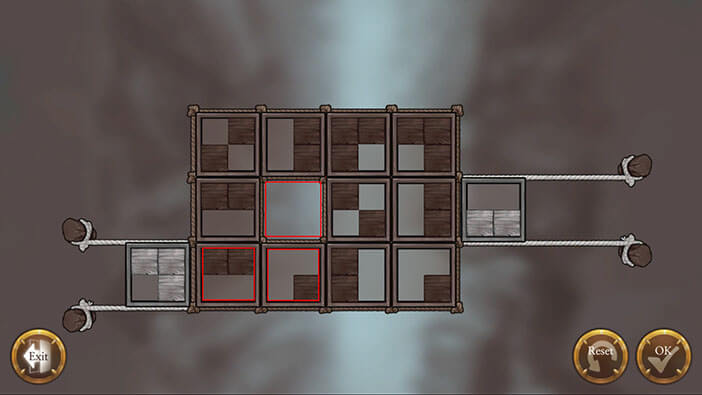
Step 3
Tap on field No. 8 to move the board up.
Tap on field No. 7 to move the board right.
Tap on field No. 3 to move the board down.
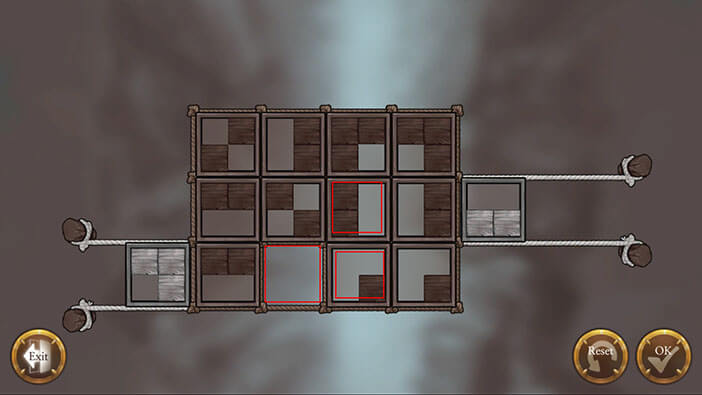
Step 4
Tap on field No. 4 to move the board left.
Tap on field No. 8 to move the board up.
Tap on field No. 12 to move the board up.
Step 5
Tap on field No. 11 to move the board right.
Tap on field No. 7 to move the board down.
Tap on field No. 6 to move the board right.
In the image below you can see how the grid should look after 5 steps.
Step 6
Tap on field No. 10 to move the board up.
Tap on field No. 11 to move the board left.
Tap on field No. 7 to move the board down.
Step 7
Tap on field No. 3 to move the board down.
Tap on field No. 2 to move the board right.
Tap on field No. 6 to move the board up.
Step 8
Tap on field No. 5 to move the board right.
Tap on field No. 9 to move the board up.
Tap on field No. 10 to move the board left.
Step 9
Tap on field No. 6 to move the board down.
Tap on field No. 7 to move the board left.
Tap on field No. 11 to move the board up.

Step 10
Tap on field No. 10 to move the board right.
Tap on field No. 5 to move the board down.
Tap on field No. 2 to move the board down.
In the image below you can see how the grid should look after 10 steps.
Step 11
Tap on field No. 1 to move the board right.
Tap on field No. 5 to move the board up.
Tap on field No. 6 to move the board left.
Step 12
Tap on field No. 2 to move the board down.
Tap on field No. 3 to move the board left.
Tap on field No. 7 to move the board up.
Step 13
Tap on field No. 6 to move the board right.
Tap on field No. 2 to move the board down.
Tap on field No. 3 to move the board left.
Step 14
Tap on field No. 2 to move the board right.
Tap on field No. 1 to move the board right.
Tap on field No. 5 to move the board up.
Step 15
Tap on field No. 6 to move the board left.
Tap on field No. 7 to move the board left.
Tap on field No. 3 to move the board down.

Step 16
Tap on field No. 2 to move the board right.
Tap on field No. 6 to move the board up.
Tap on field No. 5 to move the board right.
Step 17
Tap on field No. 9 to move the board up.
Tap on field No. 10 to move the board left.
Tap on field No. 6 to move the board down.
Step 18
Tap on field No. 7 to move the board left.
Tap on field No. 11 to move the board up.
Tap on field No. 10 to move the board right.
Step 19
Tap on field No. 11 to move the board left.
Tap on field No. 7 to move the board down.
Tap on field No. 3 to move the board down.
Step 20
Tap on field No. 2 to move the board right.
Tap on field No. 1 to move the board right.
Tap on field No. 5 to move the board up.
In the image below you can see how the grid should look after 20 steps.
Step 21
Tap on field No. 6 to move the board left.
Tap on field No. 10 to move the board up.
Tap on field No. 9 to move the board right.
In the image below you can see how the grid should look after 15 steps.
Step 22
Tap on field No. 5 to move the board down.
Tap on field No. 6 to move the board left.
Tap on field No. 10 to move the board up.
Step 23
Tap on field No. 9 to move the board right.
Tap on field No. 5 to move the board down.
Tap on field No. 6 to move the board left.
Step 24
Tap on field No. 2 to move the board down.
Tap on field No. 3 to move the board left.
Tap on field No. 7 to move the board up.
Step 25
Tap on field No. 11 to move the board up.
Tap on field No. 10 to move the board right.
Tap on field No. 6 to move the board down.
Step 26
Tap on field No. 10 to move the board up.
Tap on field No. 9 to move the board right.
Tap on field No. 5 to move the board down.
Step 27
Tap on field No. 1 to move the board down.
Tap on field No. 2 to move the board left.
Tap on field No. 6 to move the board up.
Step 28
Tap on field No. 10 to move the board up.
Tap on field No. 9 to move the board right.
Tap on field No. 5 to move the board down.
Finally, tap on the “OK” button to confirm.
Our characters managed to patch up the bridge, and it is now solid enough to cross.
Tap on the yellow arrow to continue the journey.
The rest of the journey through Hanover is uneventful, and our characters eventually reach the border of Hamburg.
Tap on the arrow.
As before, our task is to evade the border guards and get into Hamburg undetected.
Step 1
Tap on the “Left” arrow three times.
Step 2
Tap on the “Down” arrow three times.
Step 3
Go two fields to the left and one field down. The guards won’t be able to see you, since they have a very limited line of sight (only one field).

Step 4
Go one field to the left, and one field down.
Step 5
Tap on the “Left” arrow three times, and our character will get to the far left border of the screen.

Step 6
Tap on the “Up” arrow three times.
Step 7
Tap on the “Right” arrow twice.
Step 8
Tap on the “Up” arrow three times, and once on the “Left” arrow to complete this mission.

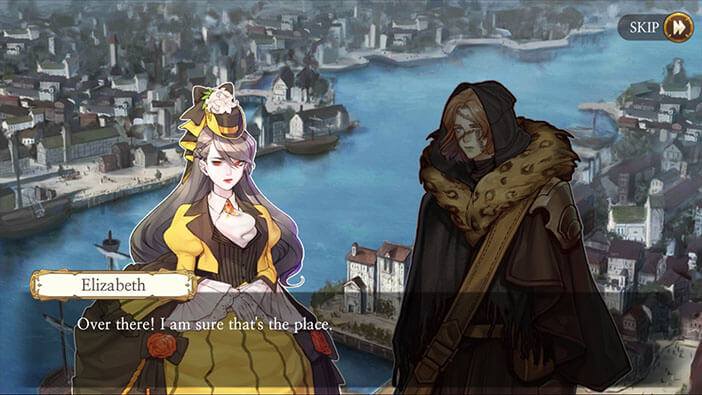
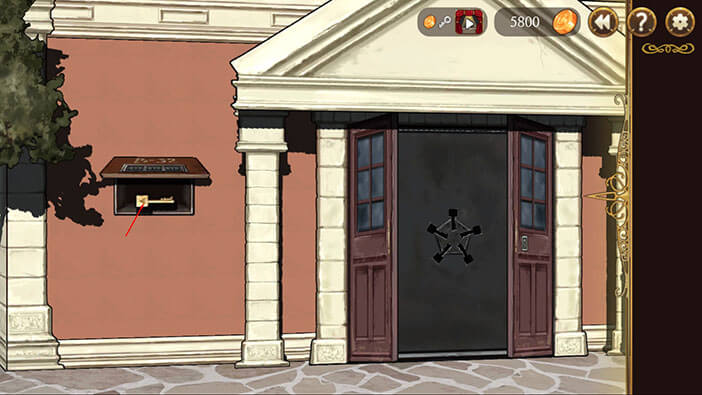
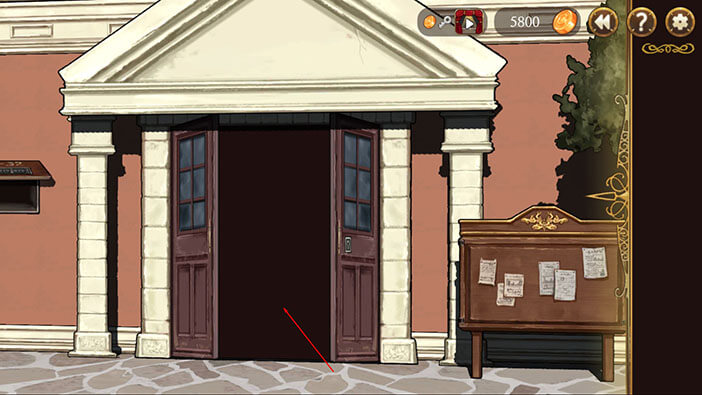
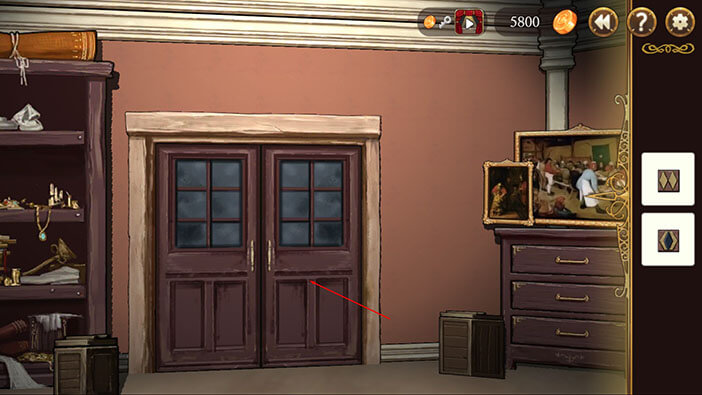
Finally, our characters reached the port of Hamburg, which was their final destination. However, in order to find Babel, they must first look for clues inside the “Hamburg Baum” agency. The agency is owned by the Aegyptus, but it is currently deserted, so our characters shouldn’t have too much trouble getting in.
Elizabeth sees the building, and the couple decides to go in and look for clues left by Henry.

After reaching the front door of the agency, the card that was given to you by Erich will be added to the inventory.
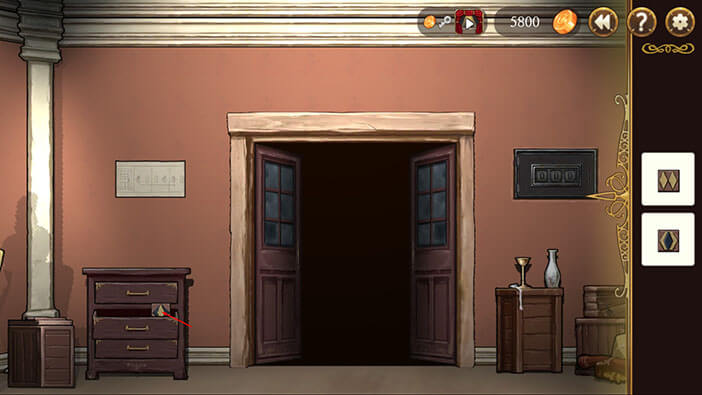
Move to the left, and on the other side of the building, you will see a wooden cart filled with various items. Tap on the cart to turn it over.
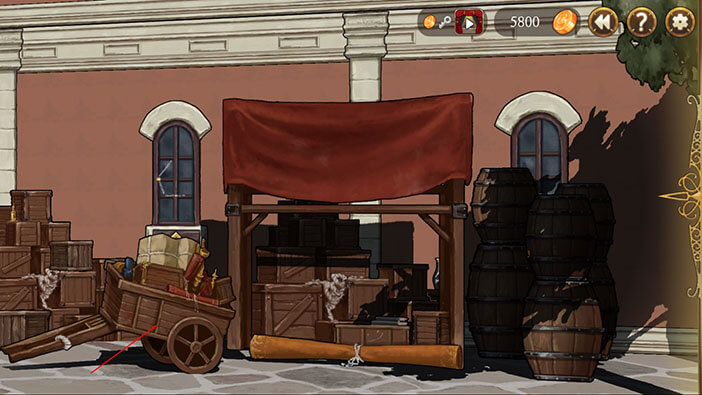
Tap on the key inside the cart to pick it up.

Well, I guess we should now go back to the front door. Select the “Key” from the inventory and tap on the keyhole to unlock the front door. Tap on the door to open it.
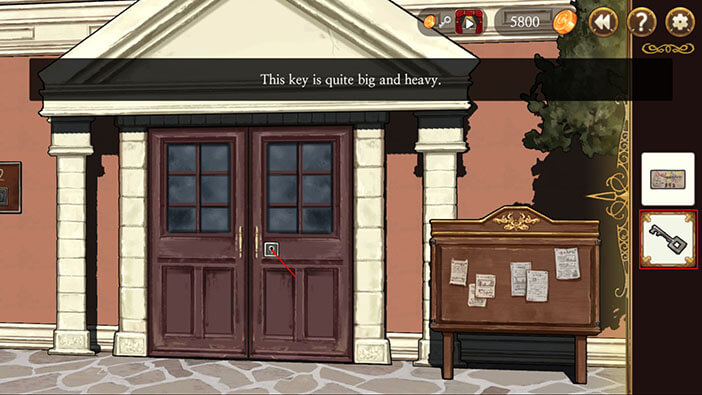
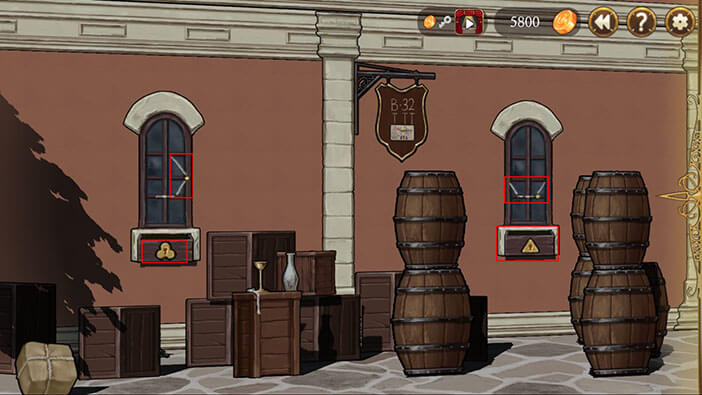
Damn! I knew this would be too easy. The entrance is blocked by the wall. There is an engraved symbol on the wall, with the slots for five key inside it. Our characters will have to find all five keys and unlock the “secret” door in order to get inside the agency.
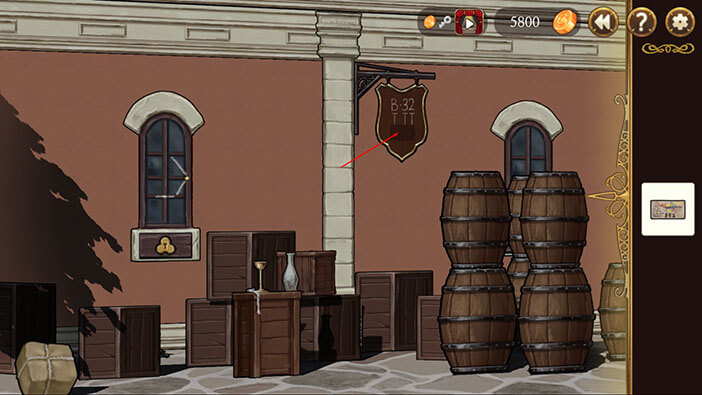
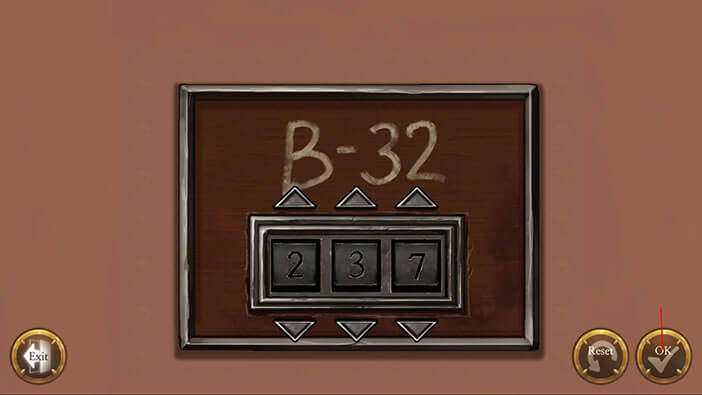
To the left of the door you will notice a “B-32” sign and below it a three digit code.
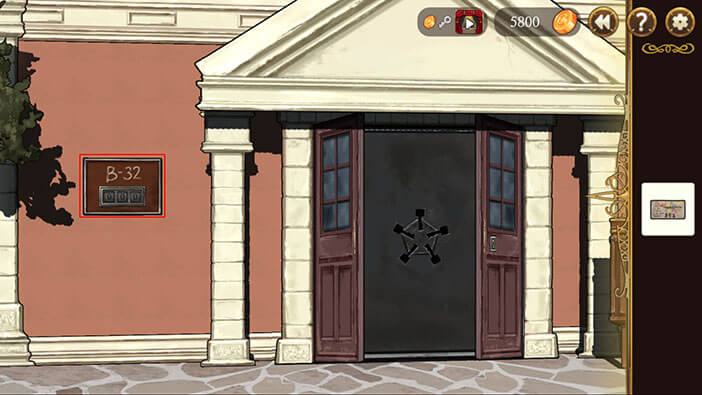
Turn to the right, and on the other side of the building and you will notice another “B-32” sign and the three letters “T” below it. Tap on the sign to start the interaction.
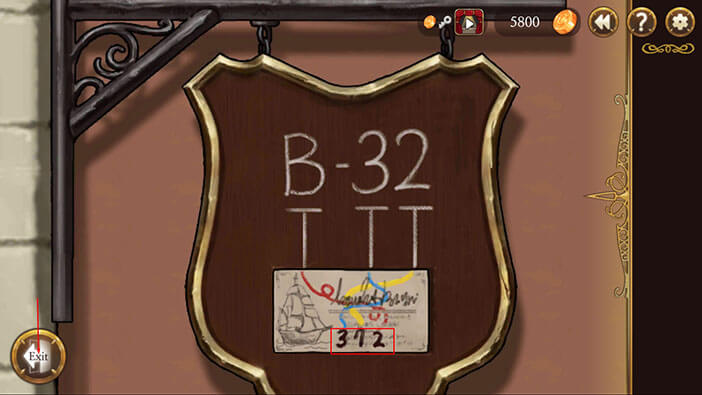
Select the “Card” from the inventory and tap on the slot at the bottom of the sign.
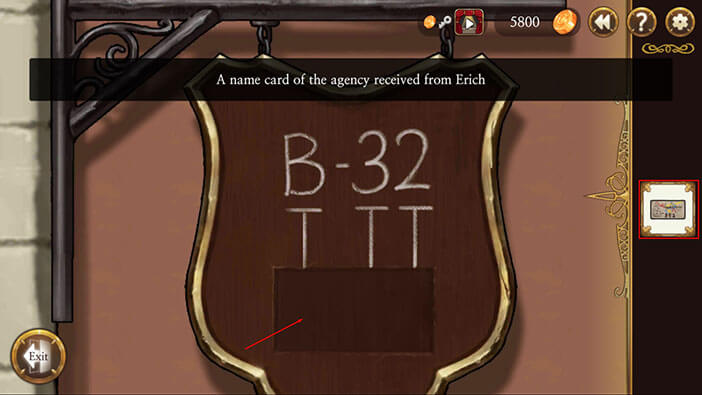
Our protagonist will notice that the three lines on the card, red, blue, and yellow, form a line that connects the letters “T” with the number of the card.
Looking at the lines we can see, the following.
Below the first letter “T” is the red line and it connects it with the number “2”.
Below the second letter “T” is the blue line and it connects it with the number “3”.
Below the third letter “T” is the yellow line and it connects it with the number “7”.
When we put it all together, we get the “237” code. Let’s use this code on the three-digit lock that we previously saw.
Tap on the “Exit” button.
Go back to the front door, and tap on the numerical lock on the left.
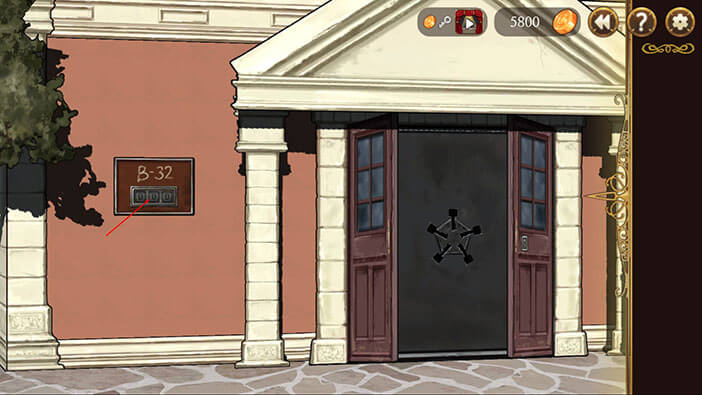
Enter the code “237” and tap on the “OK” button.
With the secret compartment now open, tap on the key inside of it, and the “Triangle-shape key” will be added to the inventory.
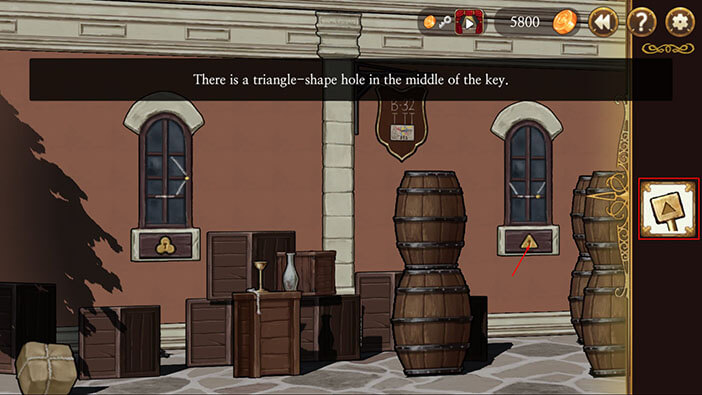
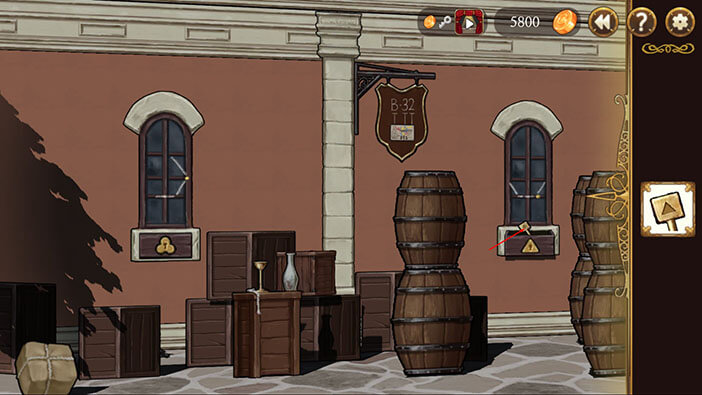
Turn all the way to the right and tap on the barrels to move them aside, revealing a window that was hidden behind them.
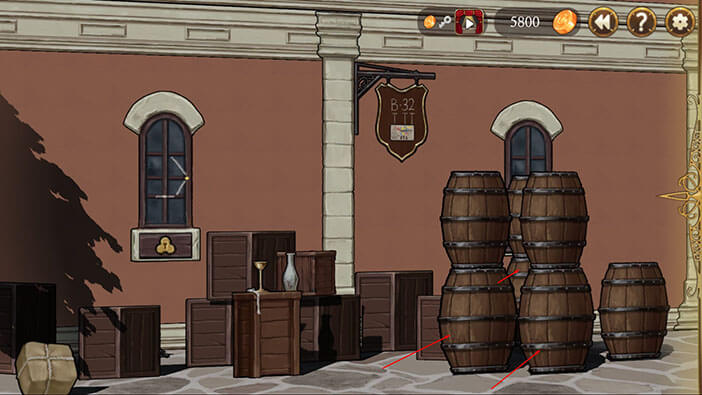
We can see that there are different shapes below the windows, with keyholes inside them. The window on the right has a triangle-shaped symbol below it, so select the “Triangle-shape key” from the inventory and tap on the keyhole.
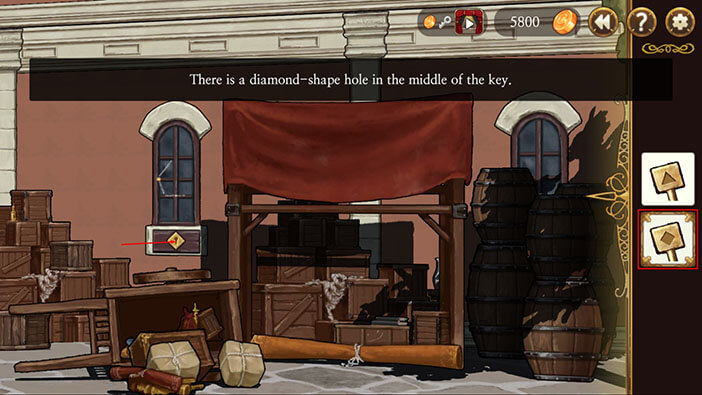
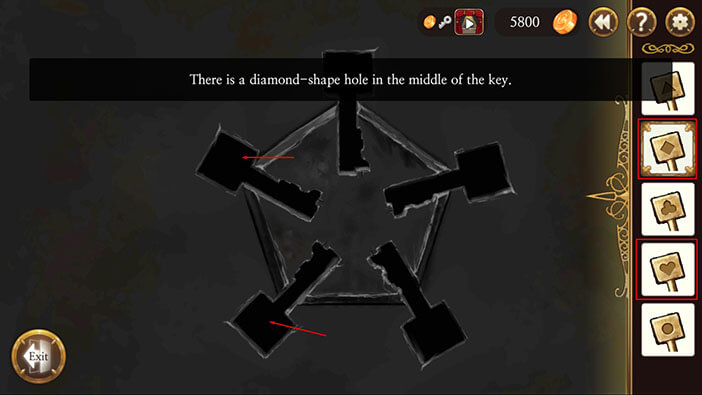
With this done, we unlocked the drawer below the window. Tap on the key inside it, and the “Diamond-shape Key” will be added to the inventory.
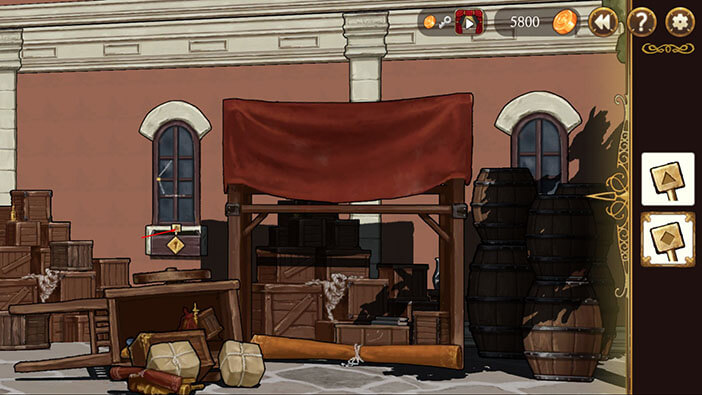
Ok, let’s look for the diamond shape slot. Turn all the way to the left, select the “Diamond-shape Key” and tap on the diamond-shaped keyhole, below the window on the left.
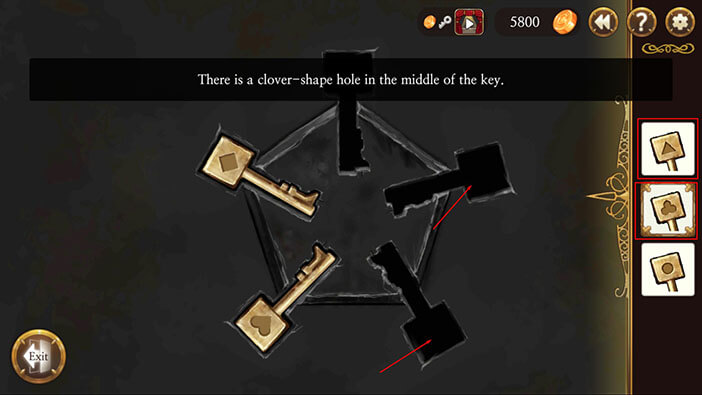
Tap on the key inside and the “Clover-shape Key” will be added to the inventory.
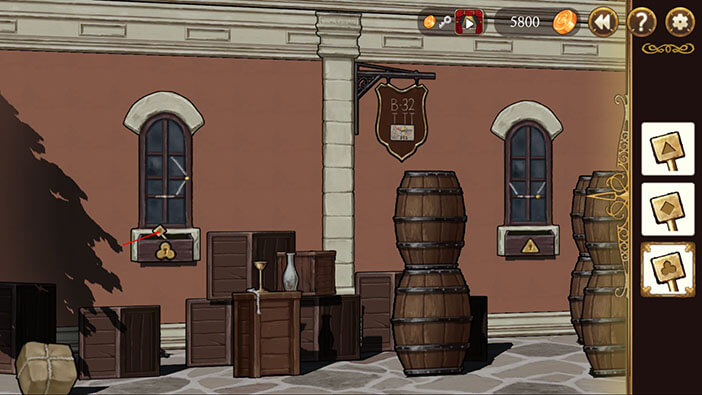
Turn all the way to the right, again. Select the “Clover-shape Key” from the inventory and tap on the clover-shaped keyhole, below the window on the left.
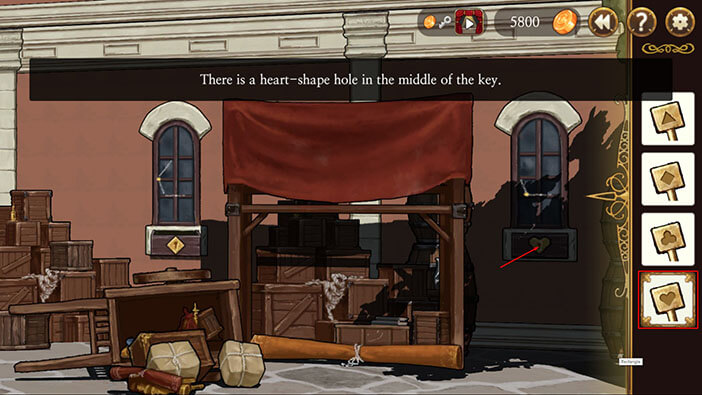
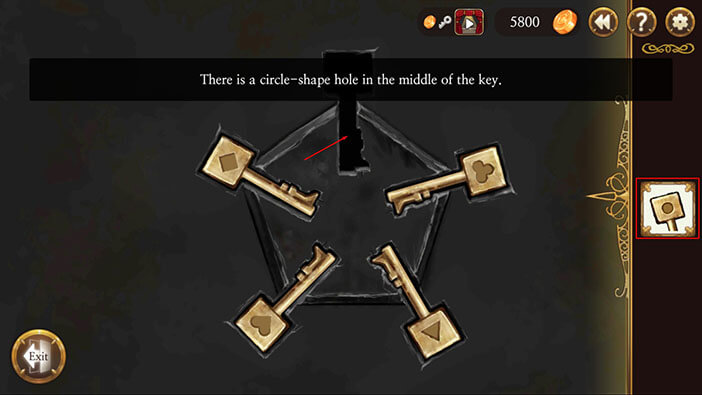
Tap on the key inside and the “Heart-shape Key” will be added to the inventory.

Turn all the way to the left, again, and tap on the barrels to move them aside.
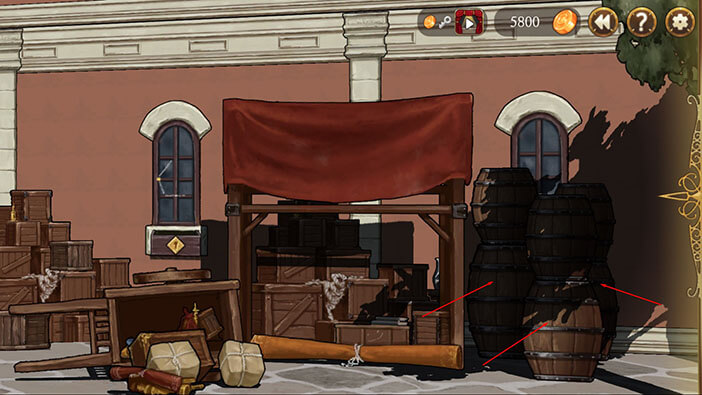
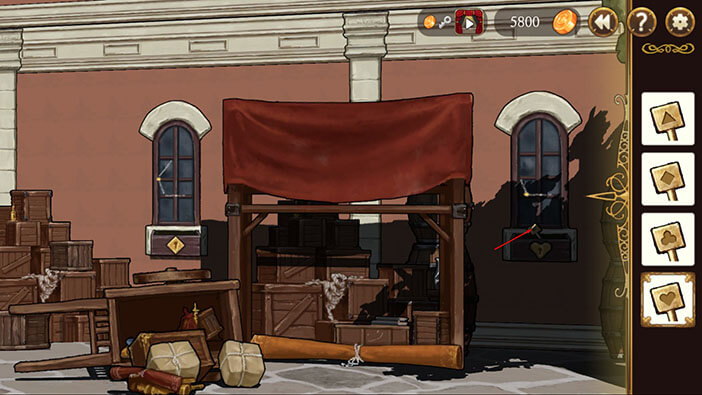
Select the “Heart-shape Key” from the inventory and tap on the heart-shaped keyhole, below the window on the right.
Tap on the key inside and the “Circle-shape Key” will be added to the inventory.
Ok, we now have all five keys, but before we go back to the front door, pay attention to the two white lines and yellow dots on the windows.
On the window marked with the “Diamond” symbol, the yellow dot is on the left side.
On the window marked with the “Heart” symbol, the yellow dot is on the bottom-left side.
Memorize the position of yellow dots on these two windows, and let’s go back and check the windows on the other side of the house.
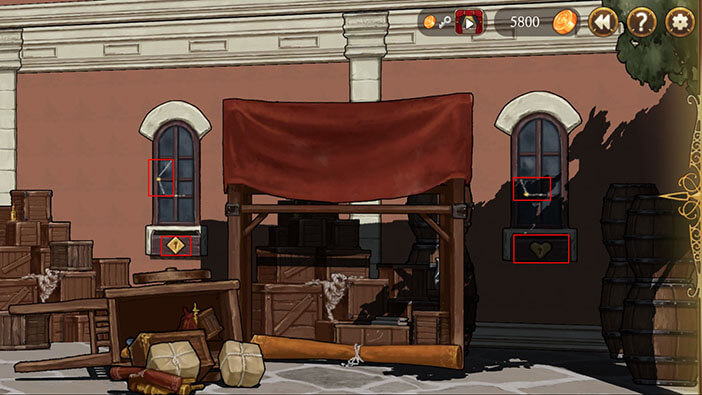
Turn all the way to the right.
On the window marked with the “Clover” symbol, the yellow dot is on the right side.
On the window marked with the “Triangle” symbol, the yellow dot is on the bottom-right side.
Memorize this.
Face the front door and tap on the five key slots to start the interaction.

Now, we should insert the keys into appropriate slots. Let’s begin.
Select the “Diamond-shape Key” and insert it into the left slot, because that’s where the yellow dot on the window above the diamond keyhole was pointing at.
Select the “Heart-shape key” and insert it into the bottom-left slot.
Select the “Clover-shape key” and insert it into the right slot.
Select the “Triangle-shape key” and insert it into the bottom-right slot.
Finally, select the “Circle-shape Key” and insert it into the upper slot, since this slot is the only one without the key.
After inserting the last key, the wall will automatically slide aside, so tap on the front door to enter the building.
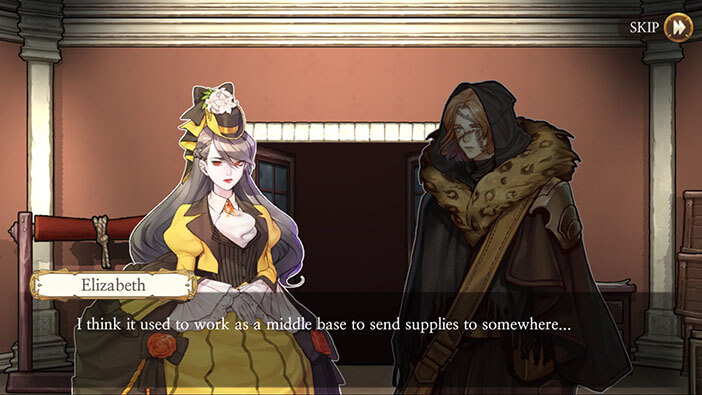
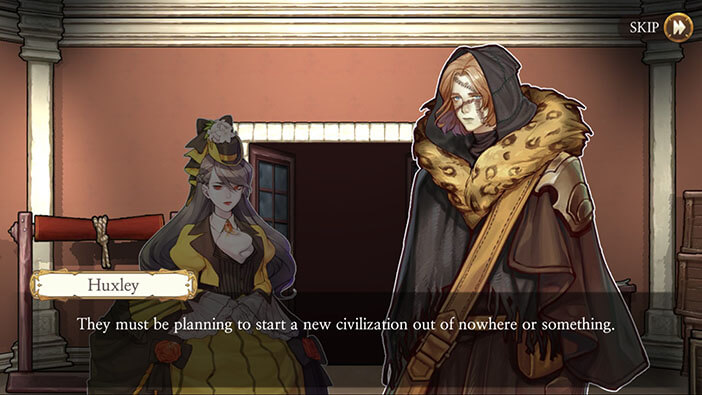
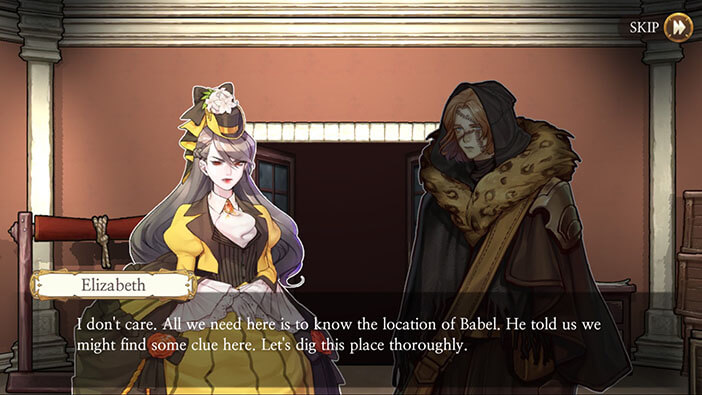
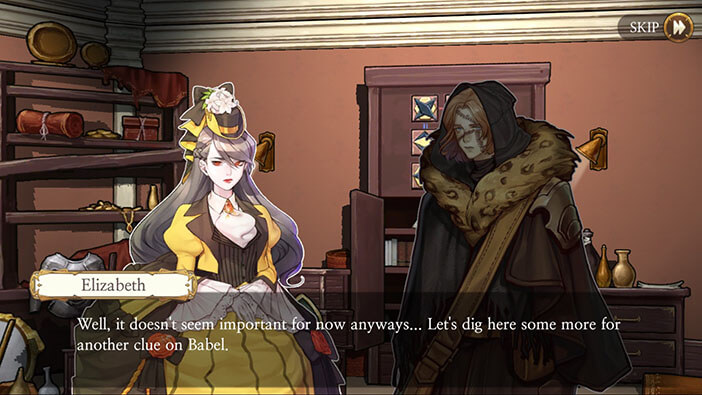
The building is deserted. It seems it was used as some kind of a supply base. Elizabeth suspects that Samuel is planning on starting a new civilization (more likely a colony) in some remote place. So, he was probably sending food and construction materials from here to Babel. Our characters decide to thoroughly search the place, since Henry told them that here they can find clues, possibly a map, that could lead them to Babel.

Turn to the right and tap on the wooden box to open it. Tap again to pick up a “wood piece” inside it.

Turn to the left and you’ll see another wooden box. Tap to open it, and tap again to pick up a “wood piece” inside it.
Turn to the left and tap on the door to open it, and tap once again to proceed into the next room.
On the left, you will notice a small cabinet. Tap on the middle drawer to open it, and tap on once more to pick up a “wooden piece” inside it.

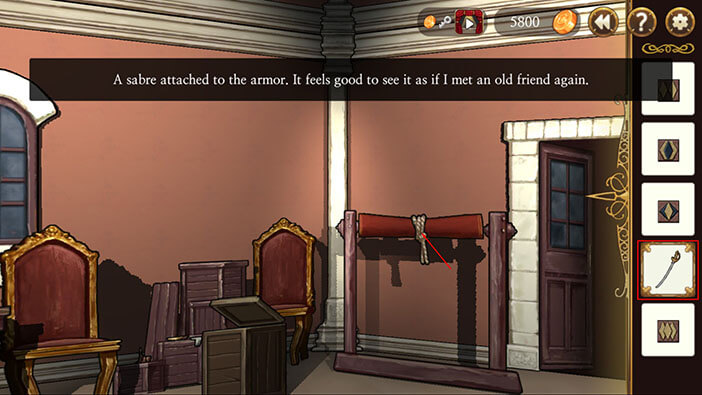
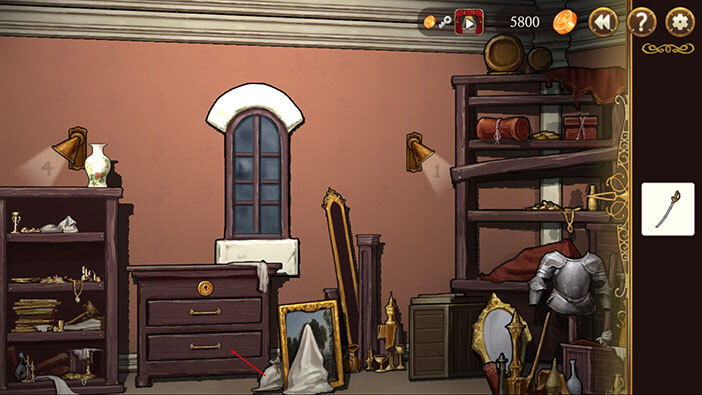
Turn a bit more to the left and you will notice two armors. There’s a saber on the armor on the left. Tap on the saber to pick it up.
Elizabeth will feel much more confident with the saber in her hands.
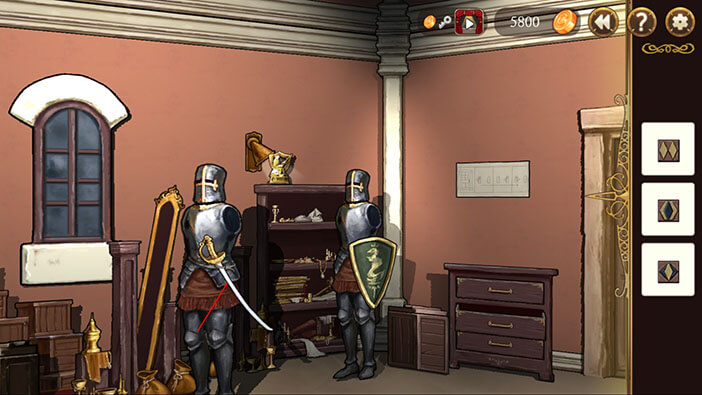
Turn to the left and face the other wall. You will notice that there’s some kind of puzzle that involves the wood pieces that we collected. However, it seems that five wood pieces are missing and we have only found three, so far.
Also, the lamps seem to be pointing at some numbers. Let’s see what’s that all about.
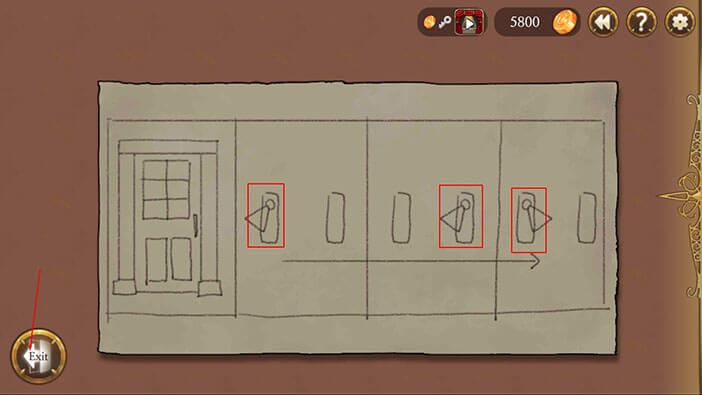
Turn around and tap on the drawing to the left of the door.

Ok, now in this diagram we see the front door and the six lampstands. However, there are only three lamps drawn, and we can clearly see in which direction they should be pointing. Let’s memorize it.
The first lamp should point to the left. (we don’t need a second and third lamp)
The fourth lamp should point to the left.
The fifth lamp should point to the right.
Tap on the “Exit” button.
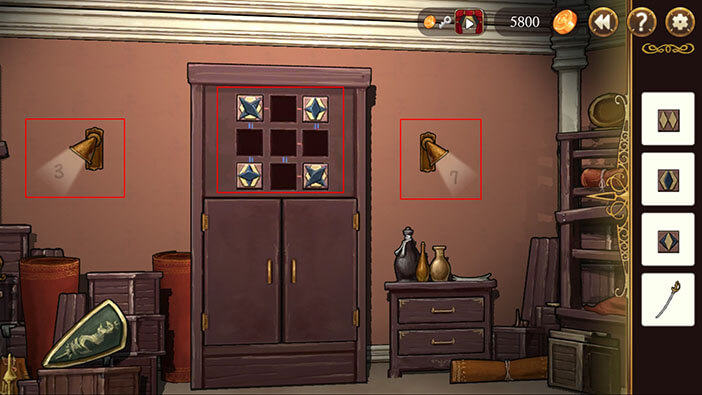
Turn to the right and we can see that the first lamp is already pointing in the to the left, as it should. However, the vase is blocking our view, so tap on the vase to move it aside.
Now we can see that the lamp is pointing at the number “4”. This is our first number, memorize it.
Since there are lamps and each one of them will reveal us a single number, we will probably use this code to unlock the three-digit numerical lock on the wall.

Turn to the right until you see the fourth lamp. Right now it’s pointing to the right, so tap on it turn it to left – as we saw in the diagram.
We can see the number “1” and this is our second number.

Turn a bit more to the right, and tap on the lamp to turn it to the right.
We can see the number “5” and this is our third number.
When we put it all together, our code is “415”.
Turn around and tap on the numerical lock.

Enter the code “415” and tap on the “OK” button.

Tap on the safe to open it, and tap again to pick up a wooden piece and a note inside it.


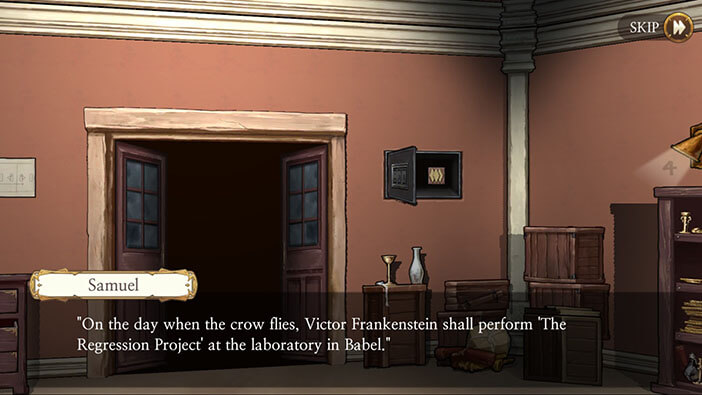
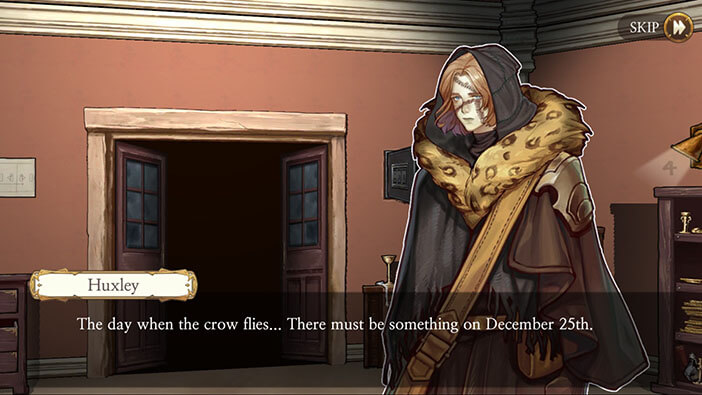
The note was written by Samuel, and it says that Victor Frankenstein will perform a “Regression Project” in the laboratory in Babel, on the day when crow flies (probably to the sun). Our characters have no idea what “Regression Project” might be, but I suspect that this is how Samuel hopes to achieve immortality.
After the dialog, another wood piece will be added to your inventory.
Tap on the door to go back to the previous room.
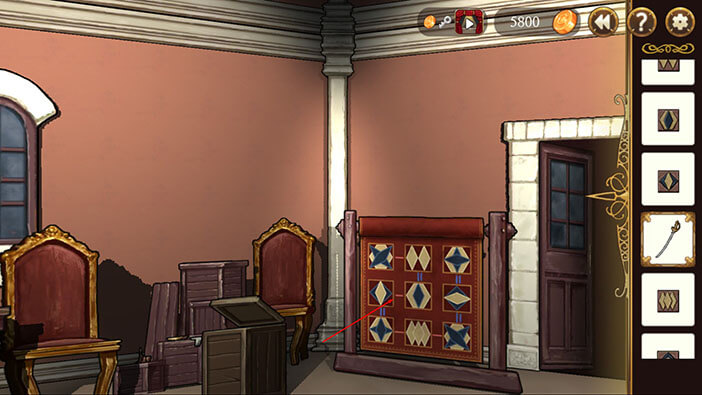
Turn around, select the “Sabre” from the inventory, and tap on the rope to cut it and unfold the carpet.
Tap on the wood piece in the lower right corner of the carpet to pick it up.
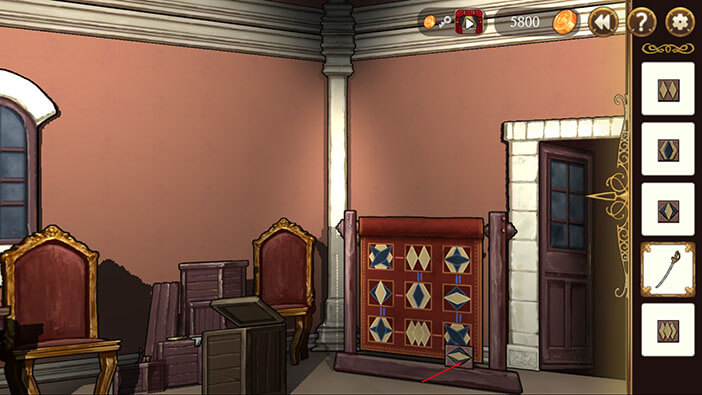
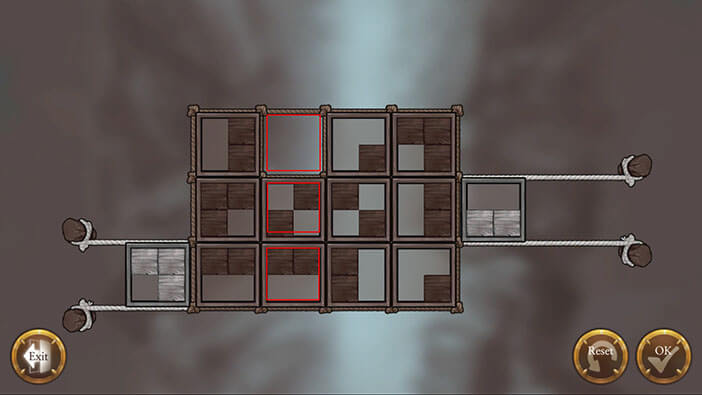
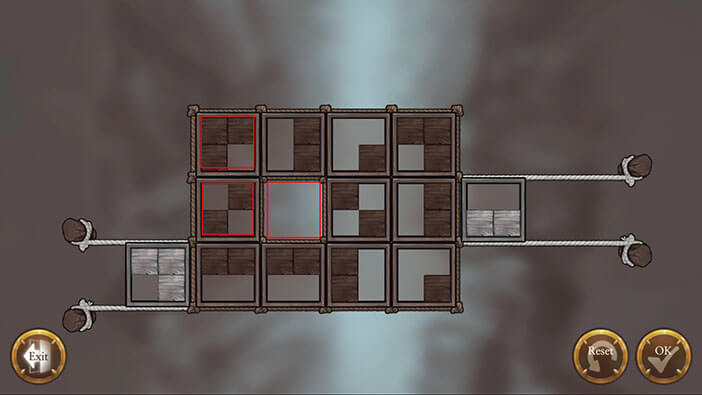
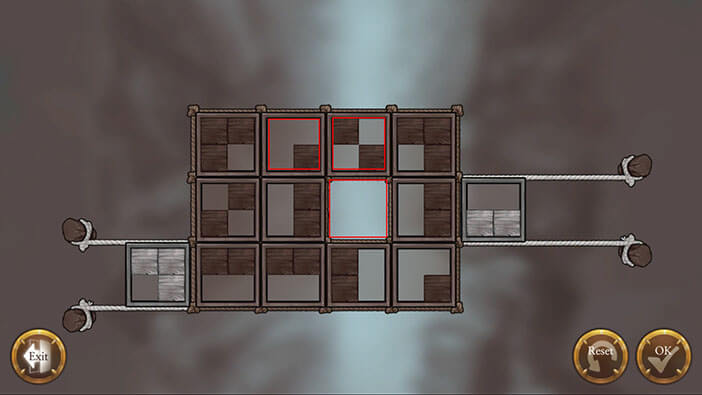
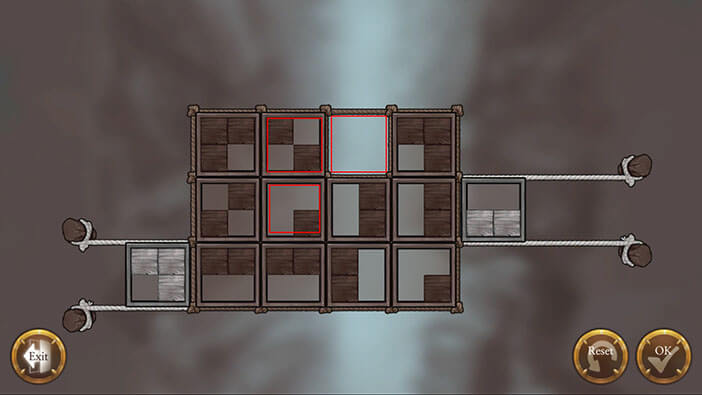
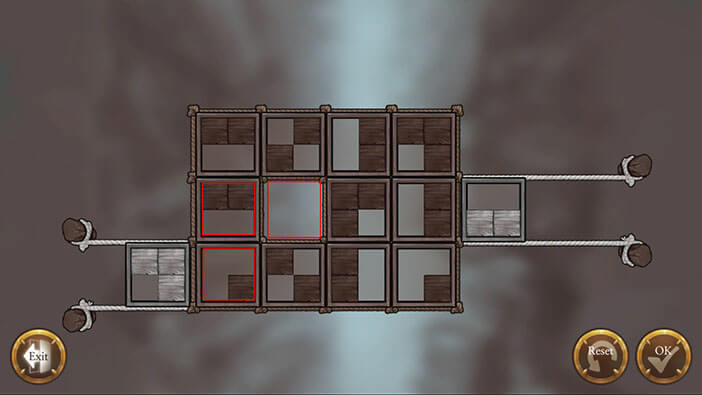
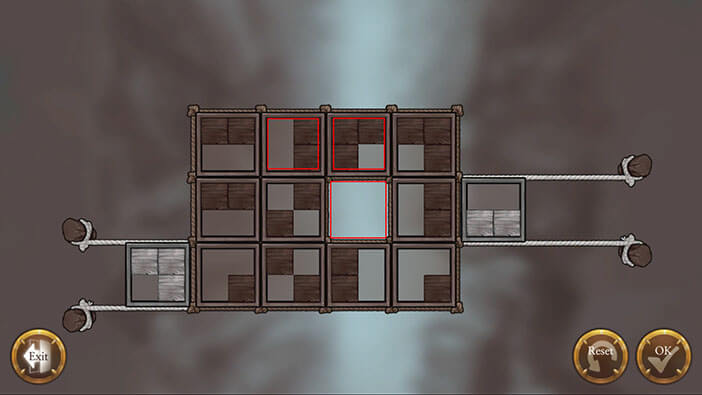
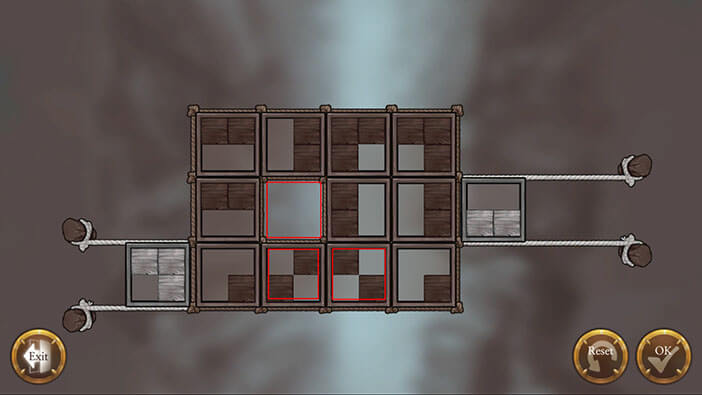
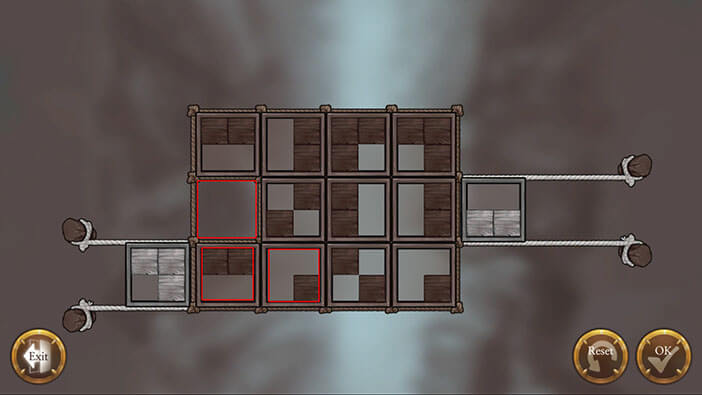
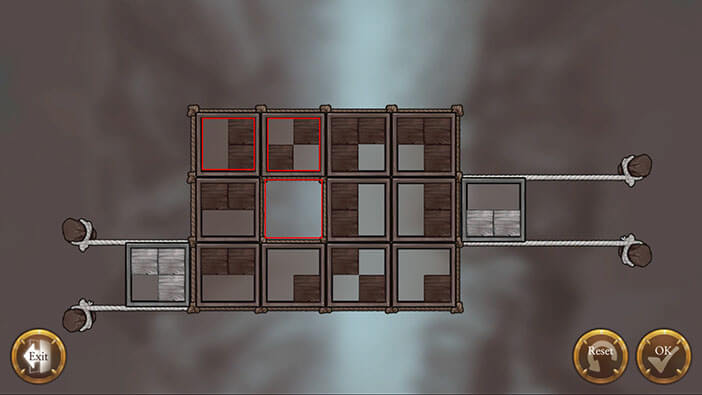
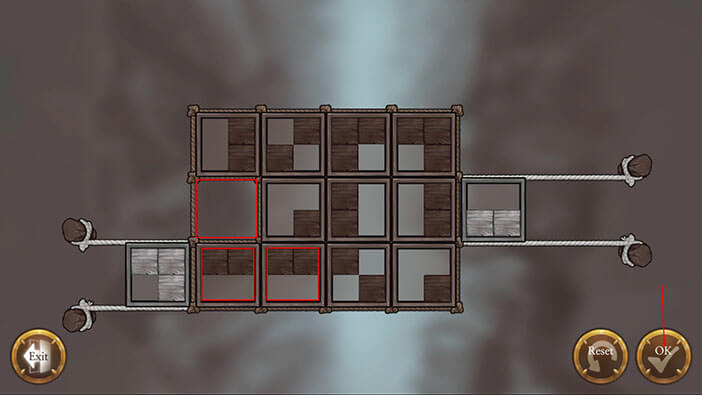
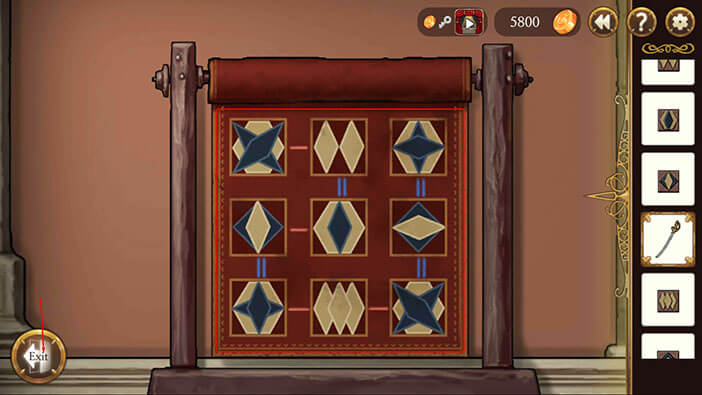
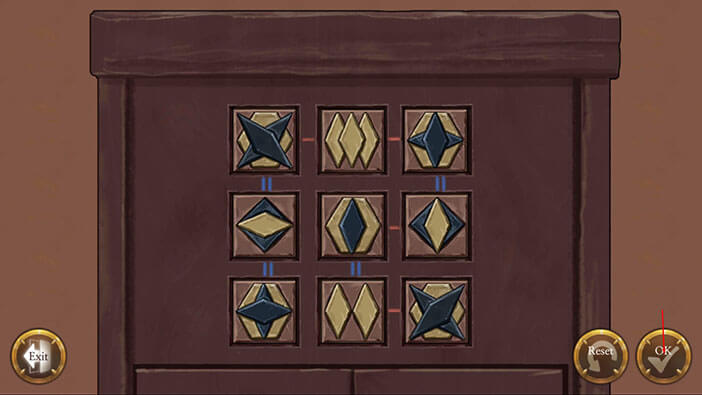
Ok, we now have all five wooden pieces, but we still don’t know how to arrange them. Tap on the carpet to examine it more closely.
There is no easy way to explain this. We will just have to try to memorize the position of the symbols on the carpet.
Tap on the “Exit” button.
Turn around and tap on the door to go back to the other room.
Turn around and tap on the puzzle.
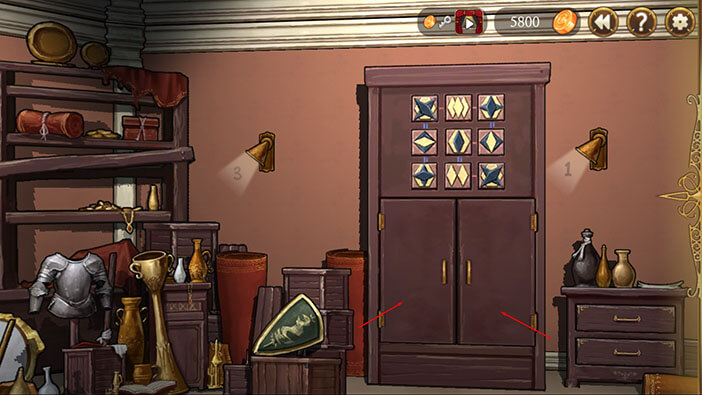
Arrange the wood pieces in the same way as we saw on the carpet and tap on the “Ok” button.
You can see the solution in the image below.
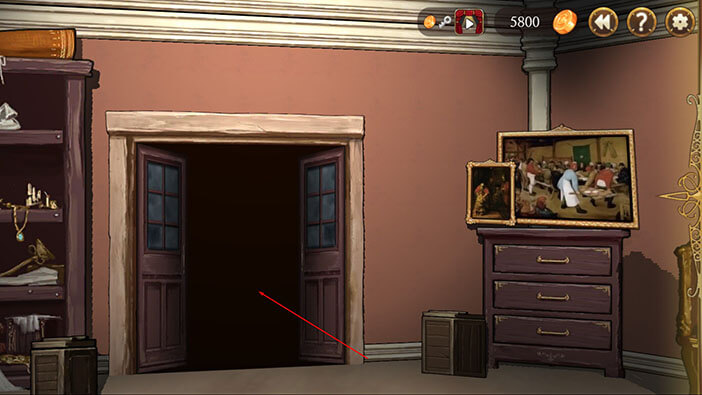
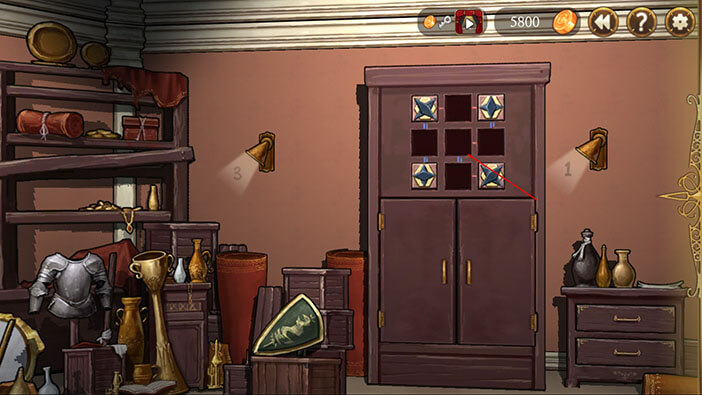
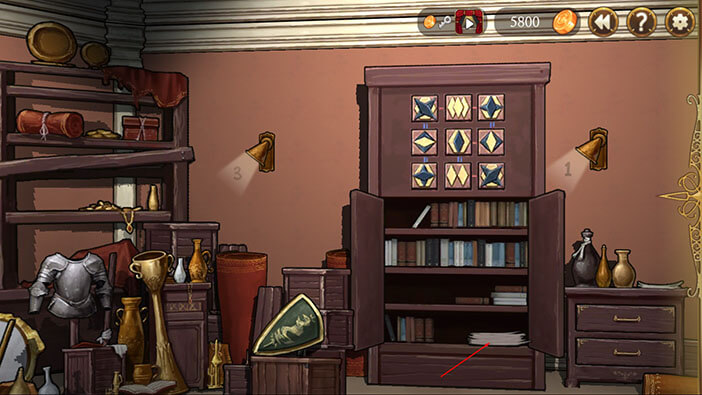
Tap on the cabinet doors below the puzzle to open them.
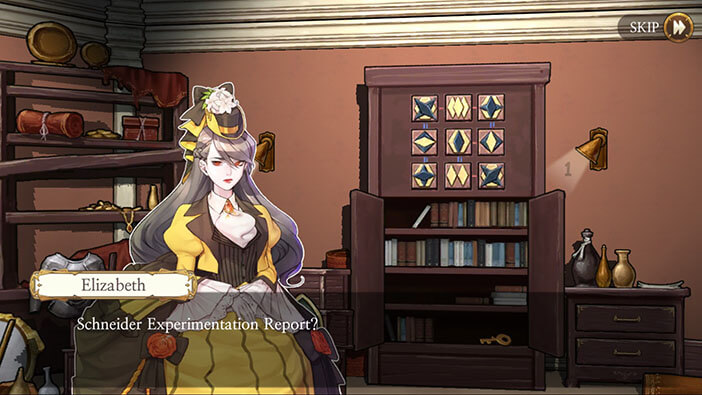
Tap on the files in the lower right corner of the cabinet. After picking up the files Elizabeth realizes that this report about Schneider’s experiment. The name sounds familiar, and, if I am not mistaking, Schneider should be the guy that sabotaged the experiment conducted by Victor’s father.
After Elizabeth picked up the documents we can see that there was a key hidden behind them. Tap on the key to pick it up.
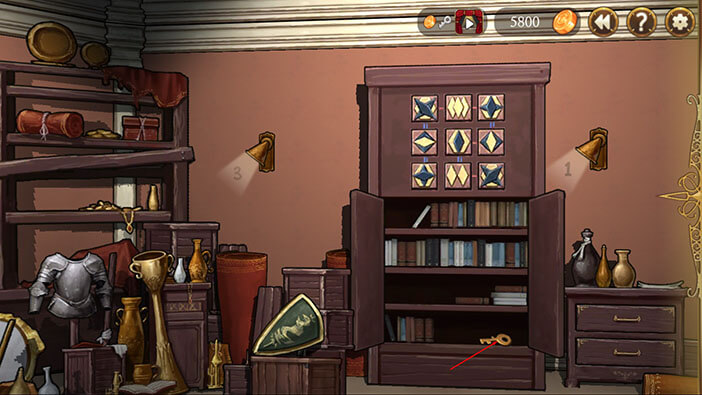
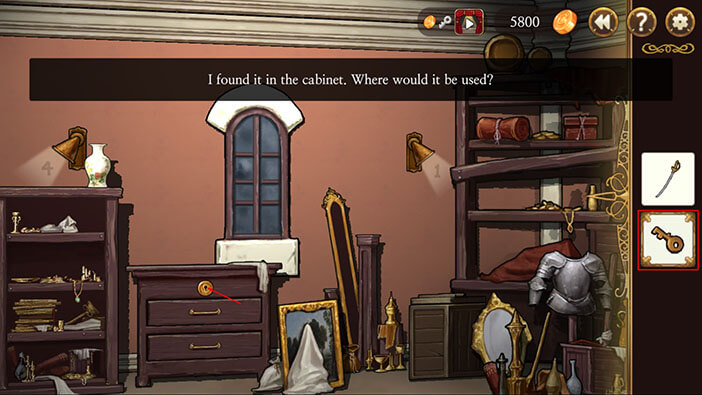
Turn to the left and you’ll see a small cabinet. Select the “Key” from the inventory and tap on the keyhole on the cabinet.
Tap on the bottom drawer to open it, and tap again to pick up the note inside it.

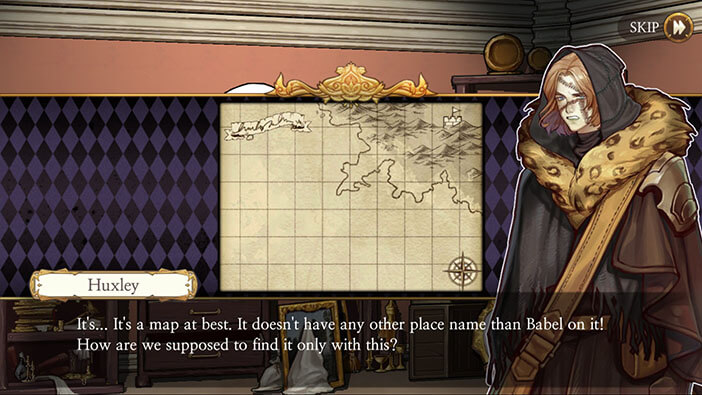
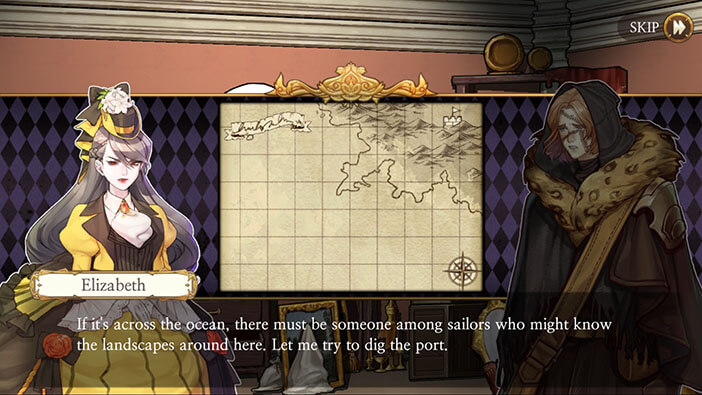
The note is actually a map. Our characters see that Babel is actually a small piece of land, surrounded by the ocean three from three sides. There are no other locations nor landmarks drawn on the map that could indicate the location of this mysterious place.
With this in mind, Elizabeth and Huxley presume that this place is probably somewhere across the ocean. So, they decide to go and look for the sailors that might recognize the landscape drawn on the map, since right now it’s their best bet to find Babel.
Well, they will have to move fast and find and discover the location of the Babel quickly, because the voyage across the ocean will take some time, and the day when a crow flies to the sun is drawing near…
On the positive side, Elizabeth is still determined to find and kill Samuel, no matter the cost.

In the next stage, we will be playing as Elizabeth and Huxley duo once more, as they seek the competent sailors who can recognize the landscape on the map, and sail them across the ocean, to Babel. Join us in the next stage of the Walkthrough for Frankenstein Room ESC, so we can discover together how the search for an experienced captain with the ship and crew capable of the oceanic voyage will go…
Thank you for reading.