Chapter 3-4 Death-Row Inmate's Memory
Complete Walkthrough
Hello everyone, and welcome to our Walkthrough for the Fourth Stage of Chapter 3 for the Frankenstein Room ESC adventure game. In this stage, we will be playing as reanimated Huxley. In the previous stage, we found out that he is our mysterious protagonist.
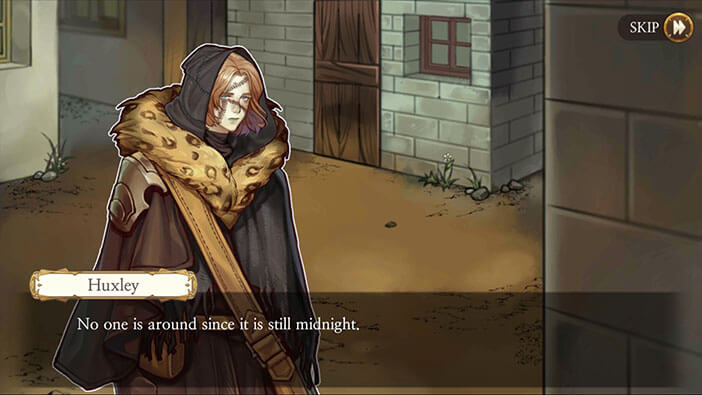
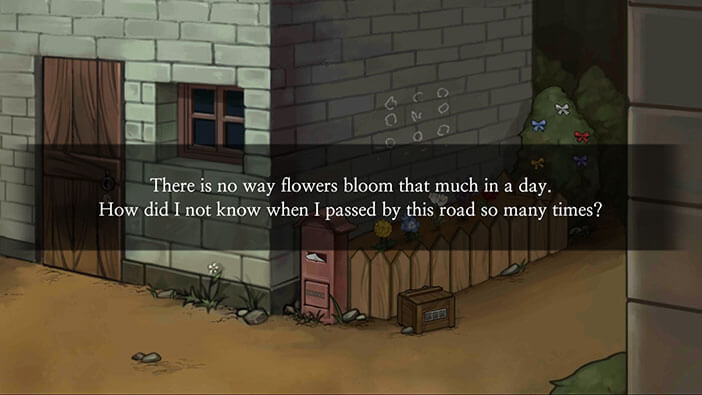
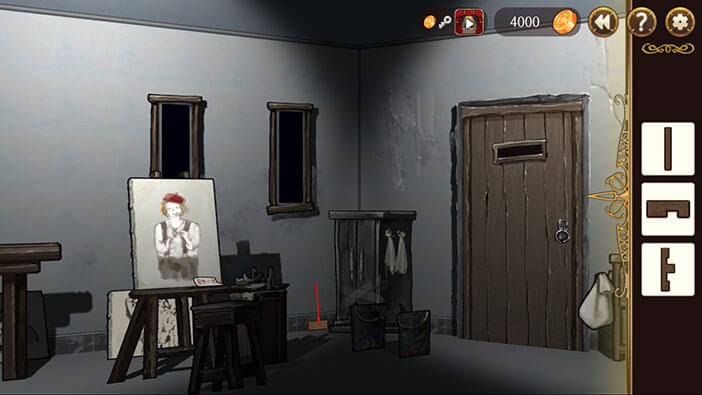
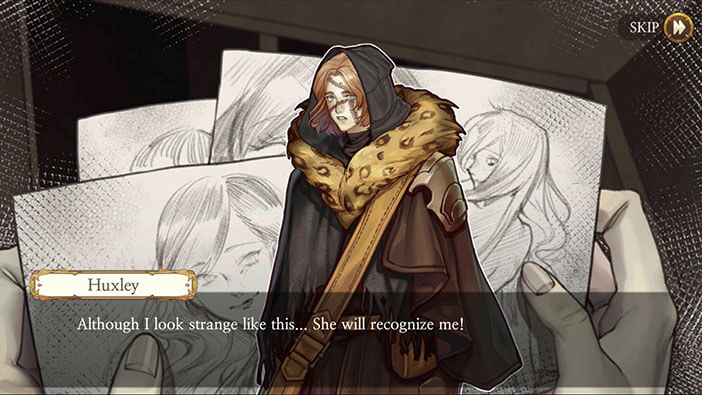
After jumping through the window, Huxley ran for hours, ignoring the stormy weather and heavy rain. He kept asking himself questions like why was he brought back life, and why was he slain in the first place? After overcoming the self-pity, the desire to find out more about his previous life awakened, and that’s how this stage starts, with Huxley coming back to his old home.
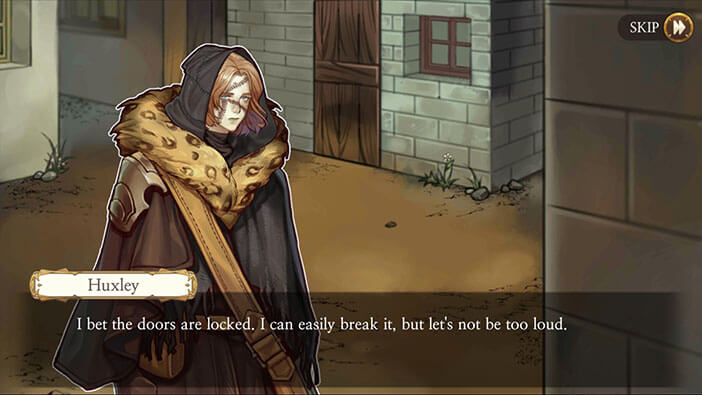
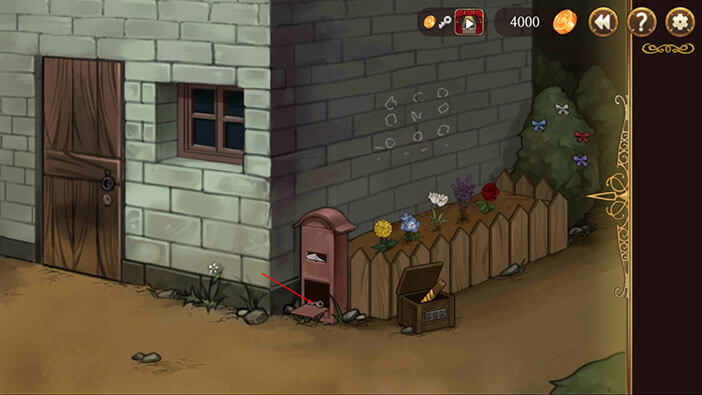
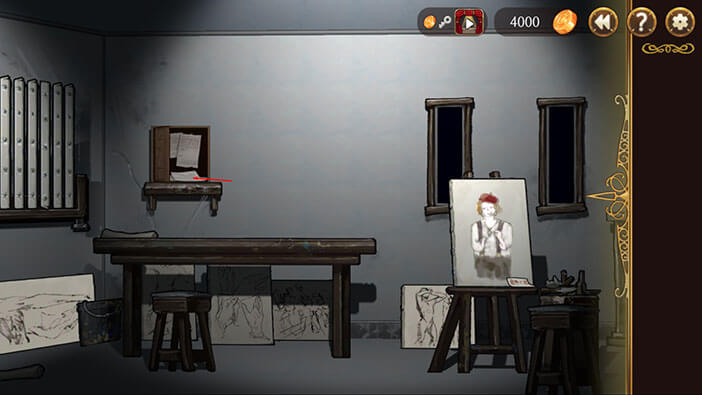
He arrived at midnight, so there weren’t many people on the streets. He briefly had a flashback of a memory from his previous life and saw himself painting. He concluded that the door must be locked, and decided to look for a key, rather than break it down.

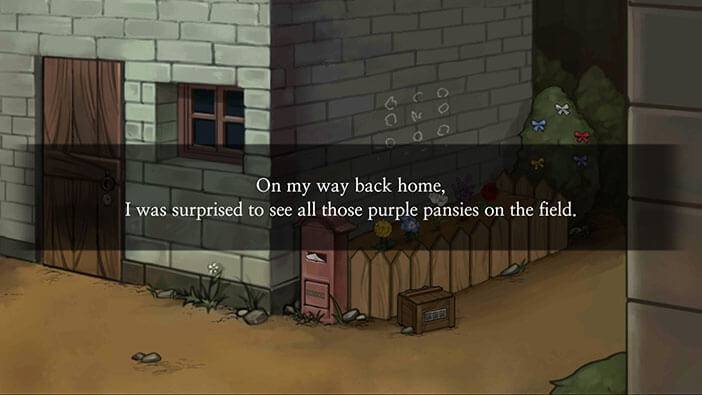
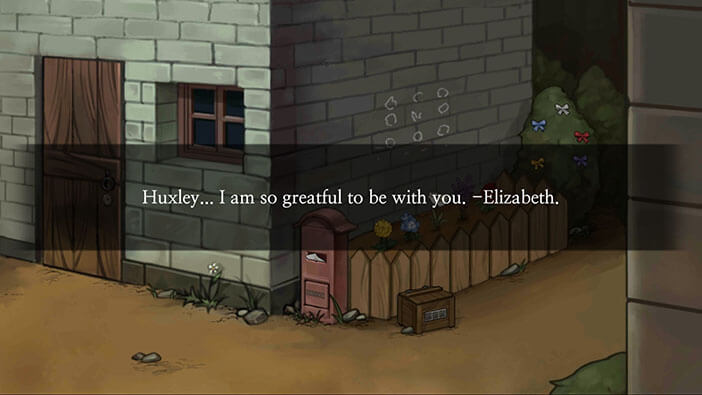
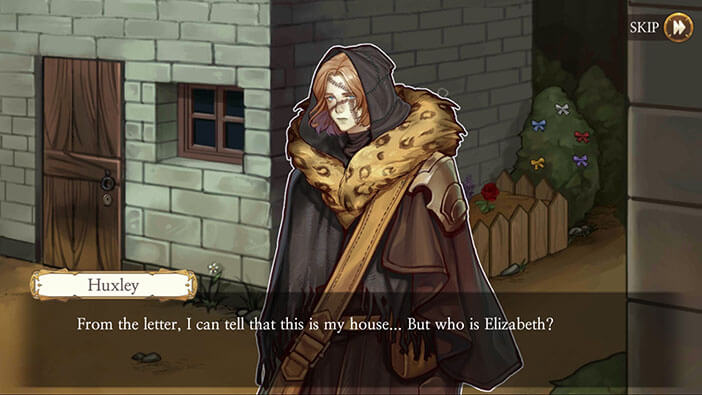
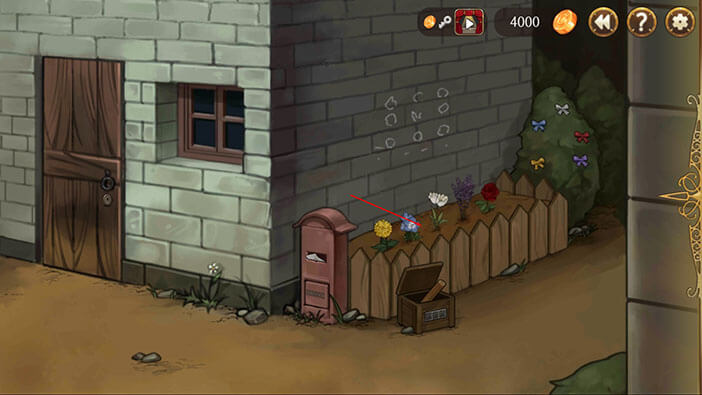
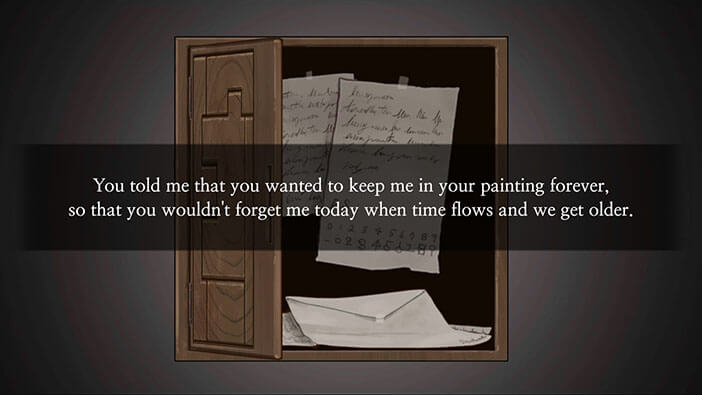
Tap on the letter inside the mailbox to read it. From the letter, Huxley discovers, that Elizabeth’s life is changing and she started to notice flowers and other beautiful things after she met him. She would also like to plant flowers with Huxley tomorrow. Our protagonist knows that he was Huxley in the previous life, but has no idea who Elizabeth might be.
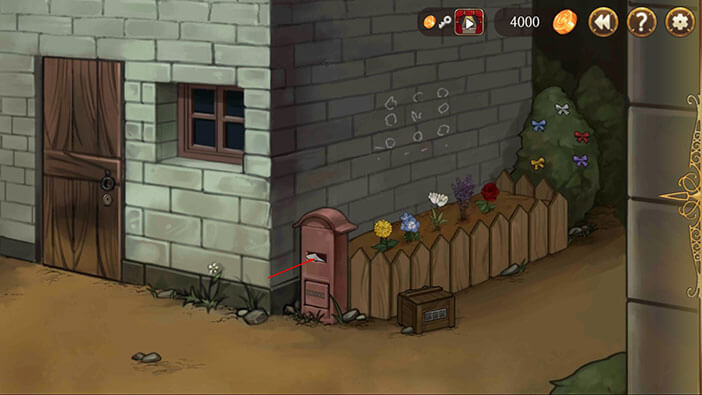

Tap on the markings on the wall above the flowers to take a closer look.
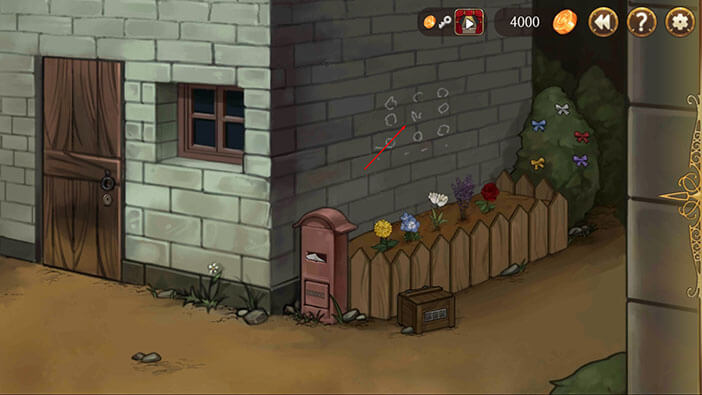
As you can see this is some kind of scheme. The drawing in the lower right corner (exclamation mark inside a circle) where the number one should be is a starting point. We can conclude that by looking at the symbols below the scheme.
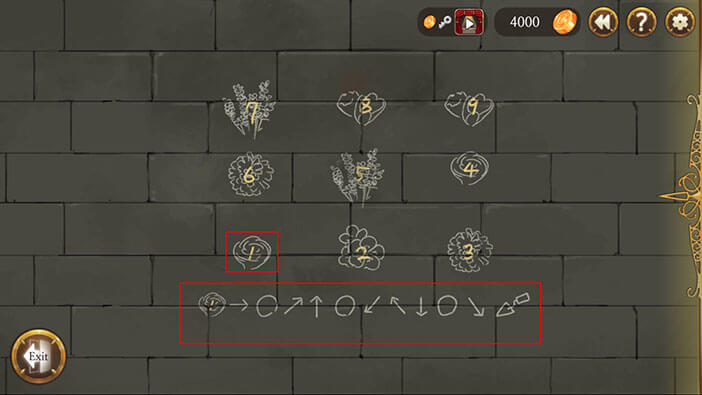
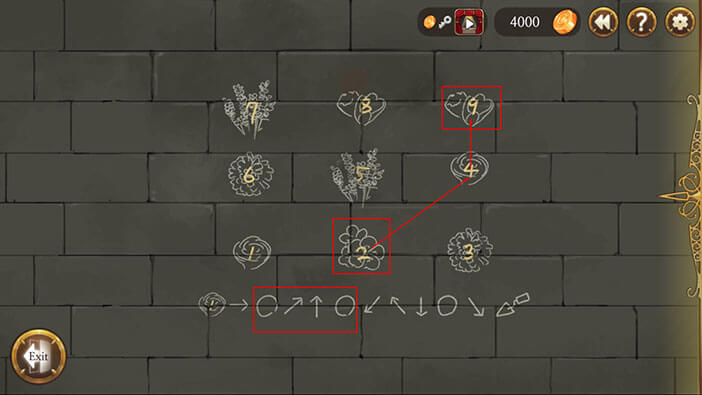
Let’s try to decipher it. So, from the starting position, we should move one field to the right. This is field number 2, so our first number is number 2.

We are now at field number 2. Looking at the arrows, we should move to the field on the upper right side of the number 2, and that brings us to number 4. From here, we should move one field upwards to a number 9 field, and that brings us to a second position (marked with a circle). So, our second number is number 9.
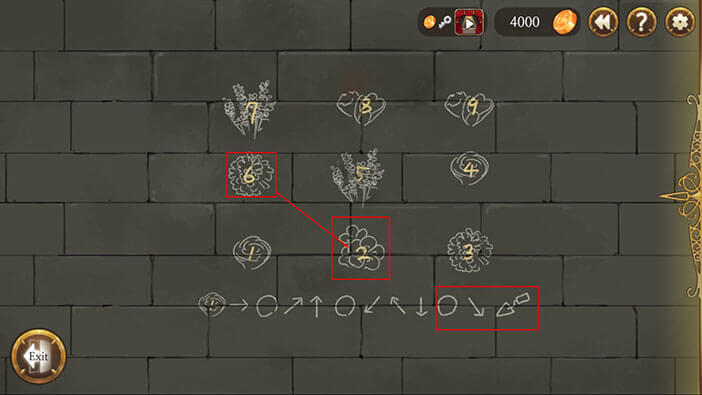
We are now at field number 9. Looking at the arrows, we should move to the field on the lower left side of the number 9, and that brings us to the number 5. From here, we should move one field up and to the left, and that brings us to field number 7. From here, we should move one field downwards to a number 6 field, and that brings us to a third position. So, our third number is number 6.
When we put it all together the code is “2, 9, 6”.

Since we’re already looking at the scheme, let’s also decipher the last step. We are at position number 9, and from here we should move down and to the right, and that would bring us back to number 2. So, we should dig at field number 2.
Tap on “Exit”.
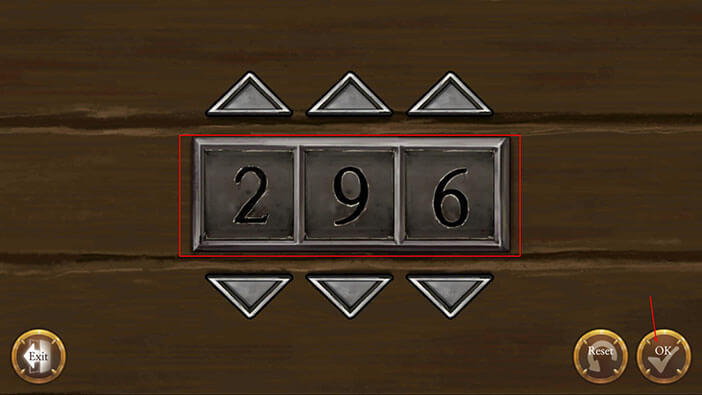
Tap on the numerical lock on the wooden box, and let’s enter the code that we figured out by solving the previous puzzle. Enter “296” and tap on the “OK” button to confirm.

Tap on the wooden box to open it, and tap on the garden trowel to pick it up. We now have a tool that can be used for digging, so let’s check out the flowers.


Tap on the small garden. We already concluded by solving the previous puzzle, that the number 2 is the correct digging location. If we are counting from left to right, the number 2 position should be just below the blue flower. So, select the “Garden Trowel” from the inventory and tap twice on the ground below the blue flower.
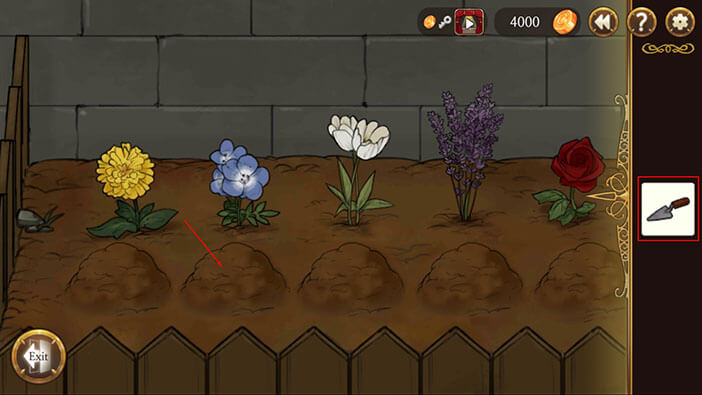
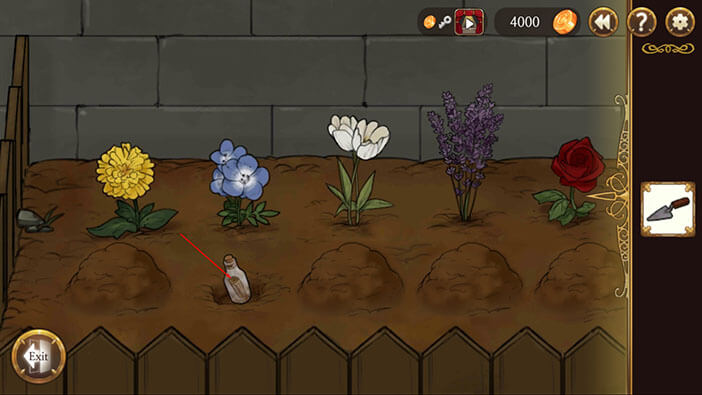
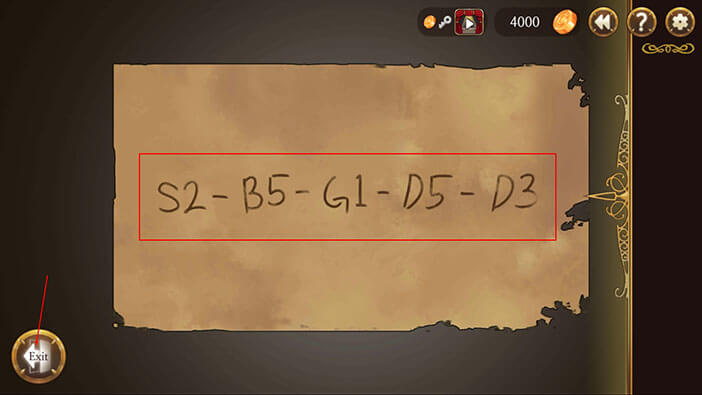
We dug up a small bottle. Tap on it to pick it up. There is a note in the bottle with numbers and letters. S2 – B5 – G1 – D5 – D3. Try to memorize this note, as we will probably need it later.
Tap on “Exit”, twice.
Tap on the bush on the right, decorated with ribbons.
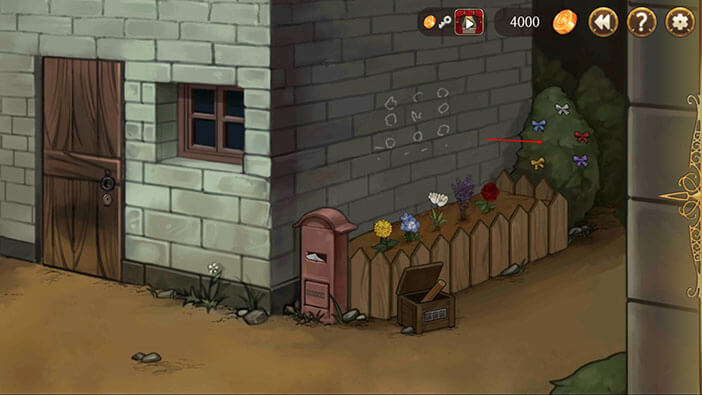
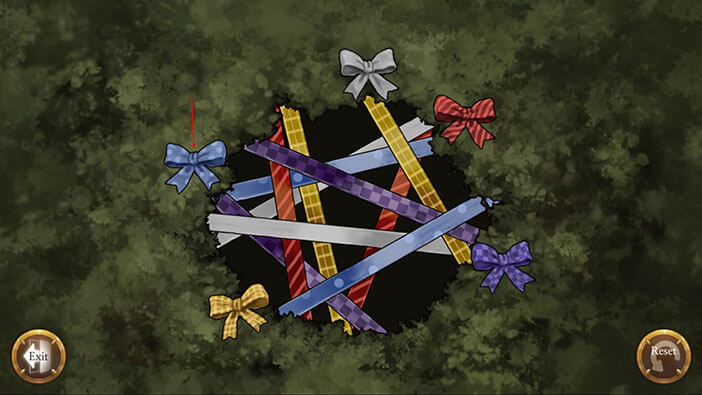
This is our next task. There are strips of different colors strung across the hole in the bush. We can remove the strips by tapping on the ribbon of the matching color. However, the top most strips should be removed first. Let’s get started.
Step 1: Tap on the blue ribbon to remove the blue stripe.
Step 2: Tap on the purple ribbon.
Step 3: Tap on the yellow ribbon.
Step 4: Tap on the white ribbon.
Step 5: Tap on the red ribbon.
Step 6: Tap on the purple ribbon.
Step 7: Tap on the blue ribbon.
Step 8: Tap on the yellow ribbon.
Step 9: Tap on the white ribbon.
Step 10: Tap on the red ribbon.
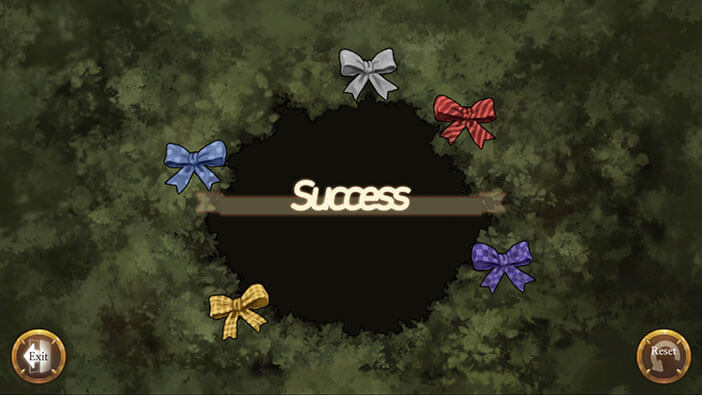
After solving this puzzle “Yellow Ribbon” will be added to the inventory.
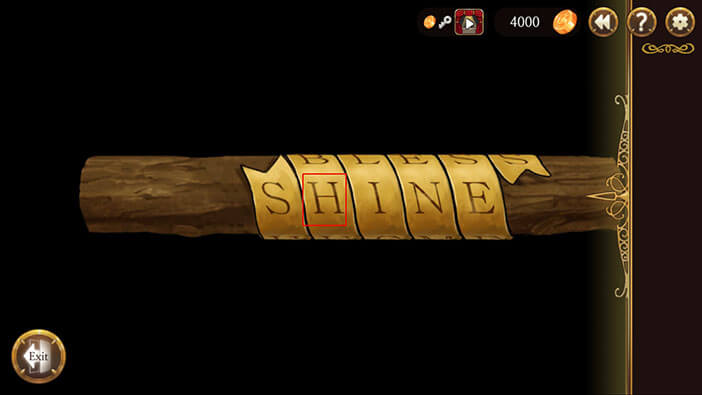
Select the “Yellow Ribbon” from the inventory and tap on the wooden stick that is sticking out from the box.

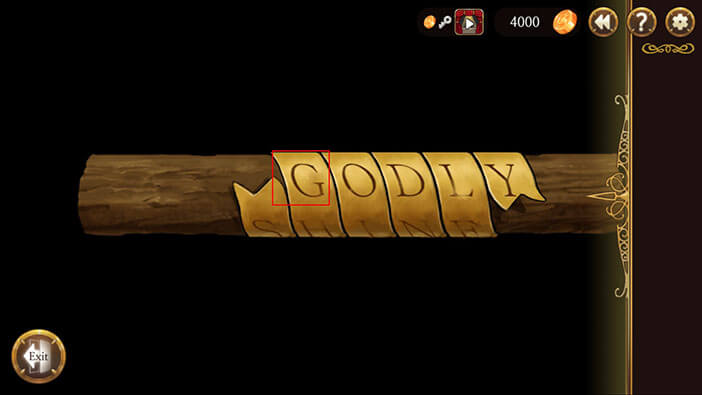
Tap on the wooden stick again, and you can see “Goldy” written on the yellow stripe wrap around it. Tapping on the wooden stick again will rotate it, showing different words, there are four words in total.


At this point, the note from the bottle would really come in handy, so I will write it down here – S2 – B5 – G1 – D5 – D3. The first letter on the note also represents the first letter of the word written on the ribbon that is wrapped around the wooden stick. Try saying that five times fast.
With that in mind, tap on the wooden stick and look for a word starting with the letter “S”.
The word is “Shine”, and our note says S2, so we need a second letter of this word. So, our first letter is “H”.
Tap on the wooden stick again and look for a word starting with the letter “B”.
The word is “Bijou”, and our note says B5, so we need the fifth letter of this word. So, our second letter is “U”.

The word starting with the letter “G” is “Goldy”, the default word. The note says we need G1, and that’s basically G, so our third letter is “G”.
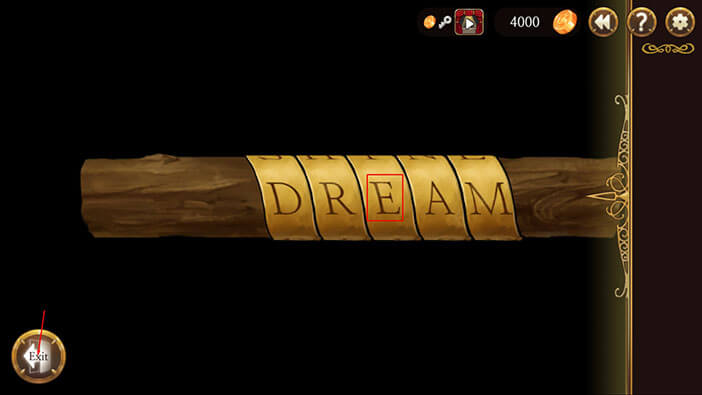
Tap on the wooden stick again and look for a word starting with the letter “D”.
The word is “Dream”, and our note says D5, so we need the fifth letter of this word. So, our fourth letter is “M”.
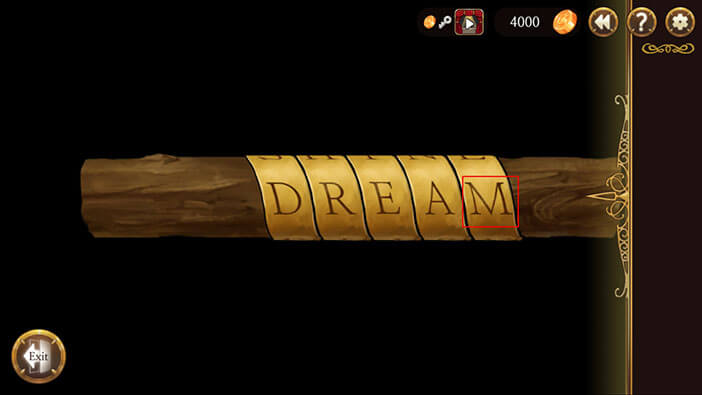
The final entry on the note says D3, and our word is “Dream”, so the fifth and final letter is “E”.
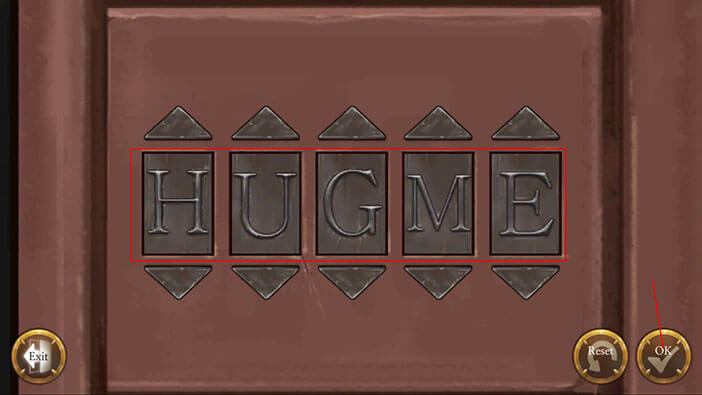
When we put it all together, we get “HUGME”, and that’s our password.
Tap on “Exit”.
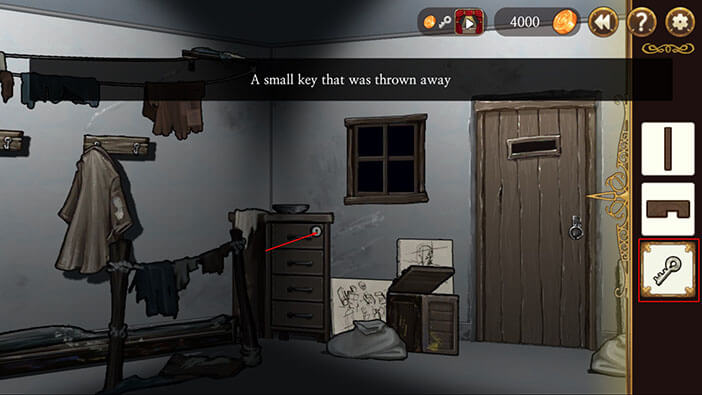
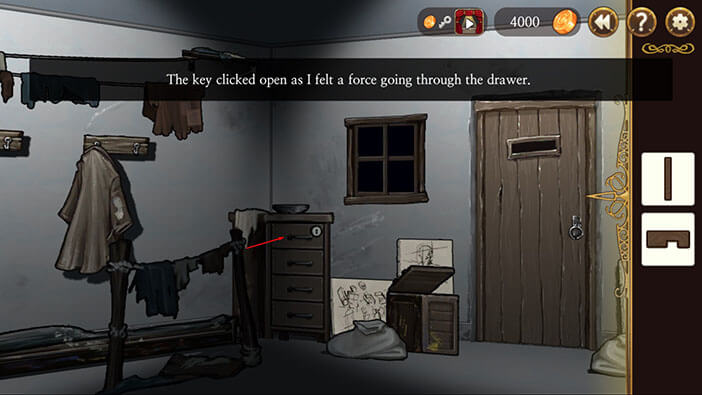
Tap on the lower part of the mailbox.

Enter the password “HUGME” using the up and down arrows, and tap on “OK” to confirm.
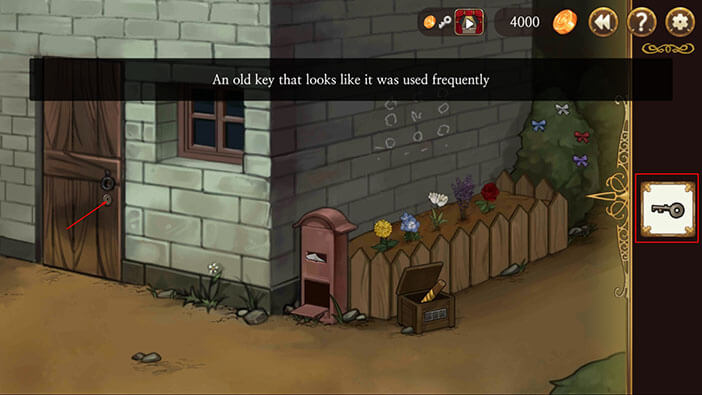
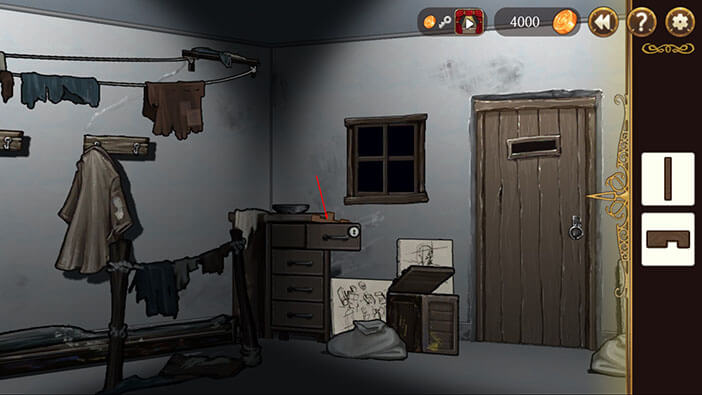
Tap on the lower part of the mailbox to open, and tap on the key to pick it up.

Select the key from the inventory and tap on the keyhole on the front door. Tap again to, finally, enter into the Huxley’s home.
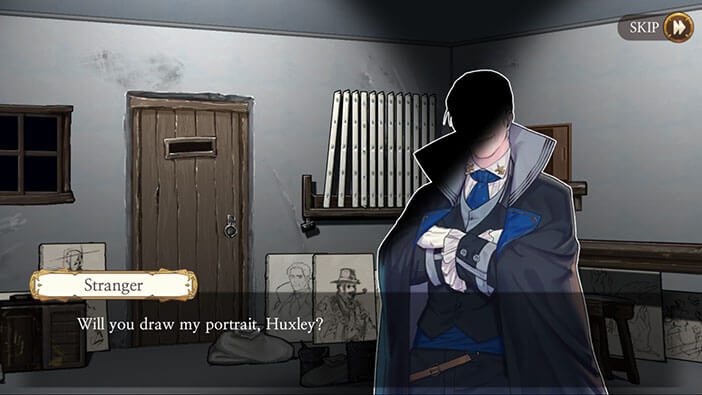
Upon entering his old home, Huxley suddenly has a hallucination and sees some mysterious person, asking him to draw a portrait. Hmm, this person looks like a person who met with Victor Frankenstein, way back, when we played the last stage of his chapter. It also looks like the portrait that we saw in the first rooms of chapter 3-1 in, presumably, Victor’s lab. I am really curious about who this person might be…
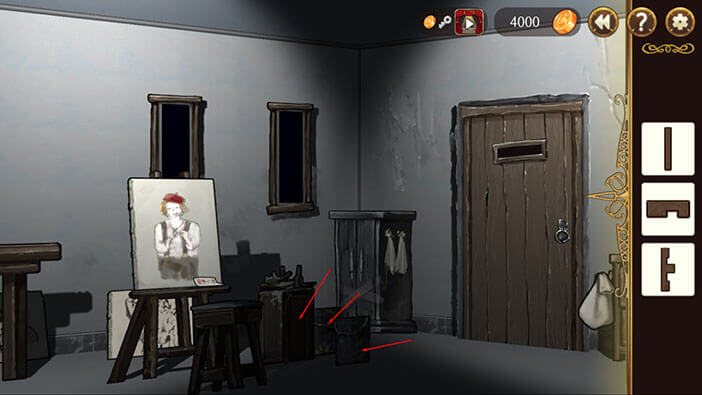
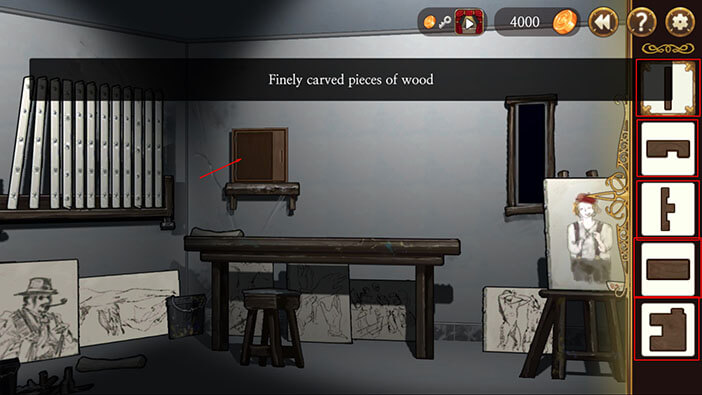
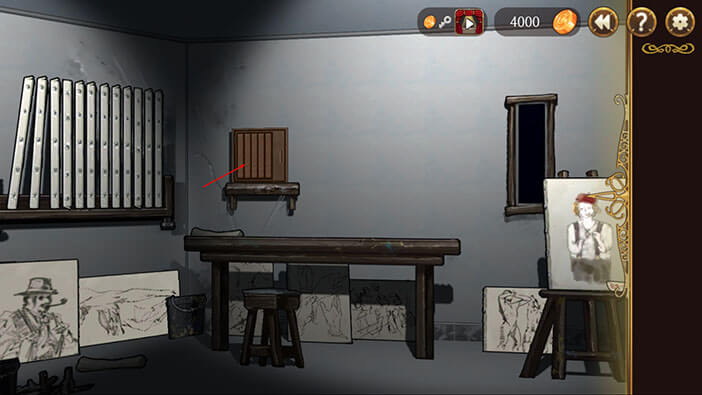
Tap on the wooden box on the left side of the door to open it. Tap again to pick up the “Wooden Piece” inside it, and it will be added to your inventory.
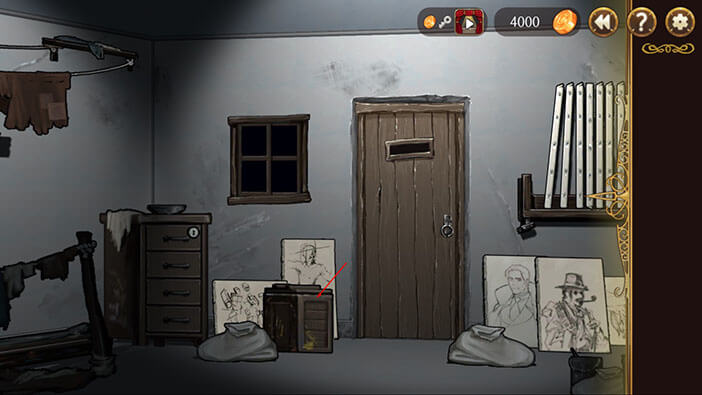
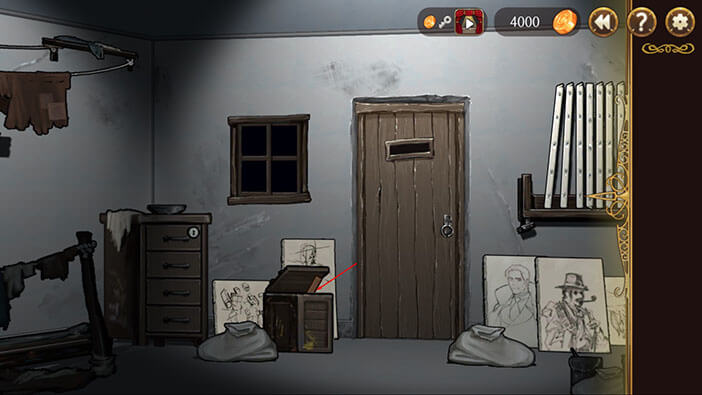
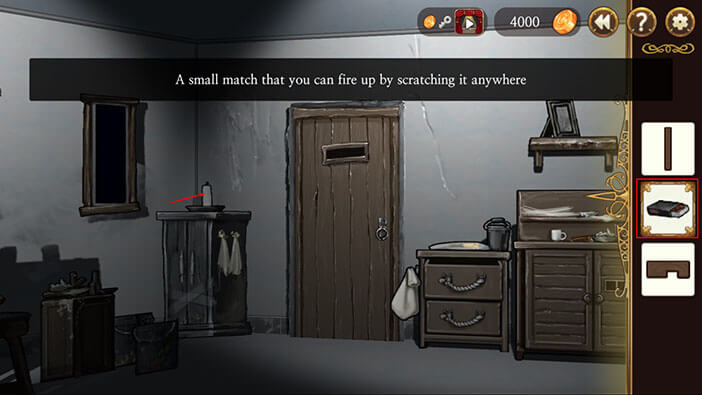
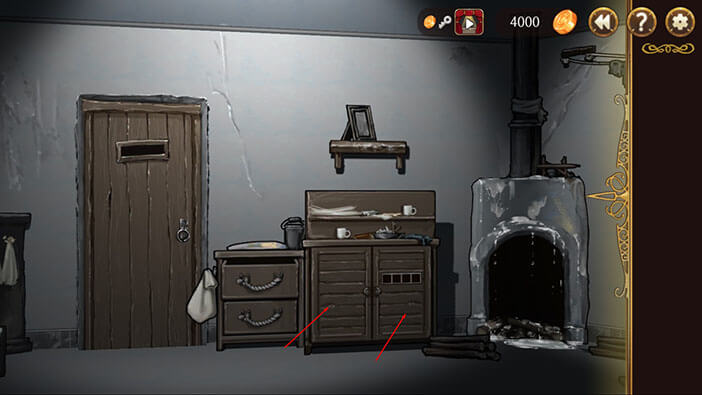
Turn around and face the other door. Tap on the matches, located on the top shelf above the cabinet, to pick them up.
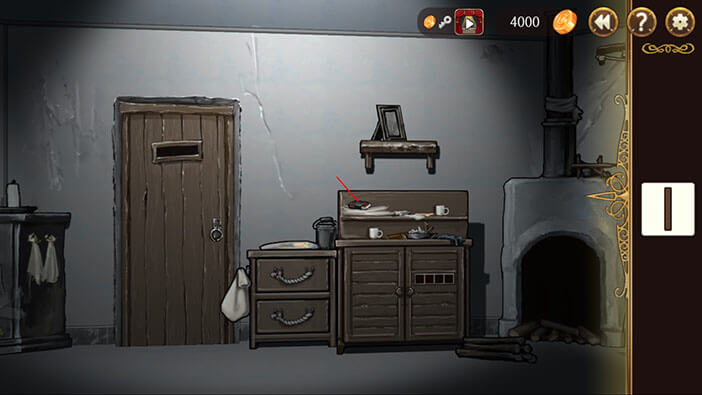
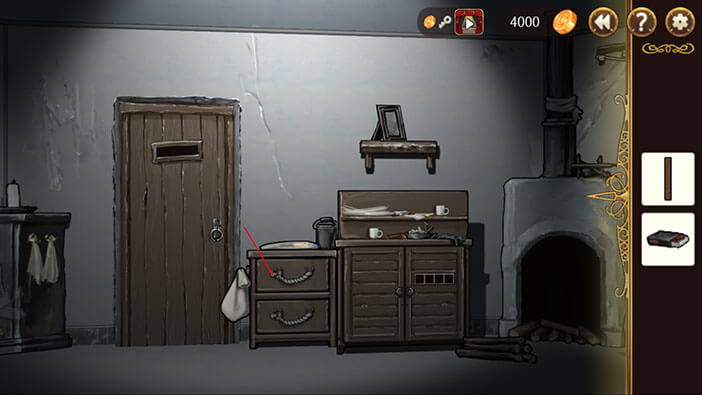
Tap on the top drawer on the left cabinet, and tap again to pick up the wooden piece inside it.

Turn a bit more to the left until you spot a candle. Select the matches from the inventory and tap on the candle to light it up.
Tap on it again, and the “Lighted Candle” will be added to your inventory.
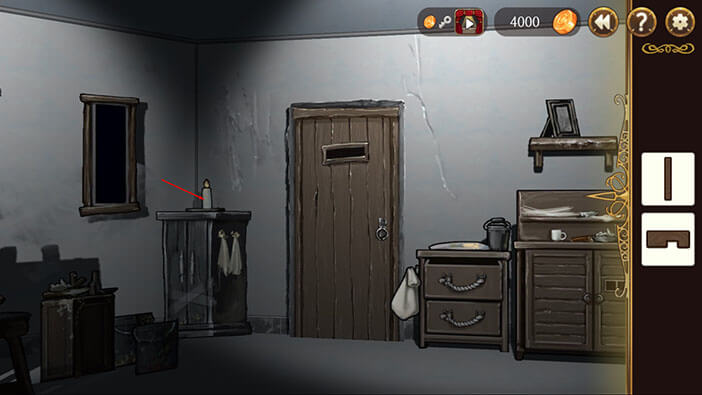
Turn a bit more to the left and tap on the water bucket to pick it up.
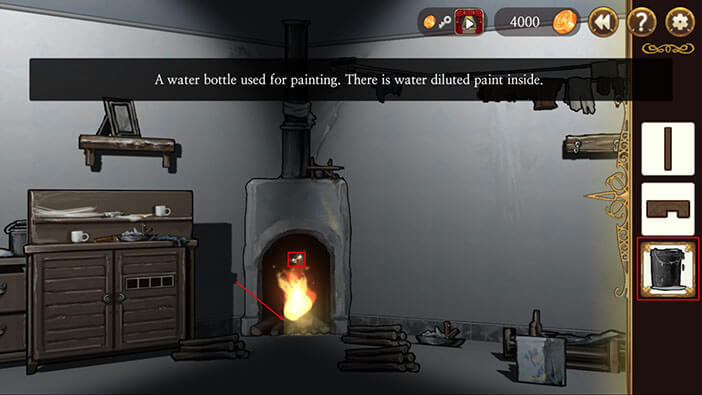
Now, let’s turn around again and face the fireplace. Select the “Lighted Candle” from the inventory, and tap on wood inside the fireplace to start a fire.
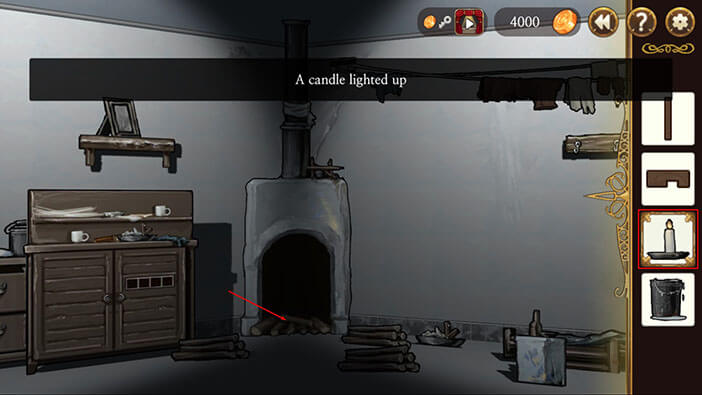
After starting the fire, we can see a key shining above the flames. Select the water bucket from the inventory and tap on the fire to put it out.
As we extinguished the fire, the key dropped from the fireplace. Tap on the key to pick it up, and it will be added to your inventory.

Turn to the right, and face the cabinet with a keyhole. Select the key from the inventory and tap on the keyhole on the top drawer to unlock it. Tap on the drawer to open it.
Tap on the wooden piece inside the drawer to pick it up.
Turn to the right until you see two buckets and a wooden box, just to the left of them. Tap on the buckets and the box to move them aside, and you will notice another wooden piece that was hidden behind these objects. Tap on the wooden piece to pick it up, and now we have a total of 4 wooden pieces.
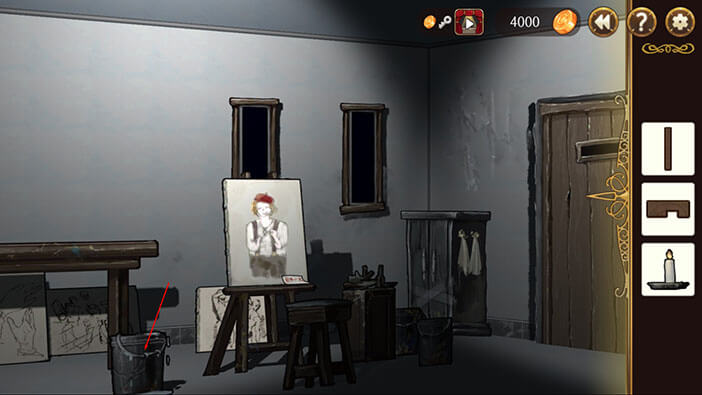
Turn slightly to the left and tap one the table stained with different colors. Tap on the wooden piece to pick it up. Tap on the “Exit” button.
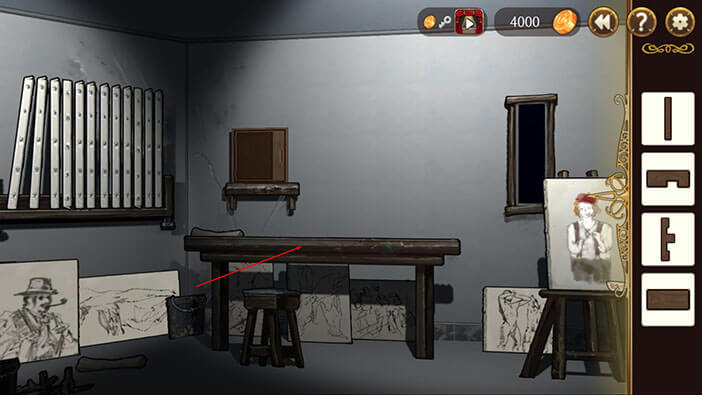
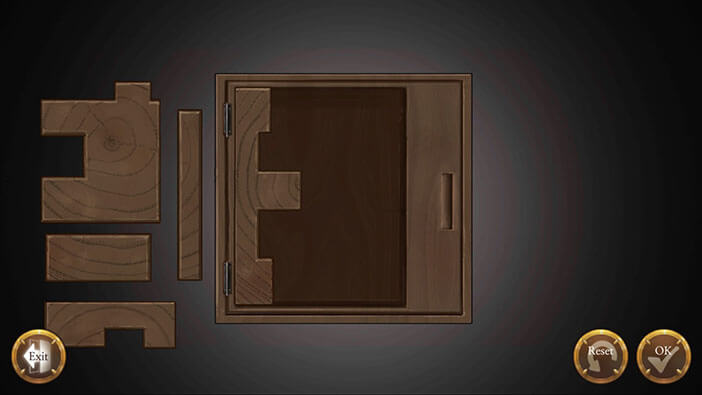
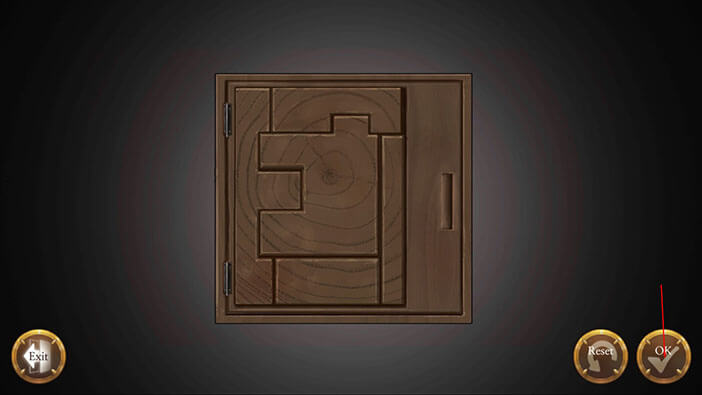
Select the wooden pieces one by one and tap on the box above the table to place them. In total, you should have 5 wooden pieces in the inventory. If you missed some of the pieces, go back to the previous steps, and find them.
After placing all five wooden pieces, tap on the box to start the interaction.
There is another task ahead of us, and that is arranging the wooden pieces inside the box. Let’s start with the piece that is already inside the box. Drag it all the way to the left edge.
The piece in the shape of a wide rectangle should be placed in the bottom left corner, next to piece number 1.

The piece in the shape of a narrow, long rectangle should be placed on the far right, lower corner.
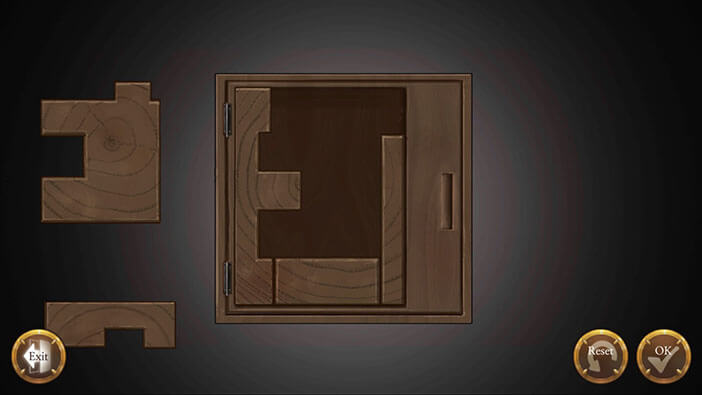
The larger of the two remaining pieces should be placed in the middle so that its bottom edge sits on the wide rectangular piece (piece number 2.)
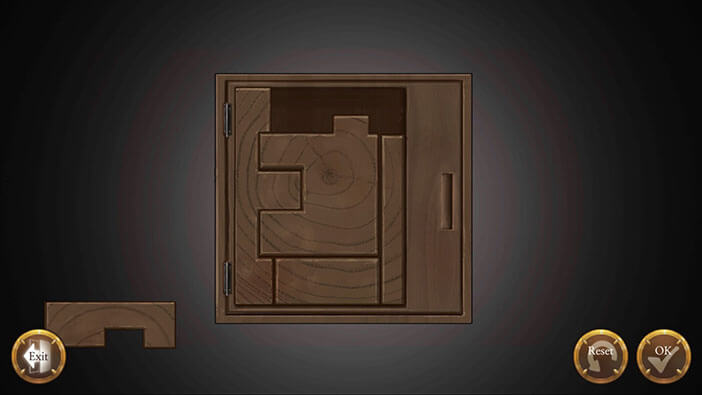
Finally, the last piece should be placed on top of the other pieces. Tap “OK” to confirm.
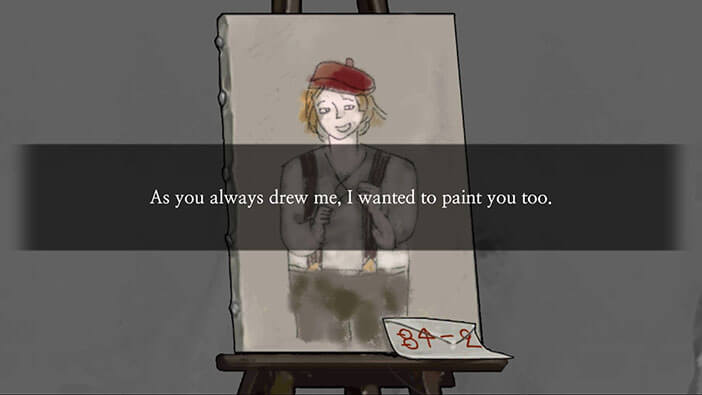
The box is now open, but before we interact with it, tap on the painting of Huxley.
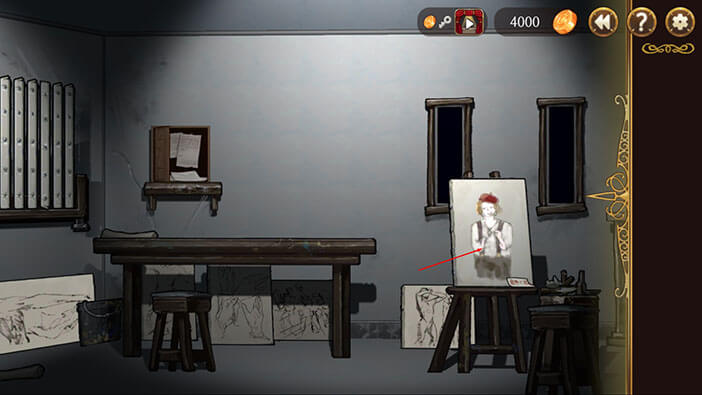
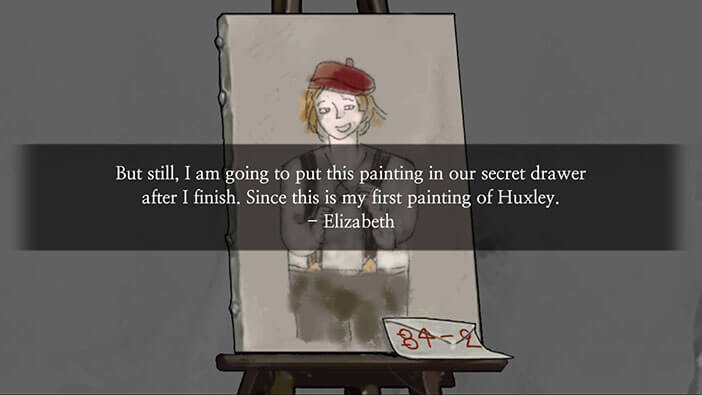
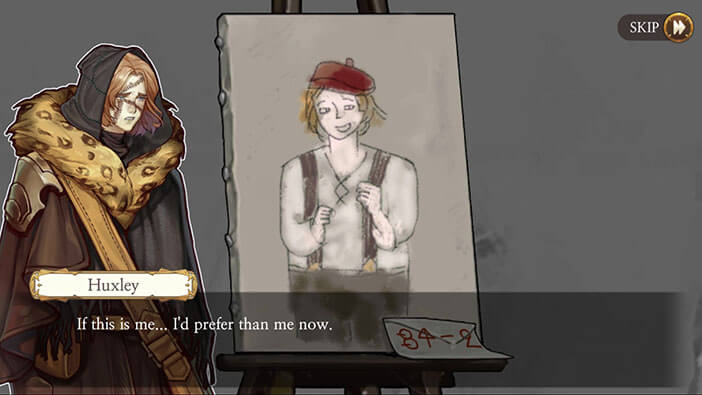
Tap on the painting again, and we will find out that this portrait was painted by Elizabeth, although she’s aware that her painting skills leave much to be desired. After looking at the portrait, Huxley thinks that he looks better now than while he was alive. Also, he concludes that Huxley was poor, but a very happy man, with Elizabeth at his side. He still can’t figure out why was he convicted and sentenced to death.
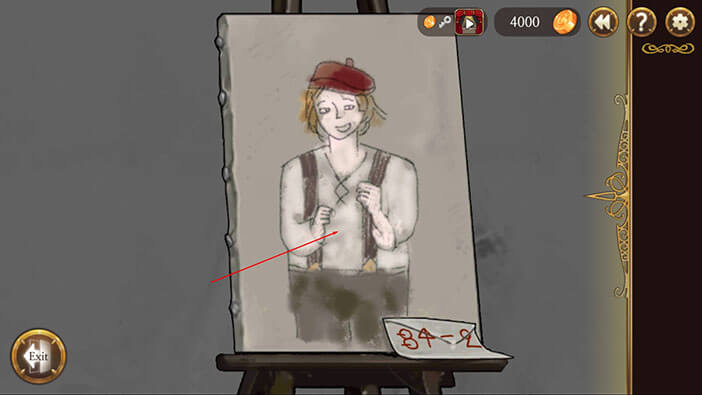
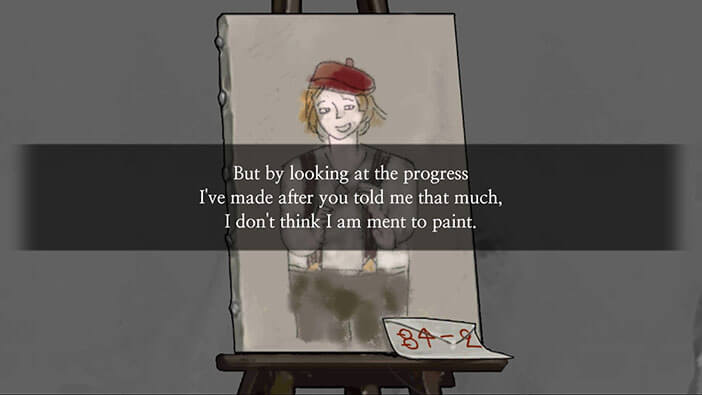

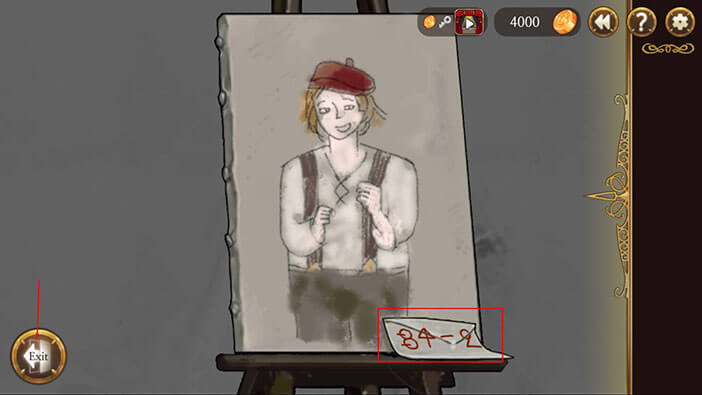
Ok, now take a look at the symbols in the lower right corner of the image and try to memorize them. It something along these lines “8 4 – 2”. Well, the first symbol isn’t exactly number 8, but it’s close enough. Tap on the “Exit” button.
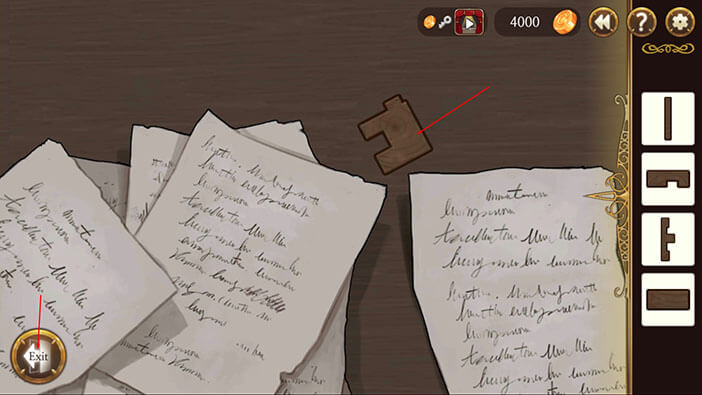
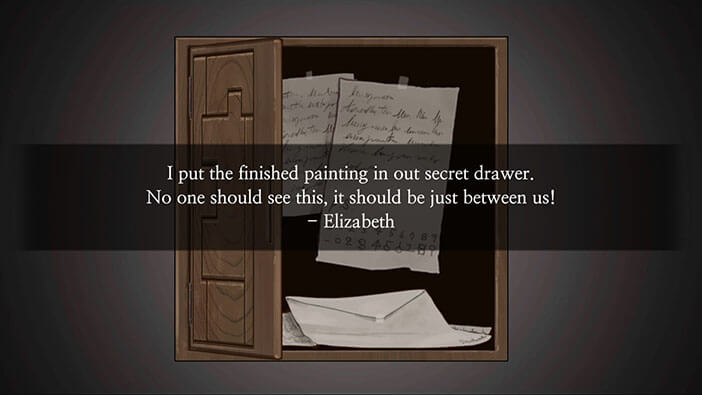
Tap on the letter inside the box. And tap on the letter again to read it.
It seems that Elizabeth has hidden some of the naughty pictures. To open this secret stash, we will first have to decipher the code using the table above the letters.
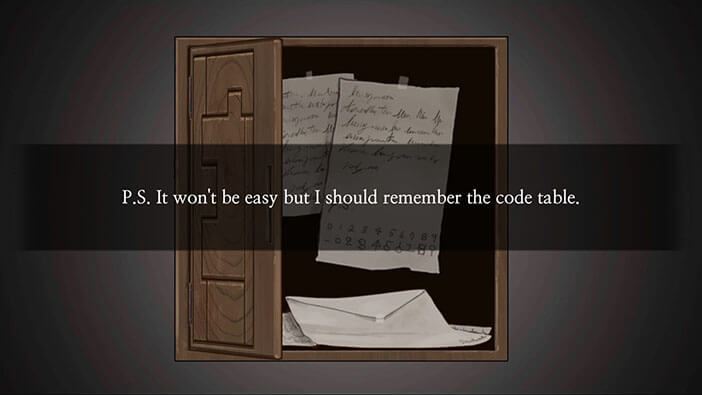
The code is represented by symbols on the portrait of Huxley, which we loosely translated to “8 4 – 2”. In order to decipher the code, we should replace these symbols with the numbers, found on the message inside the box. So, let’s do that.
Our first symbol is 8 (kind of) and the number above it is 3. So, our first number is 3.
Second symbol 4 (kind of) = 4 (second number)
Third symbol – = 0 (third number)
Fourth symbol 2 = 2 (fourth number)
When we put it all together, our code is “3402”.
Tap on “Exit”.
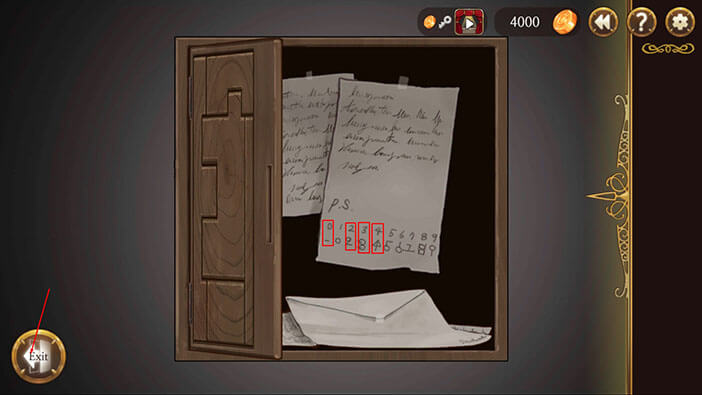
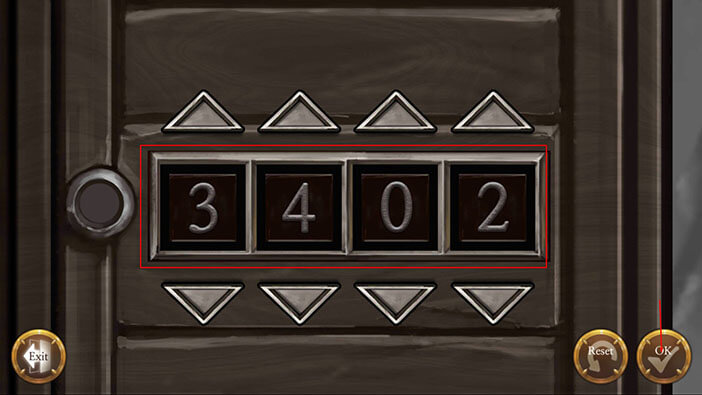
Turn around and tap on the four black squares on the right compartment of the cabinet located to the left of the fireplace.

Enter the code “3402” and tap on the “OK” button. Tap twice and open both cabinet doors.
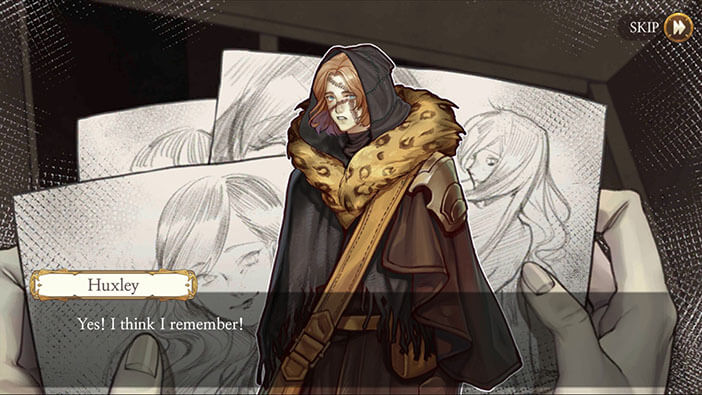
Tap on the pile of papers in the compartment to your right, and Huxley will remember a moment from his past life, after looking at pictures of Elizabeth. He remembers their life together, and how they planned to get married, but only after they manage to convince Elizabeth’s parents to accept their relationship.

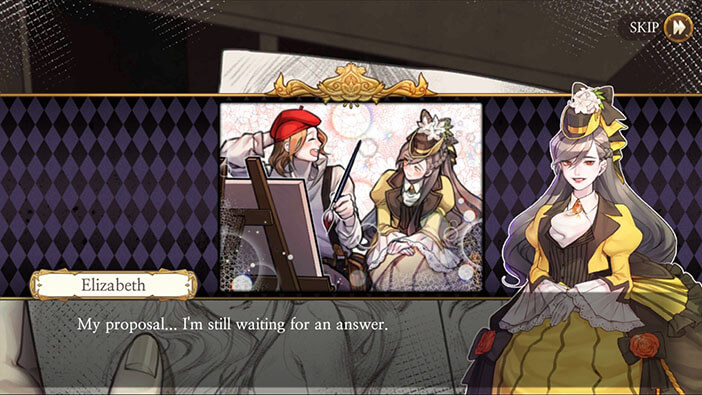
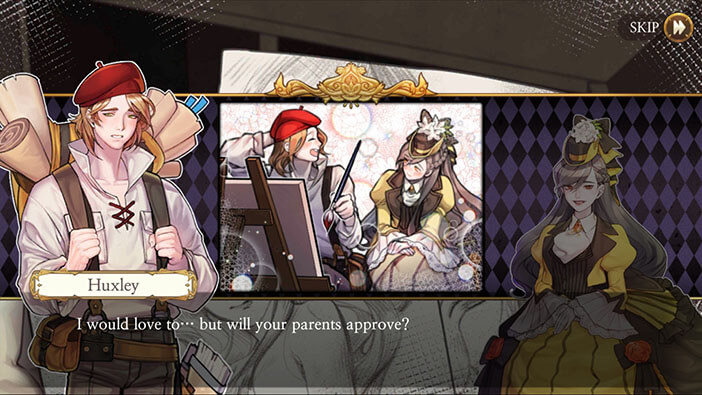
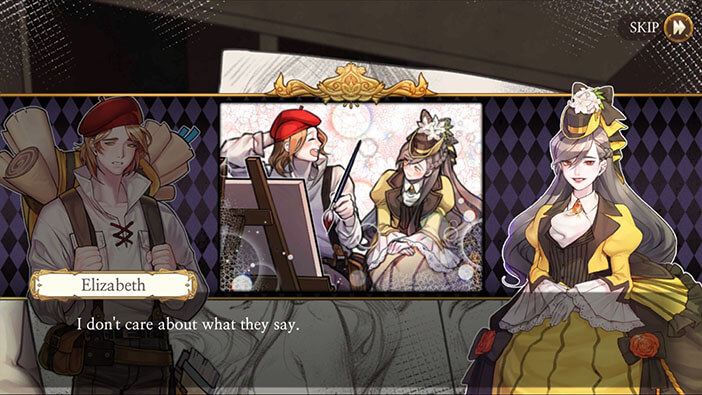

Huxley is now certain that Elizabeth was the love of his life, and decides to go to her.

That brings us to our next task, and here we should help Huxley reach Elizabeth. You can see the solution in the image below.
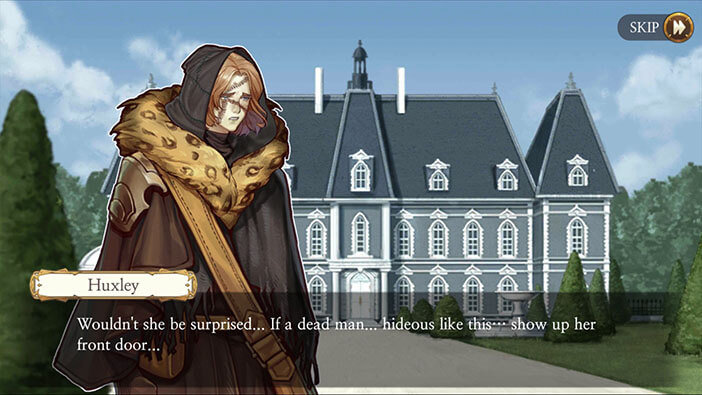
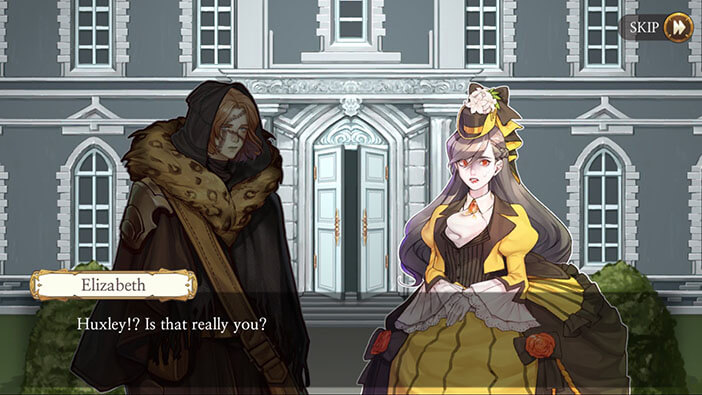
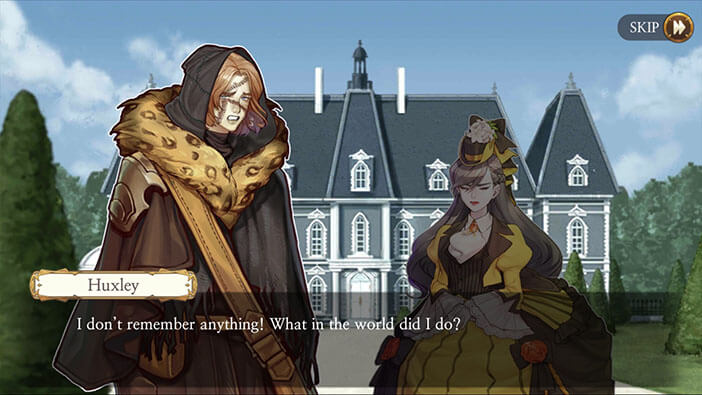
After reaching the Lavenza family mansion, Huxley becomes anxious, realizing how awful he looks, and that it would be quite a shock for Elizabeth to see her dead lover, knocking on her front door. But he musters the courage and decides to do it, anyway.
Tap on the front door.
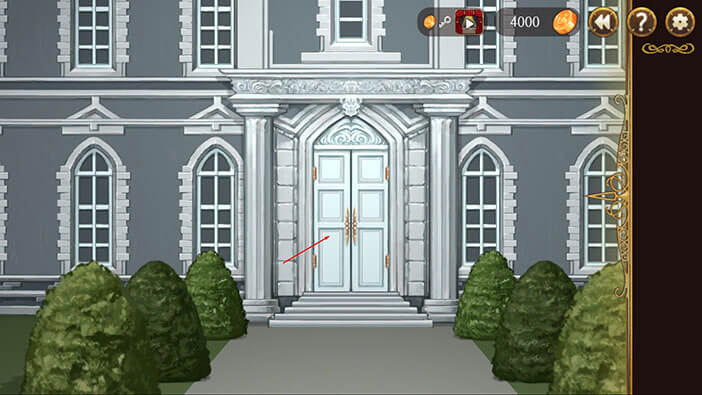
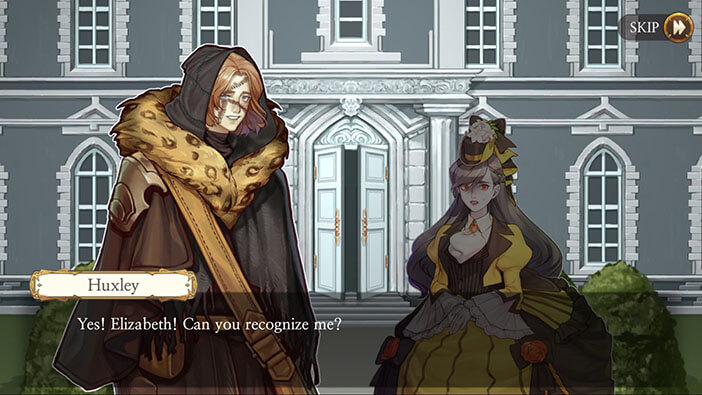
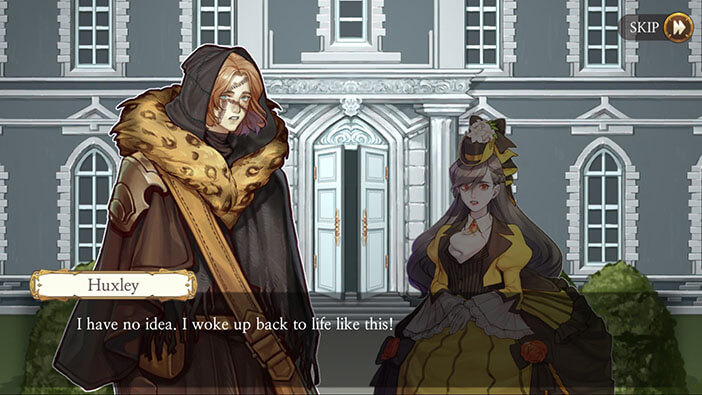
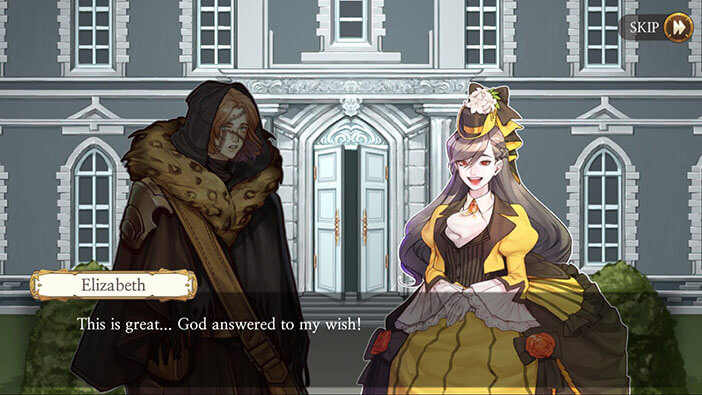
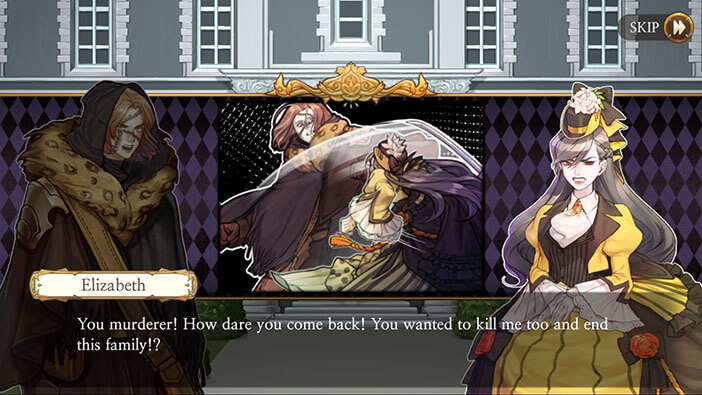
Elizabeth shows up and opens the door after a few moments, and she can’t believe her own eyes when she sees Huxley. Considering the circumstances she took this new realization very well. Of course, Huxley is overjoyed because Elizabeth recognized him. Huxley explains that he has no idea about what happened, he just came back to life at the unknown location, and that’s everything he knows.
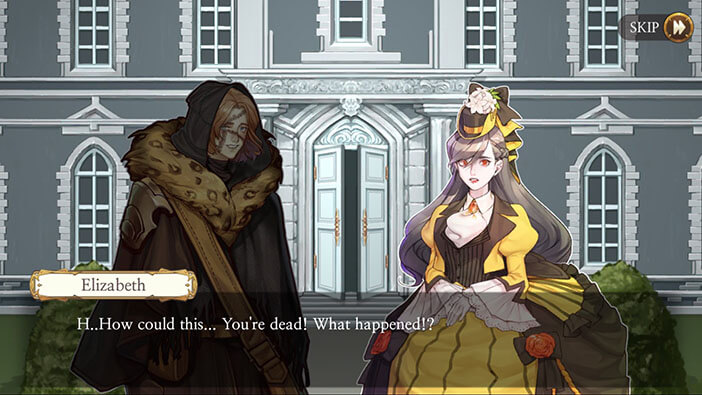
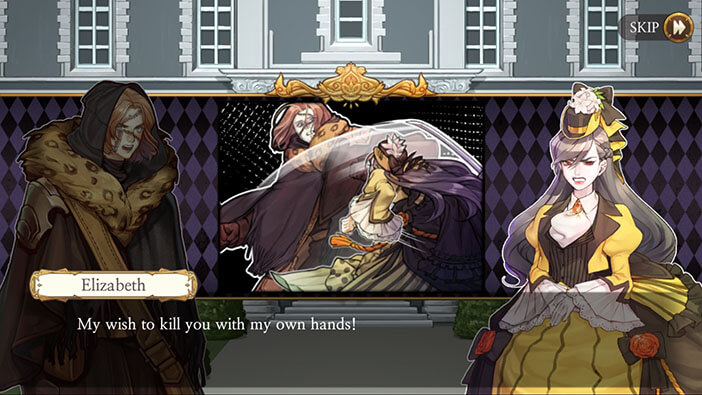
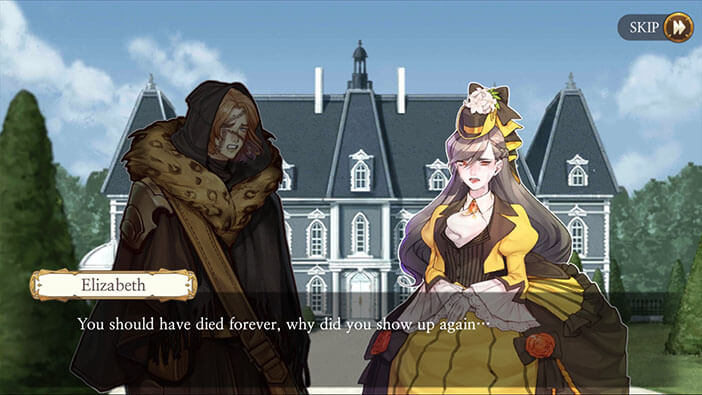
After overcoming the initial shock, Elizabeth seems overjoyed, saying that God answered her wish… And at that moment she draws a sword and attacks, a very confused Huxley…
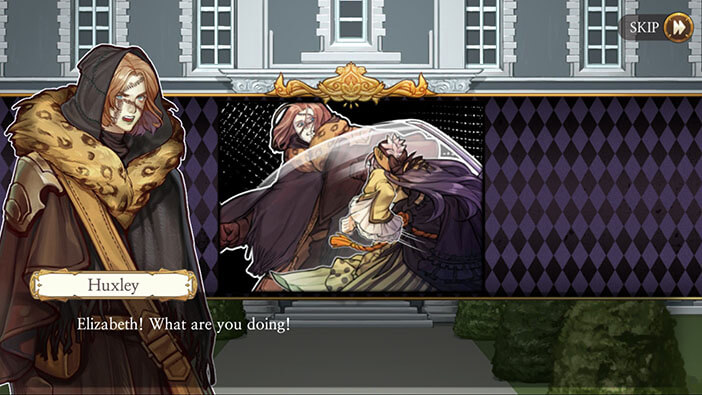
Apparently, her wish was to kill Huxley with her own hands… At this point, she believes that Huxley murdered her parents, and he somehow came back to kill her too and erase the entire Lavenza family. Poor Huxley has no idea that he was wrongly accused and sentenced for murdering Elizabeth’s parents. The only memories that he has, are the ones of Elizabeth in his own home, and a brief flashback he had about being reanimated…
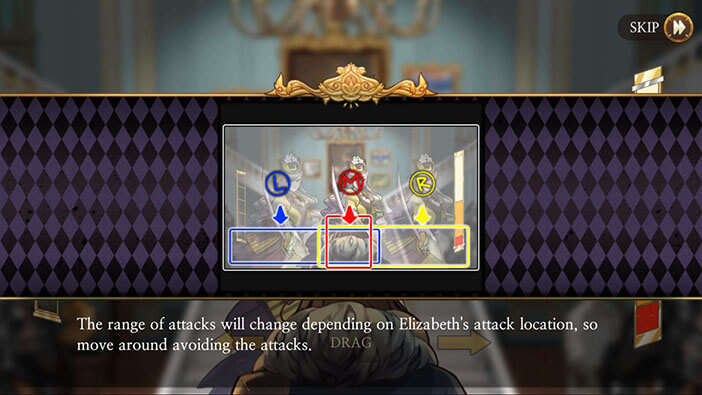
That brings us to the next minigame. We have to dodge Elizabeth’s attack by dodging left and right. It works almost exactly the same as the minigame in which we dodged shots fired by the game poacher. Looking at the bar on the right, we can conclude that we will have to dodge 5 attacks in order to successfully complete this task.
The bar on the right represents the progress of Elizabeth’s attack. The orange line means she is preparing to attack and won’t move around anymore to the left or right. The red line means that she is about to strike at any moment.
When Elizabeth misses our character, one blue line will be added to the bar on the left.
Unlike when we fought against the poacher, to evade Elizabeth’s attack from the left, you will have to dodge all the way to the right, and vice versa.

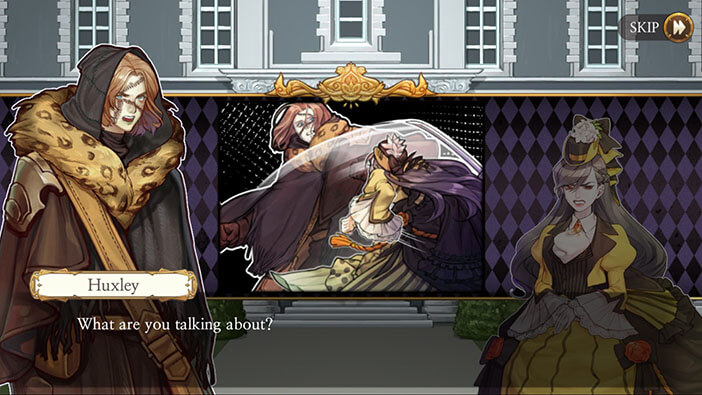
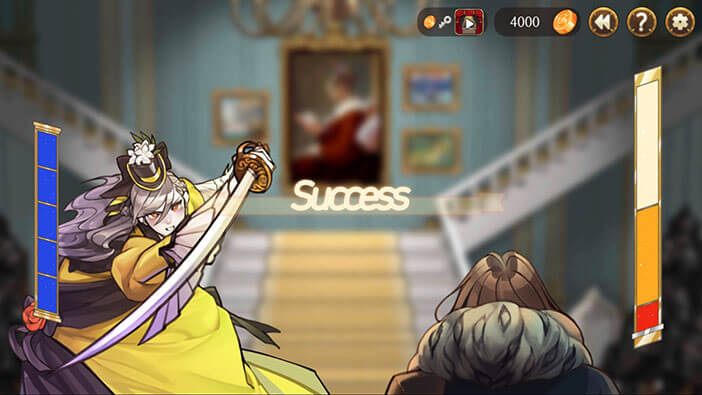
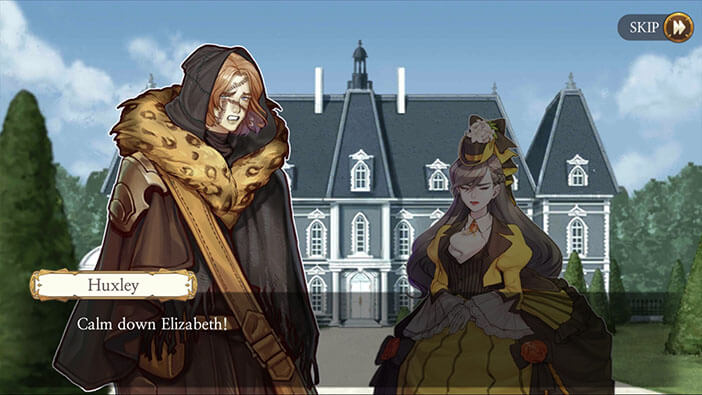
After successfully dodging the attacks, Huxley begs Elizabeth to calm down and explain what’s wrong, since he doesn’t remember anything. He didn’t think for a one moment about retaliating while dodging her attacks. At this point, she almost seems as confused as the poor Huxley…
In the next stage, we will be playing as the reanimated Huxley again, this time as he tries to uncover more of his previous life. Join us in the next stage of the Walkthrough for Frankenstein Room ESC, so we can help out Huxley in this mission. Remember that we’re still in the past and because there was only a day difference (I think?) between the morgue break-in and the investigation at Neumann’s office, I guess we will soon see Huxley swinging around the heavy axe while chasing the lawyer, and exacting his righteous revenge… I am really looking forward to playing this part of the game…
Thank you for reading.