Chapter 5-4 Destroy Evidence
Complete Walkthrough
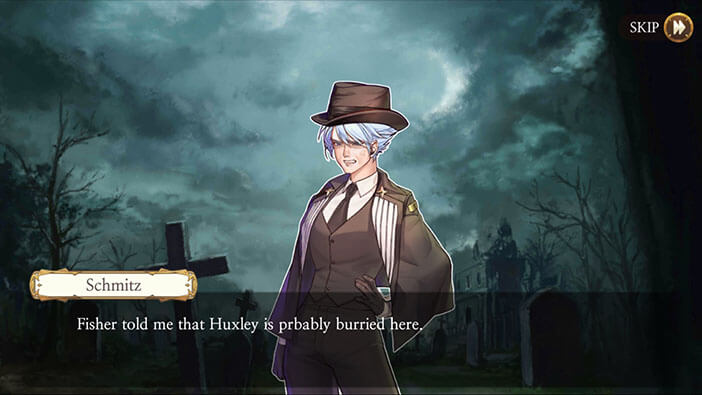
Hello everyone, and welcome to our Walkthrough for the Fourth Stage of Chapter 5 for the Frankenstein Room ESC adventure game. In this stage, we will be playing as the chief investigator Schmitz. After seeing Huxley MK II, Schmitz wants to make sure that Huxley is actually dead, and intends to dig up his grave in order to see his body (and more importantly head) with her own eyes.
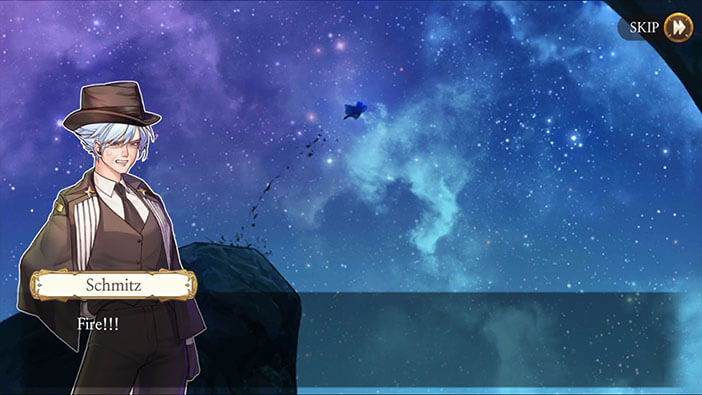
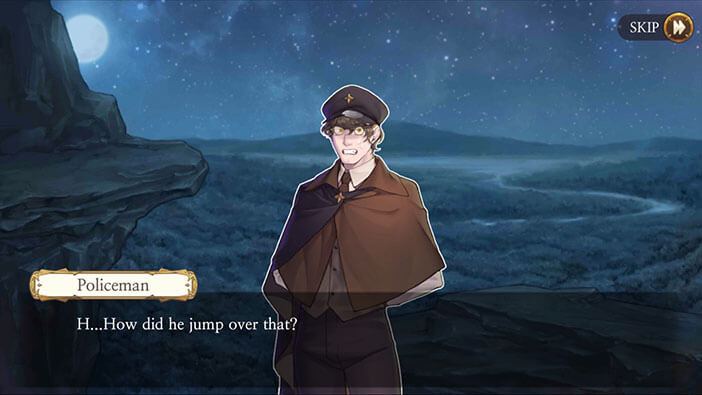
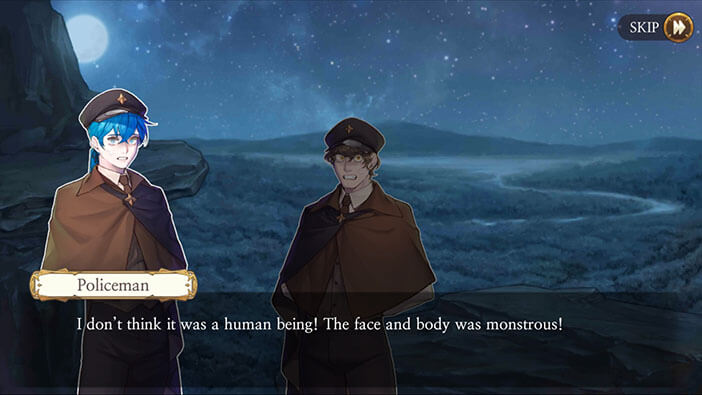
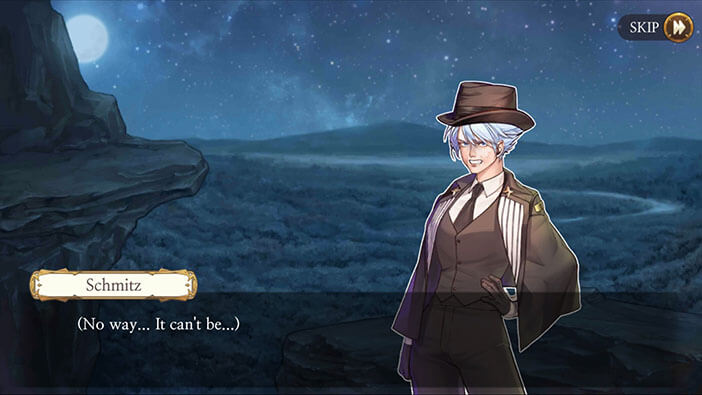
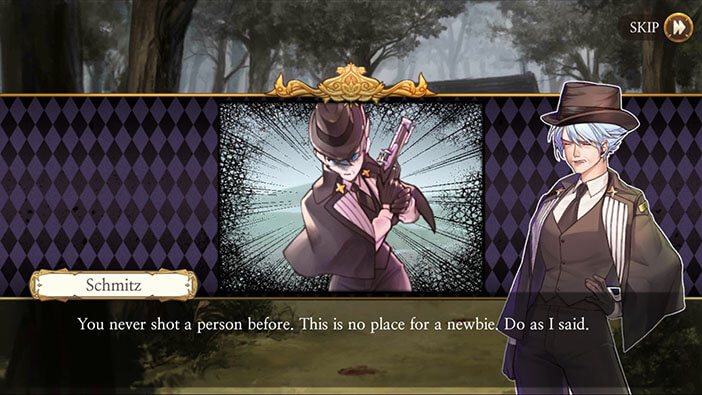
The story continues in the present time, with the last events that we witnessed when playing detective Schmitz. After shooting at Huxley and Elizabeth, the police officers are not sure if they hit their targets, and presume that all of the shots missed. The officers are very nervous after witnessing the physical powers of the monstrous creature, particularly its ability to jump much higher than any human could while carrying Elizabeth in its arms. One of the officers is shocked after realizing that the creature’s face looks very similar to Huxley’s. Chief investigator Schmitz, who has been solving cases through logic and rational thinking, can’t believe what she just saw witnessed.
From Fisher, detective finds out the location of Huxley’s grave and decides to personally check it. With that thought in mind, she heads for the cemetery, and that’s where the story continues…

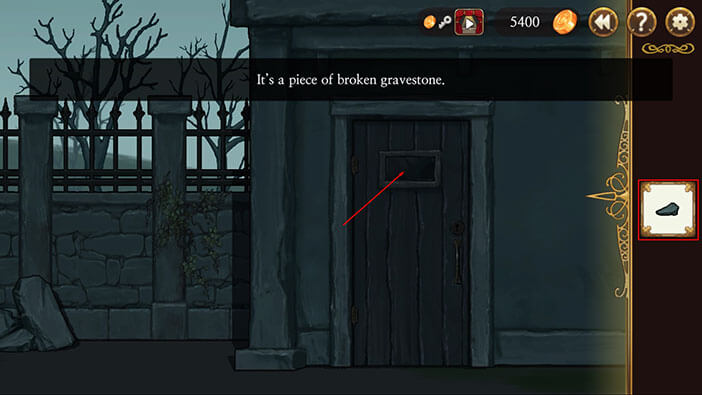
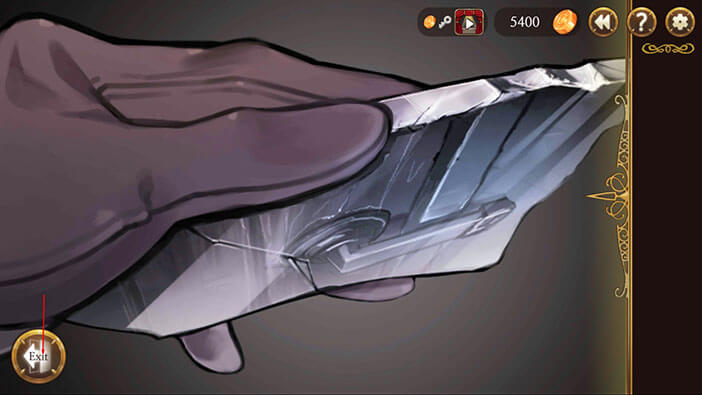
Turn to the left and tap on the pile of stones. The stones are actually a broken gravestone, and our character will pick up one of the stones.

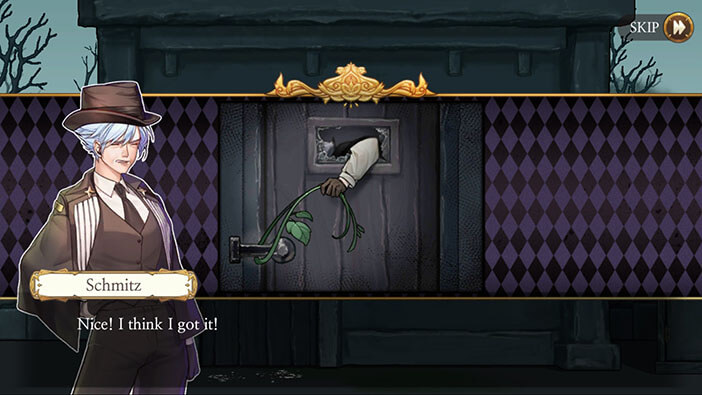
Turn to the right and face the front door. Now, select a “Piece of Gravestone” from the inventory and tap on the window on the front door.
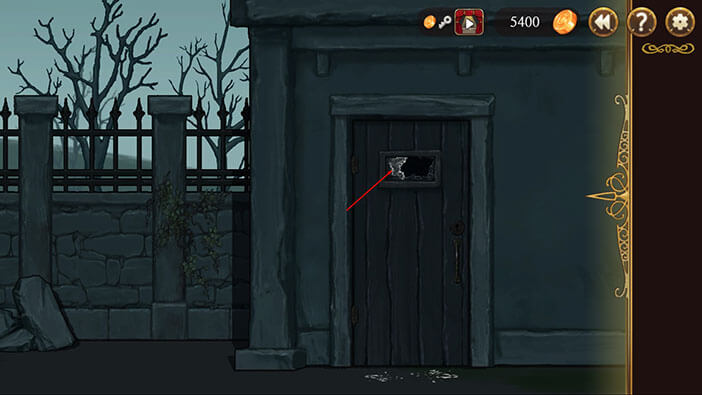
Schmitz will break the window by throwing a stone. Not the most subtle approach, if I may notice. Ironically, Schmitz might be called in after a day or two to investigate this crime scene, since the broken window is a clear indication that somebody broke into the cemetery…
Tap on the broken window, and our character will pick up a “Piece of Glass”.
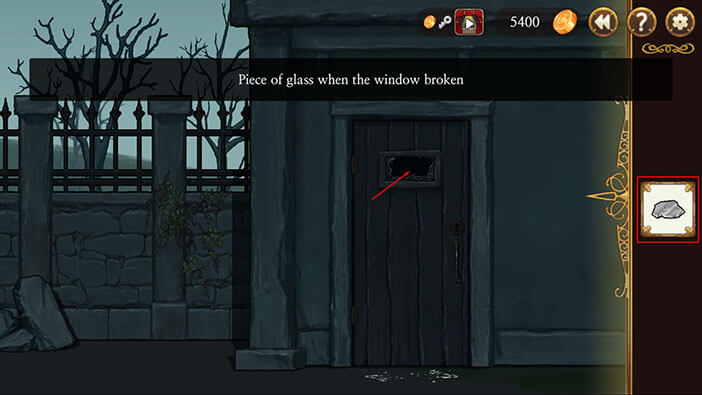
Select the “Piece of Glass” from the inventory and tap on the broken window.
Schmitz will use the glass as a mirror, which enables her to see the door handle. Tap on the reflection of the door handle, and our protagonist will conclude that she could easily open the door from the inside if she could reach the handle.
Tap on the “Exit” button.
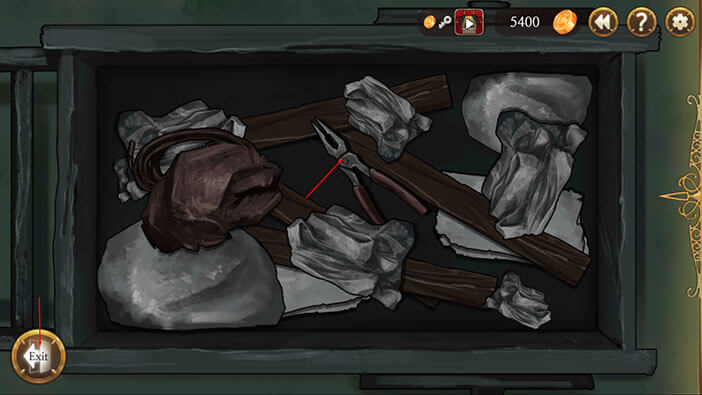
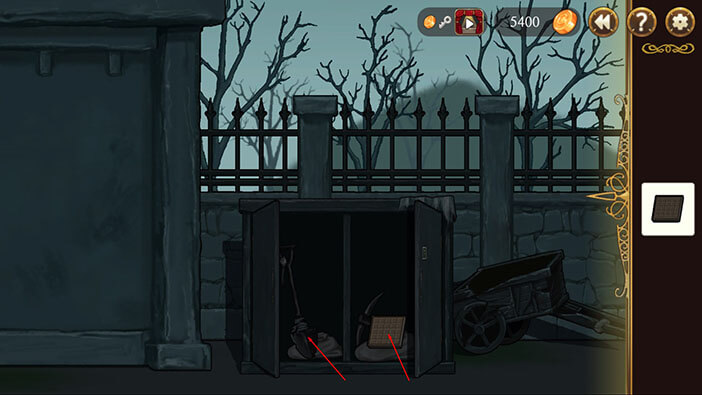
Turn to the right and tap on the object hidden behind a large metal cabinet.
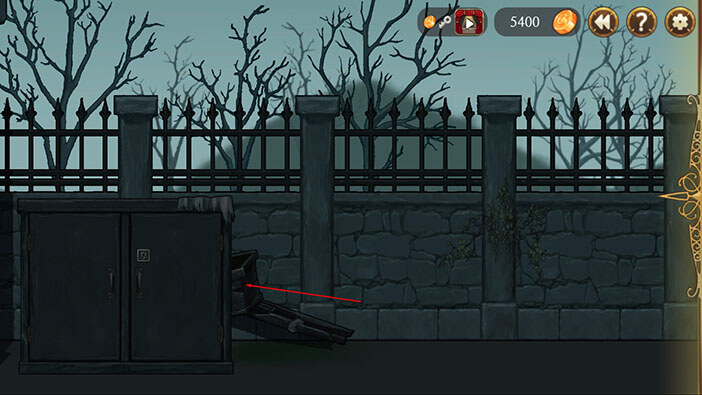
Now we can see a wooden cart. Tap on the cart to examine it.
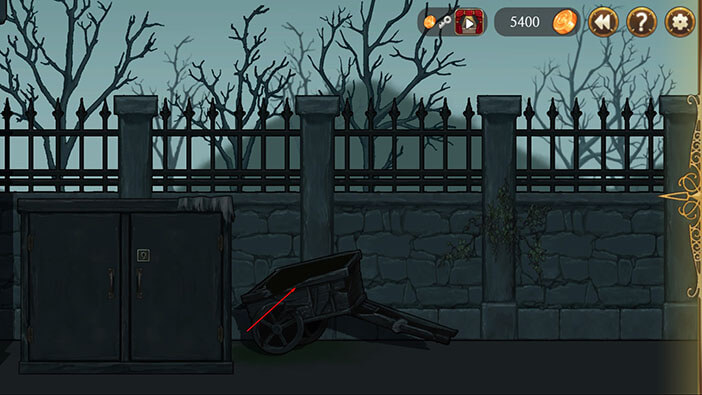
Tap on the waste inside the cart to move it aside. After moving the waste you will notice the pincers hidden below it. Tap on the pincers to pick it up. After that, tap on the “Exit” button. 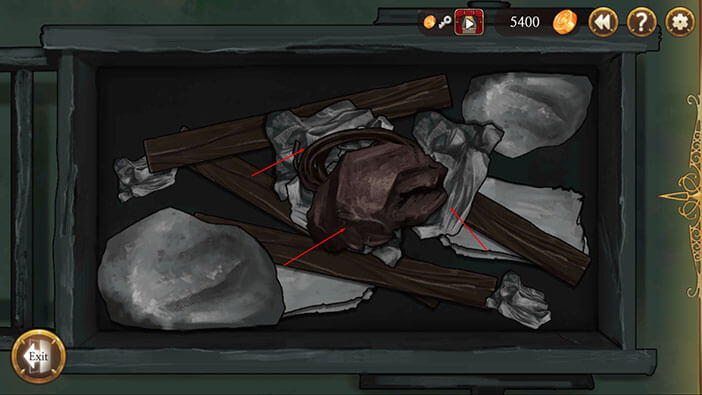
Select the “Pincers” from the inventory and tap on the vines on the right. These vines are too thin and will easily break, so we have to find stronger ones. 
Move a bit more to the right and to the right of the cemetery gate you will notice some thick vines. Select the “Pincers” from the inventory and tap on the vines. The “Strong vines” will be added to the inventory, and our character can use them to make an improvised rope. I guess we could use the improvised rope to reach the door handle. 
Let’s check out the notice board next to the gate. Tap on it so our character can take a closer look. 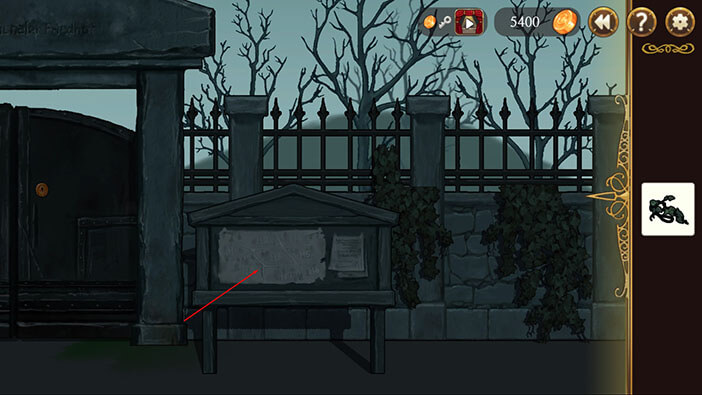
Schmitz realizes that this graveyard is huge and that she will first have to go through the records and find out in which part of the cemetery was Huxley buried. Reading the inscriptions on the tombstones would take too much time, so this isn’t a valid option. Tap on the “Exit” button. 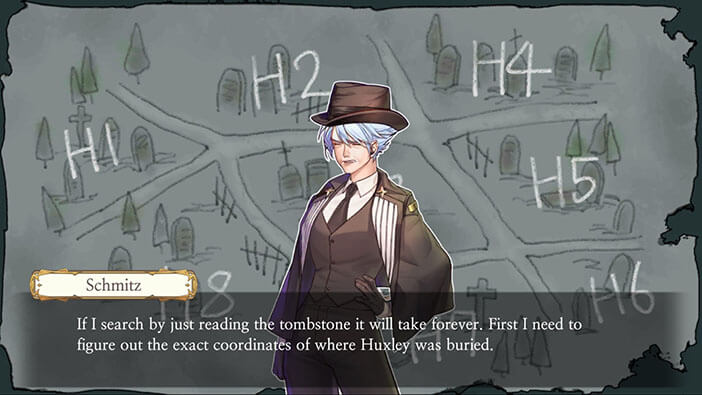
Go back to the door with the broken window. Select the “Strong vines” from the inventory and tap on the broken window. On her second try, Schmitz manages to hook the door handle with the improvised rope and opens the door. Tap on the door to enter. 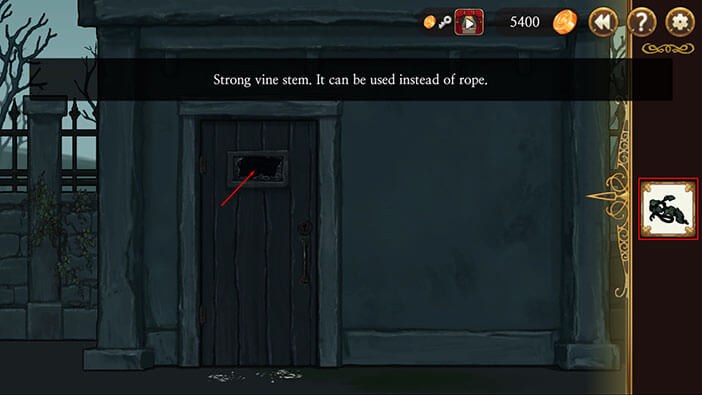

To the left, you will see a vase, and if you take a closer look, you will notice that there’s a key inside it. Tap on the key and the “Triangle Key” will be added to the inventory. 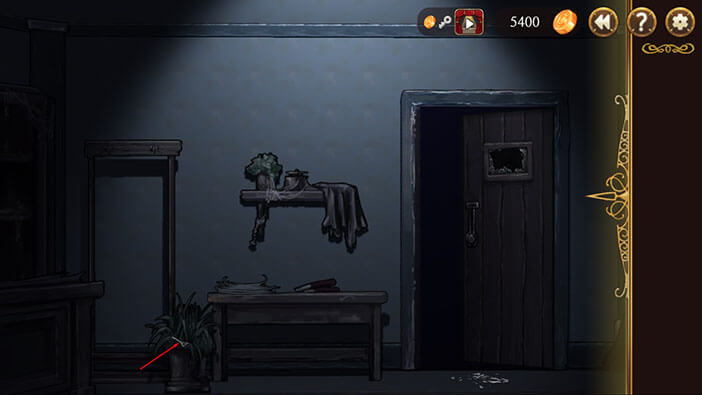
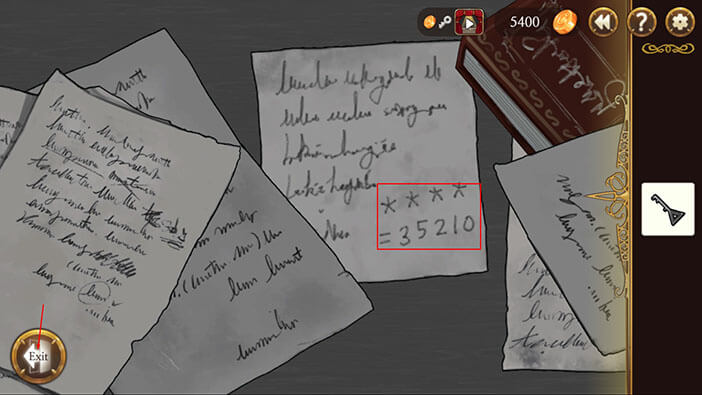
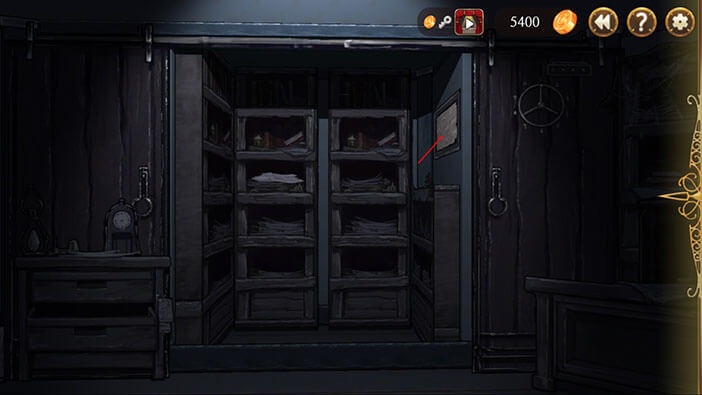
Turn to the left and you’ll see a bookshelf in the corner of the room, and you’ll also see a desk in front of it. Tap on the desk. 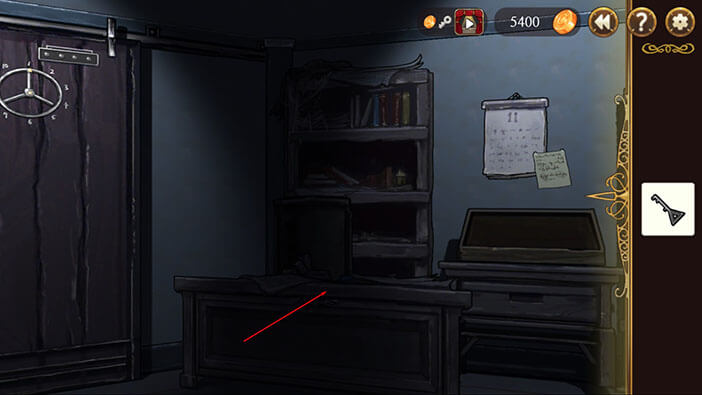
There’s a bunch of notes all over the desk. Tap on the notes in the middle to move them aside, and below them, you’ll notice a note with the numbers “35210” written in the bottom right corner. Also, we can see that there’s a star(like) symbol above each number. Memorize or write down these numbers. Tap on the “Exit” button. 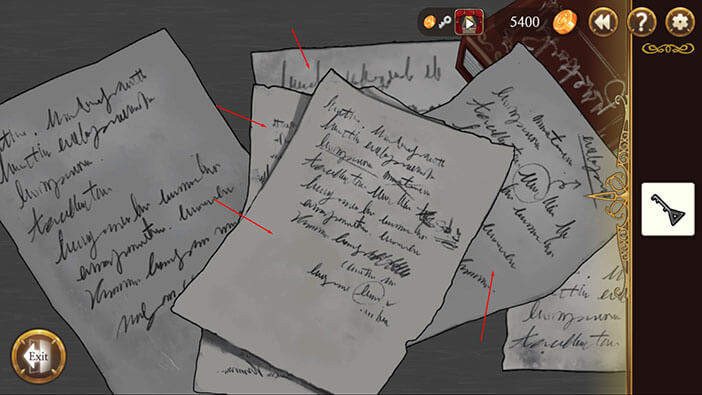
Turn slightly to the left and you’ll notice two large wooden doors. On the right door, there’s some kind of a flat dial with pointers. Tap on the dial. 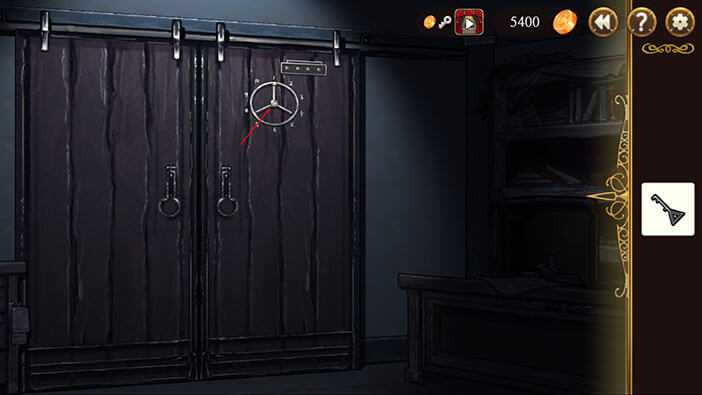
Upon closer examination, we can see that that the dial has 10 positions, marked with numbers 1 through 10. Also, there’s a yellow arrow on one of the dials, and by default, it’s pointing to number 1. In the top right there are four lights and all of them are off, for now. One light will turn on every time we point to the correct number, just like in some of the previous puzzles (there was one similar puzzle, all the way back in the first chapter, I believe). 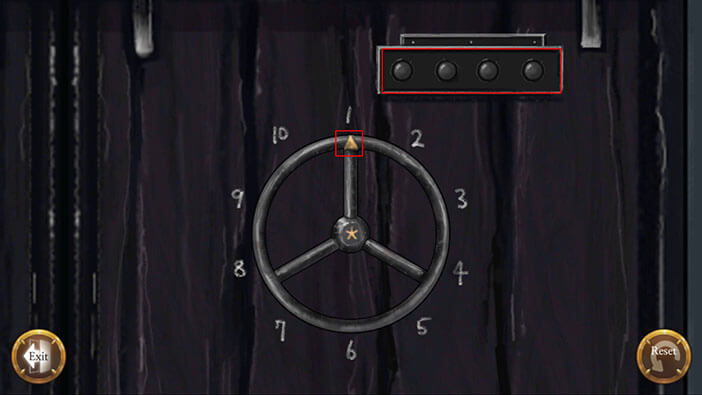
Ok, we should “enter” four numbers 3, 5, 2, and 10. Tap on the wheel and hold to turn it to the right. When the arrow is pointed to the desired number, stop holding and the “wheel” will go back to the starting position. 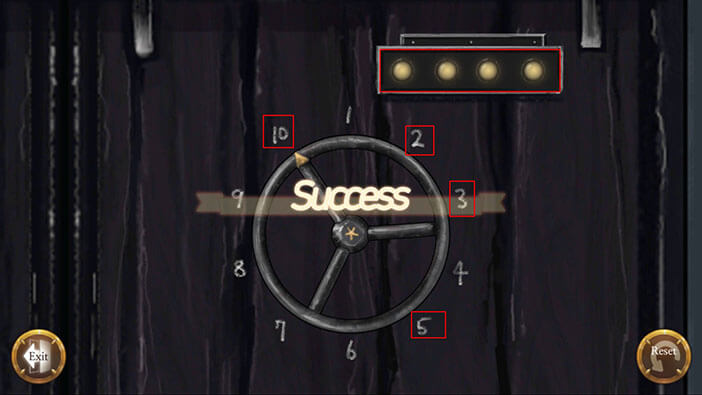
Tap on both doors to open them, and they will slide to the side, revealing another small room. 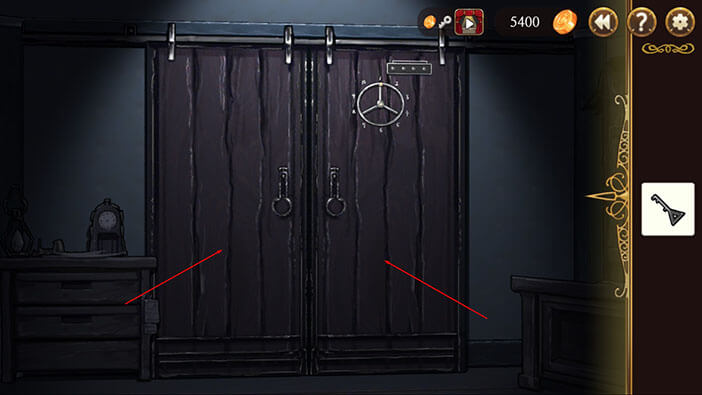
There are three shelves inside this room, but on the middle shelf, you can see a pile of paper that is of a much lighter color than the rest of the documents. Tap on this pile of documents.
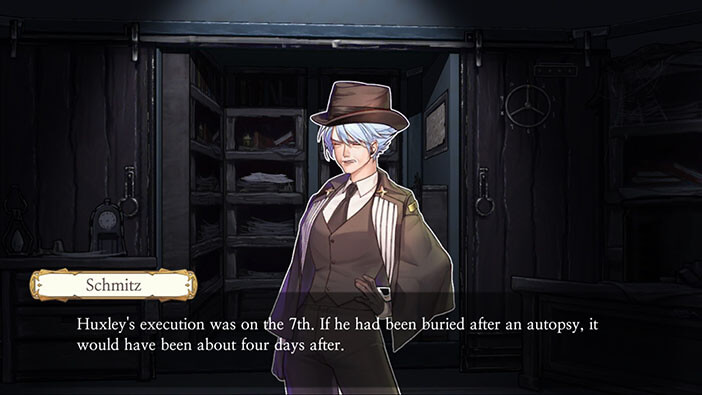
Schmitz concludes that Huxley should be buried on the 11th, since his execution was on the 7th, and he was buried 4 days after the execution. However, the documents have been filed without any particular order, and we now have to rearrange them by date.

Ugh, I really hate this type of task, and if you recall we already did two (or more?) tasks like this one while exploring the morgue…
OK, let’s get started.
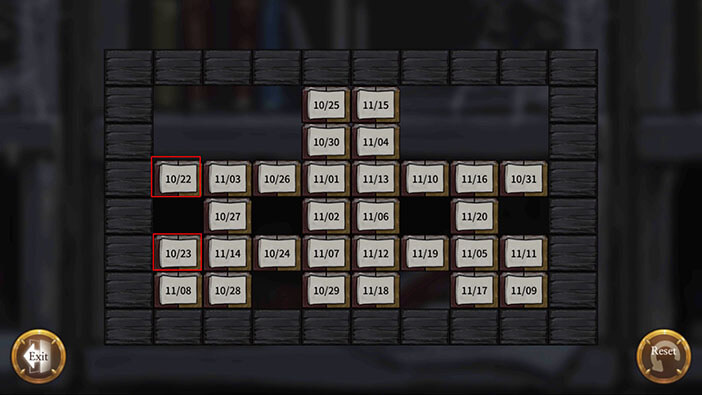
Step 1: Tap on the file 10/22 and the file 10/23.
Step 2: 10/28 and 10/29
Step 3: 10/26 and 10/27
Step 4: 10/25 and 10/26
Step 5: 10/23 and 10/24
Step 6: 10/24 and 10/25
Step 7: 10/29 and 10/30
Step 8: 11/18 and 11/19
Step 9: 11/17 and 11/18
Step 11: 11/01 and 11/02
Step 12: 11/19 and 11/20
Step 13: 11/10 and 11/11
Step 14: 11/05 and 11/06
Step 15: 10/27 and 10/28
Step 16: 11/02 and 11/03
Step 17: 11/07 and 11/08
Step 18: 11/06 and 11/07
Step 19: 10/31 and 11/01
Step 20: 10/30 and 10/31
Step 21: 11/13 and 11/14
Step 22: 11/03 and 11/04
Step 23: 11/14 and 11/15
Step 24: 11/12 and 11/13
Step 25: 11/11 and 11/12
Step 26: 11/04 and 11/05
Step 27: 11/16 and 11/17
Step 28: 11/09 and 11/10
Step 29: 11/15 and 11/16
Step 30: 11/08 and 11/09
Finally…
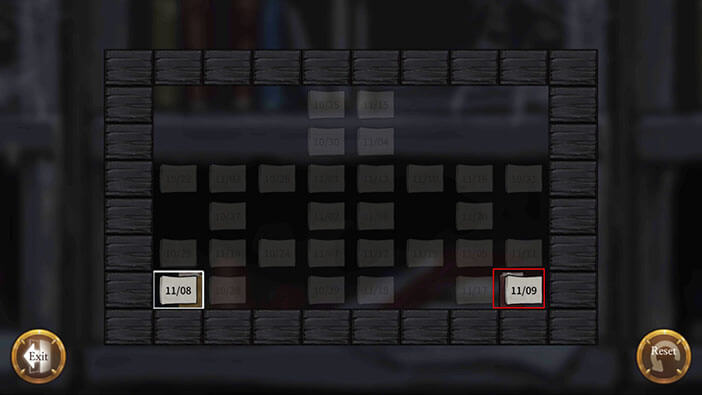
After arranging the files, Schmitz found Huxley’s file. Tap on it.
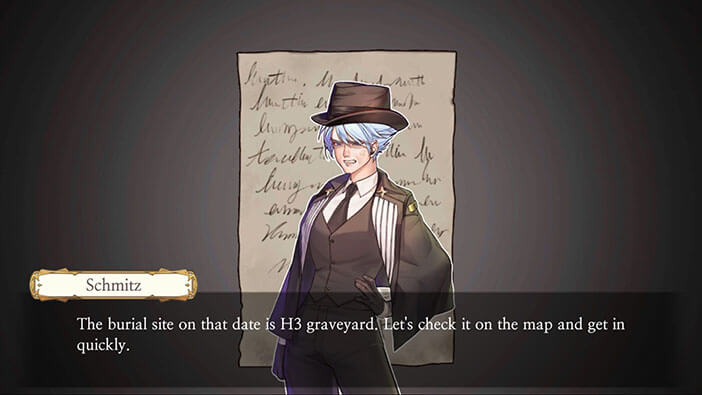
Our protagonist concludes that Huxley is buried in the H3 area.
At the bottom of the note, there are also two tombstones. You can ignore this information because it’s completely irrelevant, although it seemed important. Tap on the “Exit” button.

Before heading off to the H3 area, we will have to find a key that unlocks the graveyard gate. So, let’s take a look at the note on the right wall of the small room – tap on it. 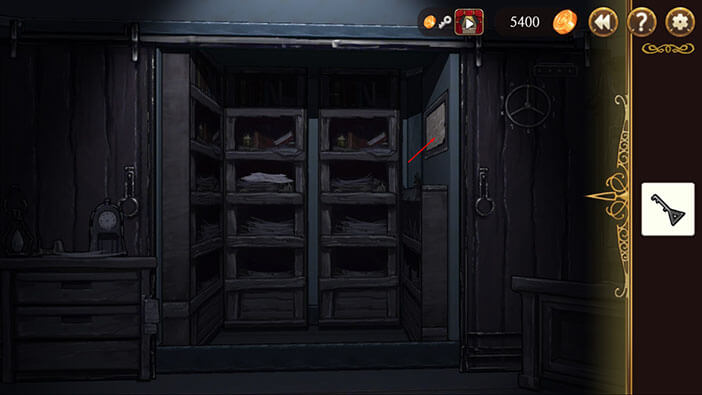
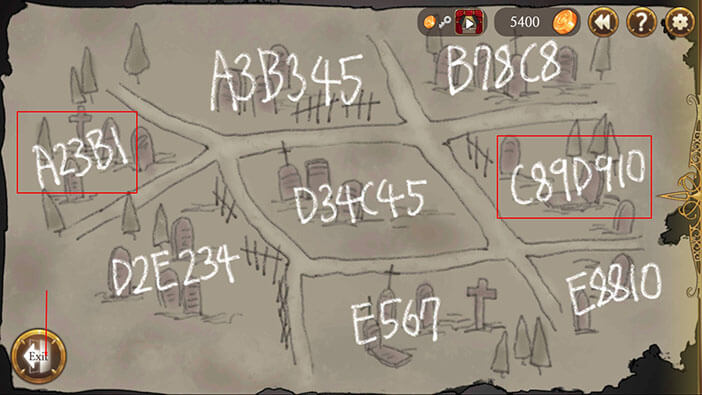
This note represents the map of the graveyard areas (just like the sign outside), but instead of the areas being marked with letter H and a number, on this map areas are marked with some kind of password. You don’t have to memorize of write these passwords (for now), just tap on the “Exit” button. 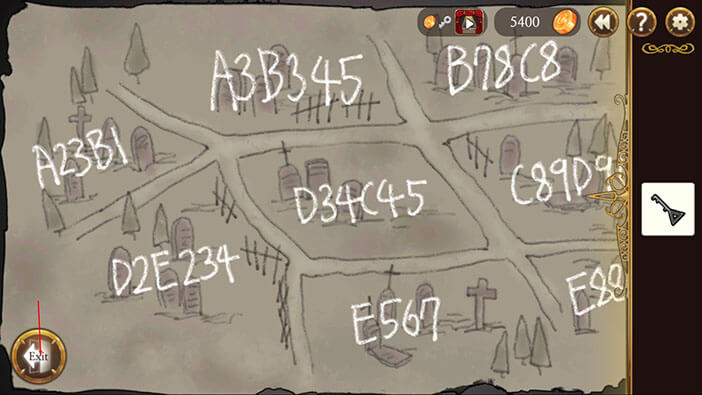
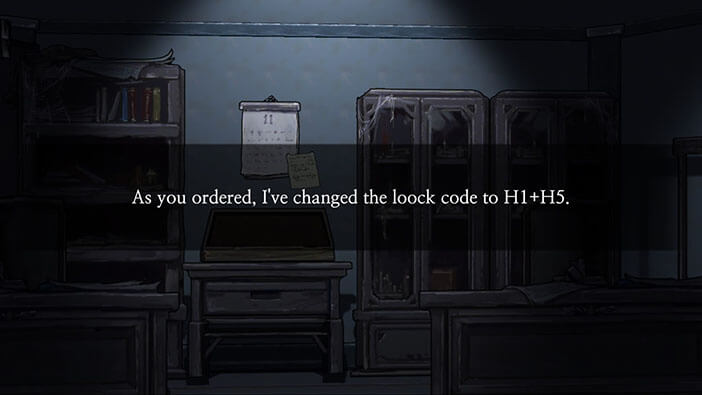
Ok, let’s examine this room before heading outside. Turn to the right and tap on the note below the calendar. It looks like the guard left the key inside the drawer below, and he changed the password to H1 + H5 (memorize this). 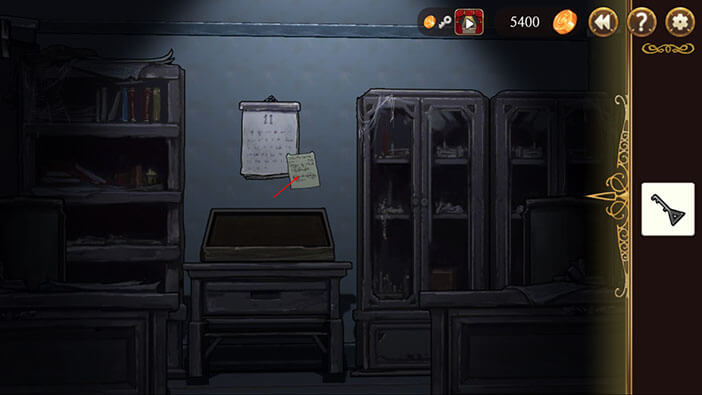
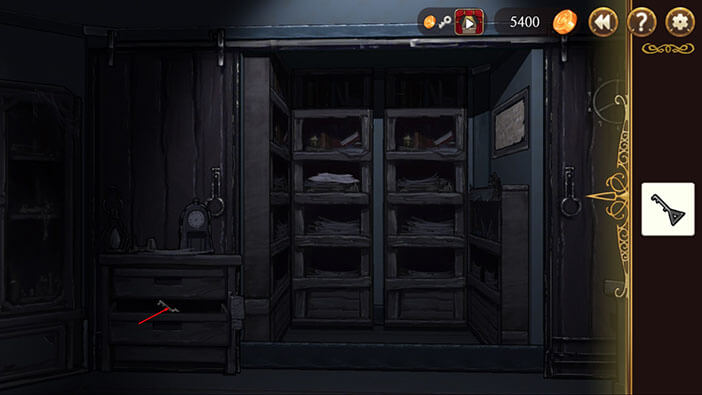
Turn to the left, and you will notice a small cabinet (to the left of the small room).
Tap on the bottom drawer of the cabinet to open it, and tap again to pick up a key inside it. A “Square Key” will be added to the inventory.

Turn a bit more to the left and you’ll see a coffee table. Tap on it to move it aside. 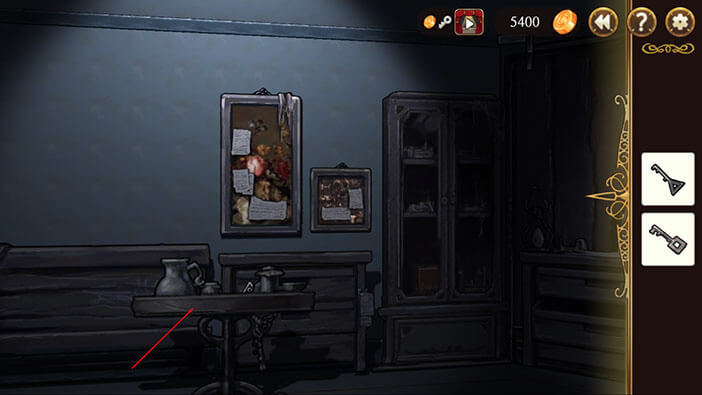
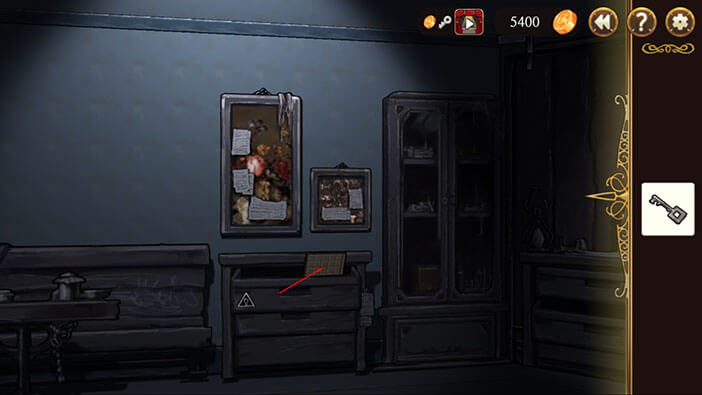
We can now see a small cabinet. There’s a triangular sign on its top drawer, so select the “Triangle Key” from the inventory and tap on the top drawer to unlock and open it. Tap on the board inside the drawer and the “Wood Board” will be added to the inventory. 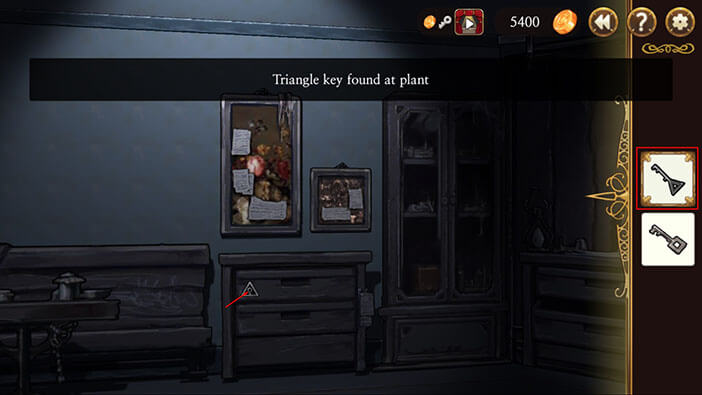
Ok, that’s it for now. Tap on the front door to exit outside. 
Once you’re outside, turn to the right and you will see a large metal container. There’s a keyhole in the square-shaped field, on the right door of the container. So, select the “Square Key” from the inventory and tap on the keyhole. 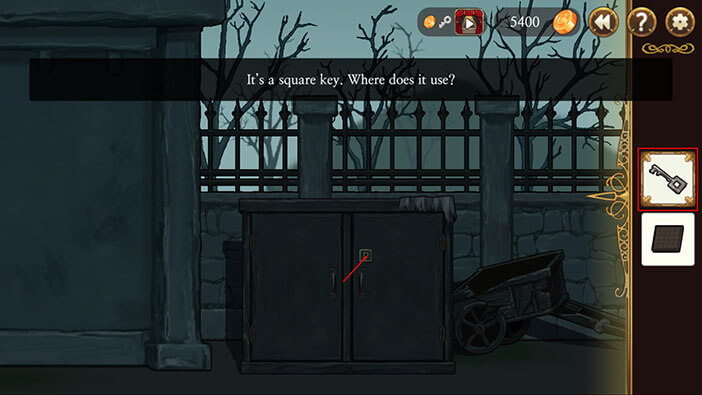
Tap on the container doors to open them. Tap on the box in the right compartment to pick it up, and tap on the shovel in the left compartment to pick it up. 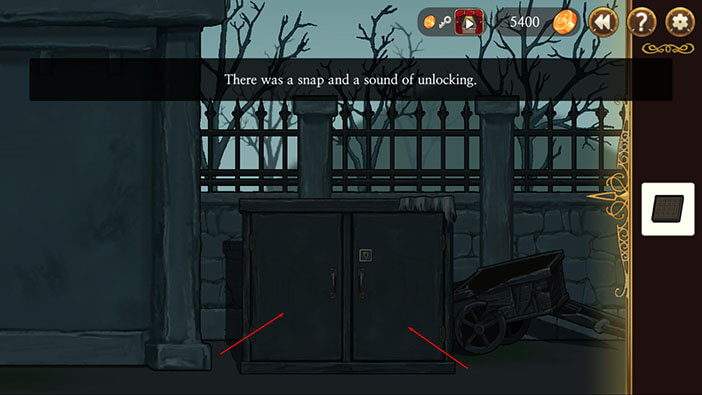
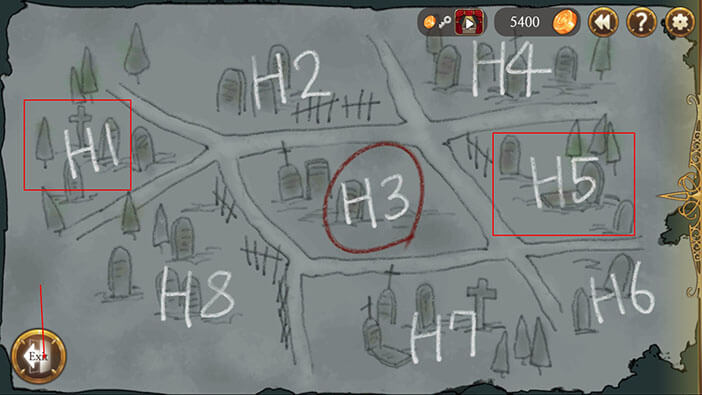
Turn all the way to the right and tap on the notice board. 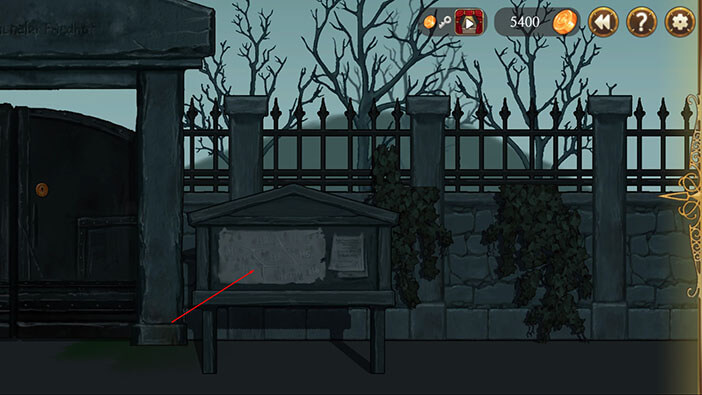
We now know that Huxley is buried in the H3 part of the cemetery. So, tap on the H3 on the map and Schmitz will mark this position. 
There’s one more thing that we should do before exiting. Remember, that guard said that he changed the code to H1 + H5? Let’s see memorize the location of these two parts of the graveyard by looking at the map.
H1 = Upper left corner of the map
H5 = Middle field on the far right side of the map
By memorizing these two locations we can look at the map that we found in the office, and use the passwords from the matching fields to unlock the drawer and get the key that unlocks the main gate.
Tap on the “Exit” button.
Turn to the left and tap on the front door to get back into the office. 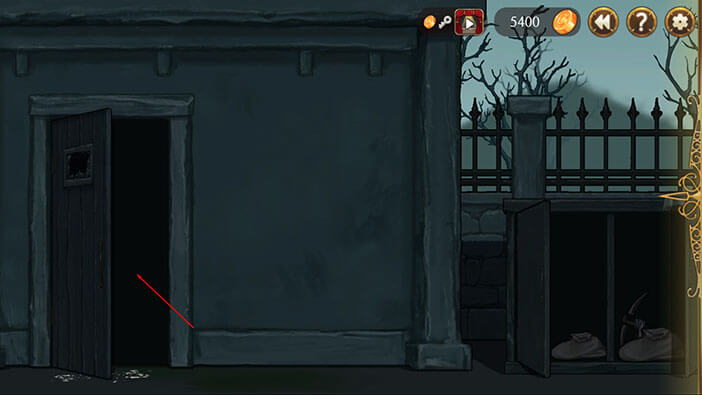
Turn around and tap on the map that we found on the right wall of the small room. By looking at the map outside we determined which positions are A1 and A5, so let’s memorize/write down passwords written in these fields.
A1 = A23B1
A5 = C89D910
Tap on the “Exit” button.
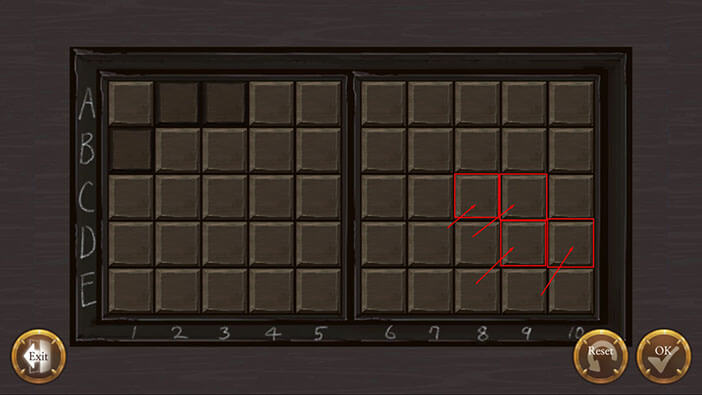
Ok, now turn to the right and you’ll see a wooden box below the calendar. Select the “Wooden Boards” from the inventory (one by one) and tap on the wooden box to place them inside. 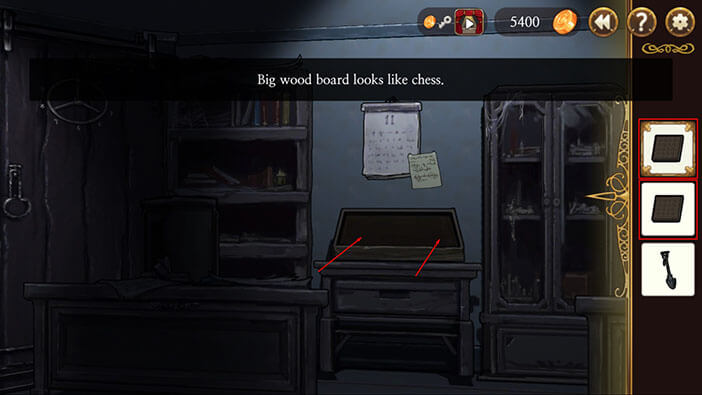
The two boards that we just place form a five by ten grid. The vertical fields are marked with alphabet letters A through E, while horizontal fields are marked with numbers 1 through 10.
The passwords from the fields H1 and H5 that we wrote down are actually coordinates of the fields on this board. I will write down these two “passwords” as a reminder below.
A1 = A23B1
A5 = C89D910
So, let’s determine the positions using the information from A1.
NOTE: There’s no field number 23 (only 10 horizontal) so, these are actually two coordinates.
First field= A2
Second field= A3
Third field= B1
Find these fields on the grid and tap on them.
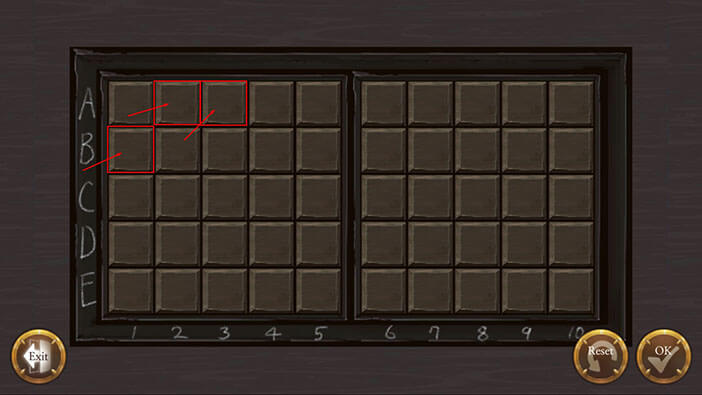
Ok, let’s look at the coordinates from A5 area.
A5 = C89D910
First field = C8
Second field = C9
Third field = D9
Fourth field = D10
Find these fields on the grid and tap on them.
Tap on the “OK” button once you’re done.
Solving the previous puzzle will automatically unlock and open the drawer below, so tap on the key to pick it up. “Gold Key” will be added to the inventory. 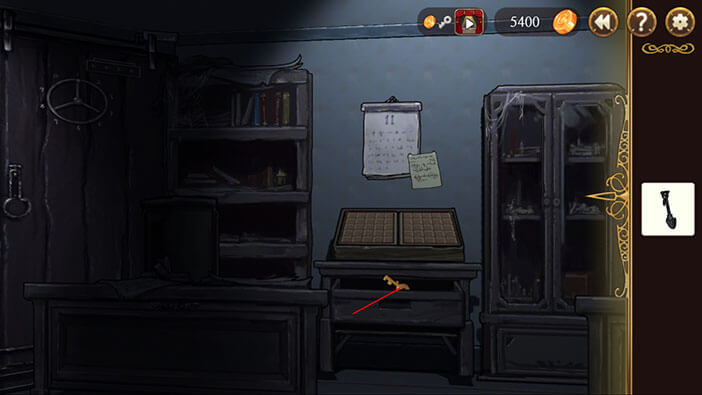
Tap on the door to exit. 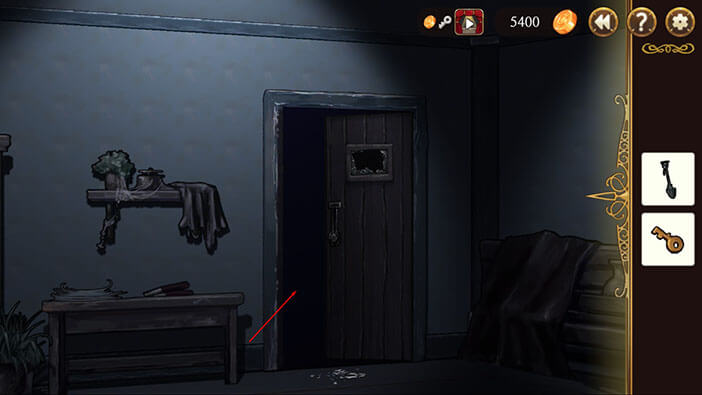
Face the main gate, select the “Gold Key” from the inventory, and tap on the keyhole. 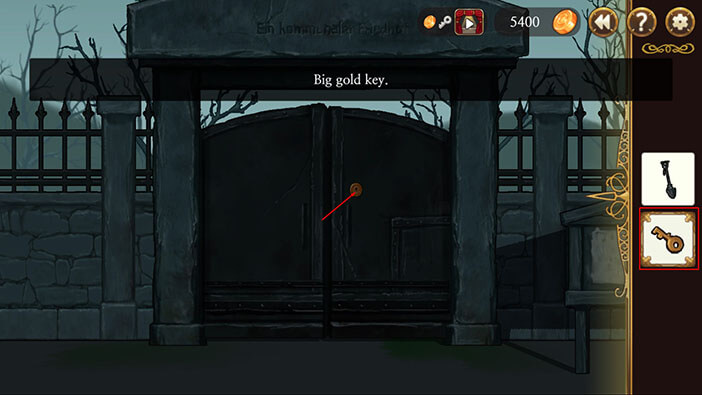
Tap on the main gate to open it, and tap again to proceed. 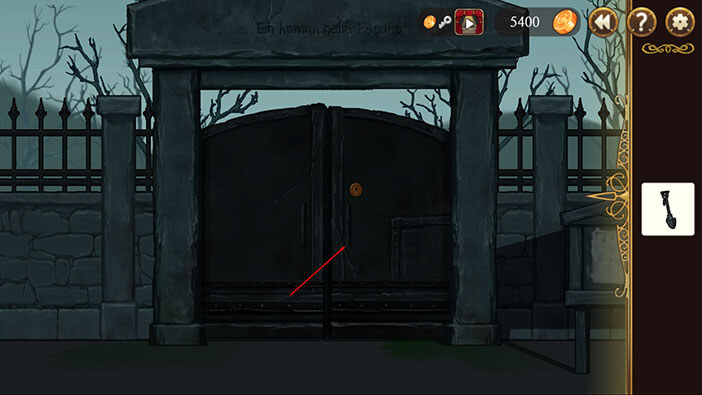
Since she already determined where Huxley was buried, Schmitz was able to quickly find his grave. However, she has no time to waste and immediately starts digging. The chief investigator hopes that she will find Huxley inside the coffin, erasing all doubts that she has. She did see Huxley’s execution, after all, so this is a reasonable line of thinking… 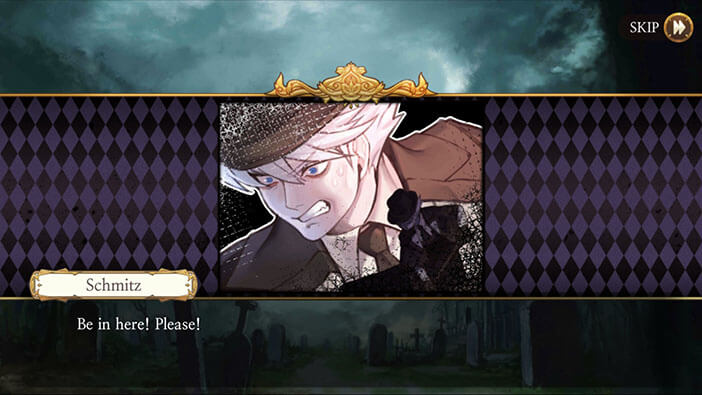
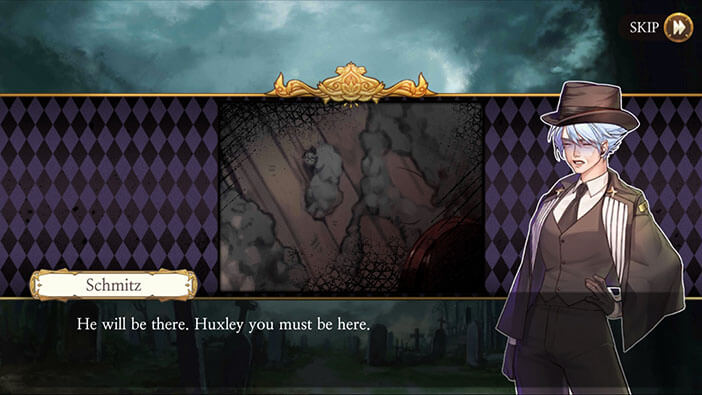
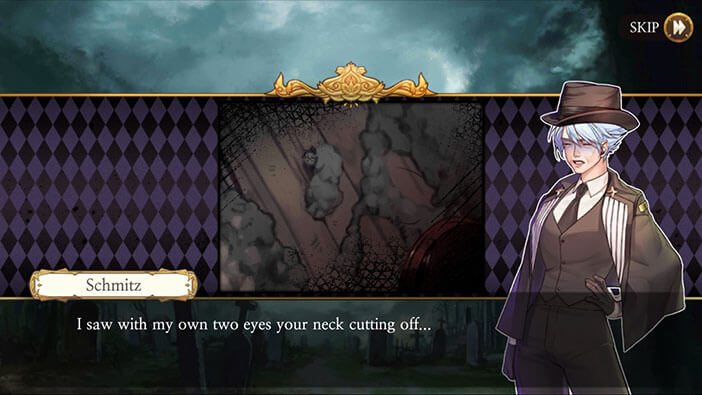
However, once she opened the coffin she saw Huxley’s body was still in there, but the head was missing… 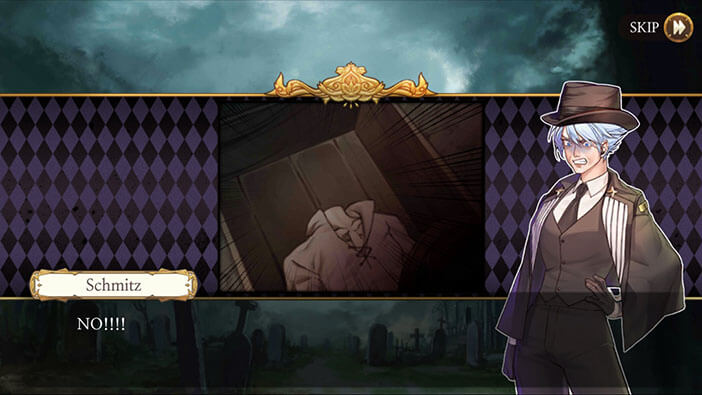
Our story continues at the Sachsen police station. After finding out that Huxley’s head is missing, Schmitz returns and immediately starts organizing the manhunt for Huxley and Elizabeth. She orders Erich to assemble all available police officers. 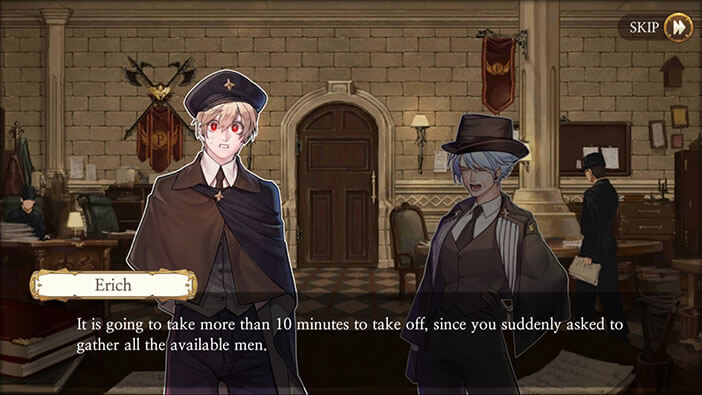
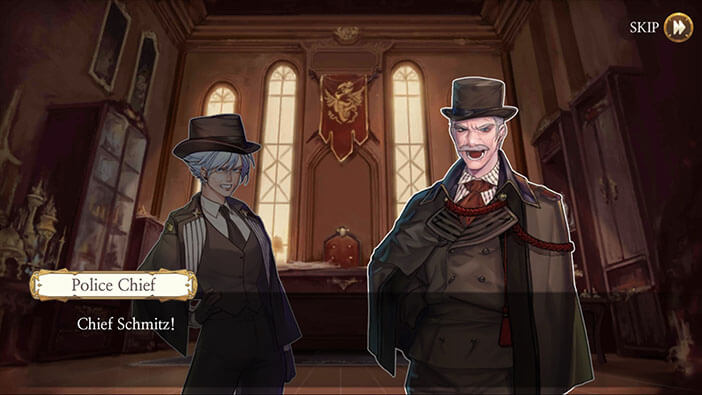
At this moment, one of the police officers interrupts the conversation by saying that the Chief of police wants to see Schmitz. This catches the chief investigator by surprise. 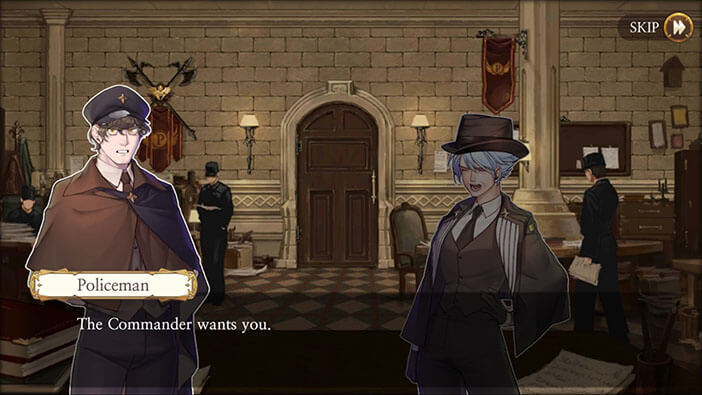
The Chief of police wants to know how could fire break out at the police station, enabling one of the prisoners to break out of jail. Schmitz explains that the fire was most likely set by Elizabeth’s accomplices. Our character also explains that although these events happened after her shift has ended, she’s ready to take full responsibility. How “noble” of her. 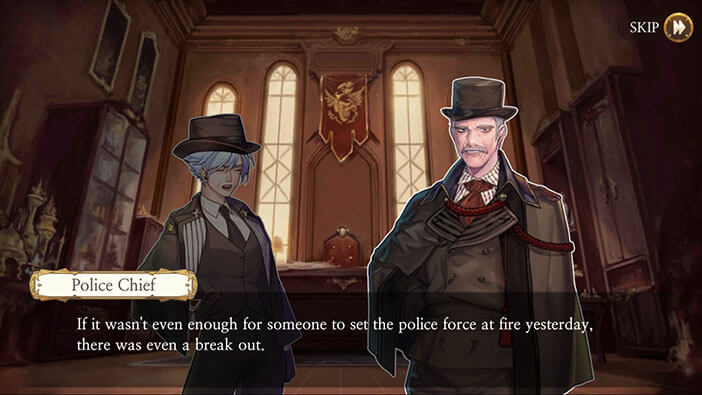
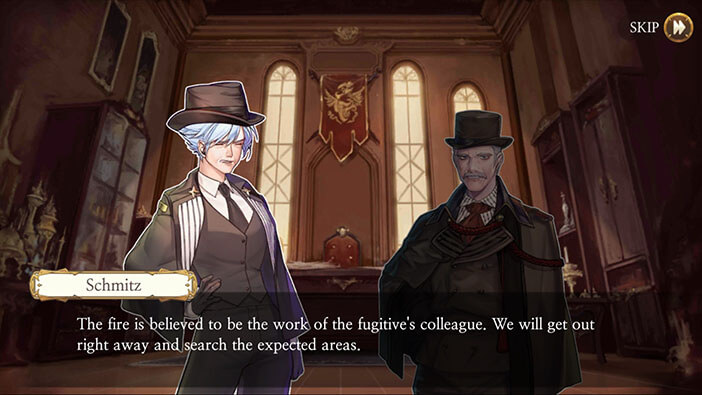

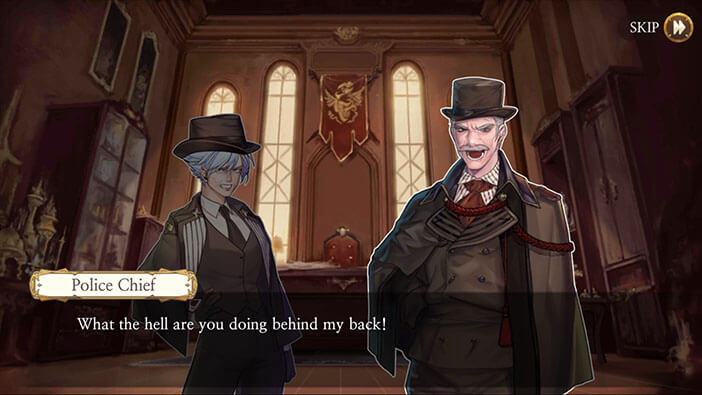
The Chief of police explains that this is exactly the problem since Schmitz was seen close to the western side of the building after her shift ended. Schmitz is very angry and wants to know the name of the person that is trying to frame her. The Chief of police calmly listens to his subordinate, and once she’s done raging, asks her to explain herself. 

However, before Schmitz has the chance to talk, the Chief of police presents a button, which is another piece of evidence. Chief explains that the button was found on Henry’s body, but Schmitz claims that no one reported this evidence to her. Chief continues, explaining that the button is the same as the ones on the Schmitz coat. At this moment Schmitz realizes that she’s missing one of the buttons on the back of her coat. As a side note, I have no idea how she can see her own back without looking at the mirror. 

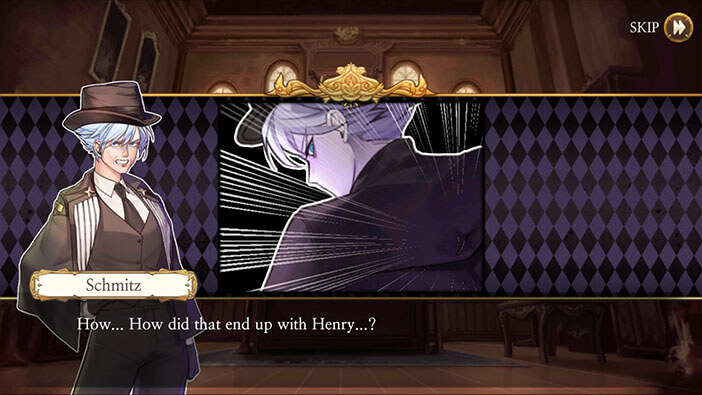
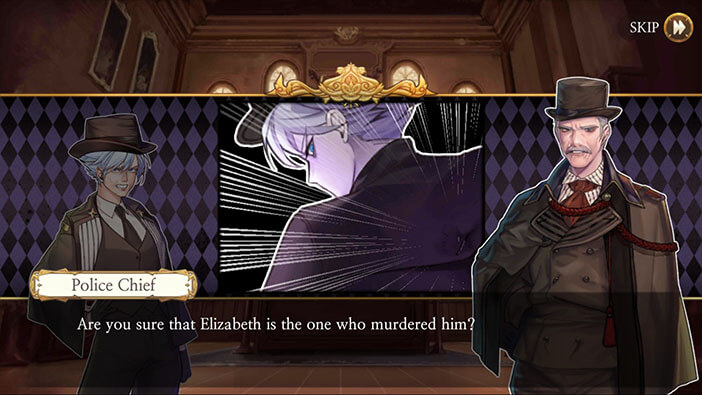
Now, the Chief of Police becomes more serious and demands to know if Schmitz met with Henry on the day of his death. He also wants to know if Schmitz knows for sure that Elizabeth was the one who killed Henry. After he doesn’t get any response from Schmitz, the Chief starts yelling, demanding an explanation. He breaks the calm demeanor and starts angrily shouting at Schmitz demanding to know what was she doing behind his back. This is a very natural reaction, it’s a miracle that this guy could stay calm even for a few minutes, considering the circumstances. 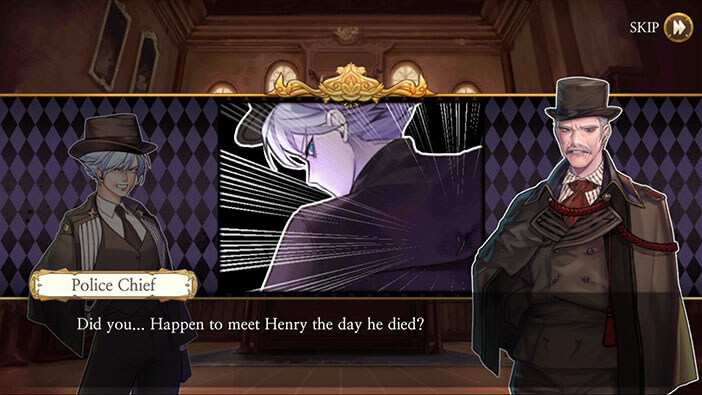

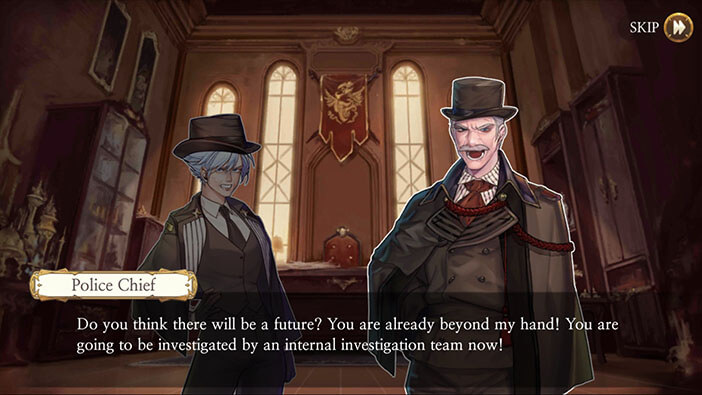
Schmitz is caught completely off guard, and she has no answers for her superior. She starts stuttering, saying that she will explain everything later.
However, the Chief is furious and states that he is no longer responsible for Schmitz since internal control is on its way to conduct the investigation.
Schmitz acts innocent and tries to make the Chief of the police feel guilty, by saying that she really didn’t expect him to “betray” her.
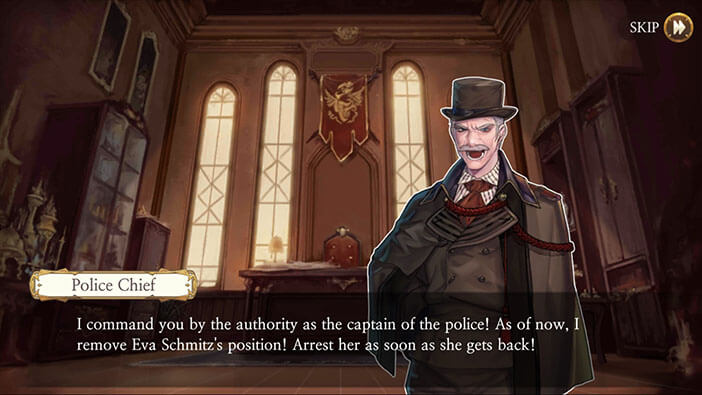
But, the Chief doesn’t buy it and orders Schmitz to turn over her gun, and stay at her home until further notice.
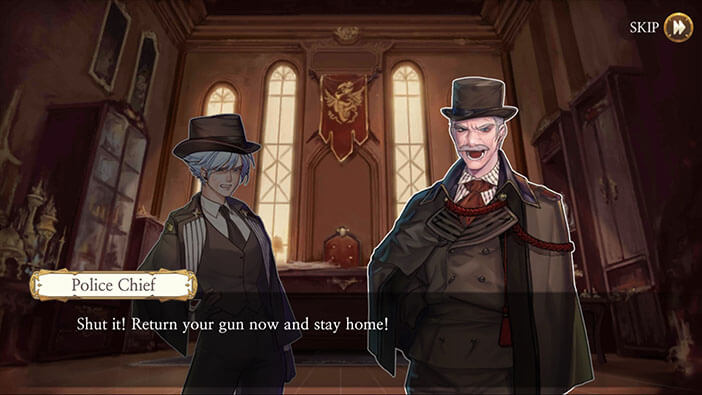
Schmitz declines, saying that she can’t do that and that she’s ready to take any consequences, but only after she finishes the search for Huxley and Elizabeth. With that, she turns her back on the chief and orders the police officers to move out.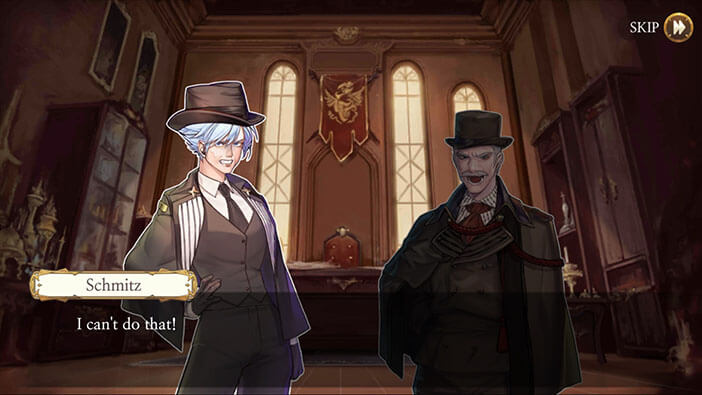


Now, the Chief is really pissed, but strangely enough, orders the police officers to arrest Eva Schmitz AFTER she gets back. So we found out two things.
First, for some unfathomable reason, the Chief will allow Schmitz to lead the search party.
Second, we learned the first name of the chief investigator Schmitz, it is Eva.

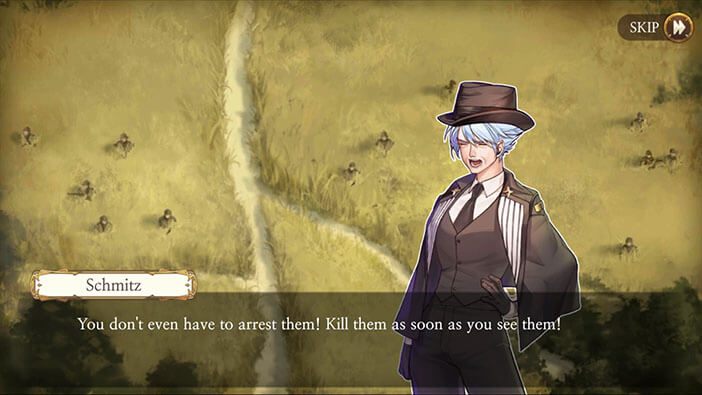
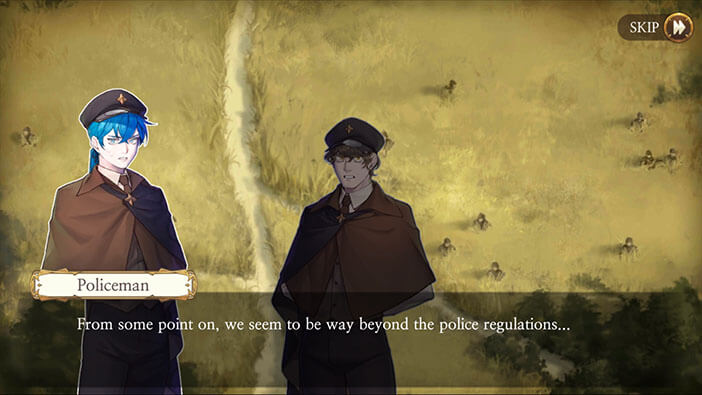
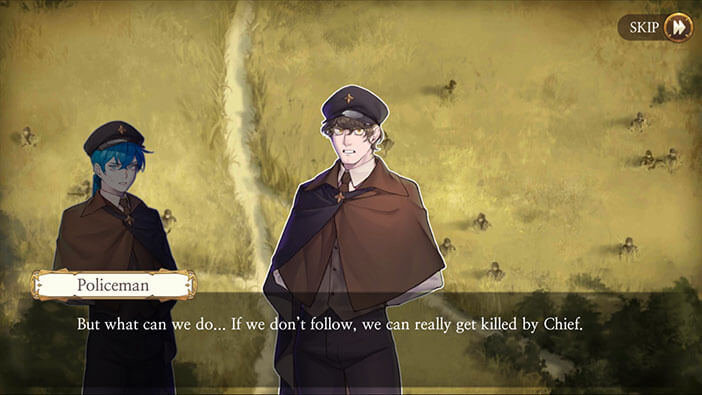
Our story continues at Sachsen Meadow. Schmitz addresses the police officers, claiming that Elizabeth has teamed up with a monster created by the Aegyptus and that the two have gone on a killing spree. She orders her officers to form up in pairs and search the area. 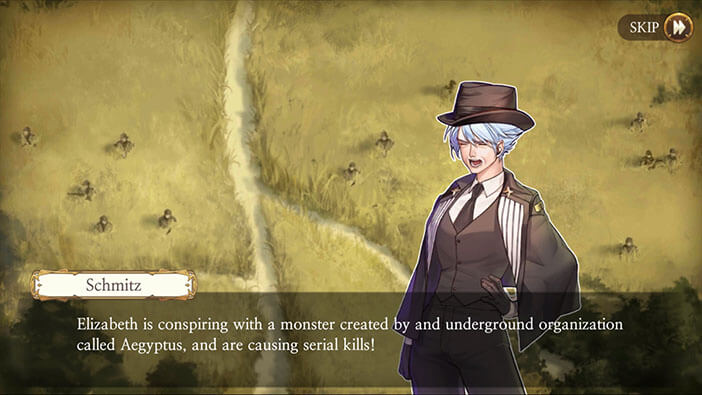
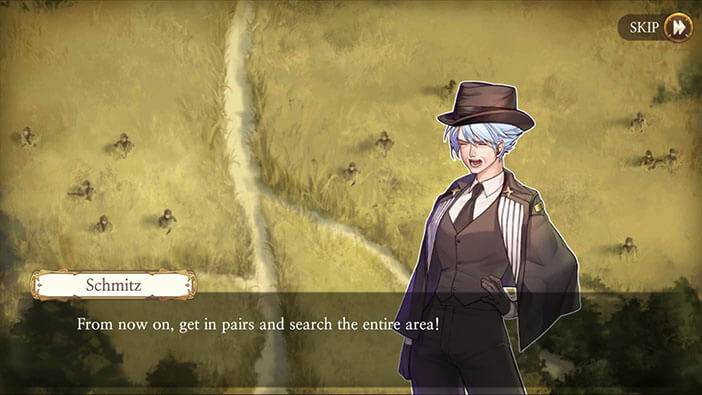
Her next statement is very controversial, to put it mildly. He orders her officers to shoot the suspects on sight, and not even try to arrest them. Erich states to go with Schmitz. However, other police officers aren’t really comfortable with orders. Most of them do not want to follow the order to shoot on sight, but are too afraid of Schmitz ti refuse…
With that, the search begins.
It looks like I was wrong and the cops did manage to score at least one hit since there’s a blood trail going through the field. So, our next task is to follow the blood trail. It’s a very straightforward process, just keep moving forward and tap on the last arrow that has bloodstains next to it.
In the first field tap on the third arrow on the left.
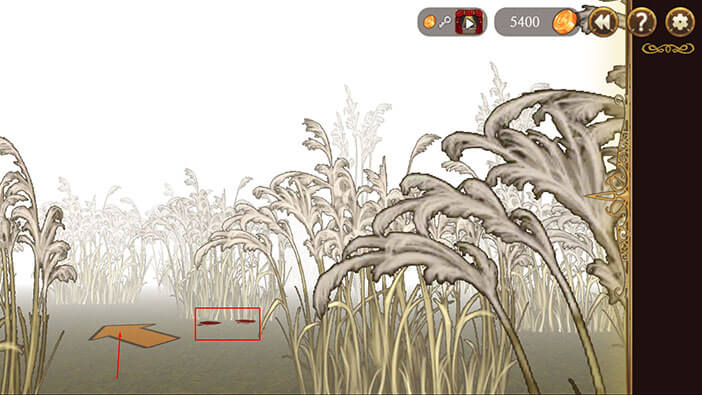
In the second field, tap on the first arrow on the left. 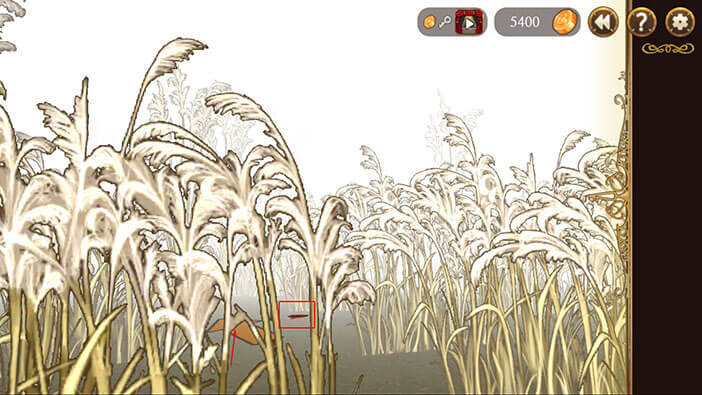
In the third field, tap on the second arrow on the left. 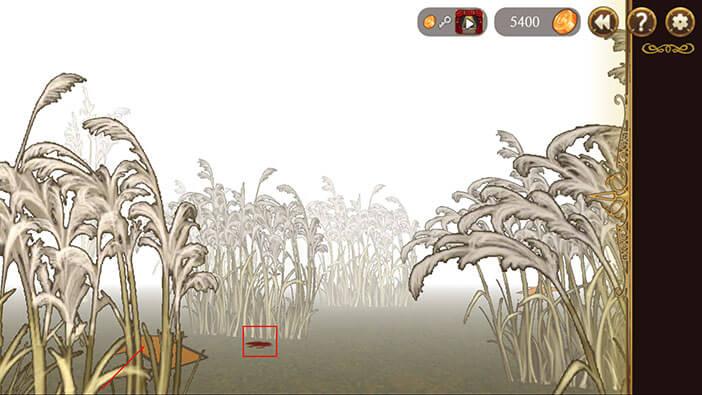
In the fourth field tap on the last arrow (this one is pointing straight ahead). 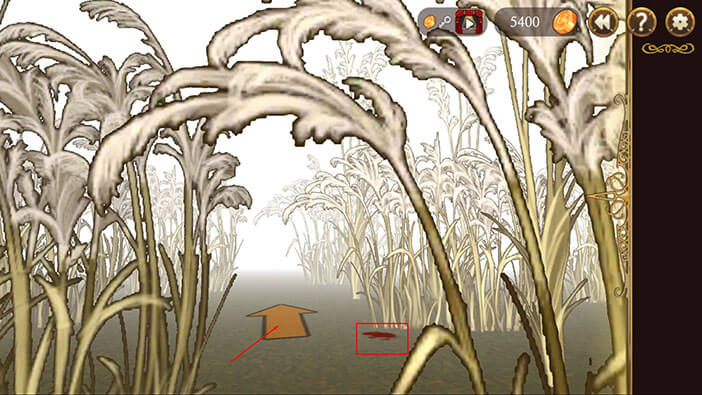
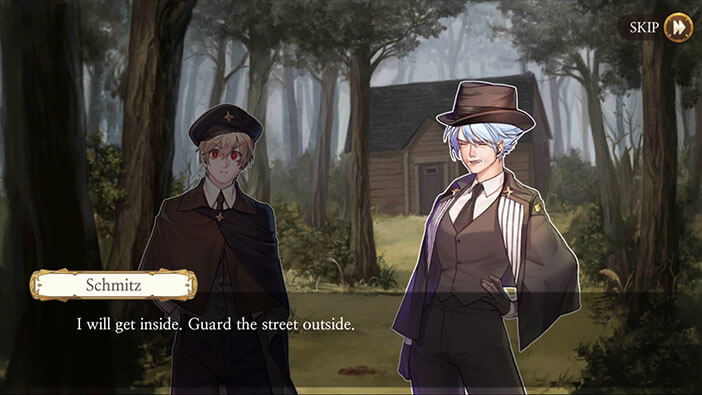
When we got out of the field, Erich noticed that the blood trail leads to the small cabin. Schmitz says that she will go in, and orders Erich to stay outside and guard the entrance.
Erich was surprised at this decision, but Schmitz explained that he never used his weapon against a suspect before, so that’s why she’s going in alone. She also states that the “newbie” (Erich) should stay outside… Well, that was rude, and somewhat illogical, since going in alone is very dangerous. But, I suspect that Schmitz wants to eliminate Elizabeth and Huxley, and that’s why she decided to leave Erich outside.
Erich reluctantly agrees, saying that he will guard the entrance to the cabin. Schmitz adds that he’s finally useful in some way… Again, very rude of her…


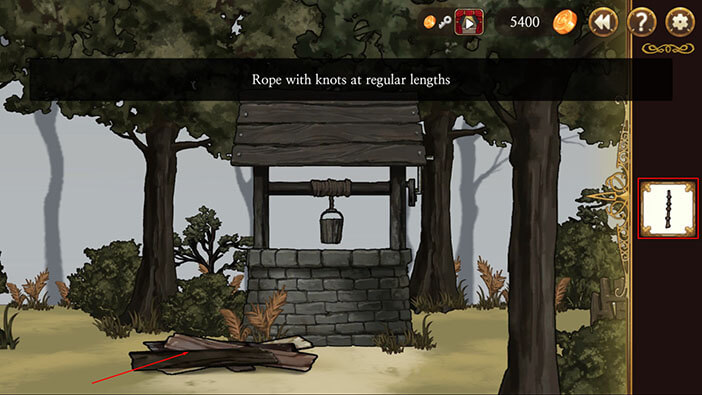
Tap on the rope on the left. 
Here we have a new puzzle. Our task is to connect the rope by going from one knot to the other, without leaving any empty space on the gird. It would be very difficult and time-consuming to explain this puzzle step by step, so if you’re struggling take a look at the solution in the image below. 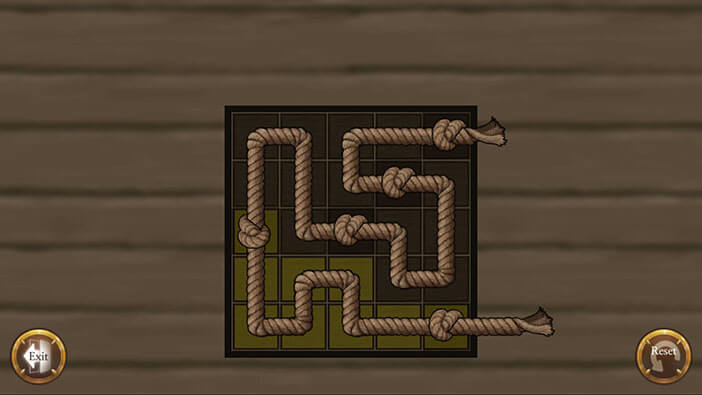
After solving the first puzzle, you will immediately advance to the next puzzle with the red rope added into the mix. Again, you can find the solution in the image below. 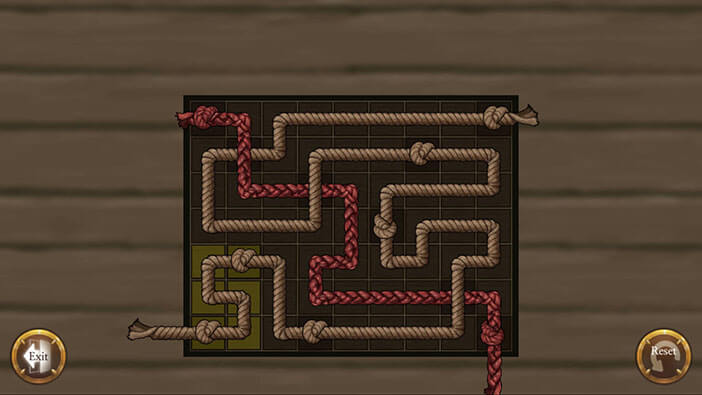
After completing the puzzle, the “Rope with Knots” will be added to the inventory.
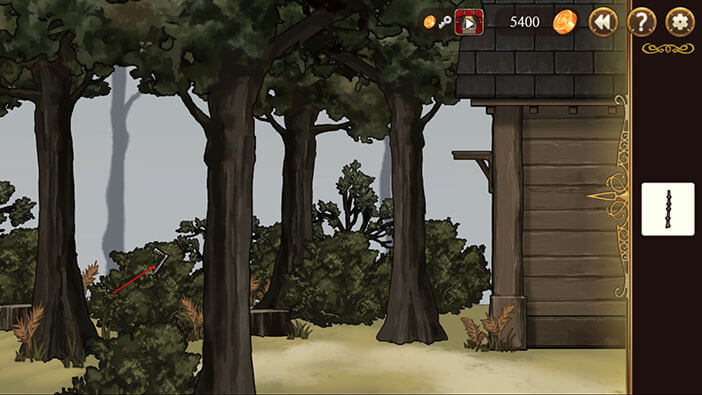
Okay, turn to the left and you will notice a metal object sticking out from the bush. Tap on the object and the “Handle” will be added to the inventory.
Turn all the way to the right and you’ll notice a well. Select the handle from the inventory and tap on the right side of the axle to attach the handle. 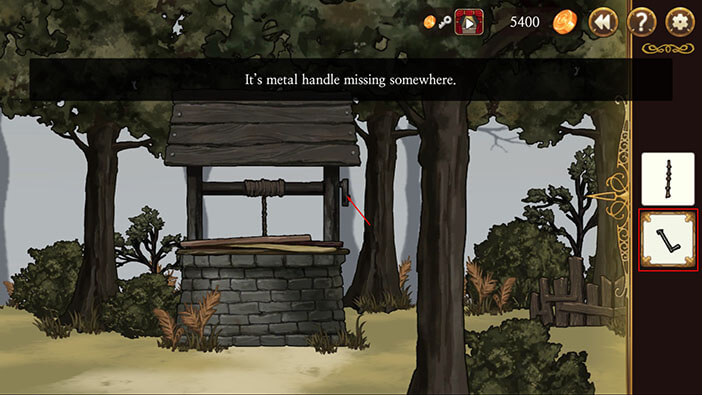
Tap on the well. 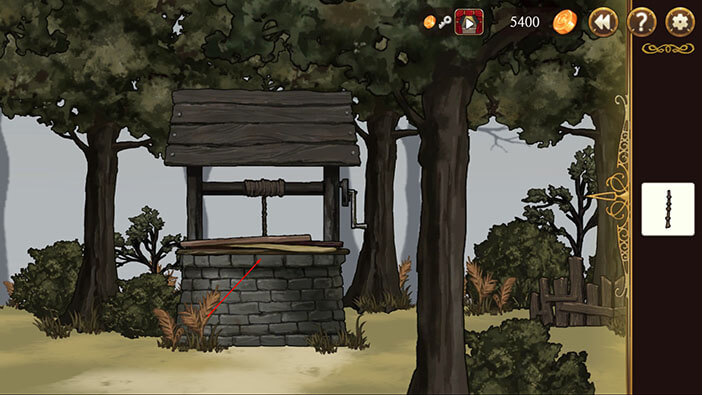
Here, we can see that the access to the well is blocked by multiple boards. This puzzle is comparable to the “ribbon” puzzle that we solved during one of the previous stages.
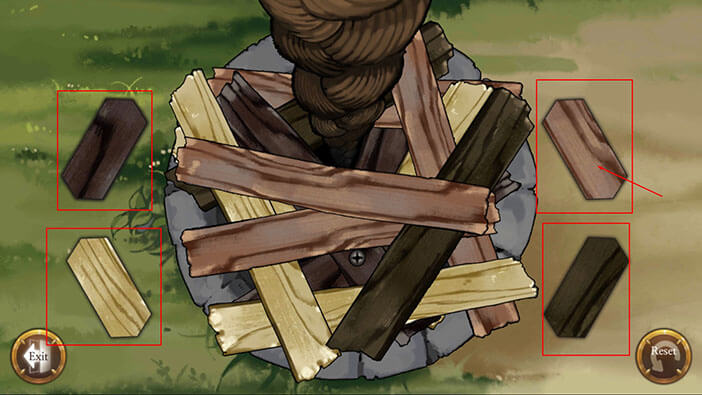
There are four boards around the wall. Our goal is to tap on one of the four boards that match the topmost board that is blocking the good entrance. If we tap on the correct board, one of the boards will be removed. If we make a mistake, the puzzle will reset.
Step 1: Tap on the board in the upper right corner
Step 2: Tap on the board in the lower right corner
Step 3: Tap on the board in the upper right corner
Step 4: Tap on the board in the lower left corner
Step 5: Tap on the board in the lower left corner
Step 6: Tap on the board in the upper left corner
Step 7: Tap on the board in the upper right corner
Step 8: Tap on the board in the lower right corner
Step 9: Tap on the board in the lower left corner
Step 10: Tap on the board in the upper right corner
Step 11: Tap on the board in the upper left corner
After removing the boards, tap on the handle. 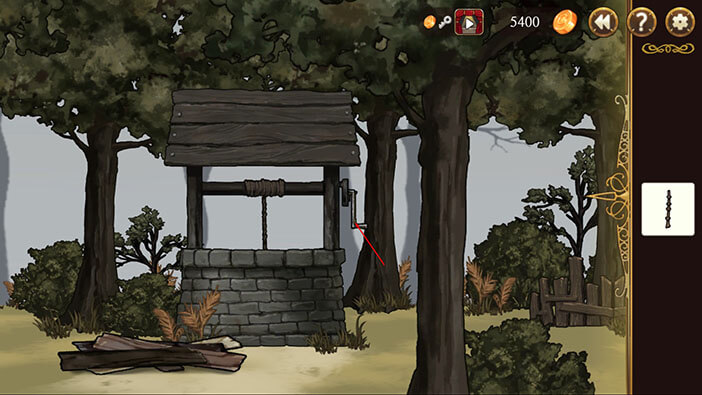
Tap on the bucket. There’s some kind of scheme inside the bucket, but it isn’t important to us right now. So, tap on the “Exit” button. 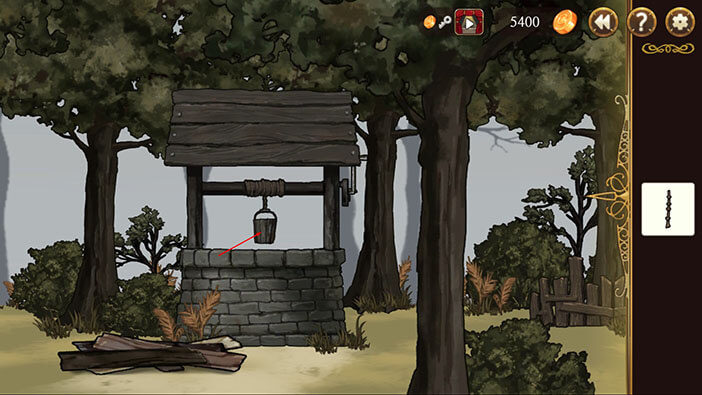
Select the “Rope with Knots” and tap on the boards that we removed from the well.
Our character will combine the two items, crafting a “Rope Ladder”.
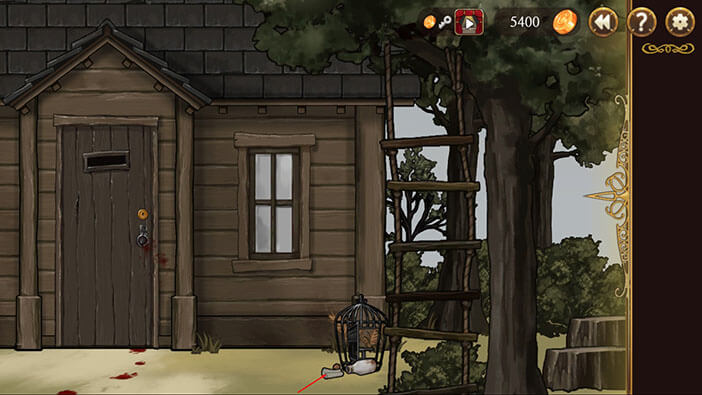
Turn to the left and you’ll notice a birdcage on the right side of the house. Select the “Rope Ladder” from the inventory and tap slightly to the left of the tree to place the ladder. 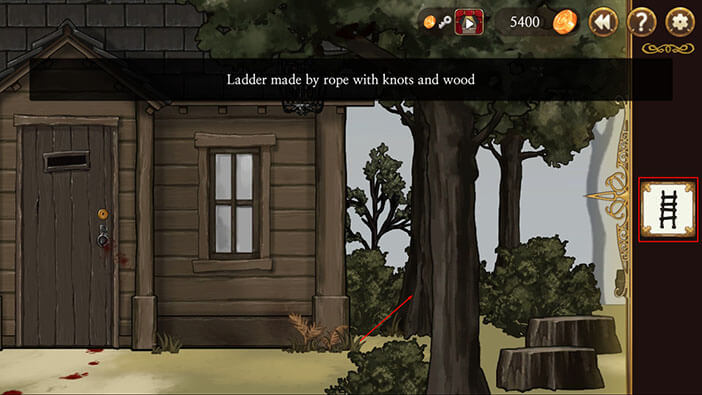
Our character can now reach the birdcage, so tap on it. 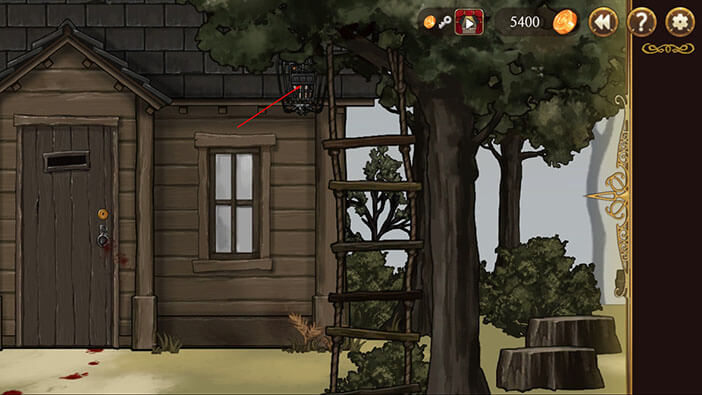
In order to open the birdcage, we will have to find a three-digit code. Tap on the “Exit” button. 
Turn to the right and face the improvised wooden table. Tap on the tree stump on the right. 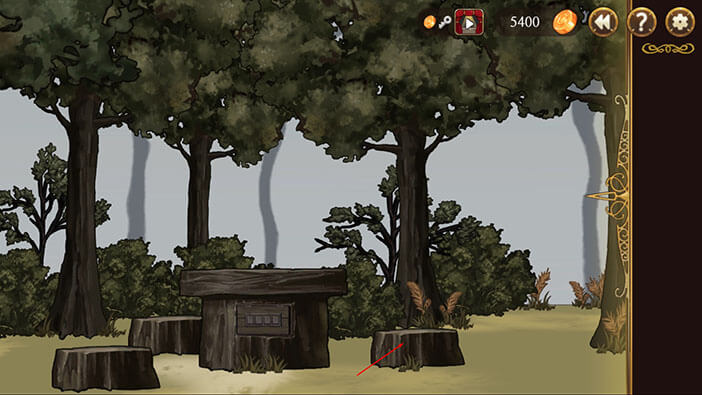
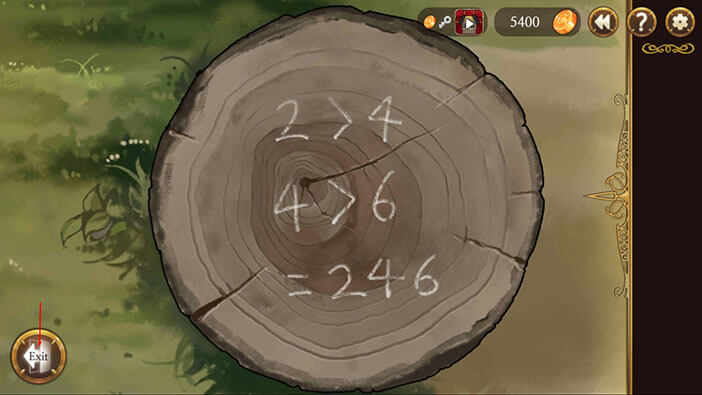
This is the example that explains how to solve this type of puzzle. It’s quite simple, really.
2 is lower than 8. (This means that the number two should come before the number 4)
4 is greater than 6. (This means that the number 4 should come before the number 6)
So, our first number should be 2, 4 is in the middle, and the last number is 6.
“246” is also the solution on the tree stump.
You don’t have to memorize the “246”, it is just an example.
Tap on the “Exit” button.
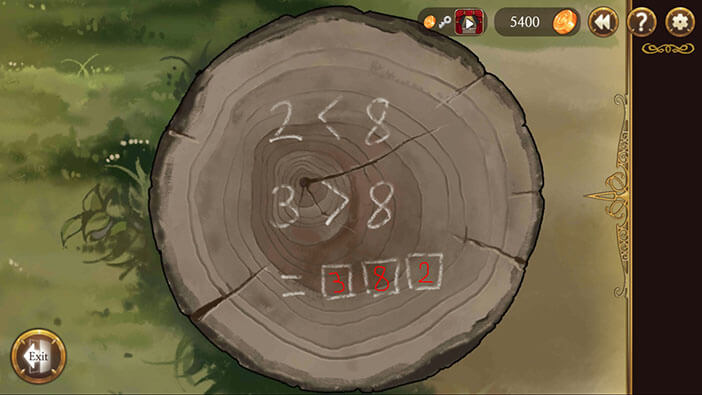
Move all the way to the right and you’ll see a tree stump with an axe embedded into it. Tap on the smaller tree stump to the right of it. 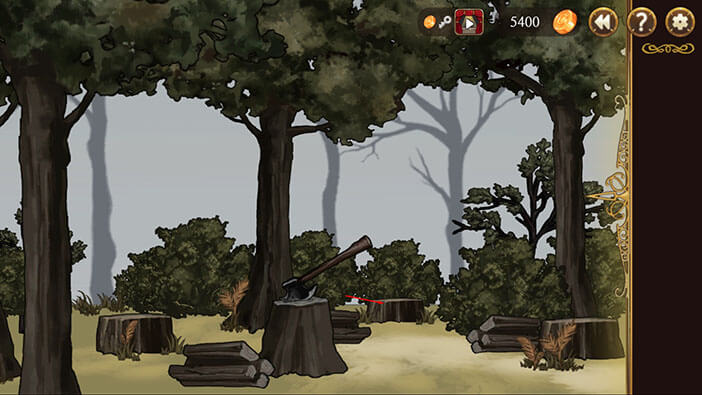
Here, we have another puzzle, but this time we will have to discover the solution by using the example that we saw previously.
2 is lower than 8. (So, the number 8 should come before the number 2)
3 is greater than 8. (So, the number 3 should come before the number 8)
We can immediately conclude that the number 8 should be in the middle, 3 should come before it, and the 2 after it.
So, the solution is “382”.
Memorize the solution and tap on the “Exit” button.
Go back to the birdcage and tap on it to start the interaction. 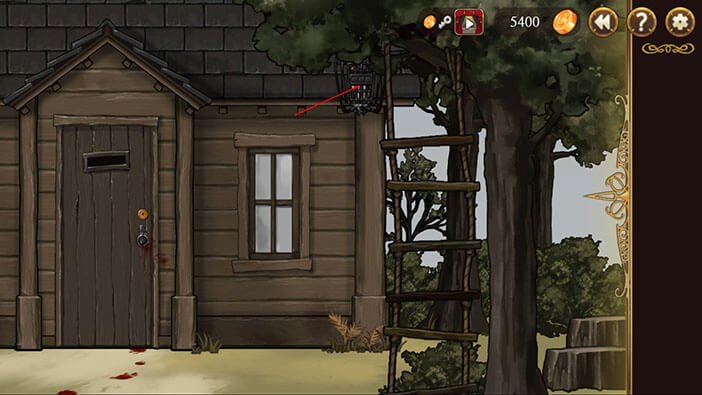
Enter the code “382” that we just discovered and tap on the “OK” button. 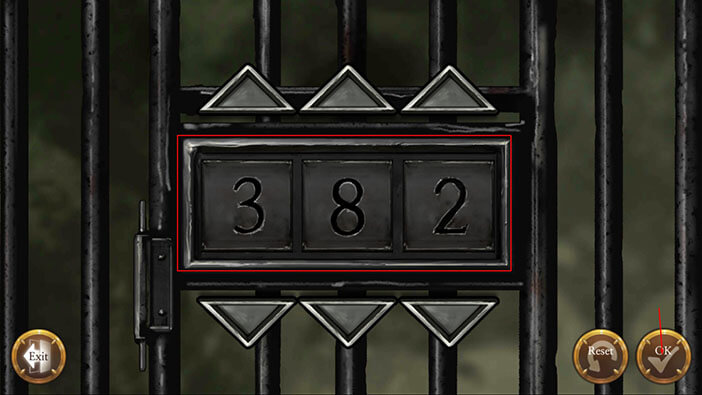
After entering the correct code the birdcage will fall down. Tap on the birdcage to open it and tap again to examine the note inside it. 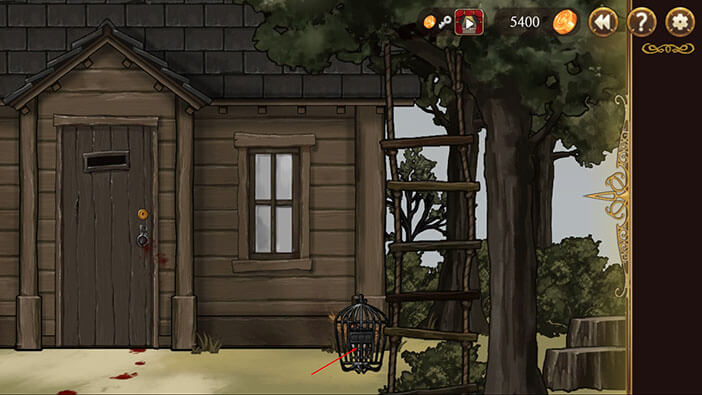
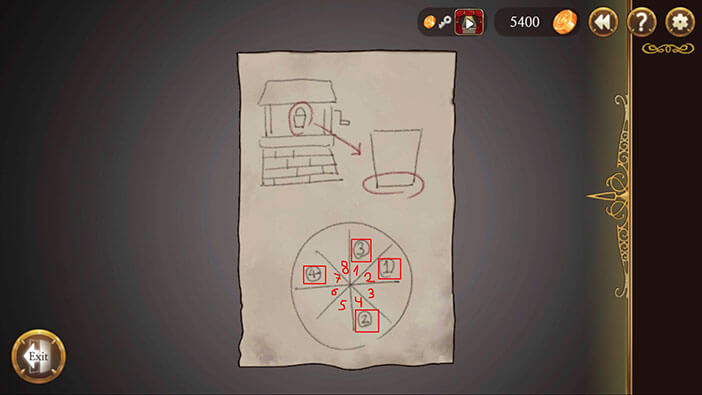
Here we can see the bucket and it looks like it is somehow connected to some much larger object.
More importantly, below this drawing, we can see a circle divided into eight parts, and there’s also a number inside four of these parts. We should remember this information, and I found a very easy way to do it. First, let’s name the fields of the circle with numbers 1 through 8. We will count the fields clockwise. Now let’s write down this information.
Inside the field number, one is number THREE.
Inside the field number, two is number ONE.
Inside the field number, four is number TWO.
Inside the field number, seven is number FOUR.
Memorize or write down this information and tap on the “Exit” button.
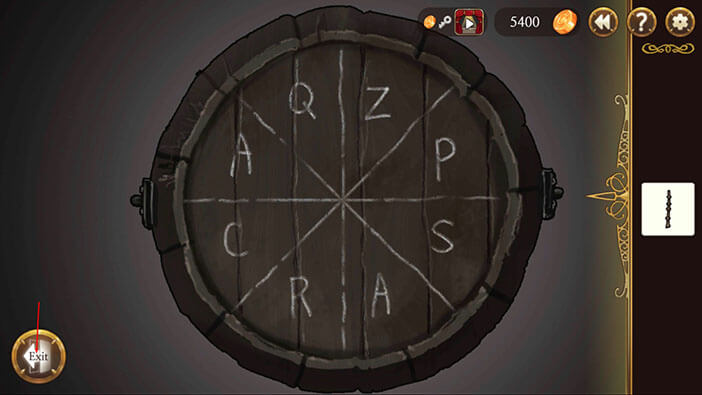
Turn to the right and tap on the bucket. 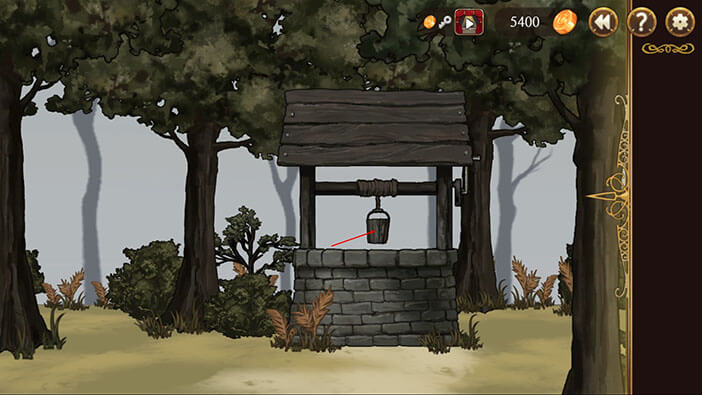
Looking at the bottom of the bucket, we can see that it also has a circle divided into 8 fields just like the drawing on the note in the birdcage.
The number on the note that we found in the birdcage represents the chronological number of the letter. We can use this information to discover the password. So, first of all, we need to find the field that contained number 1. Let’s take a look at our notes.
Inside the field number two is number ONE.
Inside field number two on the bucket is the letter “P”. So “P” is the first letter of a password.
Inside the field number, four is number TWO.
Looking at the circle in the bucket we can see the letter “A” inside the field number 4, so that’s the second letter.
Inside the field number, one is number THREE.
Looking at the circle in the bucket we can see the letter “Z” inside the field number 1, so that’s the third letter.
Inside the field number, seven is number FOUR.
Looking at the circle in the bucket we can see the letter “A” inside the field number 7, so that’s the fourth letter.
When we put it all together, we can conclude that our password is “PAZA”. Memorize the password and tap on the “Exit” button.

Turn to the left and tap on the “locking device” on the wooden table. 
Enter the password “PAZA” that we just discovered and tap on the “OK” button. 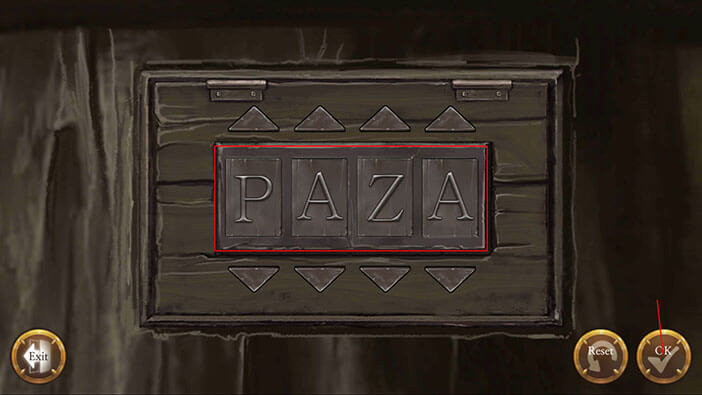
After solving this puzzle, a small door inside the wooden table will open revealing a hidden compartment. Tap on the key inside it to pick it up. 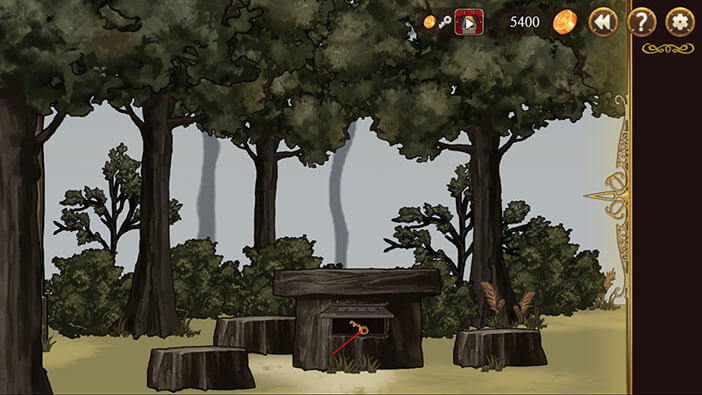
Turn to the left and tap on the cabin door. Read Schmitz’s comment. I had to show this because I laughed so hard the first time I saw it. The choice of words is just, amazing… 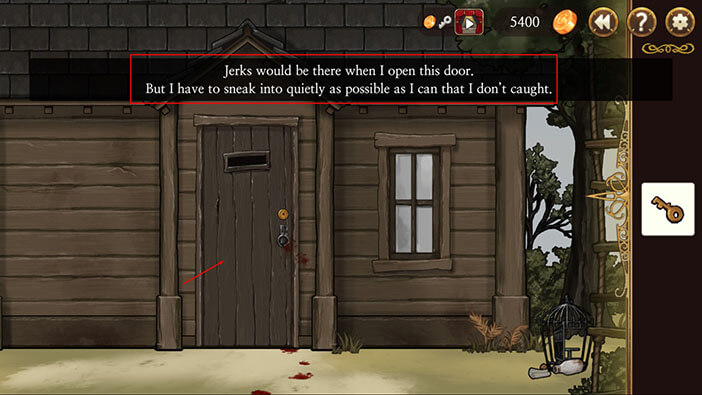
Ok, back to the walkthrough. Select the key from the inventory and tap on the keyhole to unlock the door. 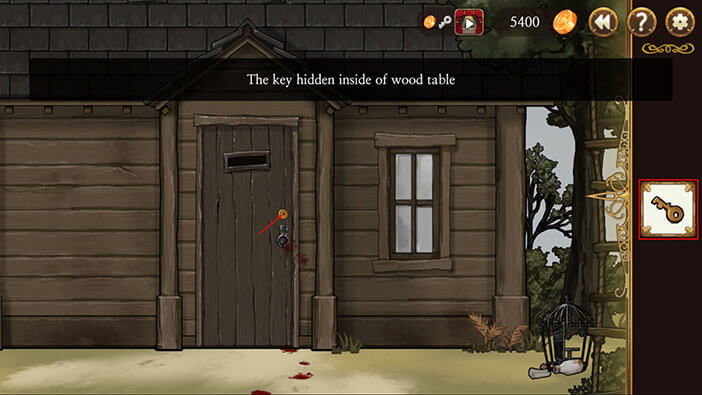
Tap on the door to open it and tap once again to enter. Schmitz is ready to finish this, once and for all. 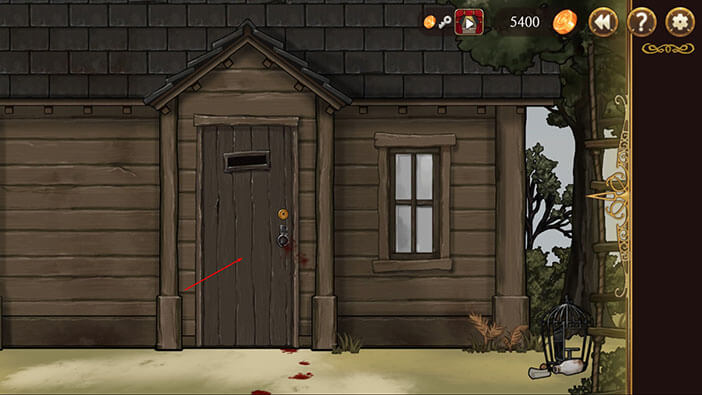
In the next scene, we can see Elizabeth and Huxley inside the cabin. Huxley was wounded during the escape, but the wound doesn’t look too serious, and he should be able to walk in a day or two. Luckily, the couple made it to the cabin, so Huxley had time to rest. 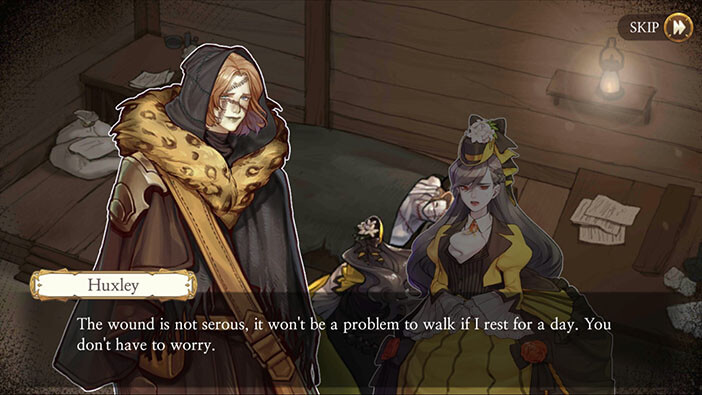
At this point, Schmitz walks into the cabin, cursing Huxley’s name along the way. The detective heard a rumor that somebody was reanimating the dead, but didn’t believe it. She continues, saying that she would turn a blind eye if Samuel only took Huxley’s life. But, that was not an option since the leader of the Aegyptus killed Elizabeth’s parents, and the death of the two members of the nobility can’t be ignored…
I am also confused, and still have no idea why Samuel didn’t go straight for the Huxley…


Now, Elizabeth realizes that Schmitz knew the truth all along, and did nothing. The young girl can’t believe that the detective could let the innocent man die, without a second thought. She considers Schmitz a disgrace for the police force – I agree with her.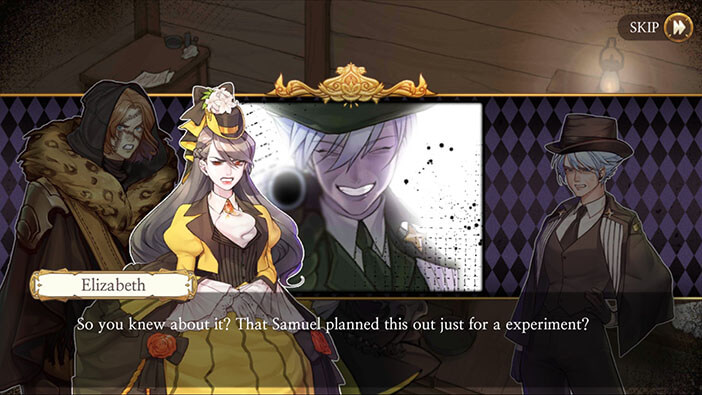

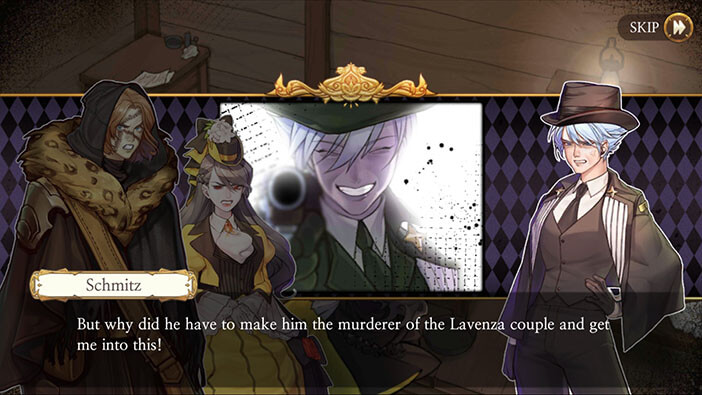
Schmitz shut her up and tries to justify her actions. She says that she was being blackmailed since Aegyptus threatened to uncover all the mistakes that she made during the investigation unless she keeps quiet.
Schmitz says that there’s only one solution to her problems. She is going to destroy all the evidence, and murder the witnesses (Huxley and Elizabeth). As the saying goes “Dead mouth can’t talk”. Well, I guess Huxley MK II is an exception to this rule…


With that said, Schmitz points her gun toward Elizabeth and Huxley and prepares to pull the trigger.
Ahem, I see another problem with Schmitz’s plan here. During the first half of the nineteenth century, almost all firearms were single-shot only (except for double-barrel shotguns and revolvers). So, how does she plan to kill both Huxley and Elizabeth?
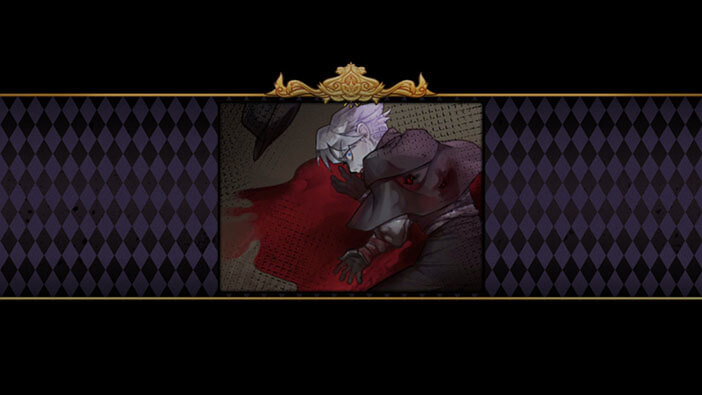
The two shots could be heard, but Schmitz wasn’t the one who fired. Everybody was surprised when they saw Erich standing in the doorway while holding a smoking gun. He shot detective Schmitz, twice. Well, I guess nobody told him that his handgun is a single-shot weapon.

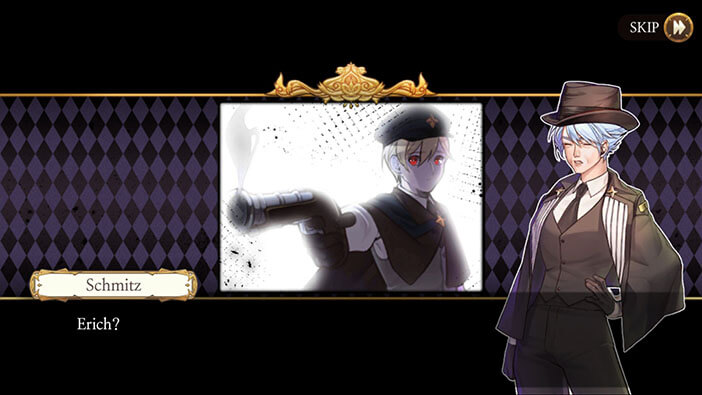
Schmitz falls down and dies, and her last question “Erich, Why?” will remain unanswered forever. Well, unless Aegyptus reanimates her, that would be a very strange turn of events.
Anyway, it seems that young detective Erich realized that Schmitz was dirty, and he was probably the one that hid the button during Henry’s murder investigation, and presented it to the Chief of police, later. In the end, Erich had to shoot Schmitz since he couldn’t just stand by while she murders two innocent people.

Well, that was certainly an unexpected ending. In the next stage, we will be playing as Elizabeth, as she and Huxley set off on a long journey. Join us in the next stage of the Walkthrough for Frankenstein Room ESC, and discover what happens next during the search for Samuel, and why Erich shot Schmitz.
Thank you for reading.