Chapter 7-4 The Reason we are Alive
Complete Walkthrough
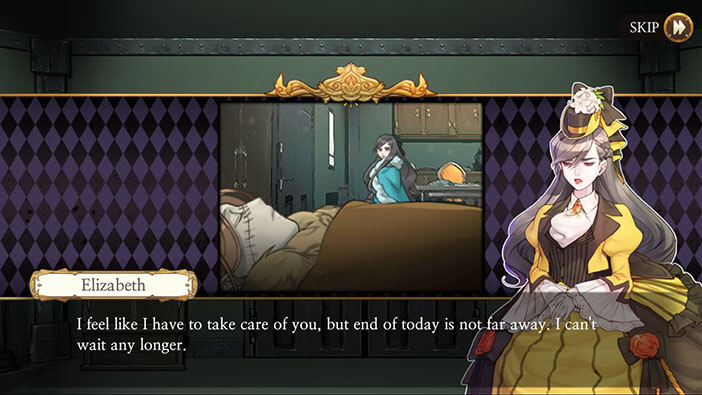
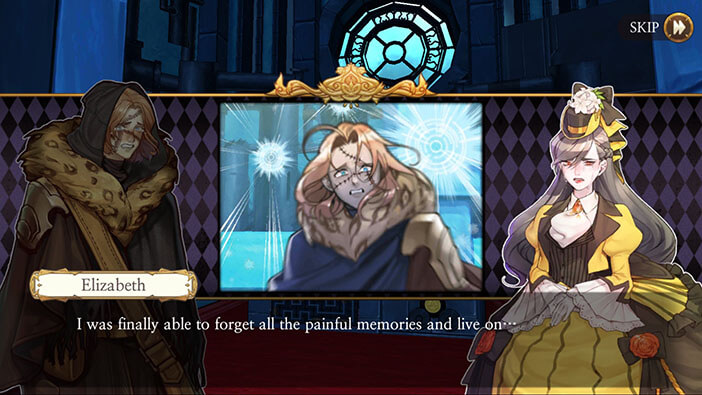
Hello everyone, and welcome to our Walkthrough for the Fourth Stage of Chapter 7 for the Frankenstein Room ESC adventure game. In this stage, we will be playing as Elizabeth, as she heads toward Babel alone while leaving the unconscious Huxley behind.
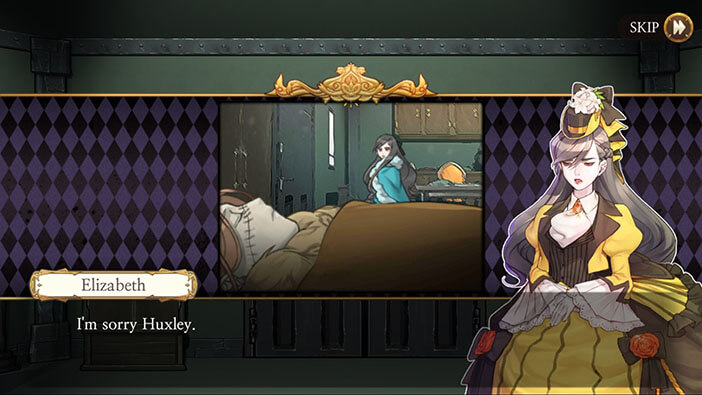
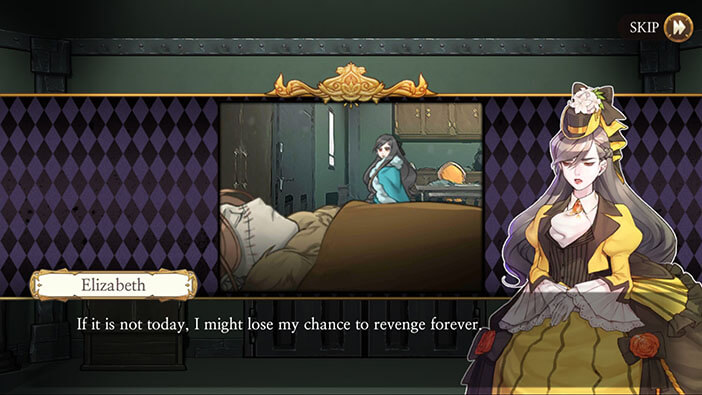
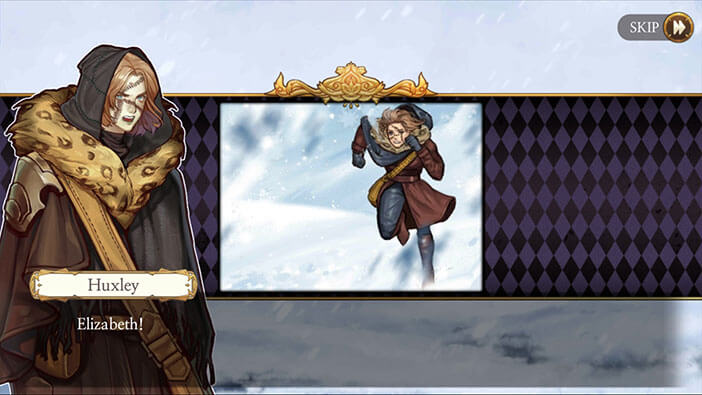
Our story continues after Huxley blacks out, right where we left off in the previous stage. Huxley is still unconscious, and Elizabeth’s heart tells her that she should stay by his side and take care of him until he wakes up. However, the end of the day is drawing near, and she has to go to Babel right now, or else she won’t get there in time. The in-game time is the 25th of December, in the afternoon, the “Day of the Sunspot Explosion”, and if she doesn’t get to Babel by the end of the day, she will lose the chance for revenge. At least that’s what she thinks. With that said, she leaves Huxley inside the warm cabin, and heads out toward Babel…

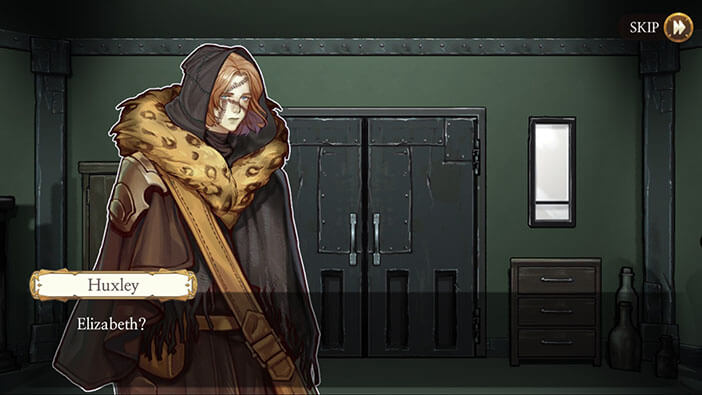
In the next scene, we can see Huxley waking up, and calling for Elizabeth. I think he will go after her, as soon as he realizes that she went to Babel.
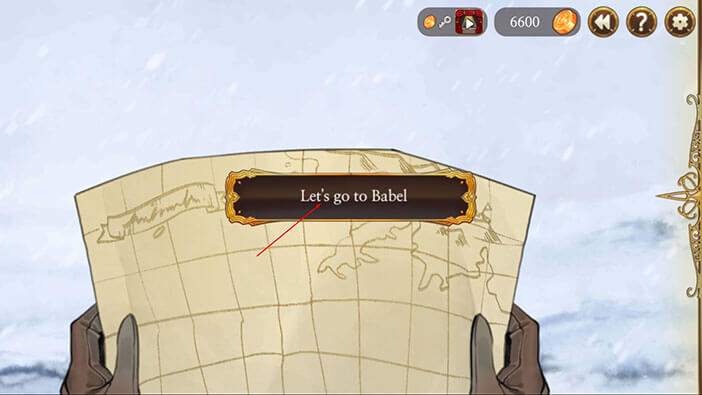
Ok, time to start our journey. Tap on the “Let’s go to Babel” button.
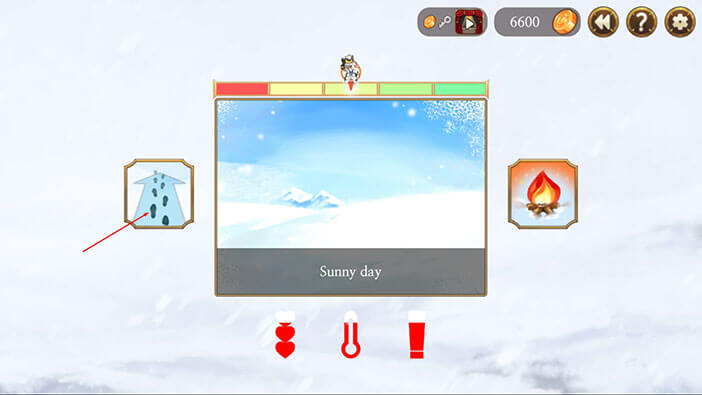
Before we reach Babel, we will have to play another survival mini-game. We already played two of these mini-games, so I won’t be going over the mechanics again. I am not sure if you’ll get randomized events in this mini-game, like in the previous two, but below you can see my version of Elizabeth’s journey.
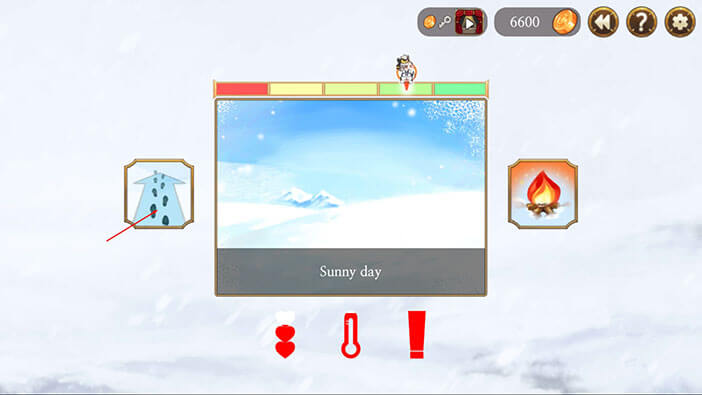
Step 1
Our journey starts with the “Sunny Day” which is a good sign. Naturally, I tap on the option on the left to move forward.
Step 2
“Sunny Day”, again, so I chose to go forward, the option on the left.

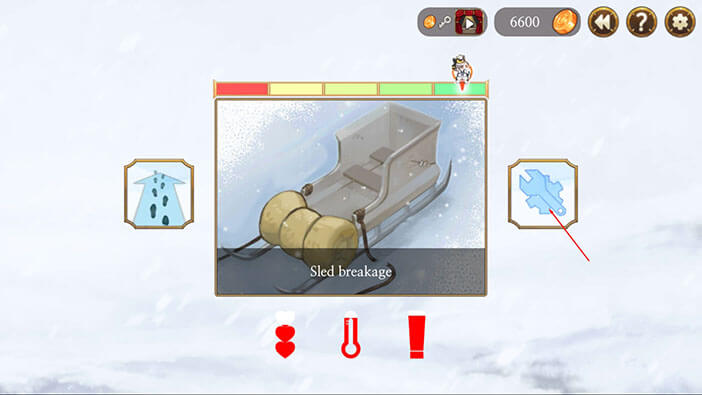
Step 3
“Sled Breakage”. I chose to repair the sled – the option on the right.

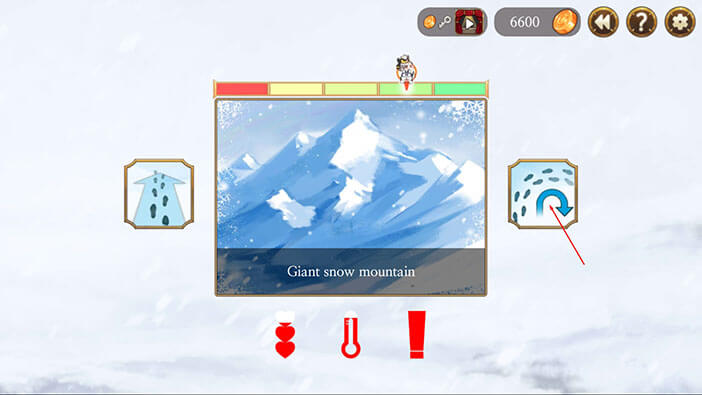
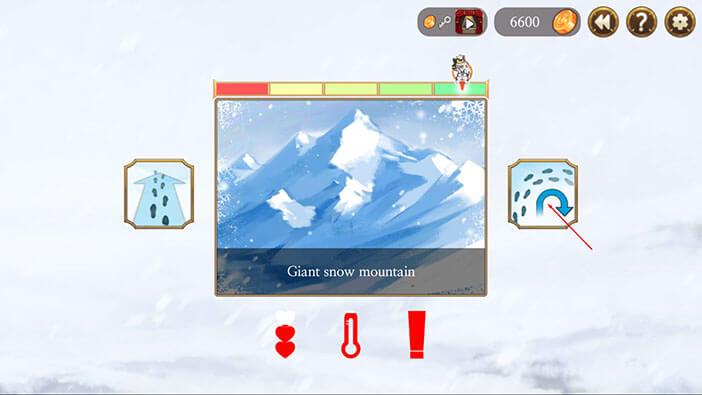
Step 4
“Giant Snow Mountain”, and I chose to go around it, the option on the right.
Step 5
“Sled Breakage”. I chose to repair the sled – the option on the right.
Step 6
“Sunny Day”, so I chose to go forward, the option on the left.
Step 7
“Giant Snow Mountain”. I chose to go around it, the option on the right. And that’s the end of my journey.
As a side note, this journey was supposed to take half an hour at most (2km distance). At this point, my hunger bar got dangerously low, and it seems like Elizabeth has been traveling for hours… I just wanted to point that out.
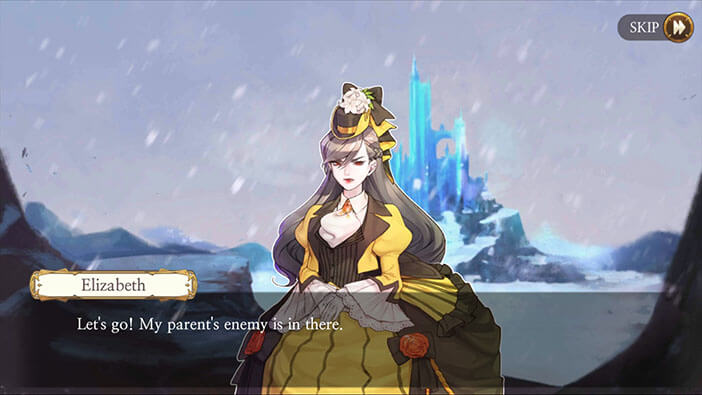
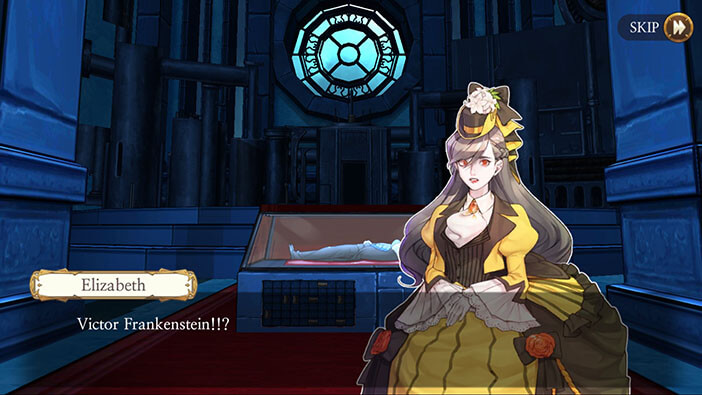
After some time, Elizabeth finally reaches Babel, and it is a huge palace, in the middle of a frozen wasteland. Elizabeth decides to go inside and face the man who killed her parents.
“Aegyptus Medal” will be added to the inventory after this scene.

We can move forward and backward by dragging, just like when we were in the forest, in one of the previous chapters.
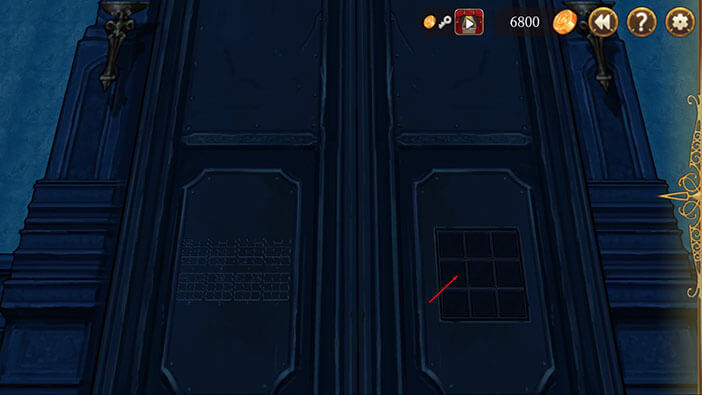
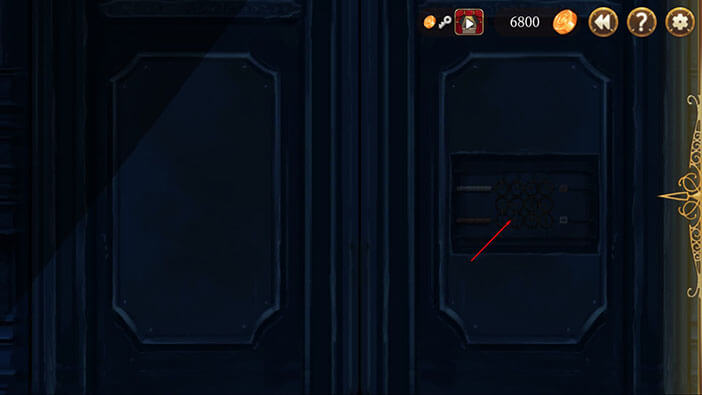
Move forward until you reach the huge door, and tap on the drawing on the left to examine it.
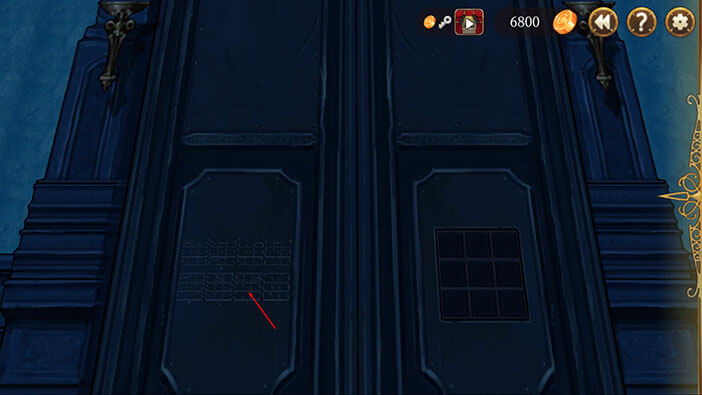
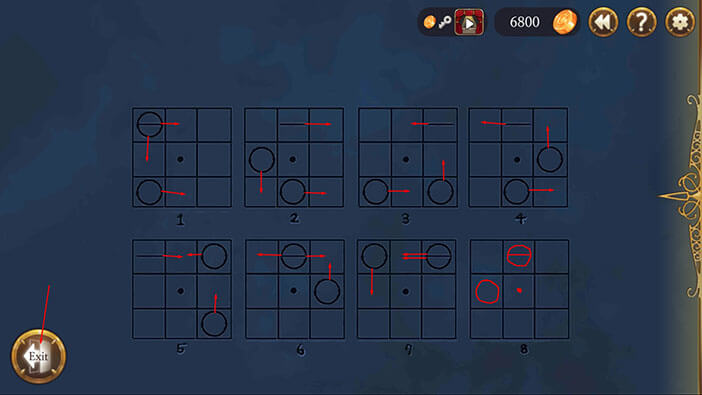
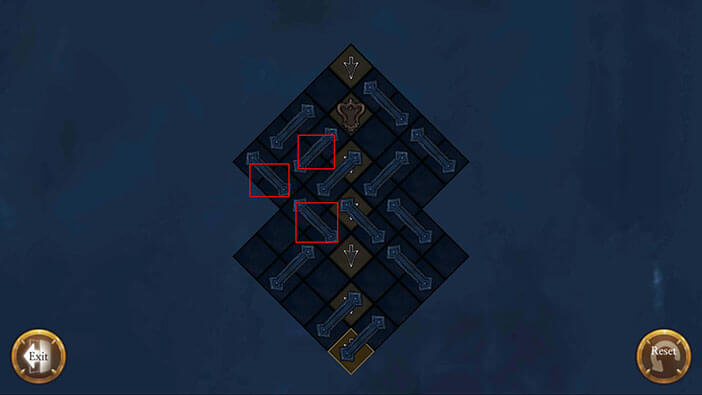
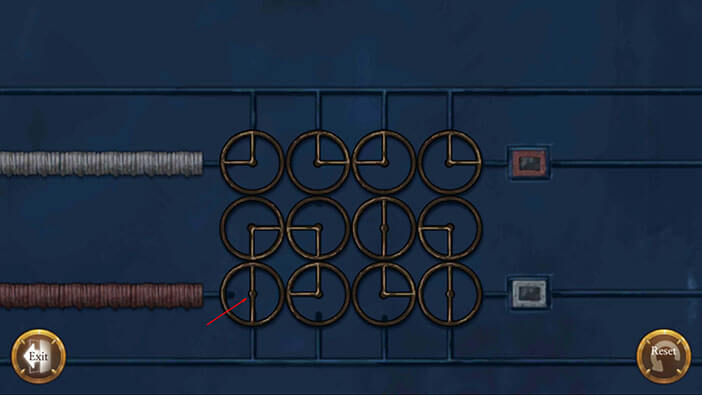
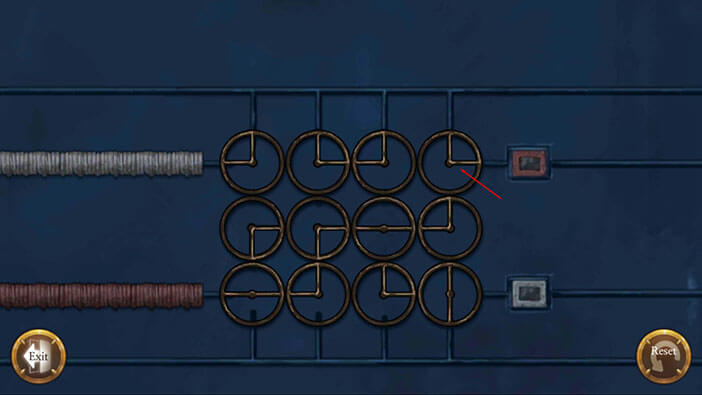
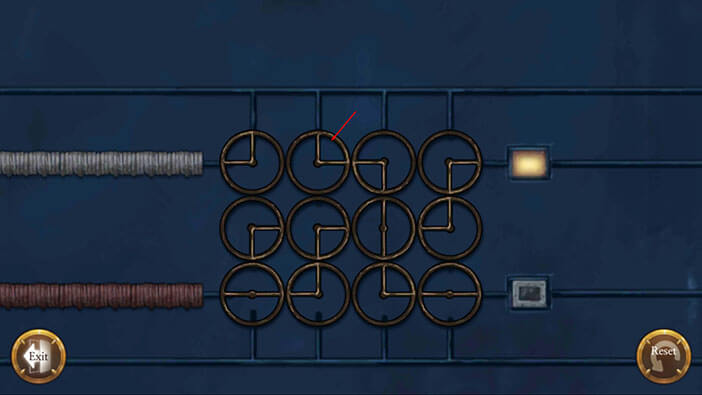
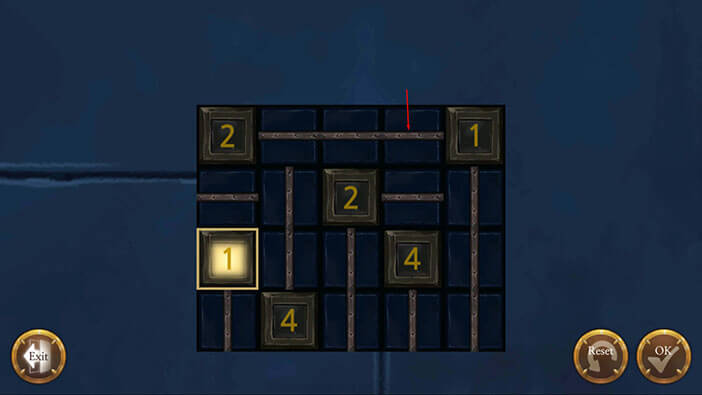
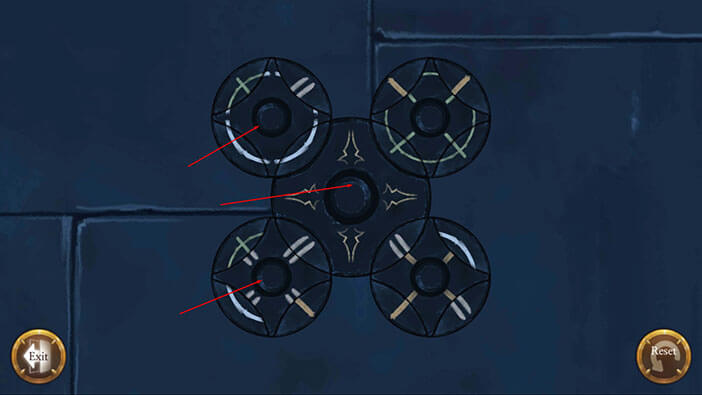
Ok, we have another puzzle to solve. There are eight grids in total, and the first seven grids are examples based on which we should determine the position of a line and two circles. Let’s try to figure out this puzzle.
Looking at the examples we can see that the two circles are rotating right to left (counterclockwise) by one field in each successive grid (example).
Also, the line is moving left to right and right to left by one field in each successive example.
The black dot in the middle is static.
With this knowledge, we can easily determine the position of the elements in the last grid by looking at example number 7.
One of the circles should be in the first field of the second row.
The line and the other circle should be in the second square of the first circle, forming a circle with a horizontal line.
The dot should be in the center of the grid just like in all other examples.
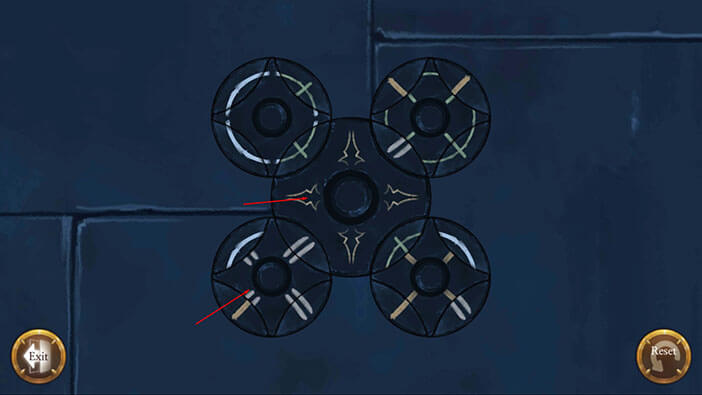
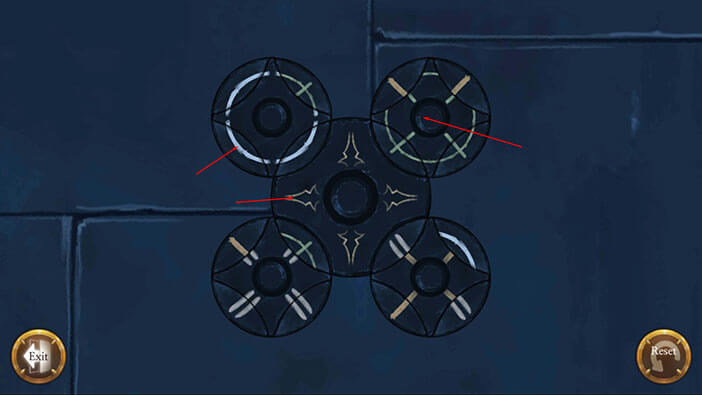
You can see the solution and the direction of the movement of the three elements in the image below.
Memorize the position of the elements (two circles and a line) and tap on the “Exit” button.
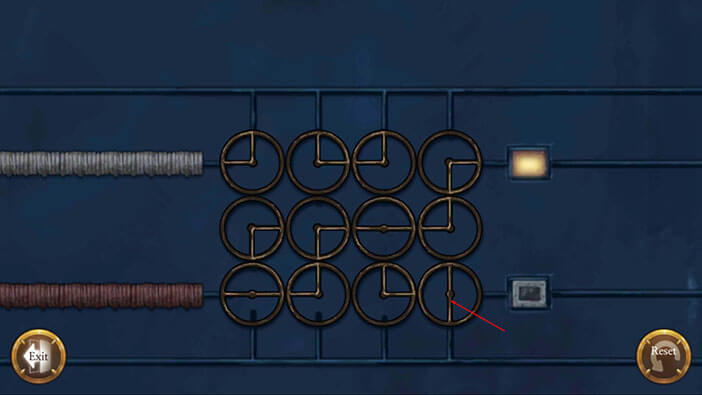
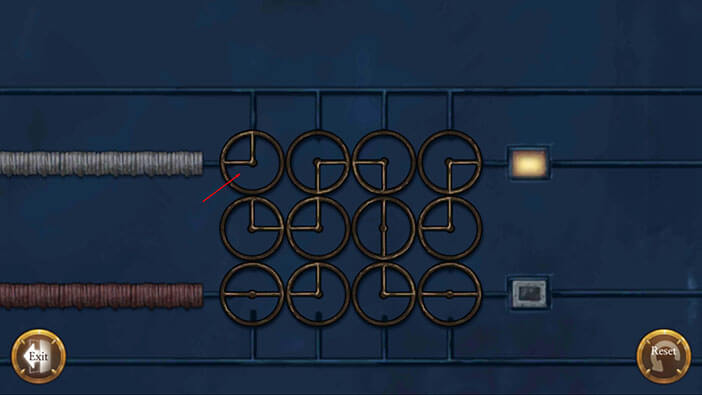
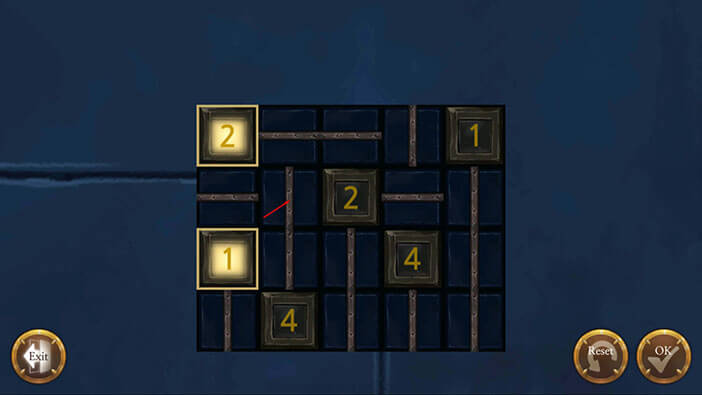
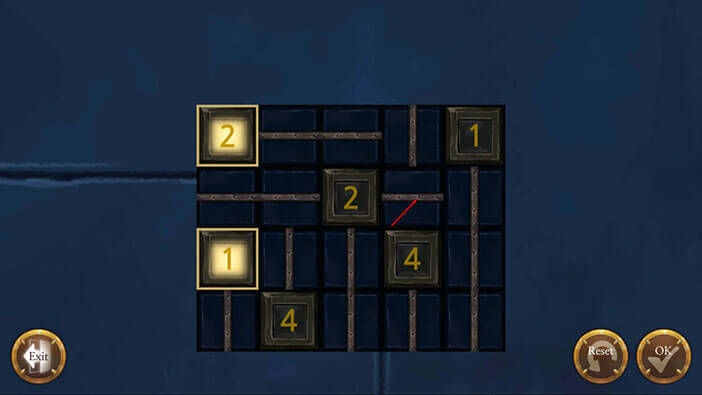
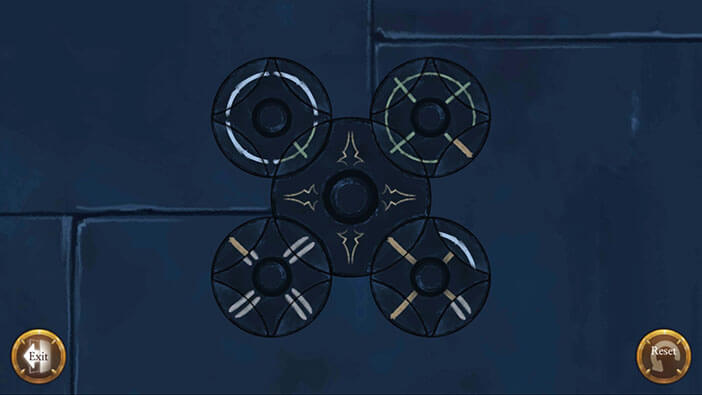
Tap on the grid on your right.
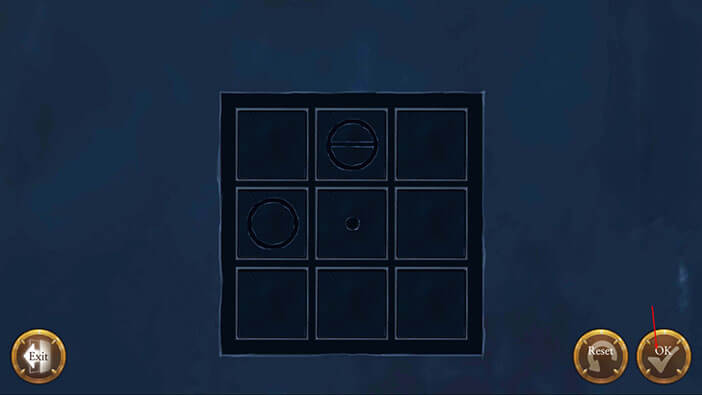
This is three by three grid just like the ones that we saw on the left. By tapping on the fields of the grid, we can change the symbol inside the fields. Let’s arrange the symbols the same way as in the last grid on the other side of the door. So,
Circle with horizontal line = second field of the first row
Circle = first field of the second row
Black Dot = center of the grid.
The other fields should remain empty. Tap on the “OK” button to confirm.
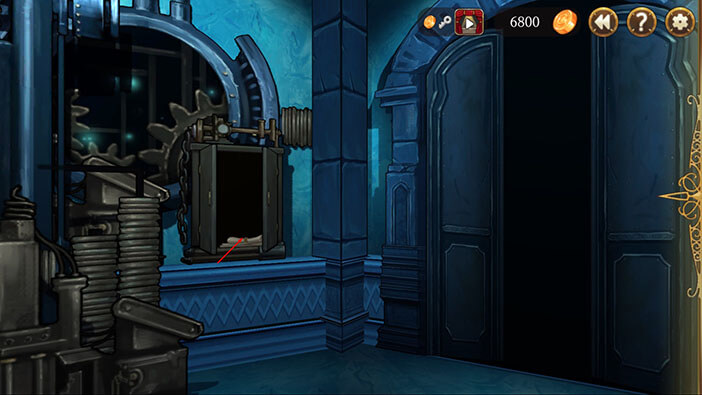
With that done, we went through the first door. Move forward, tap on the door on your right to open it, and tap once more to enter.
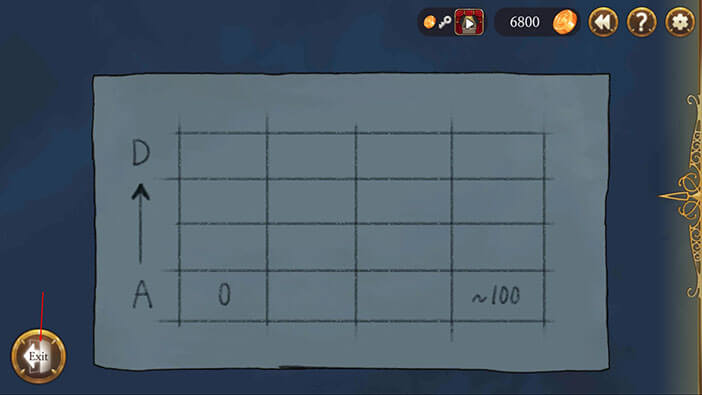
Turn to the left, tap on the cabinet to open it, and tap on the note inside the cabinet to read it.
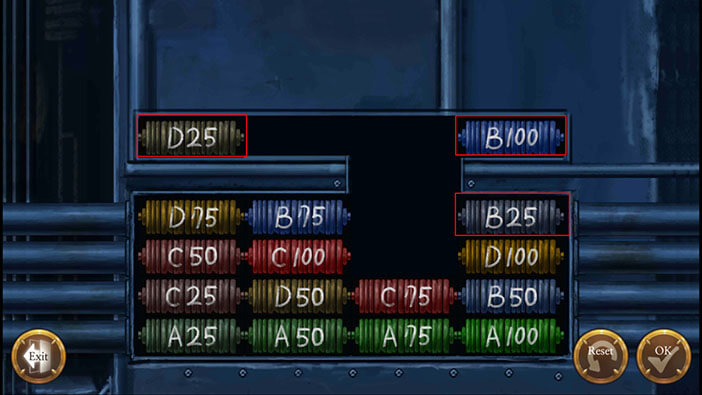
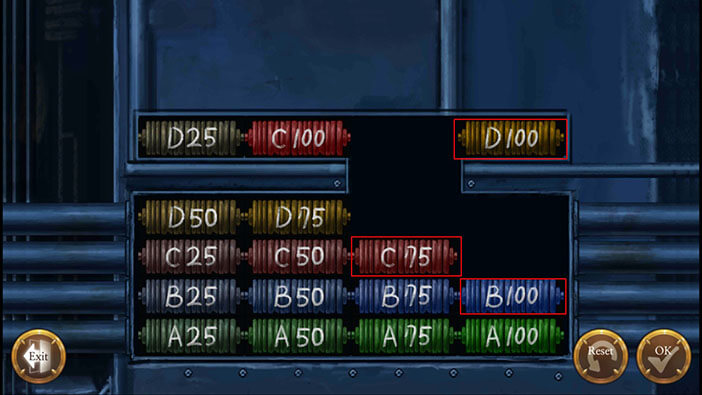
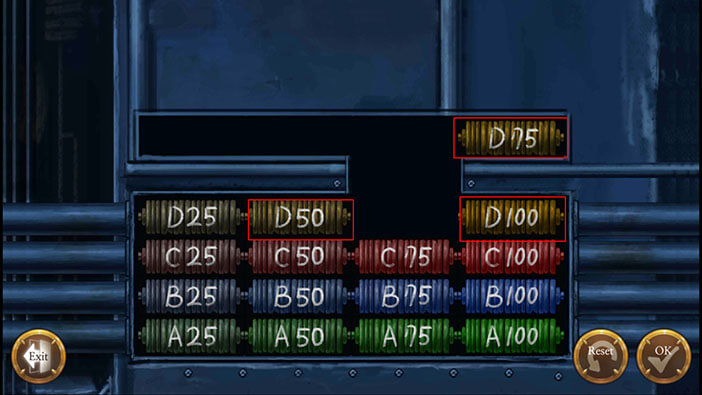
By looking at the note we can see that the letters should be arranged by the alphabet from A (bottom) to D (top). The numbers should be arranged horizontally from 0 to 100 (left to right).
Tap on the “Exit” button.
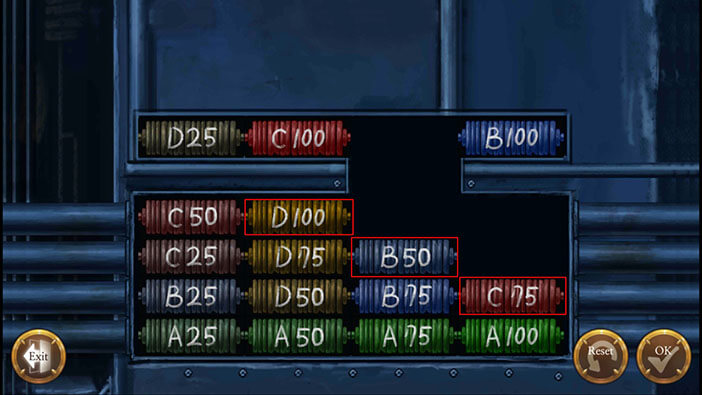
Turn to the left and you will see the batteries that are marked with letters A, B, C, and D, and numbers 25, 50, 75, and 100. Tap on the batteries to examine this machine.
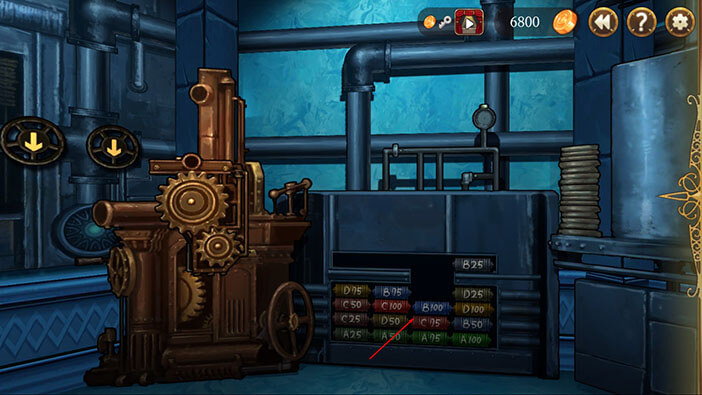
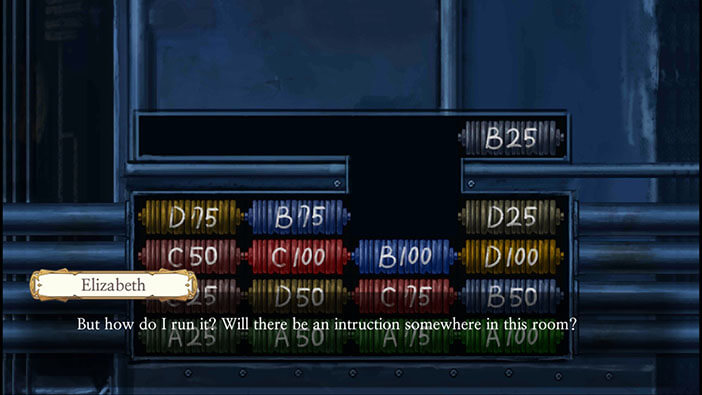
Elizabeth concludes that this is the generator room and that she should turn on this device. She is wondering if there are instructions for operating this machine somewhere inside the room.

Well, we already saw the instructions and know how to operate the machine. Looking at the bottom row of batteries we can see that the batteries marked with the letter A are already arranged in the correct order (A25, A50, A75, and A100). Our task is to arrange the batteries marked with the other three letters in the same order. So, the letter B should be above the A, C further above it, and D on top. The number on the batteries should be the same as in the bottom row (25, 50, 75, and 100 – looking from left to right).
Let’s start.
Step 1
Move D25 all the way to the upper left corner.
Move B25 to the fourth field (left to right) of the first row (top to bottom) – where D25 was located.
Move B100 to the upper right corner.
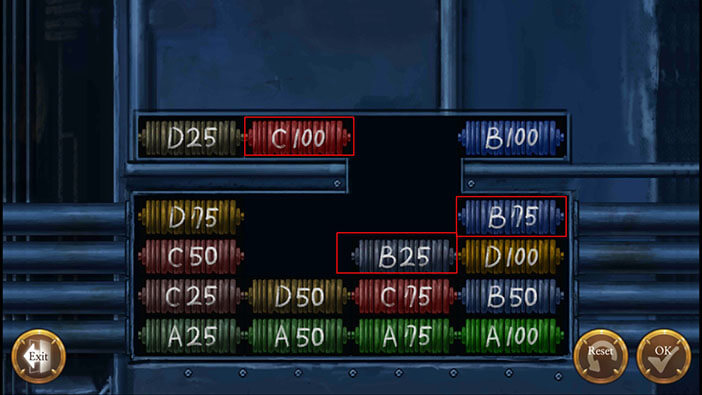
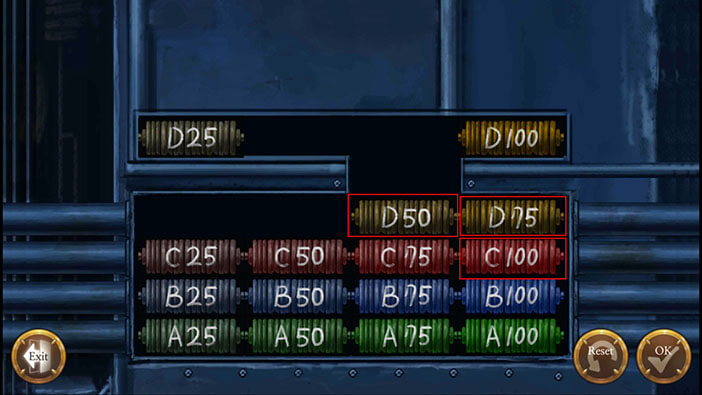
Step 2
Move B25 to the third field of the second row.
Move B75 to the fourth field of the first row – where B25 was
Move C100 to the upper left corner – next to the D25
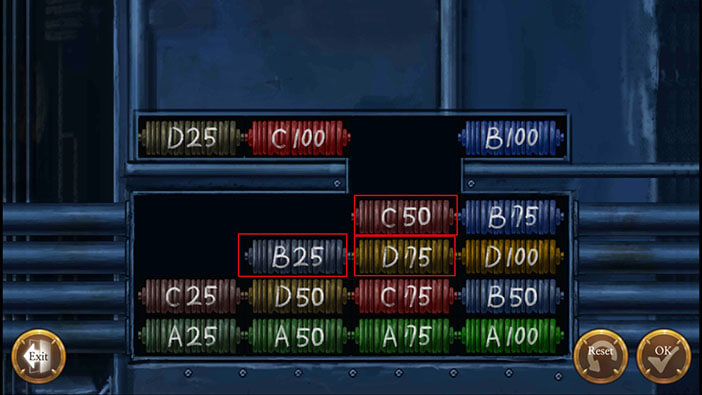
Step 3
Move B25 one field to the left.
Move D75 to the third field of the second row – next to the B25.
Move C50 to the third field of the first row – on top of D75.
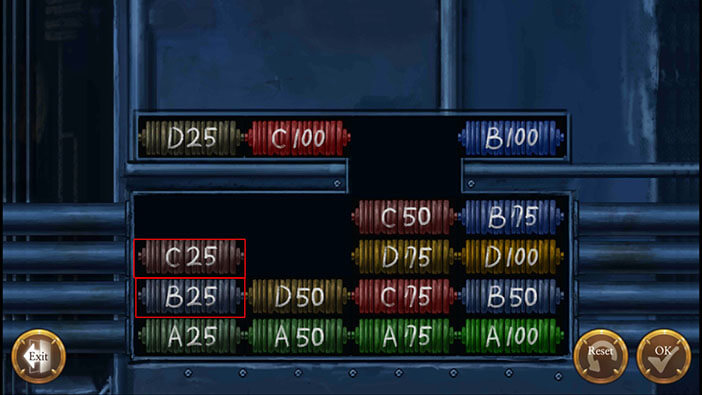
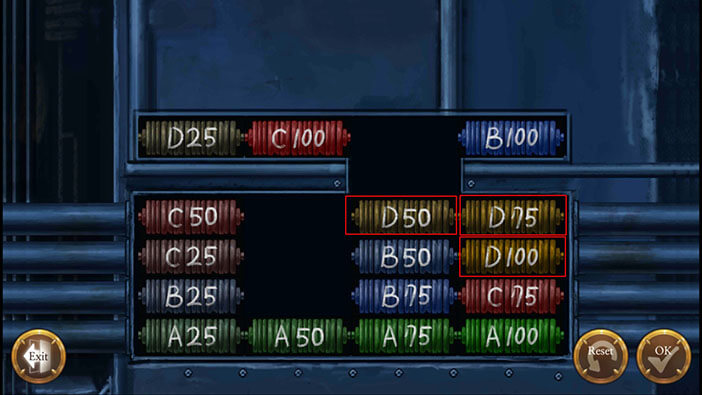
Step 4
Move C25 to the second field of the first row – on top of B25.
Move B25 one field to the left and it will fall into the correct position. Also, the C25 will fall to the second field of the second row – where B25 was.
Move C25 one field to the left (correct position).
Step 5
Move C50 to the first field of the first row – above C25.
Move D75 one field to the left – next to the C25.
Move B75 to the third field of the second row (where D75 was).

Step 6
Move D100 to the second field of the first row.
Move B50 to the third field of the first row.
Move C75 one field to the right, and the B75 and the B50 will fall down by one row. (B75 will be in the correct position)
Step 7
Move D100 to the fourth field of the second row – above C75
Move D75 to the fourth field of the first row – above D100
Move D50 to the third field of the first row.
Step 8
Move the B50 next to the B25 (correct position) – D50 will fall one row down, but that’s ok.
Move C50 next to the C25 (correct position).
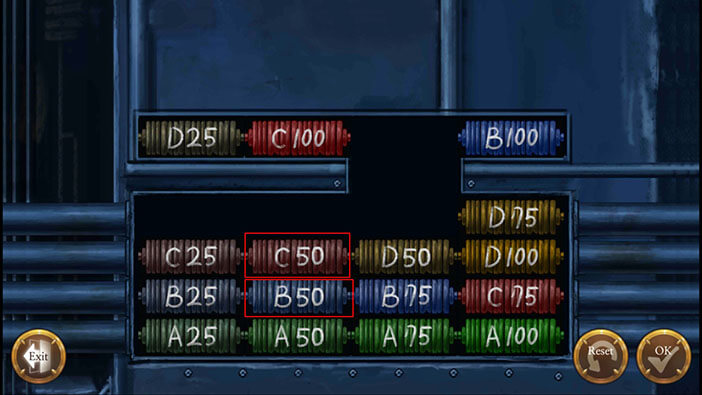
Step 9
Move D50 to the first field of the first row (above C25)
Move D75 to the second field of the first row (next to the D50)
Move B100 to the third field of the second row.
Step 10
Move D100 to the upper right corner.
Move C75 to the third field of the first row (above B100)
Move B100 next to the B75 (correct position). C75 will fall one field down into the correct position.
Step 11
Move C100 next to the C75 (correct position)
Move D75 to the fourth field of the first row
Move D50 to the third field of the first row
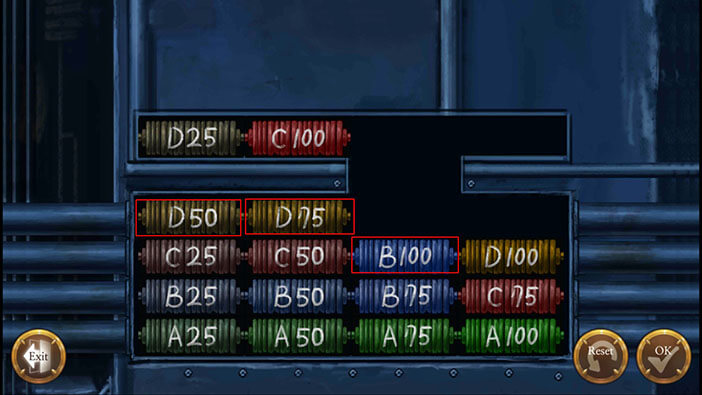
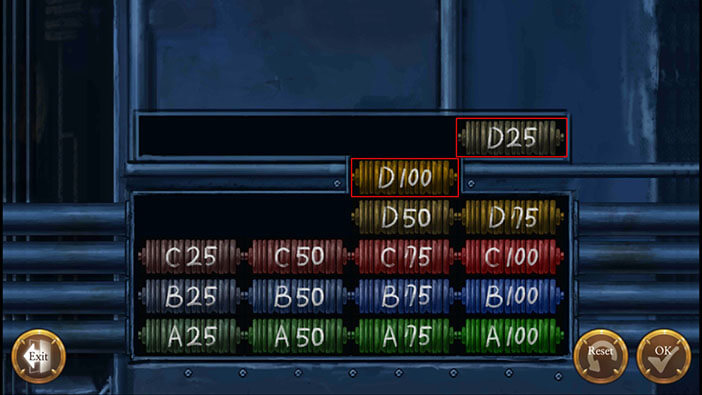
Step 12
Move D100 on top of D50
Move D25 to the top right corner
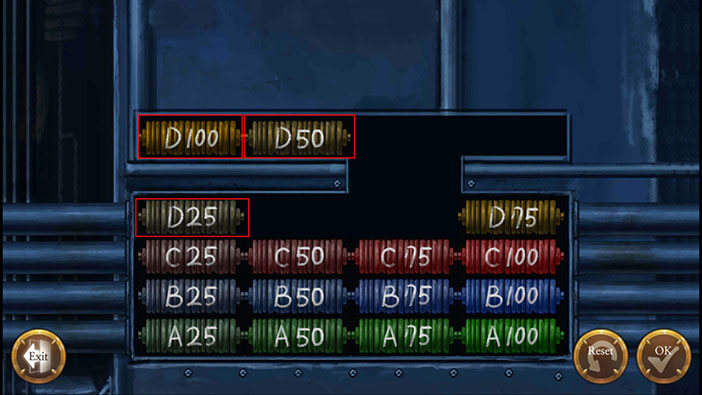
Step 13
Move D100 to the far left corner
Move D50 to next to the D100
Move D25 to the first field of the first row (correct position)
Step 14
Move D50 next to the D25 (correct position)
Move D75 to the top right corner
Move D100 to the fourth field of the first row (correct position)
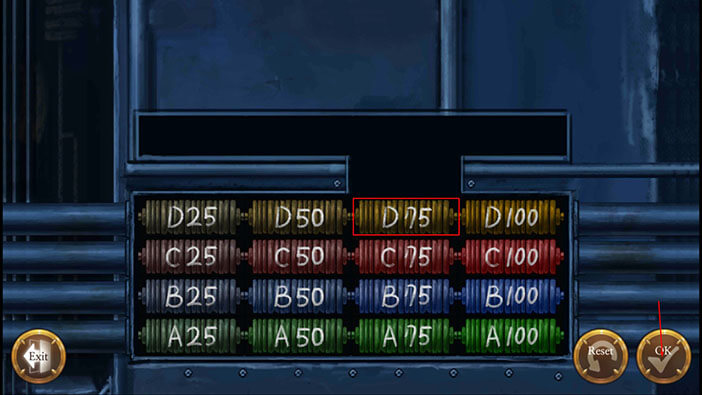
Step 15
Move D75 to the correct position and tap on the “OK” button to confirm.
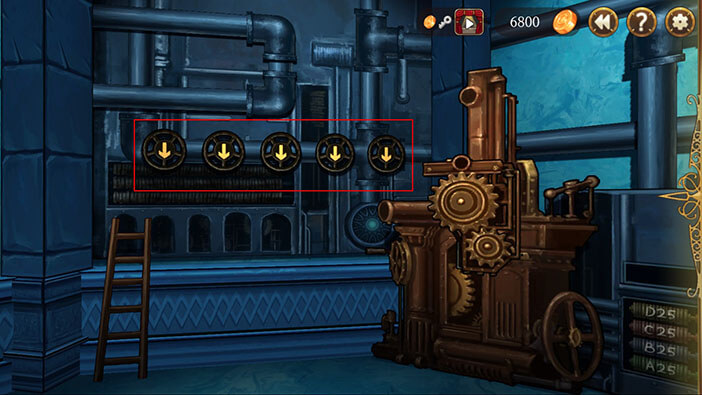
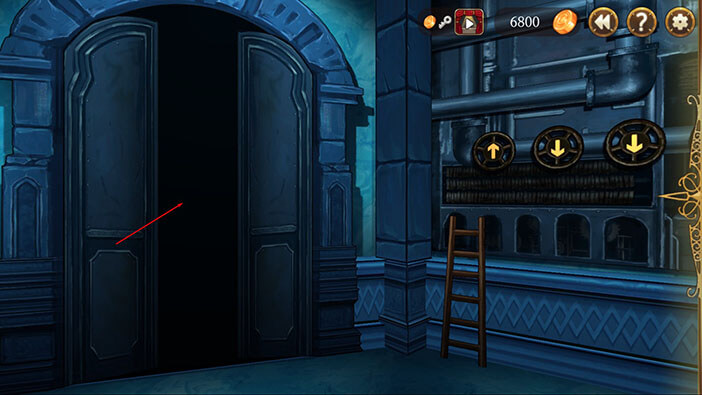
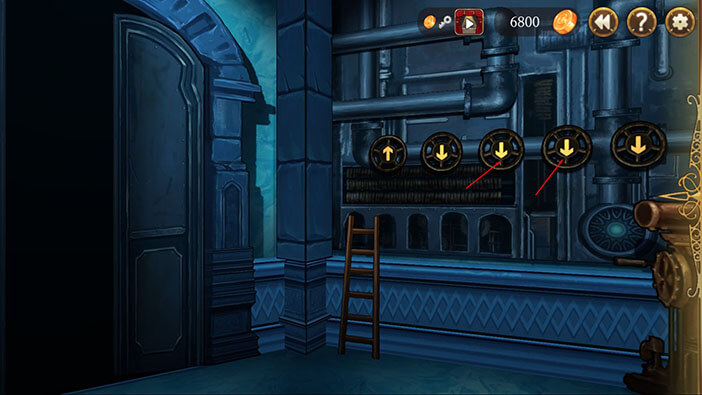
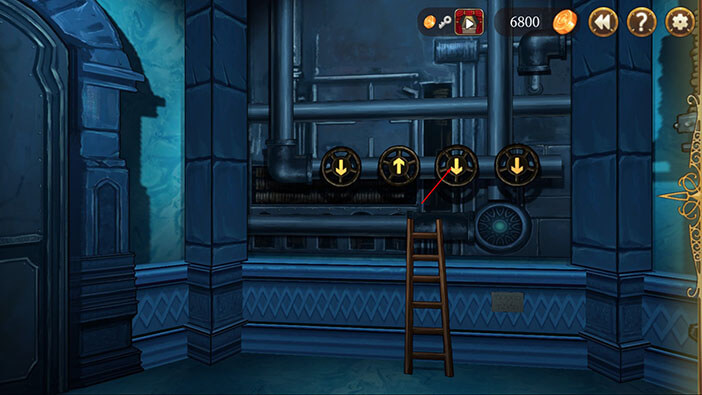
Turn to the left and take note of the five valves on the wall. We will use them in a moment.
Turn to the left and tap on the door to exit.
Tap on the door on your left to open it and tap once more to proceed into the next room.

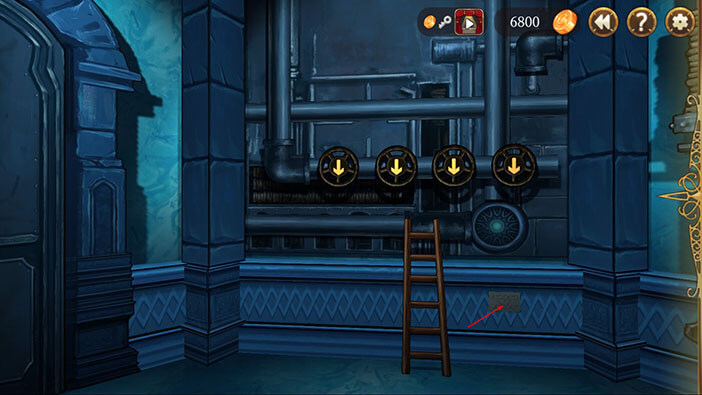
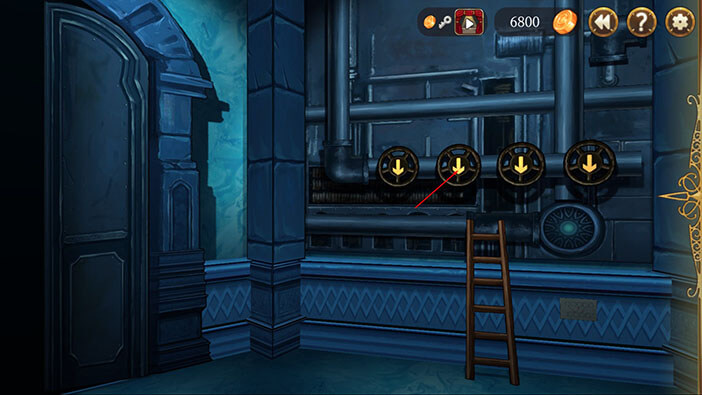
Turn to the right and tap on the ladder to move it aside. Also, take note of the four valves in this room.
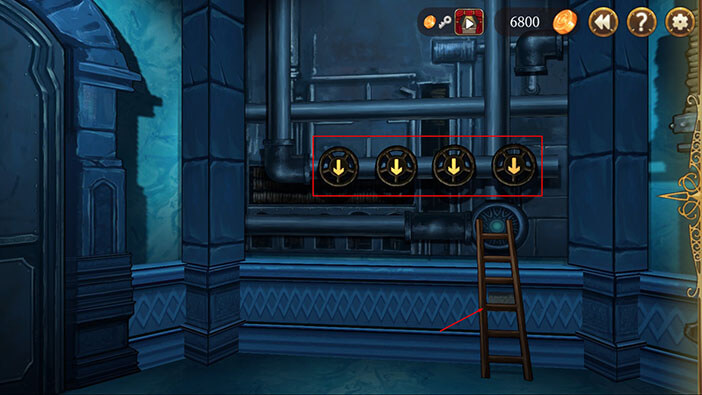
Tap on the note that was hidden behind the ladder to examine it.
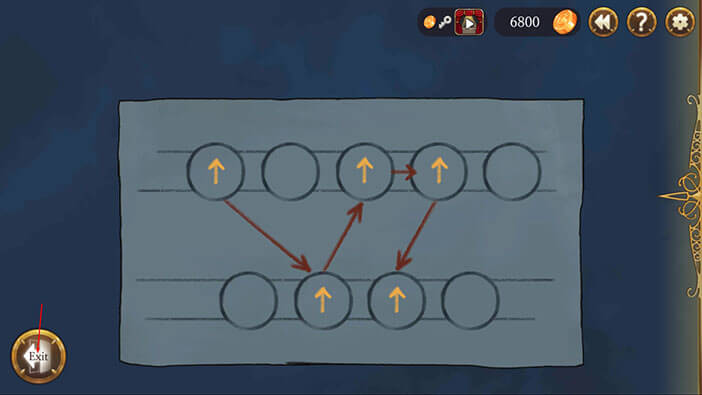
Ok, by looking at the drawing we can see that there are 9 circles (five in the top row and four in the bottom row). The circles represent the valves that we already saw. Four circles in the bottom row represent the valves inside this room, while the five circles represent the valves in the other room. The arrows on the drawing show us the order in which we should turn the valves (the arrows on the valves should point upwards)
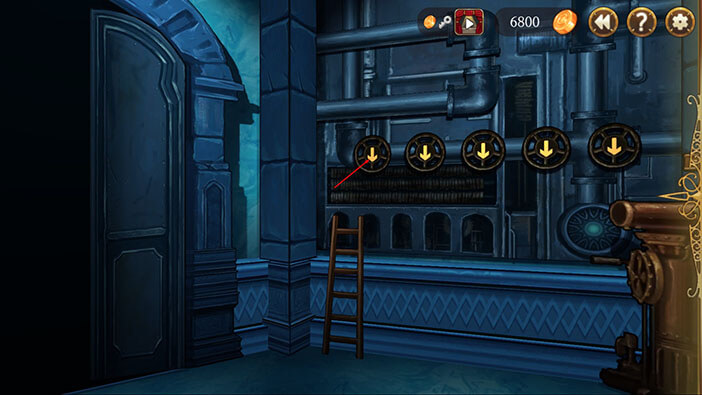
We should start with the first (left to right) valve in the room on the right.
Next is the second valve in the room on the left.
After that, we should turn the third valve in the room on the right.
After that the fourth valve in the room on the right.
And, finally, the third valve in the room on the left.
Memorize or write down this information, and tap on the “Exit” button.
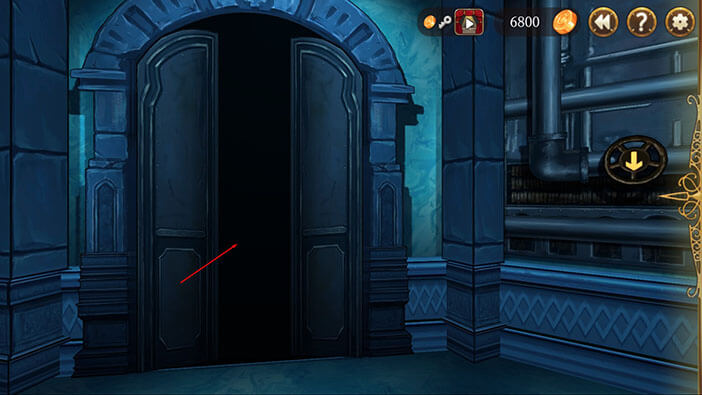
Tap on the door to exit.

Tap on the door on the right.

Tap on the first valve to turn it.
Tap on the door to exit.
Tap on the door on the left.

Tap on the second valve to turn it.
Tap on the door to exit.
Tap on the door on the right.
Tap on the third valve.
Tap on the fourth valve.
Tap on the door to exit.
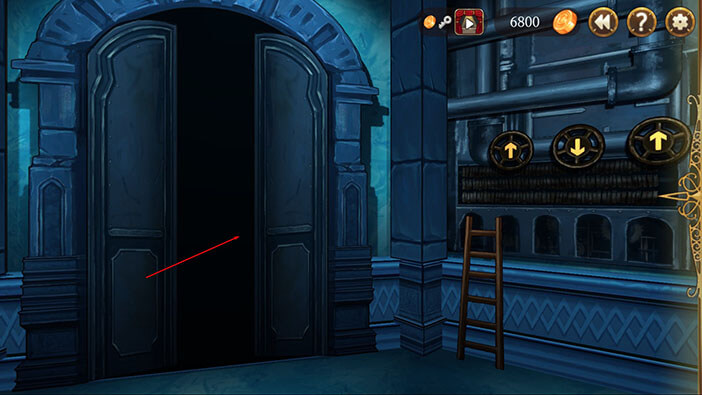
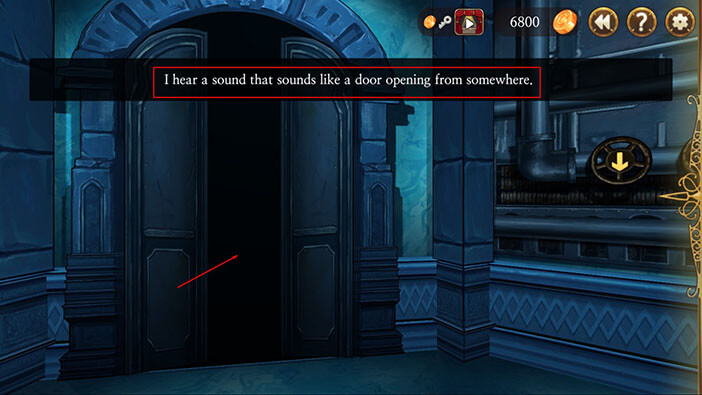
Tap on the door on your left.

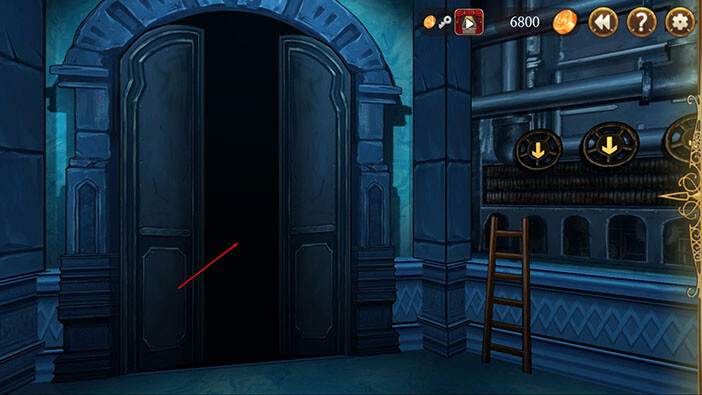
Tap on the third valve and Elizabeth will hear the door opening, so this worked.
Tap on the door to exit.
Move forward until you reach the other door. Once there, tap on the puzzle on your right.

It is very difficult to describe this puzzle, so I will just show you the step-by-step solution in the images below.
Step1
Step 2
Step 3

Step 4
Step 5
Move forward until your reach the next door. Once there, tap on the puzzle on your right.
 .
.
In this puzzle, the goal is to create a pathway from the red cable on the left to the red light on the right, by turning the circular objects inside the four by three grid. After that, we will connect the white cable with the white light.
RED LIGHT
Step 1
Tap on the first (left to right) object in the bottom row.
Step 2
Tap three times on the second object in the middle row.

Step 3
Tap on the third object in the middle row.

Step 4
Tap on the fourth object in the middle row.

Step 5
Tap on the fourth object in the top row, and you will turn on the red light.
WHITE LIGHT
Note: We can disconnect the red light and it will still stay on.
Step 1
Tap on the fourth object in the bottom row.
Step 2
Tap on the third object in the middle row.

Step 3
Tap three times on the third object in the top row.

Step 4
Tap on the second object in the top row.
Step 5
Tap twice on the second object in the middle row.

Step 6
Tap three times on the first object in the middle row.

Step 7
Tap three times on the first object in the top row, to successfully connect the red light and solve this puzzle.
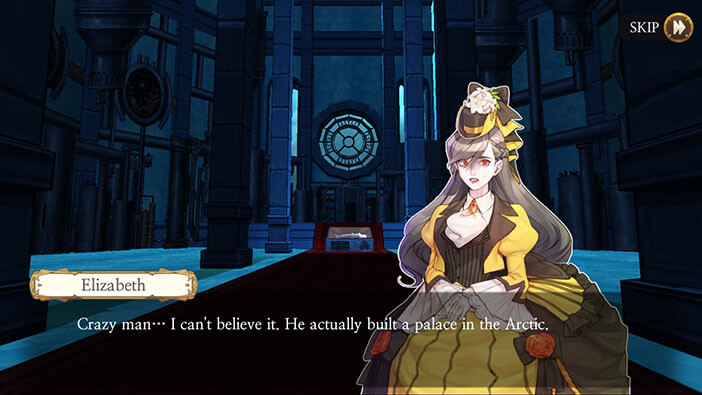
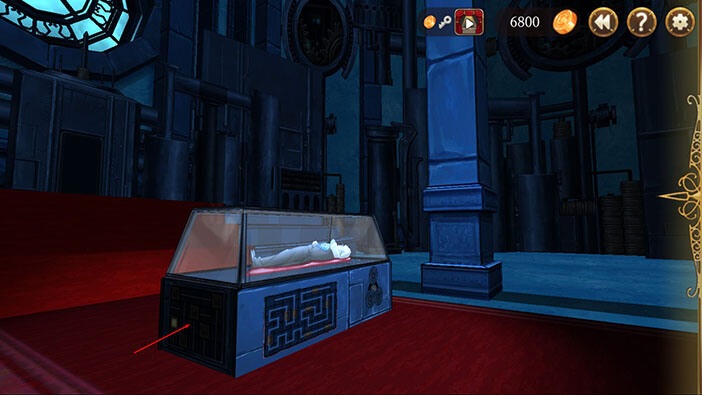
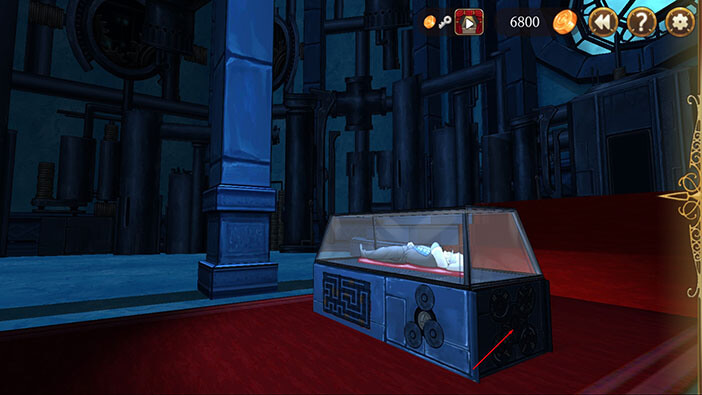
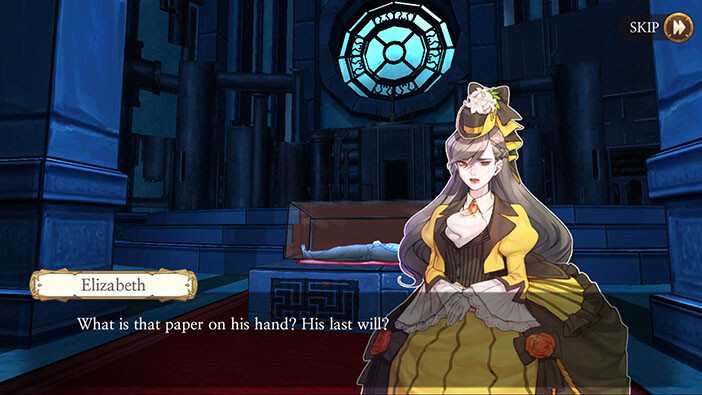
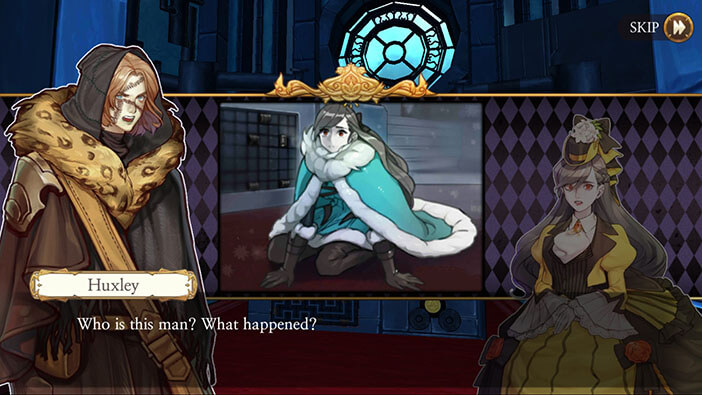
Elizabeth can’t believe that Victor built a huge palace in the Arctic. She sees a glass coffin at the end of the room.
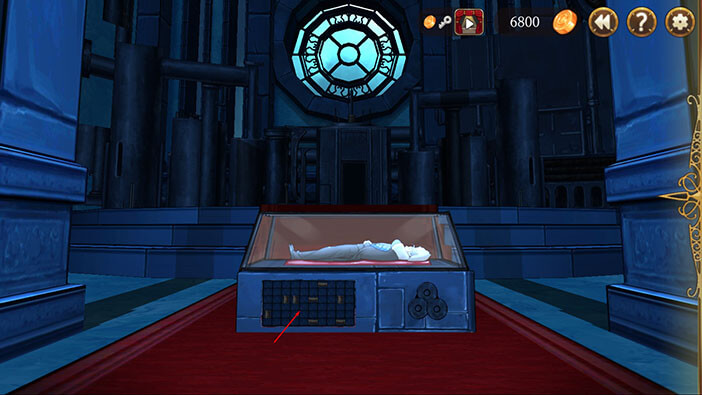
Move forward until you reach the coffin, and tap on it.

In the next scene, we can see Huxley running through the snow toward Babel, while looking for Elizabeth. He should arrive shortly because he can run very fast, and the Babel is only 2km away from the outpost.
Elizabeth realizes that Victor Frankenstein is the man inside the glass coffin! Well, he was probably in there for some time, since no ships from the Aegyptus agency left for the Arctic in the last few weeks. Hmm, this was rather anticlimactic.

Tap on the puzzle on the left.
The goal here is to connect the pipe on the right to the pipe on the left, without leaving the empty fields on the grid. We solved almost the same puzzle like this one in one of the previous chapters. You can see the solution in the image below.
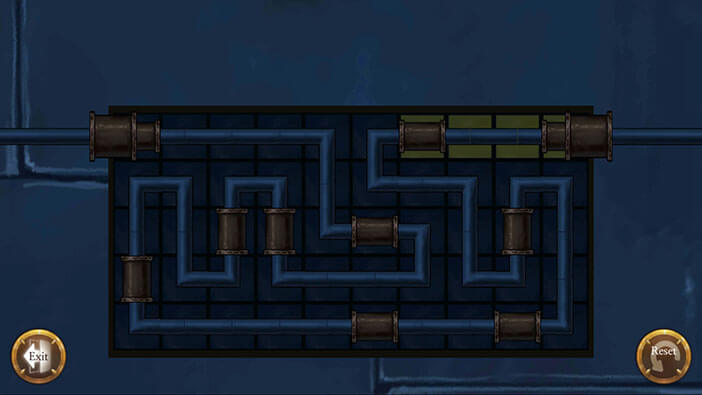
We can see that the three disks on the right side of the machine have opened up a bit, but that still isn’t enough to reach inside.
Turn to the left and tap on the puzzle.
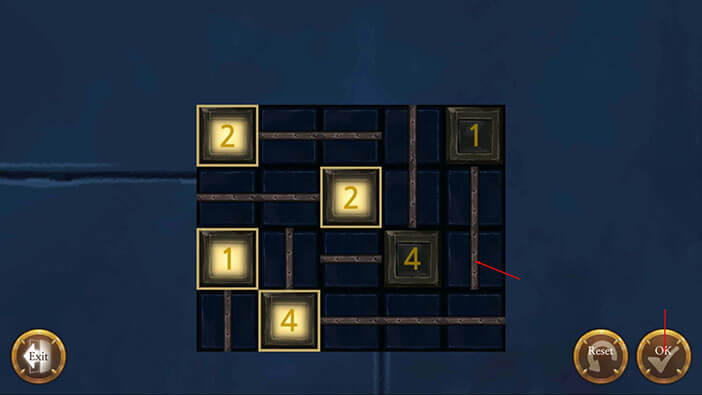
Ok, the goal of this puzzle is to connect the fields with numbers with the matching number of metal sticks. You can rotate the sticks by tapping on them.
Here I will name the fields of the grid starting from left to right, and for the rows, it will be from top to bottom (top = first row). We can see that the number 1 in the first field of the third row is already glowing since it’s connected with one metal stick.
Let’s start.
Step 1
Tap on the fourth field in the first row.
Step 2
Tap on the second field in the second row.
Step 3
Tap on the fourth field in the second row.
Step 4
Tap on the third field in the third row.

Step 5
Tap on the third, fourth, and fifth fields in the fourth row.

Step 6
Tap on the fifth field in the third row. We can see that the lights on all numbers are on now, so tap on the “OK” button to confirm.
We can see that the three disks have opened up a bit more. Turn all the way to the right and tap on yet another puzzle, at the other side of the coffin.
We already had a puzzle similar to this one in one of the previous chapters. The four smaller circles can be rotated independently. The larger circle in the middle can also be rotated (clockwise) and each time you tap on it, it will “take” one of the pieces from each of the four circles, and “send” it to the next circle.
By looking at the drawing between the movable pieces of the circles we can conclude that:
The circle in the top left corner should have pieces with white lines (four of these pieces would form a white circle)
The circle in the top right corner should have pieces that form a green circle
The circle in the bottom right corner should have pieces with orange lines
Finally, the circle in the bottom left corner should have pieces that have two white lines (each piece)
Below you’ll find a step-by-step solution to this puzzle. I will end each step with the rotation of the circle in the middle. Let’s start.
Step 1
Tap on the circle in the top left corner.
Tap twice on the circle in the middle.
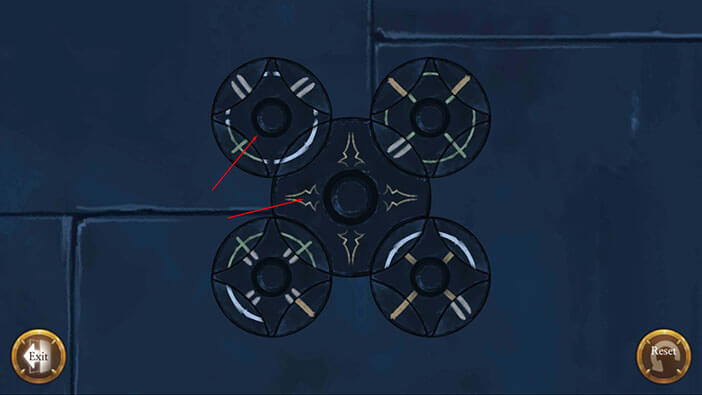
Step 2
Tap on the circle in the top left corner.
Tap on the circle in the bottom left corner.
Tap on the circle in the middle.

Step 3
Tap on the circle in the bottom left corner.
Tap on the circle in the middle.

Step 4
Tap on the circle in the top left corner.
Tap twice on the circle in the top right corner.
Tap on the circle in the middle.
Step 5
Tap on the circle in the bottom left corner.
Tap twice on the circle in the bottom right corner.
Tap on the circle in the top right corner.
Tap three times on the circle in the middle.
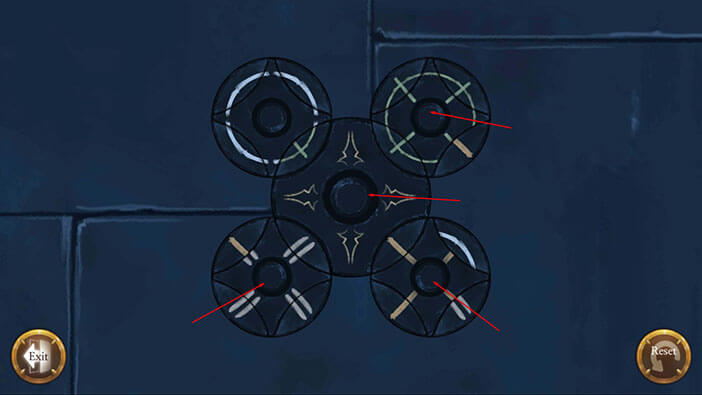

Step 6
Tap on the circle in the bottom right corner.
Tap twice on the circle in the middle.

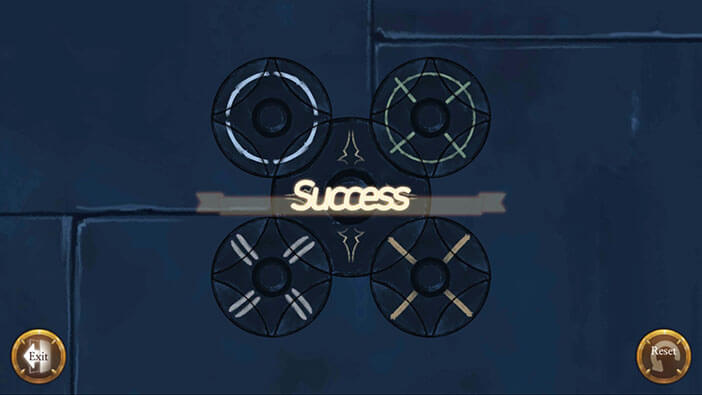
After solving this puzzle, we can see that the three disks are now completely open, revealing the slot for the Aegyptus medal. So, select the “Aegyptus Medal” from the inventory and tap on the slot.
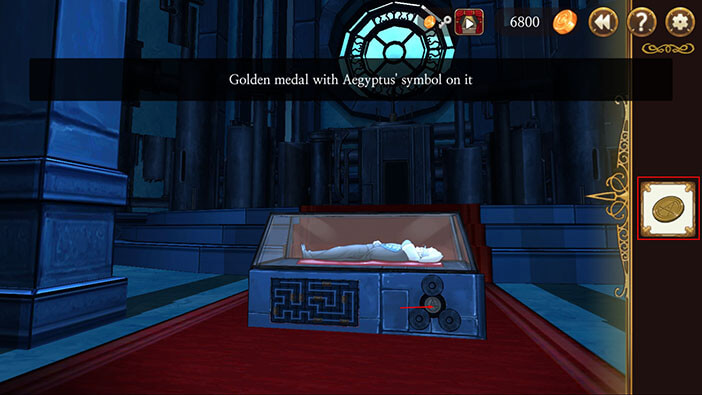
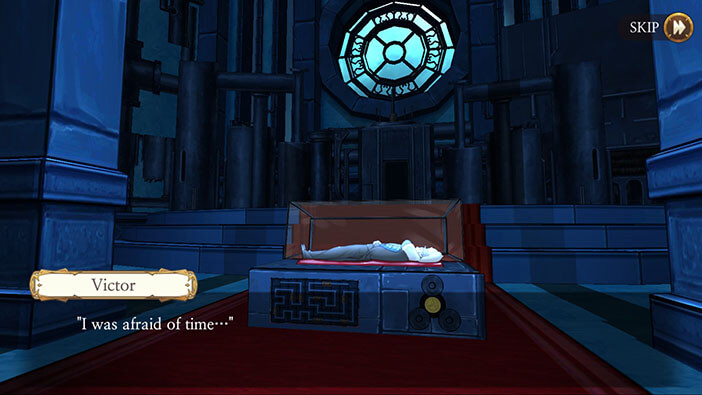
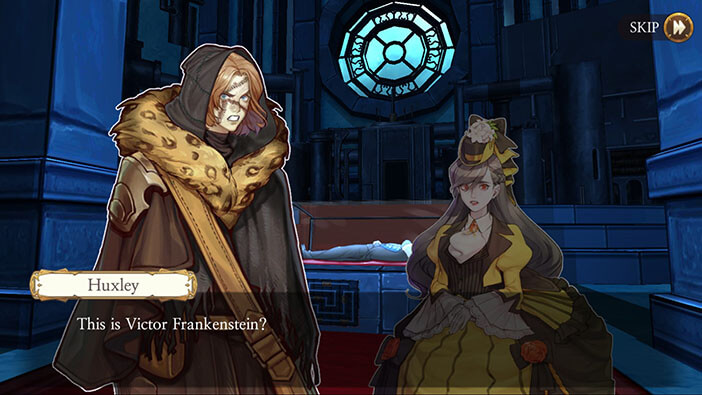
After we inserted the medal, the glass coffin automatically opened. Looking at the body inside the coffin, Elizabeth realizes that this man was dead for some time, just as we presumed. There is also a cut mark on his forehead. As a side note, I guess this mark was created during the extraction of Victor’s memory.

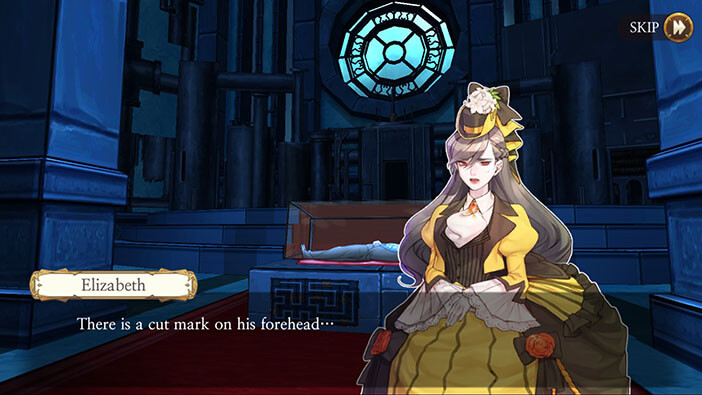
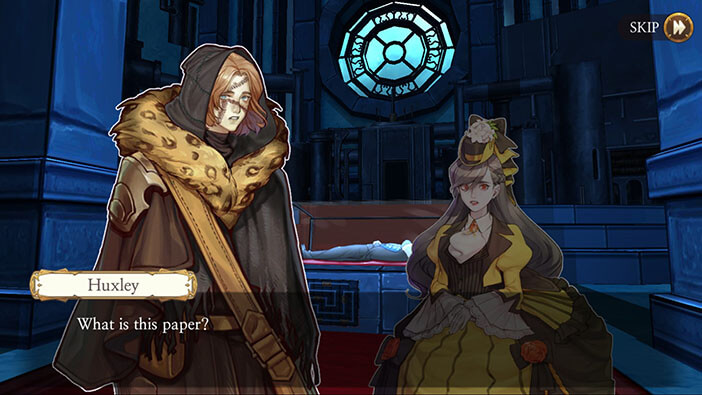
Elizabeth noticed that there’s a paper inside Victor’s hand, and decides to read it. The note on the paper says “I was afraid of time”… We don’t know if anything else was written on the note, but Elizabeth’s face turns blue, and she falls to the ground in shock.
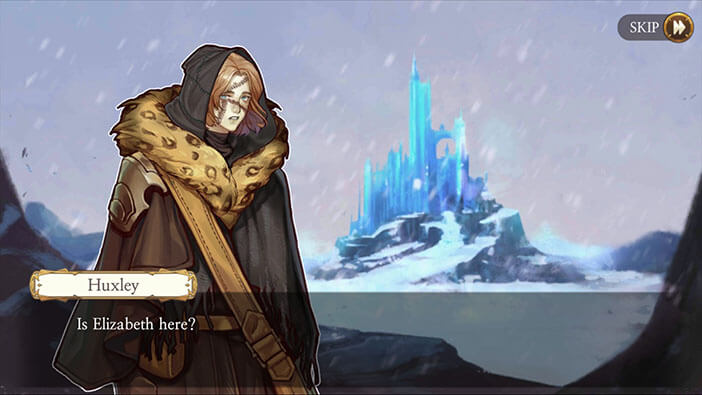
Shortly before this event, Huxley sees Babel in the distance and starts running as fast as he can, hoping to reach Elizabeth before she faces Victor/Samuel. Huxley still doesn’t know that Victor is dead.
He runs into the room and sees Elizabeth kneeling in front of the coffin. He can see that the young girl is clearly in shock and demands to know what is going on, and who is the man inside the coffin.
Elizabeth says that the man inside the coffin is Victor Frankenstein. Naturally, Huxley is surprised and probably disappointed after realizing that they traveled all the way to this god-forsaken place only to find out that the man they wanted to kill was already dead.
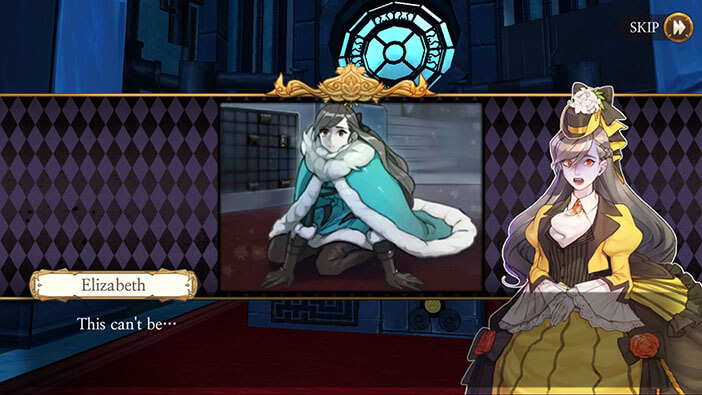
Huxley spots the note that Elizabeth dropped and reads it. After a few moments, he also seems very surprised.
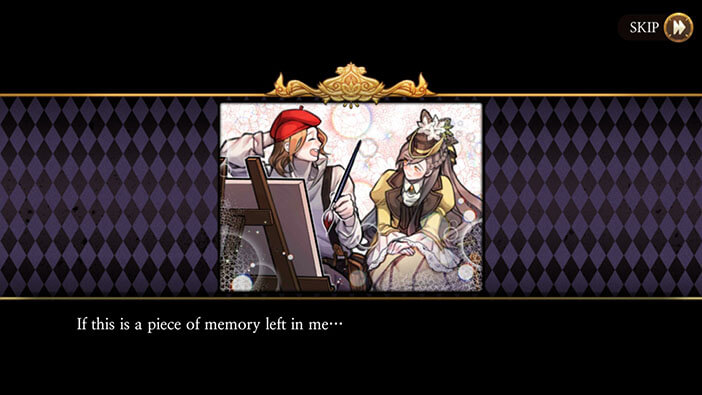
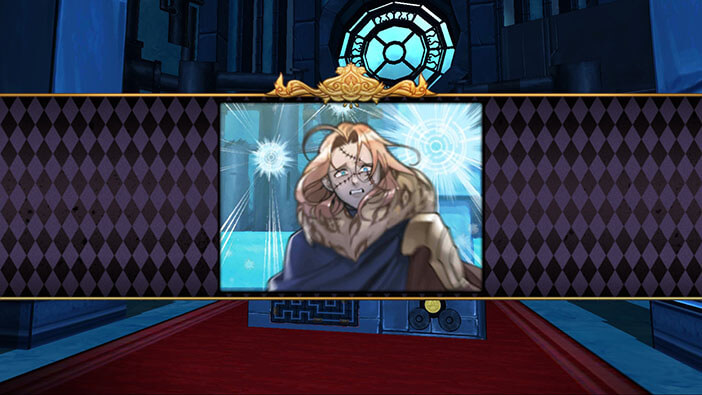
One of the memories from the past life returns back to him. He sees himself painting and laughing with Elizabeth. At this moment he realizes that something is very wrong. If this is HIS memory then how could he see HIMSELF?!
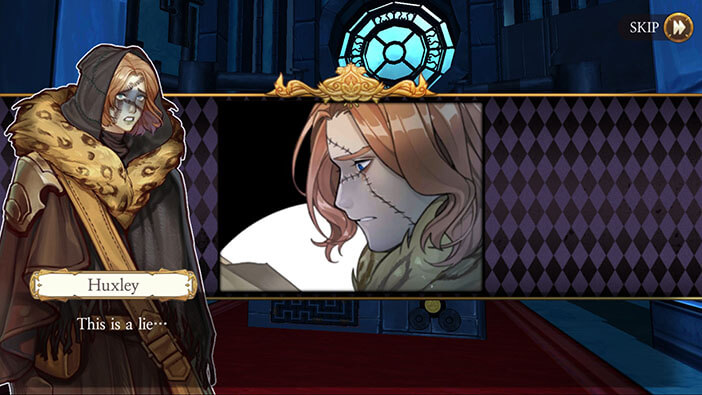
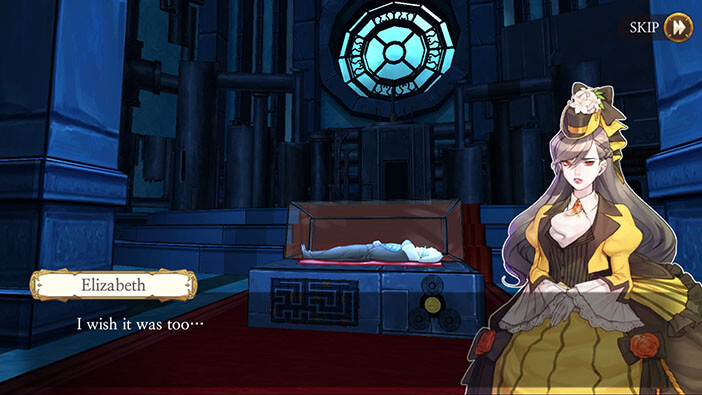
Huxley realizes that the memory of him and Elizabeth was actually seen by somebody else that was looking at the couple while they were having a good time. This means that Huxley isn’t actually Huxley, but somebody else. Naturally, Huxley tries to deny the truth, saying that this is all a lie. Elizabeth says that she would also wish that it was a lie, but understands that it isn’t, and point the gun at Huxley…
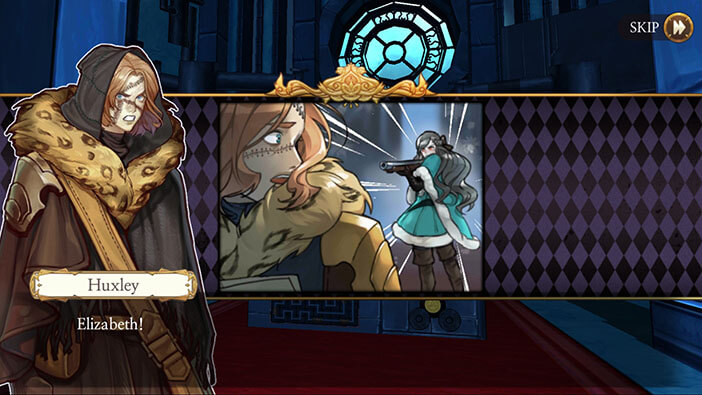
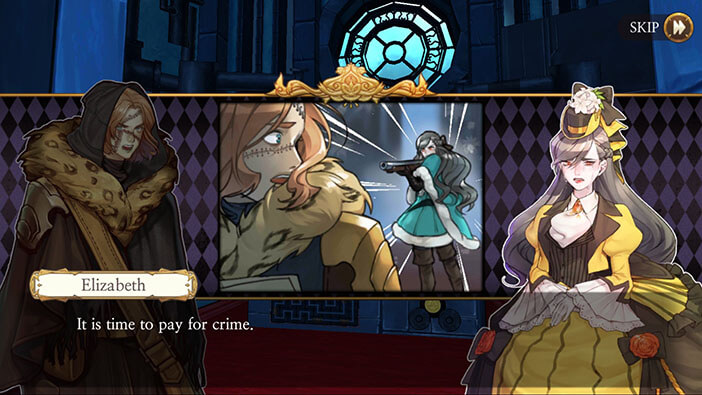
She demands to know “Huxley’s” true identity, but the poor Huxley is completely confused. Elizabeth realizes that the enemy that she was looking for was right next to her, all along. At this point, she suspects that Victor’s brain is inside Huxley’s head. With that said, she prepares to end Huxley’s life, saying that he is Victor Frankenstein.


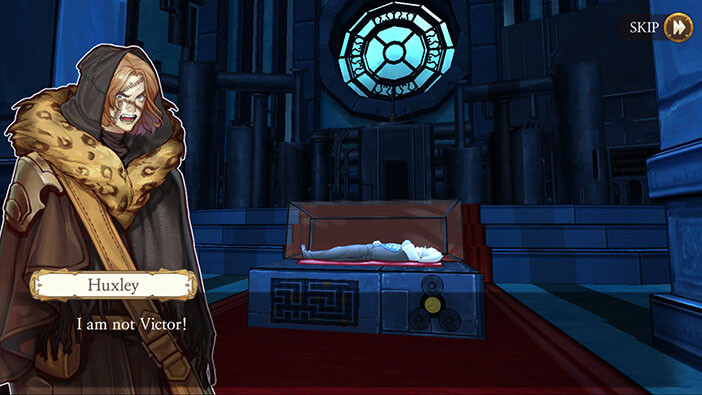
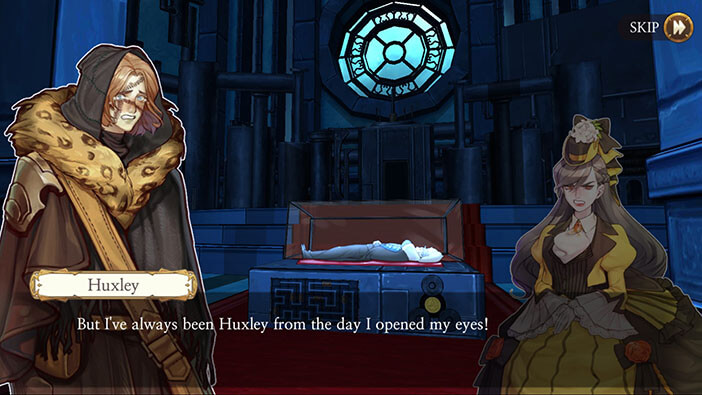
Huxley screams in denial, saying that he is not Victor, but Elizabeth demands to know who the hell is he. She warns him not to say that he is Huxley. She says that her Huxley was dead for quite some time, and that “this Huxley” is nothing but an imposter that is trying to trick her by wearing the face of her loved one. Poor Huxley doesn’t know what to say, he just keeps repeating that he doesn’t remember anything before reanimation.
However, he is also starting to lose his temper, yelling that he was Huxley from the day he opened his eyes (after the reanimation of course).


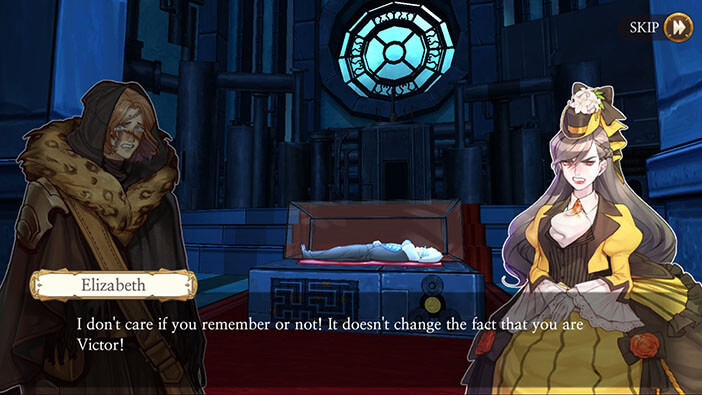
Elizabeth is frustrated, saying that he is Victor, even though he doesn’t remember anything. Huxley begs her to trust him, but it looks like Elizabeth has made up her mind, and claims that she is going to kill him!


Elizabeth says that it would be much easier for her if he just died and stayed dead. With that said she fires three shots, but it looks like she misses with all three on purpose…

Just as Elizabeth managed to somehow overcome the pain after Huxley’s execution, he showed up at her door. Now she can’t cope with the realization that her mortal enemy is wearing the face of the person that she loved more than anything else in the world… Elizabeth falls down to her knees, and bursts into tears…
After a few moments, she composes herself and orders Huxley to leave. She concludes that murdering someone that doesn’t know who he is wouldn’t satisfy her desire for revenge, just like Victor felt no relief after killing Schneider. Elizabeth also suspects that Victor intentionally left behind the story of him and Schneider, to lead her toward this conclusion.
As a side note, why would Victor leave the album with his portraits and reveal his true identity (that he is actually Samuel)? I think that from a logical standpoint his plan would have a better chance for success if he just kept his true identity secret…
Finally, Elizabeth says that she doesn’t want to see Huxley ever again, and orders him to leave, once more. 


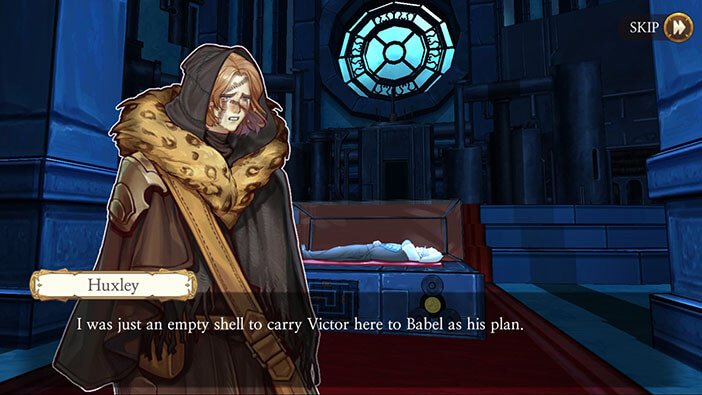
A few moments later, the machine inside this room starts working, probably because it was activated by the aurora. Huxley realizes that Victor’s plan was for him to get inside the machine. I guess this way Victor could transfer all of his memories (that he stored previously) inside Huxley’s brain.

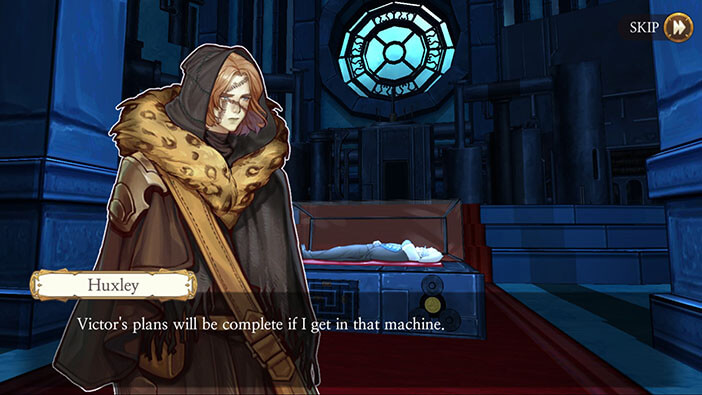
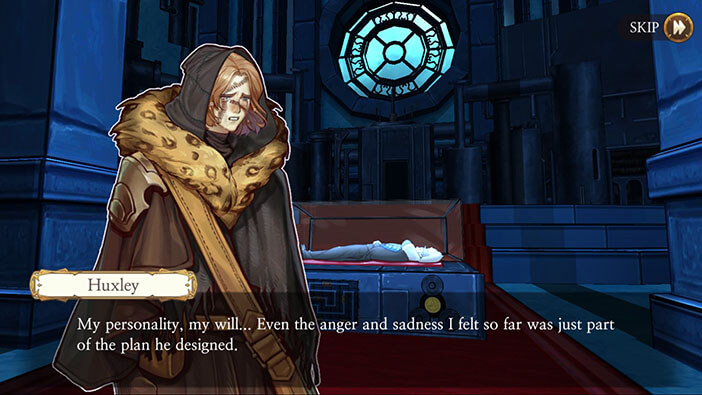
Huxley starts thinking about his own existence. He then comes to a sudden realization. He was Huxley only because he believed that he was Huxley. Huxley also realizes that his only purpose was to bring Victor (and this body) to Babel. He also understands that all of his emotions and even his own free will were fake and that he only existed because of the clever back story that Victor created, whose goal was to convince this creature that he is actually Huxley. It was all a part of Victor’s plan.

However, Huxley changes his attitude saying that although he was created by Victor, he isn’t the dead man’s slave (That’s it, just walk away).


Move toward the machine (this the only option that you have). By tapping on the machine we can see Huxley saying “Even if my fate is already decided for me, I will move by my own will”…
What the hell?! This proves exactly the opposite! How did Huxley think that he has his own free will by doing exactly what Victor wanted him to do? This is one of the rare situations in which acting like Eric Cartmen from South Park and saying “Screw you guys, I’m going home” might be the best course of action.
Once you reach the entrance to the machine, tap on it.

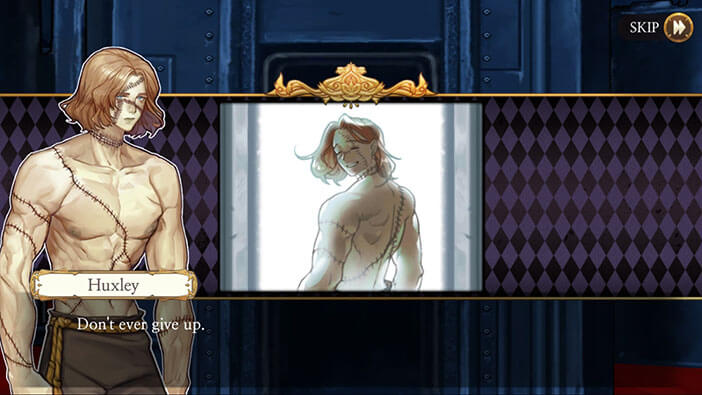
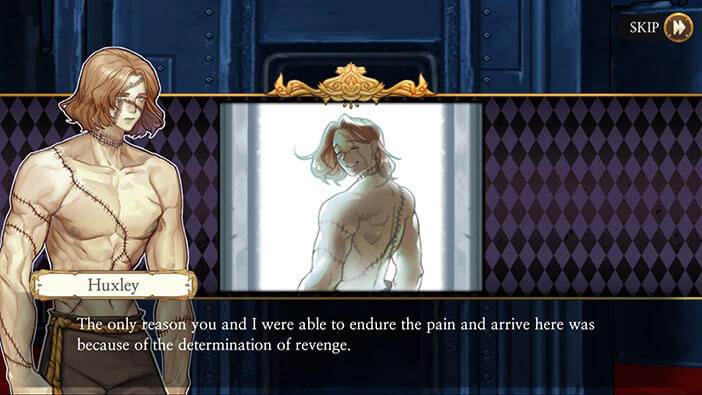
Before Huxley enters the machine, Elizabeth will ask him what the hell is he doing. Huxley calms her down, saying that she should never give up and that the only reason why the two of them were able to endure all the hardships and get this far was their burning desire for revenge. Huxley says that it is the only reason why they are alive (that also explains the title of this stage).


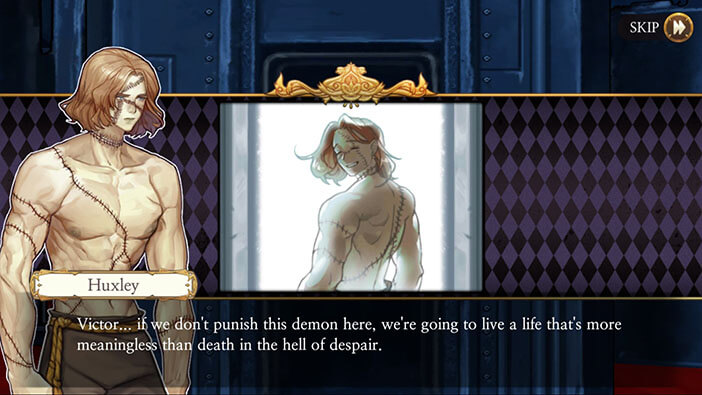
Huxley goes on saying that Victor is the demon and if they don’t punish him here and now, their lives will be meaningless, and that they would forever regret missing out on this opportunity.
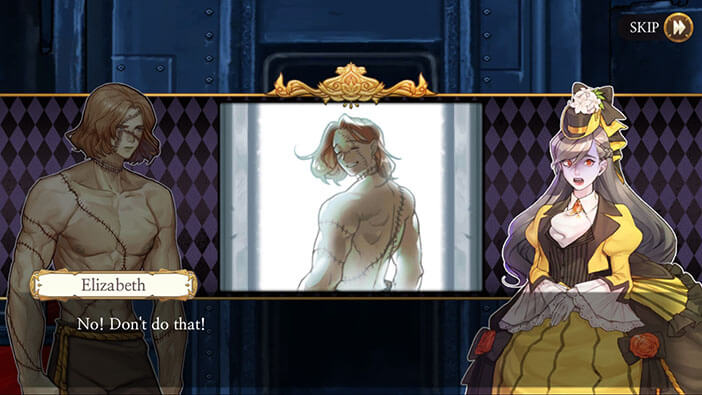
At this moment Elizabeth realizes that Huxley wants to get inside the machine and get all of Victor’s memories, so that Elizabeth could kill him after he gets out of the machine, as Victor. So, this confused creature, Huxley, is willing to sacrifice himself, so that the girl that he fell in love with could have her revenge… Also, I guess he couldn’t go on with his life, knowing that he is actually Victor and that he ruined the life of the only person that cared about him.
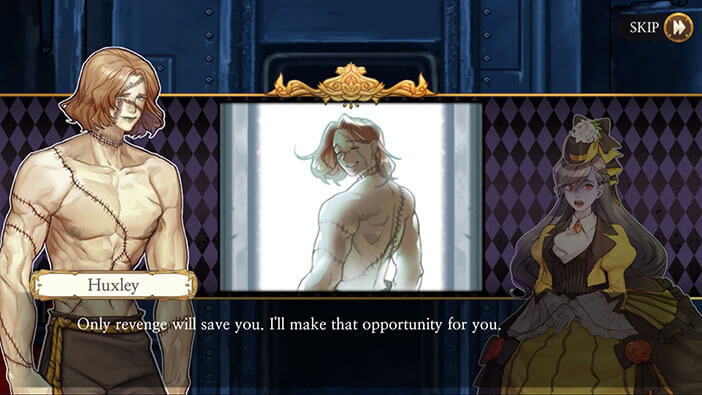
With that said he turns toward the machine, saying to Elizabeth that only revenge will save her, and he is going to make sure that she gets the opportunity to fulfill it.
Although this is a very noble move on Huxley’s part, it has a fatal flaw. This creature (currently Huxley) has superhuman strength and speed, and I doubt that Elizabeth will be able to kill it once it gets out of the machine, even though she is armed.
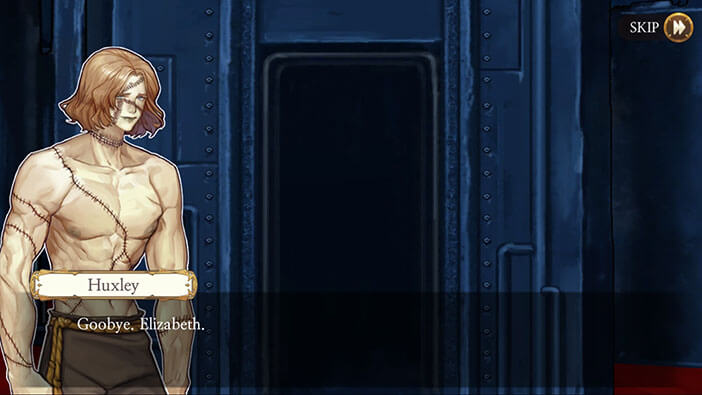
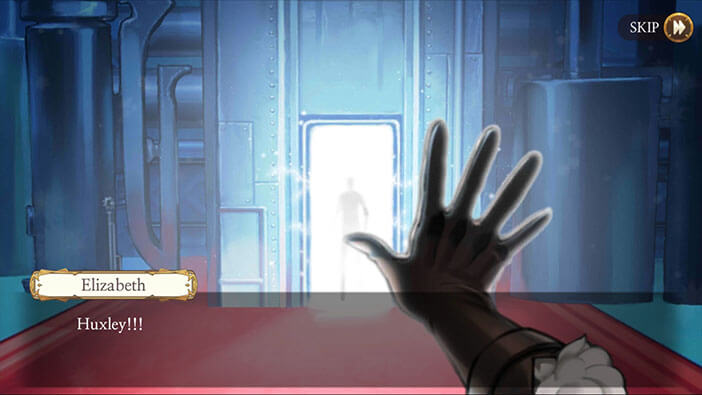
Huxley says his final goodbye, and enters the machine while Elizabeth is screaming his name…
It is clear that she doesn’t want to see him sacrifice his life, but she should also start thinking about her owns safety, because if the person that comes out of the machine is Victor, she will be in huge trouble… Let’s not forget that Victor was the one that murdered her parents.
There are still some unanswered question, like why Victor chose Elizabeth and Huxley out of all other people in the world? And who is the name that helped Victor and financed his research? We know that it wasn’t Samuel, since Samuel was just an alias that Victor took in order to avoid Schneider’s followers.
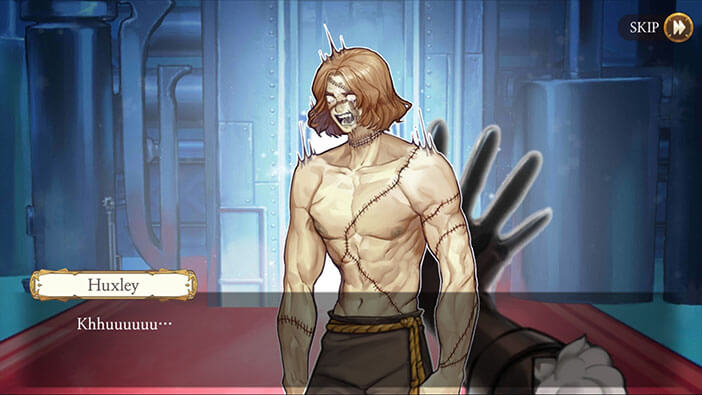
In the next scene, we can see the machine working, and all of Victor’s memories entering into Huxley’s mind. And that’s how this chapter ends…

Well, the entire story was building up to events that played out in this stage, and like in the previous stage, a lot of unexpected events played out. In the next stage, we will be playing as Victor, discovering the most important moments of his life (or maybe this could be Huxley reliving Victor’s memories). Join us in the next stage of the Walkthrough for Frankenstein Room ESC, so we can together discover more about Victor. The story ended on a cliffhanger, and I am really eager to find out what is going to happen to Elizabeth and Huxley…
Thank you for reading.